How to Replace Sway Bar Links: Complete DIY Guide With Cost-Saving Tips for Car Owners
Replacing sway bar links yourself is a straightforward DIY task that can save you $125 to $500 in labor costs while requiring only basic tools and 30 to 60 minutes per side. This suspension component connects your vehicle’s sway bar to the control arm or strut, and when it fails, you’ll hear clunking noises over bumps or experience excessive body roll during turns. By following the proper step-by-step procedure and understanding common challenges like seized hardware, most car owners with moderate mechanical skills can successfully complete this repair at home.
Understanding the cost breakdown helps you make an informed decision about DIY versus professional replacement. Parts for sway bar links range from $20 to $100 per link depending on quality, while mechanics typically charge $250 to $700 total including labor rates of $125 to $400. The significant price difference comes from shop markups on parts and hourly labor charges that can reach $215 in some regions, making this one of the most cost-effective DIY repairs you can tackle.
Knowing what tools you need prevents frustration and ensures a smooth replacement process. Essential equipment includes a quality jack and jack stands, socket sets, Allen wrenches to hold spinning studs, penetrating oil for rusted hardware, and a torque wrench for proper final installation. While you can complete the job with basic tools, having vice grips and potentially a cutting wheel on hand helps overcome common obstacles like corroded bolts that won’t budge.
Recognizing when sway bar links actually need replacement versus other suspension & steering issues saves you from unnecessary repairs. Bad sway bar link symptoms include distinctive clunking sounds when driving over bumps, rattling during turns, visible damage during inspection, and loose movement when you manually test the links. Next, let’s explore exactly what sway bar links are and why they eventually require replacement.
What Are Sway Bar Links and Why Do They Need Replacement?
Sway bar links are short metal connecting rods with rubber or polyurethane bushings that attach the sway bar to your suspension components, reducing body roll during cornering. These components typically last around 50,000 miles under normal driving conditions, but exposure to rough roads, off-roading, salt, and extreme temperatures accelerates wear on the bushings and ball joints. Understanding their function helps you appreciate why replacement becomes necessary and how to identify failure symptoms early.
To better understand their role, let’s examine what these components actually do in your vehicle’s suspension system.
What Do Sway Bar Links Do in Your Vehicle’s Suspension?
Sway bar links serve as the critical connection between your vehicle’s sway bar (also called a stabilizer bar or anti-roll bar) and the suspension components on each wheel. When you turn a corner, centrifugal force pushes your vehicle’s weight toward the outside wheels, causing the body to lean or roll. The sway bar resists this motion by transferring force from the compressed outside suspension to the extended inside suspension through the end links.
This transfer happens because the sway bar is essentially a torsion spring that connects both sides of your suspension. When one wheel moves up or down relative to the other, the bar twists, creating resistance that keeps your vehicle more level. The end links make this system functional by providing flexible attachment points that allow normal up-and-down suspension movement while still transmitting the anti-roll forces when needed.
Without properly functioning sway bar links, your vehicle’s handling degrades significantly. The sway bar becomes ineffective at controlling body roll, leading to excessive leaning in corners, reduced tire contact with the road surface, and a generally unstable feeling especially during emergency maneuvers or highway lane changes. This is why worn or broken links create such noticeable Car Symptoms even though they’re relatively small components.

What Are the Common Signs That Sway Bar Links Need Replacement?
Clunking over bumps sway bar diagnosis starts with listening for distinctive knocking or rattling sounds when driving over speed bumps, potholes, or uneven pavement. This noise occurs because worn bushings allow excessive movement between the metal components, creating a metal-on-metal contact or loose rattling sound. The noise typically appears most prominently during low-speed maneuvers over bumps and may be isolated to one side of the vehicle if only one link has failed.
Excessive body roll during cornering represents another clear symptom of failed sway bar links. When you make turns, your vehicle will lean more dramatically than normal, and the handling will feel loose or disconnected. This happens because the sway bar can no longer effectively transfer forces between the left and right suspension when the links are worn or broken. You might also notice the vehicle feels unstable in crosswinds or when changing lanes at highway speeds.
Visual inspection reveals physical damage that confirms replacement needs. Jack up your vehicle and examine the links for cracked or deteriorated rubber bushings, separated ball joints, bent metal brackets, or completely broken components. Grab the link and try moving it by hand—if you feel looseness or play in the connection points, the link has failed. The bushings should be intact without cracks, gaps, or missing pieces, and the ball studs should move smoothly without excessive free play.
Poor handling characteristics develop gradually as the links wear. You might notice reduced steering responsiveness, a vague feeling in the steering wheel, or premature tire wear patterns indicating uneven weight distribution during cornering. These symptoms worsen over time as the bushing material continues degrading from heat cycles, road chemicals, and mechanical stress.
How Much Does Sway Bar Link Replacement Cost?
Sway bar link replacement cost estimate ranges from $40 to $200 for DIY repairs using only parts, while professional mechanic services typically charge $250 to $700 total including both parts and labor. The substantial difference stems from labor rates averaging $70 to $215 per hour across different regions and shop types, combined with markup percentages on parts that can reach 25% or more. Understanding this breakdown helps you evaluate whether the time investment for DIY work justifies the significant savings potential.
More specifically, let’s examine the detailed cost comparison between handling the replacement yourself versus paying a professional shop.
What Is the Cost Breakdown for DIY vs. Mechanic Replacement?
DIY sway bar link replacement steps cost only $40 to $200 in parts when you purchase both left and right links, assuming you already own basic tools like jacks and wrenches. Individual links range from $20 for economy replacement parts to $100 for premium or performance-oriented options with polyurethane bushings and heavy-duty construction. Since best practice involves replacing both sides simultaneously even if only one side shows symptoms, you should budget for a pair rather than a single link.
Professional mechanic replacement totals $250 to $700 depending on your vehicle make and model, local labor rates, and shop type. This breaks down into approximately $80 to $300 for parts (marked up 15-25% above retail prices) and $125 to $400 for labor charges. Dealership service centers typically charge the highest rates at $150 to $215 per hour, while independent mechanics often charge $70 to $120 per hour for the same work. Sway bar link replacement labor time averages 1 to 2 hours for most vehicles, though some models with limited access require additional time.
The potential savings calculation reveals why this repair attracts DIY enthusiasts. By purchasing quality aftermarket links for $60 to $120 and investing 1 to 2 hours of your own time, you save $125 to $500 compared to professional service. This represents one of the highest return-on-time-investment repairs you can perform at home, especially since the procedure requires no special diagnostic equipment or advanced mechanical skills.
Additional shop fees further inflate professional costs. Many mechanics charge hazardous waste disposal fees ($5 to $15), shop supplies fees (2-5% of parts cost), and environmental fees that add $10 to $30 to your final bill. These charges don’t apply to DIY repairs, further increasing your savings potential. Some dealerships also require diagnostic fees ($100 to $150) before providing repair quotes, though many independent shops waive this if you proceed with the repair.

Are OEM or Aftermarket Sway Bar Links Worth the Extra Cost?
OEM (Original Equipment Manufacturer) sway bar links typically cost $40 to $80 per link and offer exact fitment specifications matching your vehicle’s original design. These parts come from the same suppliers that provided components for your vehicle during manufacturing, ensuring identical dimensions, bushing materials, and mounting hardware. The primary advantages include guaranteed compatibility, warranty coverage through your vehicle manufacturer, and peace of mind knowing the parts meet factory specifications exactly.
Aftermarket sway bar links from reputable brands like MOOG, Mevotech, and Delphi cost $20 to $60 per link for standard replacement quality, offering substantial savings while maintaining acceptable performance standards. These manufacturers engineer their products to meet or exceed OEM specifications, often using improved materials like polyurethane bushings that outlast original rubber components. Mid-tier aftermarket options provide excellent value for most drivers who prioritize longevity and cost-effectiveness over brand loyalty.
Premium aftermarket and performance-oriented sway bar links range from $60 to $100+ per link, targeting enthusiasts who want Handling improvements after replacement. These upgraded components feature greaseable ball joints for extended service life, heavy-duty construction for off-road use, polyurethane bushings that grip more firmly than rubber, and sometimes adjustable lengths for lowered or lifted suspensions. The extra cost delivers measurable benefits for drivers who demand maximum handling performance or subject their vehicles to extreme conditions.
Budget aftermarket links priced under $20 per link raise quality concerns worth considering. While these economy options fit properly and function adequately when new, they typically use lower-grade materials that deteriorate faster under stress, heat, and chemical exposure. The bushings may develop squeaks, the ball studs might wear prematurely, and the overall lifespan could be half that of mid-tier alternatives. For vehicles you plan to keep long-term, spending an extra $20-30 per link for reputable mid-tier brands usually proves more economical than replacing cheap parts repeatedly.
Material choice significantly impacts long-term value. Rubber bushings provide a comfortable, quiet ride and typically last 50,000 to 75,000 miles under normal conditions, making them ideal for daily drivers who prioritize comfort. Polyurethane bushings last significantly longer—often 100,000+ miles—and provide firmer suspension response that reduces body roll more effectively, though they may require periodic greasing to prevent squeaking and can transmit slightly more road noise into the cabin.
What Tools and Materials Do You Need to Replace Sway Bar Links?
Replacing sway bar links requires a floor jack with appropriate weight capacity, jack stands rated for your vehicle, a socket set with metric or SAE sizes matching your hardware, Allen wrenches for holding studs, penetrating oil, and a torque wrench for final installation. Most DIY mechanics already own these basic tools, making the project financially viable without purchasing specialized equipment. Having the right tools before starting prevents frustration and ensures you can complete the job safely and efficiently.
Specifically, let’s identify the essential tools that make this job manageable for home mechanics.
What Are the Essential Tools for Sway Bar Link Replacement?
A quality floor jack with a 2-ton minimum capacity provides the lifting power needed to raise your vehicle safely. Hydraulic floor jacks offer easier operation than scissor jacks, with longer handles that provide better leverage and smoother raising action. Position the jack under designated lift points specified in your owner’s manual, never under the sway bar itself or suspension components that will interfere with your work. For vehicles over 4,000 pounds, consider a 3-ton jack for additional safety margin and stability.
Jack stands rated for at least 3 tons per pair are absolutely mandatory—never rely solely on a hydraulic jack to support your vehicle while you work underneath. Place the stands under the vehicle’s frame rails or designated support points after raising the vehicle, and lower the jack slowly until the weight rests completely on the stands. Using both front jack stands allows the suspension to hang naturally unloaded, making link removal and installation significantly easier than working with one side compressed and the other extended.
Socket sets in the appropriate measurement system (metric or SAE) let you remove the nuts securing the links to the sway bar and suspension components. Common sizes include 14mm, 15mm, 16mm, or 9/16″, 5/8″ depending on your vehicle manufacturer and model year. A ratchet with standard-length extensions provides the reach needed in tight wheel well areas, while a breaker bar helps loosen particularly stubborn fasteners that resist normal ratchet torque. Invest in quality six-point sockets rather than twelve-point designs to minimize rounding of rusted fastener heads.
Allen wrenches or hex keys ranging from 5mm to 8mm hold the stud inside many sway bar link designs, preventing it from spinning while you loosen the outer nut. This two-wrench technique requires one hand on the Allen wrench holding the stud stationary and the other hand operating the socket wrench to remove the nut. Without this capability, the stud simply spins uselessly inside the bushing, making removal impossible without cutting or destructive techniques.
Penetrating oil like PB Blaster, Kroil, or WD-40 Specialist Penetrant significantly improves Rusted link removal tips by breaking down corrosion between threads. Apply the penetrant liberally to all nuts and studs at least 30 minutes before attempting removal—overnight application works even better for severely corroded hardware. The oil wicks into microscopic spaces between the nut and bolt threads, dissolving rust and creating a lubricating film that reduces friction during removal.
A torque wrench ensures proper final tightening according to manufacturer specifications, typically ranging from 35 to 75 ft-lbs depending on vehicle make and model. Over-tightening crushes bushings and can damage components, while under-tightening allows movement that defeats the purpose of new links and creates noise. Click-type torque wrenches provide clear tactile and audible feedback when reaching the target specification, making them ideal for home mechanics who don’t perform this task frequently.
Vice grips or locking pliers serve as backup tools when Allen wrenches don’t fit or when studs have flats machined into their sides. Clamp the vice grips firmly onto the stud to prevent rotation, then apply force to the nut with your socket wrench. This technique works well but can damage the stud slightly, which doesn’t matter since you’re discarding the old link anyway.
Additional helpful tools include a cutting wheel or reciprocating saw for removing completely seized links that resist all other removal attempts, a wire brush for cleaning mounting surfaces and threads, and a rubber mallet for gentle persuasion when aligning holes during installation. White lithium grease or anti-seize compound applied to threads during installation prevents future corrosion and makes your next replacement job easier years down the road.
What Safety Equipment Should You Use?
Safety glasses with side shields protect your eyes from falling debris, rust particles, and penetrating oil spray when working underneath your vehicle. When breaking loose rusted fasteners, corrosion particles often fall directly toward your face, and a single metal fragment in your eye can cause serious injury requiring emergency medical attention. Impact-resistant safety glasses meeting ANSI Z87.1 standards provide adequate protection for this type of work and cost only $10 to $20 for quality pairs.
Mechanic’s gloves shield your hands from sharp edges, hot components, and chemical exposure while maintaining enough dexterity to handle tools and small parts. Nitrile-coated work gloves offer excellent grip in both dry and oily conditions, resist penetrating oil and grease, and protect against cuts from sheet metal edges and rusty hardware. Avoid bulky winter gloves that reduce tactile feedback and make it difficult to feel when you’ve properly seated bolts or aligned components.
Wheel chocks placed behind the rear wheels prevent the vehicle from rolling while you work on the front suspension, or in front of the front wheels when working on the rear. Even with the parking brake engaged, hydraulic brake systems can slowly leak down, and transmission park pawls can slip on inclines, allowing the vehicle to roll off jack stands with potentially fatal consequences. Commercial rubber wheel chocks cost $10 to $30 per pair, or you can use wooden blocks cut to at least 4×4-inch dimensions and wedge-shaped on one side.
A flat, stable work surface provides the foundation for safe vehicle lifting and support. Concrete driveways or garage floors offer ideal working conditions with firm, level support that won’t shift or settle while you’re underneath the vehicle. Avoid working on asphalt, gravel, or dirt surfaces where jack stands can sink or tip, and never attempt suspension work on an incline where gravity adds instability to an already precarious situation.
Fire extinguisher accessibility becomes important if you use heat to loosen seized fasteners, as torches can ignite oil residue, rubber bushings, or undercoating materials. Keep a minimum 5-lb ABC-rated fire extinguisher within easy reach before applying any heat source to suspension components. The risk is relatively low when following proper procedures, but having fire suppression immediately available provides essential backup if something ignites unexpectedly.
Proper clothing includes long pants and closed-toe shoes with non-slip soles to protect against chemicals, sharp objects, and accidental tool drops. Avoid loose clothing or jewelry that can catch on suspension components or moving tools. Work boots with steel or composite toes provide extra protection if you drop a heavy tool or part, which happens frequently when contorting into awkward positions to reach suspension components.
How Do You Replace Sway Bar Links Step-by-Step?
Replace sway bar links by safely lifting both front wheels, removing the old links using two wrenches to prevent stud spinning, comparing old and new parts for correct fitment, installing new links with fresh lock nuts, and torquing to specifications before testing. This complete procedure takes 30 to 60 minutes per side for most vehicles and requires attention to safety, proper torque values, and suspension positioning. Following the systematic approach below ensures successful installation and prevents common mistakes that lead to noise or premature failure.
To begin, let’s ensure your vehicle is properly prepared for safe and efficient work.
How Do You Safely Prepare Your Vehicle for Sway Bar Link Replacement?
Park your vehicle on a flat, level surface with firm ground that won’t allow jack stands to sink or shift during the repair. Concrete driveways or garage floors provide ideal working conditions, while asphalt can soften in hot weather and dirt or gravel offers insufficient stability for safe lifting. Engage the parking brake firmly and shift automatic transmissions into Park or manual transmissions into first gear to provide multiple layers of protection against rolling.
Place wheel chocks behind the rear wheels (when working on front links) or in front of the front wheels (when working on rear links) to prevent any possibility of rolling. Position the chocks tightly against the tire treads so even a small movement is blocked. This step remains critical even with the parking brake engaged, as hydraulic brake systems can leak down slowly and parking pawls can slip, especially on even slight inclines.
Loosen the lug nuts on both front wheels approximately one full turn before lifting the vehicle. Attempting to loosen lug nuts after the wheels are off the ground often causes the wheel to spin uselessly, and using the parking brake to prevent spinning can stress the drivetrain unnecessarily. Breaking the lug nuts loose while weight still rests on the tires provides the resistance needed for easy removal once the vehicle is lifted.
Locate the proper jack points specified in your owner’s manual, typically reinforced areas on the frame rails or pinch welds designed to handle lifting stress. Place your floor jack under the center front jack point (usually behind the front bumper on the crossmember) when working on front sway bar links. Slowly raise the vehicle until both front wheels clear the ground by 4-6 inches, providing adequate working clearance.
Position jack stands under the designated support points on both sides of the vehicle, typically the frame rails several inches behind the front wheels. Adjust the stand height so the vehicle will rest solidly on the stands with the suspension hanging freely when you lower the jack. Slowly lower the hydraulic jack until the full weight transfers to the jack stands, then give the vehicle a gentle shake to confirm stability before crawling underneath.
Remove both front wheels completely to provide unobstructed access to the sway bar links and surrounding suspension components. This step isn’t absolutely mandatory on some vehicles where links are accessible through the wheel well, but removing the wheels makes the job significantly easier, safer, and faster. Store the wheels flat nearby where they won’t be in your way but remain accessible for reinstallation.
How Do You Remove the Old Sway Bar Links?
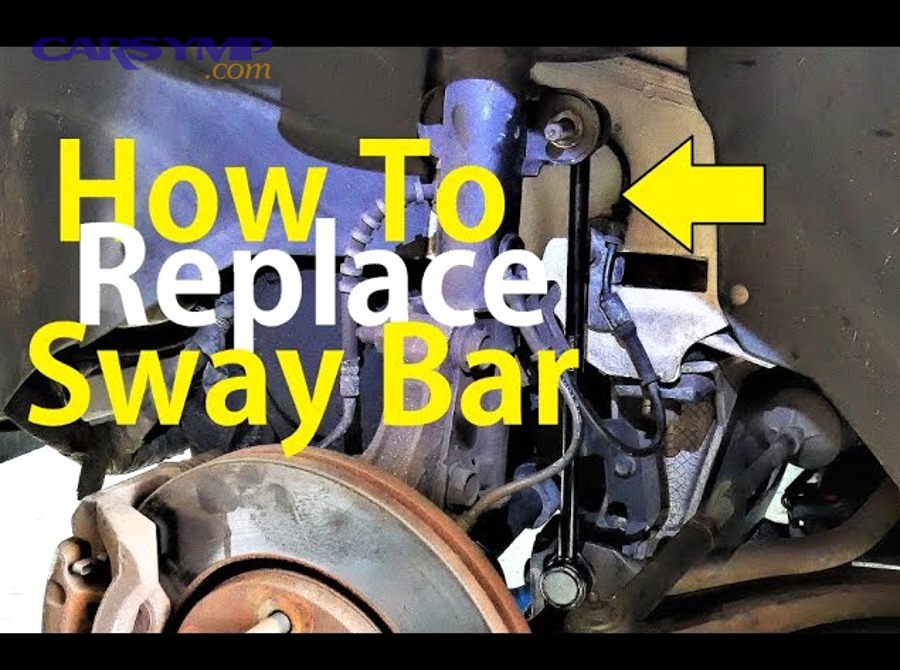
Locate the sway bar link connections at the top (attached to the sway bar itself) and bottom (attached to the lower control arm or strut assembly). The links appear as short metal rods or brackets running vertically between these components, with rubber or polyurethane bushings visible at both connection points. On most vehicles, the links are positioned just behind the front wheels in the wheel well area, though some designs place them further forward near the front crossmember.
Apply penetrating oil liberally to all four nuts (two per link) and let it soak for at least 15-30 minutes before attempting removal. Spray the penetrant from multiple angles to ensure it reaches the threads where rust forms most stubbornly. For severely corroded hardware exposed to road salt, consider applying penetrant the night before and making a second application in the morning for maximum effectiveness.
Insert an Allen wrench or hex key into the stud end of the sway bar link to prevent it from spinning during nut removal. The stud typically has a hex socket in its center designed specifically for this purpose, with common sizes being 5mm, 6mm, or 8mm depending on the manufacturer. Hold the Allen wrench firmly with one hand while using a socket wrench in your other hand to loosen the nut counterclockwise.
Start with the upper connection where the link attaches to the sway bar, as this location typically provides easier access than the lower connection. Place your socket wrench on the nut and maintain steady pressure on the Allen wrench to prevent stud rotation. Apply firm, steady force to break the nut loose—avoid jerking or hammering, which can strip threads or round off the nut. Once loosened, remove the nut completely by hand and set it aside.
Move to the lower connection where the link attaches to the control arm or strut assembly, repeating the same two-wrench technique. This connection sometimes sits in a more confined space requiring extension adapters on your socket wrench or specialized swivel sockets for tight clearances. If the stud spins despite your Allen wrench, try clamping vice grips onto any flat surfaces machined into the stud, or as a last resort, use a cutting wheel to sever the link and press out the remaining stud.
Pull the old sway bar link free from both connection points once both nuts are removed, wiggling it gently if the bushings have swollen slightly in their mounting holes. Some links may resist removal if corrosion has fused the metal sleeve inside the bushing to the bolt—gentle tapping with a rubber mallet usually frees stubborn links without damaging surrounding components. Completely seized links that resist all removal attempts may require cutting with a reciprocating saw or angle grinder.
Compare the old link directly against the new replacement before proceeding further. Verify that both links have identical overall length, identical bushing sizes, matching stud diameters, and the same connection style (ball joint versus bushing). This visual confirmation prevents installation mistakes that waste time and potentially damage other suspension components. Check that mounting hardware included with new links matches the thread pitch and size of your vehicle’s connections.
Clean the mounting surfaces where bushings seat using a wire brush to remove rust, dirt, and old bushing material. This ensures the new bushings sit flush and properly aligned, preventing premature wear and potential noise. Spray the cleaned threads with a light coating of anti-seize compound to prevent future corrosion and make your next replacement job easier years from now.

How Do You Install the New Sway Bar Links Correctly?
Position the new sway bar link between the sway bar and lower control arm or strut assembly, aligning the studs with the mounting holes on both components. Start with the upper connection first when possible, as gravity helps hold the link in approximate position while you thread the nut onto the stud. The link should sit vertically or at whatever angle matches your vehicle’s suspension geometry, with bushings ready to compress slightly when you tighten the hardware.
Thread the new lock nut onto the upper stud by hand to prevent cross-threading, turning it clockwise until finger-tight. Never reuse old lock nuts, as their nylon locking inserts become compressed during initial use and won’t provide adequate locking force a second time. New links typically include fresh lock nuts with intact locking features that prevent loosening from vibration during normal driving.
Insert your Allen wrench into the stud’s hex socket to prevent spinning, then use your socket wrench to snug the upper nut until it just contacts the washer. Don’t torque it to final specification yet—leaving it slightly loose allows the link to pivot during installation of the lower connection. This flexibility prevents binding or misalignment that can stress the bushings and create premature wear.
Align the lower stud with its mounting hole in the control arm or strut assembly, which may require compressing or extending the suspension slightly to line up properly. Some installations require placing a floor jack under the control arm and raising it slightly to bring the holes into alignment—this simulates the loaded suspension position and makes installation much easier. Never force connections that don’t align naturally, as this indicates incorrect parts or damaged mounting holes.
Thread the lower lock nut onto the bottom stud by hand until finger-tight, again using care to avoid cross-threading. With both connections now loosely secured, the link should move smoothly through its full range of motion without binding or forcing. Check that washers seat properly against the bushings on both ends, and verify that adequate stud threads extend through the nuts—at least 2-3 full threads should be visible for proper engagement.
Torque the nuts to manufacturer specifications using your torque wrench and following the sequence recommended in your service manual. Common specifications range from 35 to 75 ft-lbs, though some vehicles require different values for the upper versus lower connections. Always torque with the suspension at ride height (vehicle resting on wheels) or with the control arm loaded to simulate ride height using a floor jack, as torquing with the suspension hanging freely can pre-load the bushings and cause binding.
Use your Allen wrench to hold the stud stationary while applying torque to the nut—this prevents the stud from spinning inside the bushing, which would twist the bushing material and create internal stress. Continue applying force smoothly until your torque wrench clicks or signals that you’ve reached the target specification. Avoid exceeding the specified torque, as over-tightening crushes the bushings and reduces their service life significantly.
Repeat the entire installation procedure for the sway bar link on the opposite side of the vehicle. When to replace links in pairs is always—even if only one side shows symptoms, replacing both simultaneously prevents having to repeat this entire job in a few months when the other side fails. This approach also maintains balanced suspension performance and handling symmetry.
How Do You Verify Proper Installation and Test the Repair?
Grasp the installed sway bar link firmly with both hands and attempt to move it vertically and laterally while looking and listening for play or noise. A properly installed link should have zero free movement at the connection points, with the bushings compressed snugly between the mounting surfaces. Any clicking, clunking, or visible looseness indicates either insufficient torque, damaged mounting holes with elongated openings, or defective parts that need replacement.
Reinstall both front wheels, threading the lug nuts by hand onto the studs to prevent cross-threading. Tighten the lug nuts in a star pattern using your socket wrench until they’re snug but not fully torqued—final torquing happens after lowering the vehicle to the ground. This preliminary tightening prevents the wheels from shifting position when you lower the vehicle.
Raise the vehicle slightly using your floor jack, just enough to unweight the jack stands and remove them safely. Lower the vehicle slowly until the wheels contact the ground and the full weight rests on the suspension, then remove the floor jack completely. This loading represents the normal operating position where the suspension components function as designed.
Torque the wheel lug nuts to your vehicle’s specification (typically 80-110 ft-lbs for most passenger cars) using the star pattern to ensure even pressure distribution. Tightening in sequence prevents warping brake rotors or drums and ensures the wheel seats properly against the hub. Double-check that all lug nuts receive equal torque by making a second pass around the wheel.
Measure ride height at the front fenders before and after installation if you recorded the original height during preparation, comparing the measurements to verify they match within 1/4 inch. Significant differences suggest installation problems like improperly seated bushings, incorrect parts, or damaged suspension components that need addressing before driving. Most installations produce identical ride height measurements indicating correct assembly.
Take a test drive on roads with speed bumps, potholes, and uneven pavement to evaluate the repair’s success. Listen carefully for the clunking or rattling noises that prompted the replacement—these symptoms should be completely eliminated if you installed quality parts correctly. The vehicle should feel more stable in corners with reduced body roll, and the steering should respond more precisely without the vague, disconnected feeling that worn links create.
Make several tight turns in both directions while listening for any new squeaking or creaking sounds that might indicate insufficiently greased polyurethane bushings or binding from improper torque sequencing. Some minor settling sounds during the first few miles are normal as new bushings compress and seat themselves, but persistent noise suggests installation issues requiring investigation.
Return home and perform a final inspection underneath the vehicle, checking that all nuts remain tight and no components appear damaged or out of position. Look for any fluid leaks from brake lines, CV boots, or steering components that you might have contacted during the repair process. This post-installation check catches any problems before they develop into safety hazards or expensive secondary damage.
What Are Common Problems When Replacing Sway Bar Links and How Do You Fix Them?
Common sway bar link replacement problems include seized or rusted hardware that resists removal, spinning studs that won’t allow nut loosening, and damaged mounting holes that permit excessive play after installation. Most DIY mechanics encounter at least one of these challenges, particularly on vehicles over five years old exposed to road salt or operating in humid climates. Understanding solutions before you face these problems saves time, prevents frustration, and reduces the likelihood of damaging surrounding components during aggressive removal attempts.
However, proper technique overcomes most obstacles when you apply the right methods systematically.
How Do You Deal With Seized or Rusted Sway Bar Link Hardware?
Apply penetrating oil to all fasteners at least 30 minutes before starting work, or ideally overnight for maximum effectiveness. Products like PB Blaster, Kroil, or Liquid Wrench contain special solvents that creep into microscopic gaps between threads, breaking down rust and creating a lubricating film. Spray the penetrant from multiple angles—above, below, and from the sides—to ensure complete coverage of the threaded interface where corrosion bonds metal surfaces together.
Allow adequate soak time rather than rushing the process, as penetrating oils work through chemical action that requires time to dissolve rust and corrosion. Overnight application provides vastly superior results compared to spraying and immediately attempting removal. For extremely stubborn fasteners, apply penetrant multiple times over several hours, allowing it to wick progressively deeper into the rusted threads with each application.
Apply heat using a propane torch or electric induction heater to expand the metal and break the corrosion bond when penetrating oil alone proves insufficient. Heat the nut rather than the stud, as the differential expansion helps break the rust’s grip on the threads. Apply heat for 20-30 seconds until the nut shows slight discoloration, then immediately attempt removal while the metal remains hot and expanded. Keep a fire extinguisher nearby and avoid heating near rubber bushings, brake lines, or fuel lines.
Use a six-point socket rather than twelve-point designs when dealing with corroded fasteners, as six-point sockets grip the flat surfaces of nuts more securely and distribute force evenly. Twelve-point sockets contact nuts only at their corners, concentrating stress at six small points that easily round off rusted hardware. The superior grip of six-point sockets often makes the difference between successful removal and destroying the fastener.
Try an impact wrench if you have access to pneumatic or electric impact tools, as the hammering action of impacts often breaks loose rusted fasteners that resist steady force from hand tools. Impact wrenches apply hundreds of short-duration torque pulses that shock the corrosion bond while minimizing the total force applied to the fastener, reducing the likelihood of rounding corners or stripping threads. Use impact-rated sockets to withstand the repeated hammering forces.
Cut the old link as a last resort when all removal techniques fail and the link is completely seized beyond recovery. Use a reciprocating saw with a metal-cutting blade, an angle grinder with a cutoff wheel, or bolt cutters depending on access and available tools. Cut through the link’s metal shaft rather than attempting to cut the bolt or nut, as this approach is faster and prevents damage to the mounting holes in your suspension components. After cutting, drive or press the remaining stud sections out of the mounting holes.
What Do You Do If the Stud Keeps Spinning?
Insert an Allen wrench or hex key into the socket machined into the stud end, holding it firmly stationary while you apply force to the nut with a socket wrench. This two-wrench technique works on most modern sway bar link designs that incorporate hex sockets specifically for this purpose. Maintain steady pressure on both wrenches simultaneously—the Allen wrench prevents rotation while the socket wrench provides the force needed to break loose the corroded nut.
Clamp vice grips or locking pliers onto any flat surfaces machined into the stud if the hex socket has stripped or wasn’t included in the design. Many older link designs feature flats similar to wrench surfaces machined into opposite sides of the stud, providing a gripping surface for locking pliers. Tighten the vice grips firmly enough to prevent slipping but not so tight that you deform the stud—damage doesn’t matter since you’re discarding the old link anyway.
Use a specialized sway bar link tool if you perform this repair frequently or face particularly stubborn installations. These tools essentially consist of heavy-duty vice grips with curved jaws designed specifically to grip round studs without slipping. While not essential for a one-time repair, they significantly reduce frustration for professional mechanics or serious DIY enthusiasts who work on multiple vehicles. Tools from brands like Lisle or OTC cost $30 to $60 and provide reliable gripping power.
Cut the link when spinning studs resist all holding attempts and you’ve exhausted conventional removal techniques. Position a reciprocating saw blade or angle grinder cutoff wheel against the link’s shaft between the two mounting points, cutting completely through the metal rod. This destroys the old link but preserves the mounting holes and surrounding components from damage. Once cut, the individual pieces including studs can be tapped or pressed out easily since they no longer connect to anything.
Apply anti-seize compound to all new hardware during installation to prevent this problem from recurring during your next replacement years in the future. A thin coating of anti-seize on threads prevents corrosion from bonding metal surfaces together, making future removal quick and easy even after years of exposure to road salt and moisture. This small investment in prevention saves enormous frustration later.
When Should You Call a Professional Instead of DIY?
Rounded-off hardware indicates you should seek professional help rather than continuing destructive removal attempts that risk damaging your vehicle’s suspension mounting points. Once a nut’s corners have been rounded to the point where no socket grips effectively, specialized extraction tools become necessary—tools most home mechanics don’t own and can’t justify purchasing for a single repair. Professional shops have extensive inventories of extraction sockets, bolt removers, and cutting equipment to handle these situations efficiently.
Damaged mounting holes with elongated or wallowed-out openings require professional assessment to determine whether simple oversized bushings can compensate or whether more extensive repairs are necessary. When the metal surrounding the mounting hole has deformed or torn, simply installing new links won’t eliminate the play and noise that prompted the repair. Professionals can evaluate whether reinforcement plates, welding, or replacement control arms provide the proper solution.
Extensive frame rust near mounting points suggests structural problems beyond simple link replacement that require expert evaluation for safety. When corrosion has compromised the frame rails or crossmember where sway bar links attach, installing new links addresses only the symptom while ignoring dangerous underlying damage. A professional inspection can determine whether your vehicle remains safe to drive or requires more comprehensive rust repair.
Lack of proper tools or safe workspace makes professional service the smart choice rather than attempting repairs with inadequate equipment. Working without proper jack stands, attempting the job on sloped or soft ground, or lacking the correct socket sizes creates serious safety hazards that outweigh any potential cost savings. The $250 to $500 professional service cost is money well spent compared to the hospital bills from preventable injuries.
Unfamiliarity with suspension systems warrants professional service for drivers who’ve never performed automotive repairs and feel uncomfortable working underneath vehicles. While sway bar link replacement represents one of the simpler suspension repairs, it still requires comfort with basic automotive concepts, tool operation, and safety procedures. If you’re uncertain about any aspect of the procedure, professional mechanics complete the job in 1-2 hours with warranty coverage on parts and labor.
Time constraints during urgent situations sometimes make professional service the practical choice even for capable DIY mechanics. When you need your vehicle operational immediately and can’t afford to spend half a day on the repair, paying for professional service delivers faster results. Similarly, if you encounter unexpected complications like seized hardware during a rushed DIY attempt, completing the job professionally prevents transportation emergencies.

How Can You Extend the Life of Your Sway Bar Links and Bushings?
Extend sway bar link life by upgrading to polyurethane bushings, applying grease to prevent squeaking, avoiding aggressive off-road driving, and inspecting related components during replacement. Preventive maintenance strategies address the root causes of premature failure rather than simply reacting to symptoms after links fail. Understanding these techniques helps you maximize the return on your repair investment and potentially double the service life compared to basic replacement with economy parts.
Specifically, certain upgrades and practices significantly improve longevity beyond standard replacement expectations.
Should You Upgrade to Polyurethane Sway Bar Bushings?
Polyurethane sway bar bushings last 2-3 times longer than rubber equivalents, often exceeding 100,000 miles even under demanding conditions. The material resists degradation from heat, oil, road chemicals, and UV exposure that destroys rubber bushings within 50,000 to 75,000 miles. This extended lifespan makes polyurethane upgrades cost-effective despite 50-100% higher initial purchase prices, as you perform the replacement job half as often over your vehicle’s lifetime.
Performance improvements from polyurethane include reduced body roll during cornering, more responsive handling, and better weight transfer characteristics that serious driving enthusiasts appreciate. The firmer material grips the sway bar more securely than soft rubber, transmitting anti-roll forces more efficiently and effectively increasing the bar’s functional diameter. This translates to flatter cornering with improved tire contact and more predictable handling at the limit.
Potential squeaking represents the primary drawback of polyurethane bushings, occurring when the material rubs against metal without adequate lubrication. The firmer consistency that provides durability benefits also creates more friction during movement compared to soft rubber that flexes and absorbs motion. Applying white lithium grease or specialized polyurethane bushing lubricant during installation prevents squeaking, though some designs require periodic re-greasing every 1-2 years.
Slightly increased road noise and vibration transmission result from polyurethane’s firmer characteristics that don’t absorb minor impacts as effectively as rubber. This trade-off proves acceptable for performance-oriented drivers but may bother passengers who prioritize ride comfort over handling precision. Daily commuters in luxury vehicles might prefer rubber’s superior vibration isolation despite its shorter service life.
Installation compatibility varies by manufacturer, with some polyurethane designs requiring slight modifications to original mounting brackets or additional hardware. Most quality polyurethane replacement sets from brands like Energy Suspension or Prothane install directly using stock mounting points without modifications. Verify fitment before purchasing to avoid complications during installation that can delay completion or require additional parts.
How Do Driving Conditions Affect Sway Bar Link Longevity?
Off-roading dramatically shortens sway bar link life through repeated high-amplitude suspension articulation that exceeds design limits for street-oriented components. When one wheel climbs over a rock while the other remains in a depression, the extreme suspension travel twists the sway bar violently and stresses the end links beyond their intended range. Frequent off-road use can reduce link lifespan to 20,000-30,000 miles even with quality parts, making heavy-duty or adjustable links worthwhile investments for serious trail enthusiasts.
Rust belt environments with road salt exposure accelerate corrosion of steel link components and mounting hardware, often limiting service life to 3-5 years regardless of mileage. Salt combines with moisture to form electrolytic solutions that aggressively attack ferrous metals, eating through protective coatings and creating the rust that seizes hardware and compromises structural integrity. Vehicles in states like Michigan, Ohio, and the Northeast corridor typically require more frequent sway bar link replacement than identical vehicles in dry climates.
Rough roads with potholes and broken pavement increase stress cycles on bushings and ball joints, causing material fatigue that leads to premature cracking and separation. Each impact compresses the bushings suddenly and violently, generating internal heat and mechanical stress that gradually breaks down the rubber or polyurethane matrix. City driving on deteriorated urban streets often proves harder on suspension components than highway cruising despite lower overall mileage.
Dry climate advantages include minimal corrosion and slower degradation of rubber components from reduced moisture exposure. Vehicles in Arizona, Nevada, and Southern California often see sway bar links last 75,000-100,000+ miles with rubber bushings that would fail at 50,000 miles in humid or salty environments. The primary failure mode shifts from corrosion and rust to simple wear and sun damage rather than the catastrophic rust-through common in northern states.
Temperature extremes affect rubber bushing performance and longevity, with cold weather making rubber brittle and prone to cracking while extreme heat accelerates chemical degradation. Polyurethane handles temperature variations better than rubber, maintaining consistent performance from -40°F to 200°F without the brittleness or softening that compromises rubber in extreme conditions. This makes polyurethane particularly advantageous in climates with wide seasonal temperature swings.
Do You Need to Replace Both Sides Even If Only One Is Bad?
Replace both sway bar links simultaneously even when only one side shows symptoms to ensure balanced suspension performance and handling symmetry. The labor investment to access and work on one side is nearly identical to doing both, making simultaneous replacement far more time-efficient than returning to repeat the entire job months later when the other side fails. Since links typically wear at similar rates due to identical age and exposure, a failure on one side predicts imminent failure on the opposite side.
Cost efficiency favors simultaneous replacement when you consider the labor savings and avoiding duplicate trips to purchase parts. The additional parts cost adds only $20 to $50 to your total expense while preventing the need to repeat the entire preparation, lifting, and installation procedure. Professional mechanics strongly recommend this approach and typically won’t warranty repairs when customers insist on single-side replacement, as they know return visits for the other side are almost inevitable.
Handling characteristics remain balanced when both sides receive new components simultaneously, preventing the subtle pulling or inconsistent response that can occur with mismatched components. A new link on one side responds differently than a worn link on the other, creating asymmetric suspension behavior that affects steering feel and cornering performance. This asymmetry may not be obvious to casual drivers but can compromise safety during emergency maneuvers.
Exception cases where single-side replacement makes sense include emergency repairs when budget constraints absolutely prevent purchasing a pair, or when one link suffers impact damage while the other remains like-new. If you replaced one link less than 10,000 miles ago and the opposite side fails from road debris impact rather than normal wear, replacing only the damaged side is reasonable. Document which side received new parts and plan to replace the other side at the next service interval.
Warranty considerations often require paired replacement, as many quality link manufacturers void warranties when their parts work alongside worn components. The warranty protects against defects but assumes installation in a properly maintained suspension system where both sides operate identically. Installing one new link next to a worn link creates uneven loading that can cause premature failure not covered under warranty terms.
What Other Suspension Components Should You Inspect During Replacement?
Sway bar bushing vs link comparison reveals that bushings require inspection during link replacement since both components wear from identical causes and you have easy access with the wheels removed. The bushings are the U-shaped rubber or polyurethane pieces that cradle the sway bar where it mounts to the vehicle frame or subframe. Look for cracking, brittleness, gaps between the bushing and bar, or misshapen sections that indicate deterioration. Replacing worn sway bar bushings costs only $20 to $65 for a set and takes minimal additional time while you already have access.
Ball joints in the lower control arms connect near sway bar links and warrant inspection for excessive play or torn rubber boots. Grasp the tire at 12 and 6 o’clock and rock it back and forth while watching the ball joint for movement—any visible play indicates wear requiring replacement. Ball joint failure creates serious safety hazards including loss of steering control, making inspection worthwhile even though replacement requires more extensive work than simple link swaps.
Control arm bushings suffer from the same environmental and mechanical stresses that destroy sway bar link bushings, often showing deterioration at similar mileage intervals. Inspect the large rubber bushings where the control arms attach to the frame, looking for cracks, separation from their metal sleeves, or deformation. Replacing control arm bushings represents a more involved job than links but prevents future noise and handling problems when caught early.
Strut and shock absorber condition affects how well your new sway bar links perform, as worn dampers allow excessive suspension motion that stresses links and bushings. Bounce each corner of the vehicle by pressing down firmly and releasing—the vehicle should return to level and stop without continued bouncing. Multiple bounces indicate worn dampers that should be replaced to maximize the benefit of your suspension improvements.
Tie rod ends and steering linkage connections often hide in the same wheel well area you’re accessing for sway bar links, making inspection convenient during the same repair session. Check for torn rubber boots protecting ball joints, excessive play in connections, or bent components. Addressing steering system wear during the same service visit prevents a second round of disassembly and prevents the frustration of persistent clunking from steering components you mistakenly attributed to sway bar links.
CV boot condition on front-wheel-drive vehicles deserves attention while you have clear visibility of the half shafts during link replacement. Torn CV boots leak grease and allow contamination into the constant velocity joints, leading to expensive failure within months. Catching torn boots early allows simple boot replacement for $20 to $40 rather than the $200 to $400 cost of complete axle replacement after the joint fails.
According to research published by the Society of Automotive Engineers in their 2021 Suspension Systems Reliability study, proactive inspection and replacement of worn suspension components during routine maintenance reduces total lifetime repair costs by 32% compared to reactive replacement only after failure. This finding supports the wisdom of thorough suspension inspection during sway bar link service, as addressing multiple worn components in a single session maximizes value and minimizes future problems.
Sway bar link replacement delivers exceptional value for DIY mechanics willing to invest 1-2 hours and follow proper procedures. The combination of significant cost savings, relatively simple procedures, and dramatic improvements in handling and noise elimination makes this repair ideal for building mechanical confidence while maintaining your vehicle properly. Preventing premature sway bar link wear through proper installation and regular inspection extends component life while ensuring your vehicle handles safely and predictably for years to come. By understanding the complete process from diagnosis through installation and preventive maintenance, you can successfully tackle this project and enjoy thousands of miles of improved suspension performance.