


If your clutch pedal feels soft, inconsistent, or won’t disengage cleanly, your clutch hydraulic system may need bleeding—because trapped air compresses, steals hydraulic pressure, and prevents full slave-cylinder travel. The fastest way to know is to use a simple “master-to-slave” checklist: confirm fluid level/condition, look for leaks, then test whether the pedal improves after a controlled bleed.
Next, you’ll learn what bleeding actually is (it’s not “adding fluid,” it’s purging air) and why certain designs trap bubbles stubbornly—especially when the slave cylinder sits higher or the line loops upward.
Then, you’ll see what typically introduces air (leaks, worn seals, opened lines, or low fluid) and how to recognize the difference between “air in the system” and “hardware failure.”
Introduce a new idea: once you can diagnose the need, the right method matters—gravity, two-person, vacuum, and reverse bleeding each win in different layouts, and choosing wrong can waste an afternoon.
Does Your Clutch Hydraulic System Need Bleeding?
Yes—your clutch hydraulic system likely needs bleeding if you have (1) a spongy or sinking pedal, (2) hard-to-select gears due to incomplete disengagement, and (3) recent fluid loss/service that may have introduced air.
Then, to confirm the need quickly, follow a short symptom-and-inspection path before you touch a wrench.
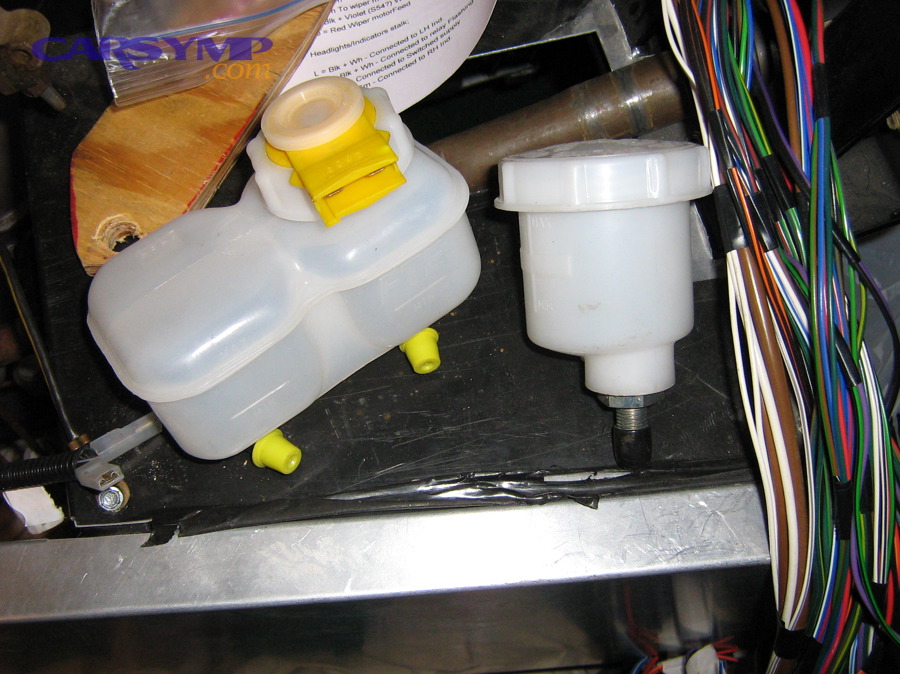
A hydraulic clutch works like a syringe: the master cylinder converts pedal motion into pressure; the slave cylinder converts pressure into clutch-fork (or release bearing) travel. Fluid doesn’t compress much, but air compresses easily—so a bubble acts like a spring, absorbing your pedal stroke. The result is a pedal that feels “soft,” engagement that changes day-to-day, or a clutch that won’t fully release when hot.
The practical goal is not “make the pedal feel nicer.” The goal is restore full slave travel so the clutch disc separates cleanly from the flywheel. If you ignore it, you can accelerate synchro wear, increase shift grinding, and mask a leak that becomes a no-start situation later.
Is a soft/spongy clutch pedal a bleeding problem?
Yes—most of the time a spongy clutch pedal points to air in the hydraulic circuit for three reasons: air compresses, bubbles migrate to high points, and repeated pumping can temporarily “improve” feel by moving bubbles.
Specifically, the key clue is temporary improvement after pumping: if a few rapid presses make the pedal firmer for a moment, air is very likely present.
However, don’t assume air is the only cause. A pedal can feel soft from an internally bypassing master cylinder (seal leak inside the bore), but that usually shows up as a pedal that slowly sinks under steady pressure even after proper bleeding.
Are hard shifts and gear grinding signs you need to bleed?
Yes—hard shifts can indicate bleeding needs for three reasons: incomplete clutch release, reduced slave travel, and delayed pressure buildup from compressible air.
More importantly, verify it with a simple “release test”:
- Engine running, clutch fully pressed, try selecting reverse.
- If reverse crunches but improves after pumping, air is strongly suspected.
- If reverse always crunches and pumping does nothing, suspect mechanical issues (see the “NOT the fix” section).
Should you bleed after opening the hydraulic line or replacing parts?
Yes—anytime the system is opened you should bleed for three reasons: air enters instantly, bubbles cling to hose walls, and refill alone doesn’t purge high points.
Besides, if you’ve just done a clutch replacement, bleeding is not optional—it’s part of returning the system to known-good operation. Treat it like torquing the pressure plate bolts: a required step, not a “maybe.”
What does “bleeding” (purging) a hydraulic clutch mean?
Bleeding a hydraulic clutch is the controlled process of forcing fluid through the master-to-slave circuit to purge trapped air, restoring consistent pressure and full slave-cylinder stroke.
Next, it helps to understand why tiny bubbles cause big symptoms—even when the reservoir looks “full.”

Bleeding is often misunderstood as “topping up.” In reality, you’re exchanging fluid while evacuating air from the highest points and from cavities inside the slave cylinder. The smallest pockets can cause the biggest problems because the clutch circuit moves relatively small volumes compared with brakes.
Also note the terminology:
- Bleeding = remove air (primary objective)
- Flushing = replace old fluid (secondary benefit while bleeding)
- Bench bleeding = pre-filling a new master cylinder before installation (when applicable)
Is clutch bleeding the same as flushing the fluid?
No—clutch bleeding focuses on removing air, while flushing focuses on replacing old fluid; they overlap because pushing new fluid through often removes both bubbles and degraded fluid.
However, if your fluid is dark, contaminated, or old, treat bleeding as a chance to flush enough volume to improve reliability—especially because glycol-based fluids absorb moisture over time, which reduces heat tolerance and can increase corrosion risk. A University of Texas at Arlington mechanical engineering thesis notes brake fluid’s hygroscopic nature and discusses how moisture absorption can significantly reduce boiling temperatures over time.
What causes air to enter the clutch hydraulic system?
There are 4 main causes of air entering a clutch hydraulic system: (1) external leaks, (2) internal seal bypass, (3) opened lines/components during service, and (4) low reservoir level that uncovers the port and pulls in air—grouped by “loss,” “ingress,” and “disturbance.”

Then, you can narrow the cause by matching symptoms to where air most likely enters.
Most real-world clutch bleeding needs are not “mystery bubbles.” They come from a specific entry point. If you bleed without fixing the entry point, the pedal will often degrade again in days or weeks.
Common entry points include:
- Master cylinder rear seal (leaks down the firewall or into the cabin)
- Slave cylinder dust boot (wetness at the bellhousing or slave body)
- Line fittings (seepage that’s easy to miss)
- Reservoir cap/diaphragm issues (less common, but can contribute to contamination)
Which leaks most often introduce air: master cylinder or slave cylinder?
The slave cylinder is the more common entry point in many vehicles for three reasons: it lives in higher heat, its seal cycles through larger motion, and it’s exposed to road debris and vibration.
However, the master cylinder can fail in a sneakier way: it may bypass internally without visible leakage, causing a pedal that slowly sinks.
A quick discrimination test:
- Visible fluid at slave/boot = likely slave leak
- Wet carpet/firewall under pedal = likely master leak
- No leaks but sinking pedal under steady pressure = possible internal bypass (master commonly)
Can low fluid alone cause air in the clutch line?
Yes—low fluid can introduce air for three reasons: the feed port uncovers during pedal return, the master draws air instead of fluid, and the returning bubble rises and parks at high points.
Specifically, even a small drop in fluid level can matter if the reservoir is shared with brakes or if the clutch pickup is higher. Always confirm the clutch pickup design before assuming “the brakes look fine, so the clutch must be fine.”
Which clutch bleeding method should you use: gravity, two-person, vacuum, or reverse?
Gravity bleeding wins for simplicity on straightforward layouts, two-person is best for stubborn air with a clear bleeder path, vacuum is optimal for solo work and quick fluid movement, and reverse bleeding is strongest when bubbles are trapped high near the master cylinder.
However, method choice should follow circuit geometry—not personal preference.

Here’s the decision logic: air rises. So if your clutch line runs upward, loops, or places the slave above the master, you’ll often do better with reverse bleeding or master-side purging. If the bleeder is truly the highest point and the line descends cleanly, gravity and two-person bleeding work beautifully.
To make this concrete, the table below compares methods by what most DIYers actually care about (time, tools, mess, and success rate on “trapped-high” bubbles).
Method comparison table (what each method is best at):
| Method | Best for | Weakness | Tools needed | Typical DIY success |
|---|---|---|---|---|
| Gravity | Simple circuits, gentle purge | Slow; may not move trapped bubbles | Hose + bottle | Medium |
| Two-person pump/hold | Stubborn systems with normal bleeder placement | Needs coordination; risk of aeration if done wrong | Wrench + hose | High |
| Vacuum | Solo bleeding; fast fluid exchange | Can pull air past threads (false bubbles) | Hand vacuum pump | Medium–High |
| Reverse | Air trapped near master/high loops | Needs syringe/adapter; can overflow reservoir | Syringe/pump | High on tricky layouts |
A practical manufacturing-focused paper from BITS Pilani (Mechanical Engineering) describes clutch bleeding as removal of air from the hydraulic clutch system and reports major cycle-time reduction using an improved bleeding approach in a medium-duty vehicle plant.
Is gravity bleeding good enough for most hydraulic clutches?
Yes—gravity bleeding is often enough for three reasons: air naturally rises while fluid settles, a steady drip reduces turbulence, and you’re less likely to re-aerate fluid than with aggressive pumping.
However, it’s “good enough” only when the bleeder is positioned so air can actually escape. If the highest point is a loop near the master, gravity may leave a stubborn bubble behind.
Should you choose vacuum bleeding if you’re working alone?
Yes—vacuum bleeding is ideal solo for three reasons: one-person control, continuous fluid movement, and faster purging when you maintain reservoir level carefully.
On the other hand, vacuum can create false bubbles by pulling air around bleeder-screw threads. The fix is simple: wrap threads with PTFE tape (avoid blocking the fluid port), keep the hose tight, and judge success by pedal feel and slave travel—not bubble count alone.
When does reverse bleeding beat the other methods?
Reverse bleeding wins when air is trapped high for three reasons: bubbles naturally want to rise, pushing fluid from slave-to-master carries bubbles upward, and it often clears master-cylinder pockets that pumping can’t dislodge.
In other words, reverse bleeding matches physics instead of fighting it.
How do you bleed a clutch hydraulic system step by step?
Use the two-person bleed method in 7 repeatable steps—prep, protect paint, fill reservoir, cycle pedal with hold, crack bleeder, close bleeder, and verify pedal/slave travel—to restore firm feel and consistent disengagement.
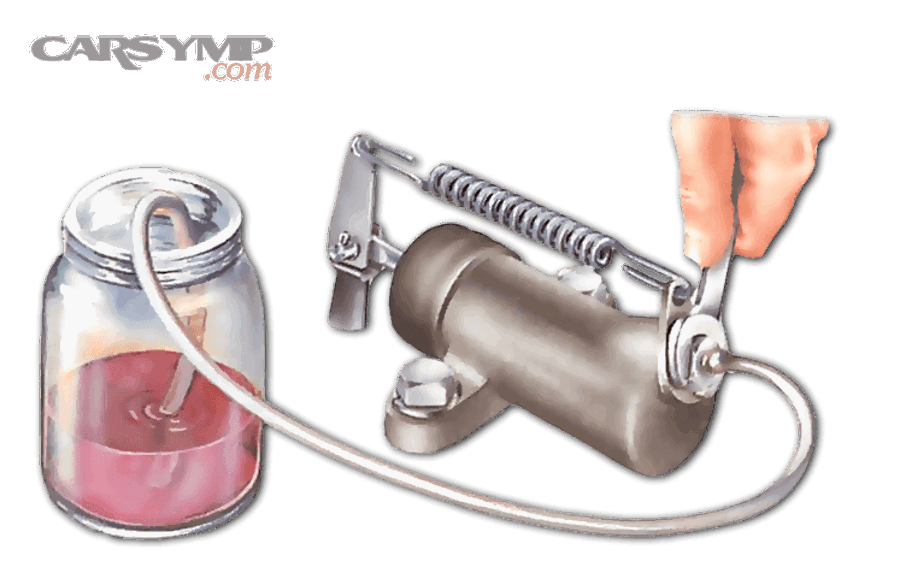
Next, follow the steps exactly and you’ll avoid the two classic DIY mistakes: letting the reservoir run low and releasing the pedal with the bleeder open.
Before you start, confirm the correct fluid spec (DOT 3/4 or manufacturer-specific). Protect paint—brake fluid removes paint quickly. Use a clear hose into a catch bottle so you can see the flow.
What tools and supplies do you need before bleeding?
To bleed efficiently, assemble:
- Correct brake fluid (fresh, unopened is best)
- Box-end wrench for bleeder screw
- Clear vinyl hose + catch bottle
- Gloves, rags, brake cleaner
- Jack/stands if access requires it
- Optional: vacuum pump or syringe for reverse bleed
Also, if you’re mid-project and weighing related work, this is a good time to consider workflow: a Clutch replacement labor time and process plan often places hydraulic bleeding near the end, after mechanical assembly and before road testing.
How do you do the two-person “pump, hold, crack, close” method correctly?
Do it in this exact rhythm to prevent reintroducing air:
- Top reservoir to max line.
- Attach hose to bleeder; submerge hose end in fluid in the bottle (helps prevent backflow).
- Helper slowly pumps pedal 3–5 times, then holds pedal fully down.
- You crack bleeder 1/4–1/2 turn; fluid/air exits.
- You close bleeder before the pedal comes up.
- Helper releases pedal slowly.
- Refill reservoir frequently; repeat until no air and pedal stabilizes.
Key detail: slow pedal motion reduces turbulence and foaming. Fast pumping can whip fluid into microbubbles that mimic “air in the line.”
How do you gravity bleed a clutch without making a mess?
Gravity bleeding is simple:
- Fill reservoir.
- Attach hose to bleeder into a bottle.
- Crack bleeder slightly and let it drip.
- Keep reservoir topped up.
- After steady clean flow, close bleeder and test pedal.
To speed it up: raise the master cylinder relative to the slave (if safe and practical), or gently tap the line and slave to dislodge clinging bubbles.
How do you reverse bleed using a syringe safely?
Reverse bleeding steps:
- Remove some fluid from reservoir first (avoid overflow).
- Fill a syringe with clean fluid; connect to bleeder via snug hose/adapter.
- Crack bleeder and slowly push fluid upward.
- Watch reservoir for bubbles; stop before overflow.
- Close bleeder; set reservoir to correct level; test pedal.
This method is especially effective when the system traps air near the master cylinder. If you see bubbles surfacing at the reservoir, you’re winning.
Evidence note: A Lund University (Faculty of Engineering LTH) master’s thesis on bleeding hydraulic systems discusses how continuous bleeding concepts can be very effective at keeping a system free of air, highlighting the practical value of designs and procedures that prioritize reliable de-airing.
How do you confirm the bleed worked and prevent air from coming back?
Confirm a successful bleed by checking (1) consistent pedal feel, (2) full disengagement without gear clash, and (3) stable fluid level with no new leaks—then prevent recurrence by fixing seep points, using fresh fluid, and protecting the circuit from repeated air ingress.

Then, treat prevention as part of the job, not an afterthought.
A bleed “worked” only if the clutch releases consistently under real conditions: cold start, after heat soak, and during stop-and-go. Don’t declare victory after one driveway press.
What pedal feel and engagement point proves the air is gone?
You’re done when:
- The pedal returns crisply (no lazy return)
- Engagement point stays consistent over multiple presses
- Shifts into reverse/first are clean at a stop
- The pedal doesn’t improve noticeably with pumping (because there’s no bubble left to “move around”)
If your pedal still changes after pumping, you likely still have air—or a seal is bypassing internally.
How do you check for leaks after bleeding?
Inspect immediately and again after a short drive:
- Around bleeder screw (wipe and recheck)
- Line fittings (look for wetness, not just drips)
- Slave boot/bellhousing area
- Master cylinder and firewall/cabin area
If you find seepage, bleeding becomes a temporary bandage. Fix the leak first, then bleed again.
How do you prevent recurring air—maintenance and best practices?
Prevent recurrence with three habits:
- Use correct fluid and keep it fresh (moisture matters). A University of Texas at Arlington Mechanical & Aerospace Engineering thesis discusses moisture absorption in brake fluid and how it can reduce boiling temperature over time, reinforcing why fresh fluid and proper maintenance matter in hydraulic systems.
- Avoid letting the reservoir drop during service.
- Replace aged rubber hoses/seals if they’re the underlying failure.
If you’re already deep into driveline work, pair this with a broader reliability plan—especially if you’re debating a Flywheel resurfacing vs replacement decision during clutch service, because drivability complaints can come from multiple sources that overlap in symptoms.
When is bleeding NOT the fix (and what should you check instead)?
There are 5 situations where bleeding won’t fix the problem: (1) mechanical clutch wear, (2) warped/contaminated friction surfaces, (3) failing master/slave seals bypassing internally, (4) release mechanism faults, and (5) transmission/input shaft issues—grouped by “hydraulic,” “mechanical,” and “gearbox.”
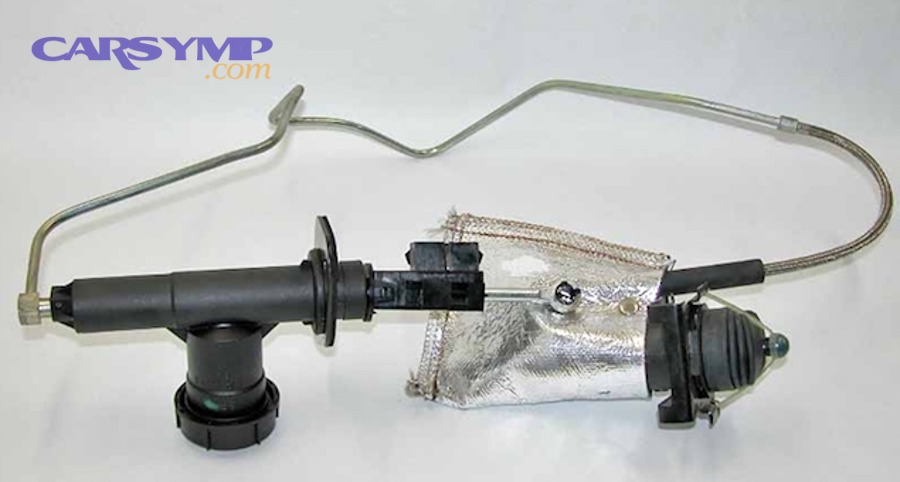
Next, you’ll use quick checks to avoid chasing bubbles when the real issue is hardware.
Bleeding fixes compressibility from air. It does not fix:
- A pressure plate that can’t clamp/release correctly
- A clutch disc that’s worn to the rivets
- A throwout bearing binding on a guide tube
- A slave cylinder that moves but doesn’t move far enough due to internal failure
This is also where many DIYers discover that a “bleeding problem” was actually a need for clutch replacement—especially if the engagement point is high, the engine revs rise without matching vehicle speed (slip), or there’s a burning smell under load.
Could a failing master cylinder mimic trapped air?
Yes—a failing master cylinder can mimic air for three reasons: internal seal bypass reduces pressure, pressure bleeds off under steady hold, and the pedal may feel soft without external leakage.
Test: press the pedal and hold steady pressure. If it slowly sinks, suspect internal bypass even after proper bleeding.
What mechanical clutch issues feel like “air in the hydraulics”?
Common mechanical lookalikes:
- Warped clutch disc or pressure plate → chatter, inconsistent engagement
- Contaminated disc (oil/grease) → slip + grabby feel
- Release fork pivot wear → inconsistent release point
- Binding release bearing → heavy or notchy pedal
If you’re diagnosing components, keep your terminology consistent and your inspection structured—this is where a guide like Clutch kit components explained is helpful because it maps each symptom to a specific part (disc, pressure plate, release bearing, pilot bearing/bushing where applicable).
When should you stop bleeding and plan for clutch/flywheel service?
Stop bleeding and plan mechanical service when:
- Pedal feel is firm, but the clutch still drags (hard to get into gear)
- There’s persistent slip under load
- You see oil contamination at the bellhousing
- Slave travel is normal but disengagement is not
At that point, your time is better spent on mechanical inspection and repair sequencing—including your Flywheel resurfacing vs replacement decision based on heat spots, cracks, thickness spec, and runout.
Contextual Border: You now have a complete, intent-first answer to “do I need bleeding and how do I do it?” The next section expands into special configurations and edge cases that change bleeding needs and method choice.
What special cases change clutch bleeding needs (and which method works best)?
There are 4 special cases that change clutch bleeding needs—(1) concentric slave cylinders, (2) shared brake/clutch reservoirs, (3) long/looped hydraulic lines, and (4) heavy-duty or air-assisted clutch systems—each favoring a different bleeding strategy based on where air gets trapped.

Next, you’ll match the special case to the method that clears air with the least frustration.
How do concentric slave cylinders change bleeding strategy?
Concentric slaves (inside the bellhousing) often trap air differently and can be harder to access. Best practices:
- Prefer vacuum or pressure-assisted methods where recommended
- Avoid aggressive pedal pumping that can aerate fluid
- Confirm any OEM-specific procedure (some require specific pedal strokes or scan-tool steps)
Does a shared brake/clutch reservoir increase bleeding frequency?
Yes—shared reservoirs can mask clutch pickup starvation or contamination. Practical implications:
- The clutch circuit may draw from a higher port; brakes can look “fine” while clutch draws air.
- If fluid is old, both systems suffer from moisture absorption risks over time.
- Keep fluid clean and at the correct level to prevent uncovering the clutch feed port.
What if your line routing has high loops or the slave sits above the master?
Choose reverse bleeding or master-side purging tactics:
- Reverse bleed to push bubbles upward naturally
- Tap line high points gently to dislodge clinging bubbles
- Reposition the slave (if removable) so the bleeder is truly the highest point during bleeding
Which method is best for heavy-duty or air-assisted clutch hydraulics?
Heavy-duty systems may need higher flow and more controlled pressure:
- Two-person method can work but may be slow
- Vacuum bleeding can help move volume efficiently
- Follow manufacturer procedures closely—heavy vehicles can have larger height differences and more stubborn bubble behavior
Evidence note: The Lund University thesis (Division of Machine Design, Department of Design Sciences) emphasizes that concepts enabling continuous or effective de-airing can keep systems free of air, which aligns with why method choice and geometry matter so much in real hydraulic circuits.