


If you’re searching for
Beyond the price tag, you also want to avoid paying twice: approving a pad-and-rotor job when the true issue is a loose wheel, uneven tire, or worn front-end component. That’s why a good estimate starts with a clear symptom map and a short diagnostic plan, not a parts list.
Another common goal is choosing the “right level” of repair. Some drivers need a budget fix to get through inspection, while others want a long-term solution that prevents vibration from returning in 2–3 weeks. The same symptom can lead to very different outcomes depending on how the work is done.
To begin, the sections below break down realistic cost ranges, what pushes those numbers up or down, and how to read a quote so you can say yes (or no) with confidence. After that, we’ll cross the contextual border into the less obvious factors that quietly inflate brake-vibration repair costs.
How much does it typically cost to fix brake vibration?
Most brake-vibration fixes land between a few hundred dollars and around a thousand, depending on whether you’re paying for pads only, rotors, calipers, or additional related work. Next, the fastest way to narrow your number is to match your symptom to the most likely repair “package.”
A helpful mental model is to think in layers:
- Layer 1 (cheapest): Minor vibration linked to pad condition, bedding, or light rotor surface issues—sometimes corrected with pads and proper prep.
- Layer 2 (most common): Vibration under braking that tracks rotor condition, hub mating surfaces, or uneven friction—often quoted as pads + rotors per axle.
- Layer 3 (expensive): Vibration caused by sticking calipers, worn suspension joints, bent hubs, or repeated comebacks—often requires parts beyond pads/rotors.
RepairPal’s estimator lists an average brake rotor replacement cost between $559 and $730, including estimated labor and parts in that range.
For brake pads, RepairPal’s estimator lists an average brake pad replacement cost between $325 and $383.
To make the ranges more practical, use the table below as a budgeting guide. This table helps you compare common repair paths, what they usually include, and why the cost moves.
This table summarizes common brake-vibration repair packages and what drives each price range.
| Common fix path | What it usually includes | Why the price changes |
|---|---|---|
| Pads only (per axle) | Pads, hardware kit (sometimes), basic cleaning | Vehicle type, pad grade, shop labor rate, seized slide pins |
| Pads + rotors (per axle) | Pads, rotors, hardware, rotor/hub surface prep | Rotor design, rust severity, caliper condition, sensor add-ons |
| Rotor correction (if eligible) | Rotor machining or replacement, measurement checks | Minimum thickness, heat damage, scoring, runout source |
| Caliper-related repair | Caliper replacement or rebuild, bleeding, fluid | Rust belt corrosion, hose condition, labor time, bleeding method |
| Non-brake root cause fix | Tire balance/rotation, wheel issues, suspension repair | Diagnosis accuracy, part availability, alignment needs |
AAA notes average brake pad replacement cost is often in the $100–$300 per-axle range, and also cautions that a “complete brake job” can approach $1,000 when multiple components are involved.
Which symptoms change the price the most?
The biggest price swings come from where the vibration is felt, when it shows up, and how repeatable it is, because those clues separate “brake-only” causes from wheel, hub, and suspension issues. Next, use the symptom profile to decide whether you should authorize a brake quote immediately or pay for diagnosis first.
Does the vibration show mainly in the steering wheel or the whole body?
If the steering wheel shakes more than the seat, the likely cost tends to cluster around front-end causes (front rotors, front tires, or front suspension), while whole-body shaking can suggest rear involvement or tire/wheel issues. Next, confirm whether the vibration tracks braking pressure or vehicle speed.
In practical terms, steering-wheel shake can still be “just brakes,” but it also increases the chance you’ll need additional inspection time for
Does it happen only when braking, or also while cruising?
If you feel shaking even when you are not braking, the cost often shifts toward tires, wheel balance, or drivetrain issues, while braking-only vibration is more likely rotor, pad, or caliper related. Next, do a quick self-check: does the vibration stop instantly when you lift off the pedal?
If it continues after you release the brake, don’t let a shop “sell you rotors” first—pay for a short road test and wheel/tire check because that cheaper path can prevent an unnecessary brake job.
Is there a pulsing sensation through the pedal?
A rhythmic pulse at your foot often points toward rotor-related variation or hub runout, which typically increases the chance you’ll be quoted rotors (and possibly pads) rather than pads alone. Next, note whether the pedal feel changes with harder braking or stays the same.
Many owners describe this as brake pedal vibration, but it is best treated as a symptom, not a diagnosis: it can come from rotor/hub geometry, uneven friction deposits, ABS activation on rough surfaces, or even a loose wheel.
Does it worsen after a recent brake service?
If vibration began soon after brake work, costs often rise because the fix may involve redoing labor: cleaning mating surfaces, correcting torque, re-bedding pads, or replacing parts that were installed incorrectly. Next, bring your invoice—good shops can spot the likely error path quickly.
This is also where you’ll want to ask whether new parts were installed with new hardware, whether hub surfaces were cleaned, and whether the shop measured runout before and after installing the rotor.
What causes brake vibration and what repairs match each cause?
Brake vibration usually comes from geometry (runout, hub issues), friction variation (pad deposits, uneven contact), or a non-brake issue that feels like braking shake, and each category has a different cost “shape.” Next, match the likely cause to a repair plan that fixes the root, not just the symptom.

Rotor or hub runout (geometry problem)
If the rotor or hub is not running true, the fix often requires measuring, cleaning the hub face, indexing the rotor, and possibly replacing the rotor—so the cost commonly lands in the pads+rotors range rather than pads-only. Next, ask whether the shop can show you runout readings before recommending parts.
Hidden cost driver: if the hub itself is the problem (rust buildup, damage, or bearing play), you can face additional labor and parts beyond normal brake service.
Uneven friction transfer or “hot spots” (surface problem)
If vibration is caused by uneven friction layers, a correct fix may involve pad replacement plus rotor surface correction and proper bedding, which can cost less than a full replacement if caught early. Next, confirm whether the shop is addressing the root cause (overheating, stuck slides, pad choice) so it doesn’t return.
This is where the quality of prep work matters: cleaning, lubrication, correct hardware, and correct bedding can be the difference between a quiet brake job and a comeback.
Caliper/slide pin problems (clamping problem)
If a caliper is sticking or slide pins are seized, vibration is often paired with heat, pulling, or uneven pad wear, and the repair cost can rise sharply because bleeding and additional labor are involved. Next, have the shop show you uneven pad taper or overheated hardware as proof before approving calipers.
In many cases, replacing rotors without fixing a sticking caliper simply burns the new parts and recreates the shake.
Wheel and installation errors (fastener problem)
If the vibration started after wheels were removed, the fix can be surprisingly simple—correct torque, clean mounting surfaces, and recheck—but ignoring it can lead to repeated rotor issues. Next, explicitly ask the shop to check for Wheel lug torque issues after brake work before selling major parts.
A mismatched or uneven torque pattern can distort the rotor’s clamping, and the repair might be mostly labor, but it can save you from replacing otherwise-good components.
Non-brake sources that mimic brake vibration (misleading problem)
Out-of-balance tires, bent wheels, worn control arm bushings, and loose tie-rod ends can all feel like braking shake, and the cost can vary from inexpensive balancing to higher suspension labor. Next, request a brief road test that separates “brake-only” vibration from speed-related vibration.
When a shop skips this step, you risk paying for brakes that don’t solve the real complaint.
What diagnostic steps should you pay for before approving repairs?
Pay for diagnosis when the symptom could be non-brake related, when vibration started after recent work, or when you’re being quoted expensive parts without measurements. Next, insist on a short, documented checklist so you can see what the shop verified.
Road test with a repeatable trigger
A proper road test recreates the vibration at a consistent speed and braking effort, which helps separate brake-only shake from tire/suspension vibration. Next, ask the tech to describe whether the vibration frequency changes with vehicle speed or with brake pressure.
This single clue often prevents unnecessary rotor replacement when the true issue is a speed-based shake from tires or suspension.
Visual inspection plus wear pattern reading
Pad taper, uneven rotor color, cracked friction material, and seized hardware can reveal the cause quickly and cheaply. Next, request that the shop shows you the wear pattern on both inner and outer pads on the same axle.
If one pad is much thinner, the fix may require hardware and caliper service, not just fresh pads.
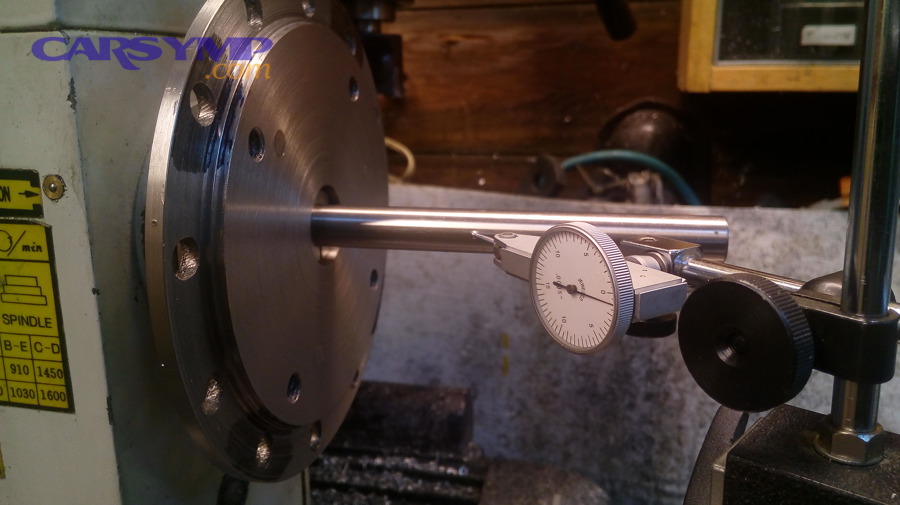
Runout and hub face checks (measure, don’t guess)
Measuring runout and checking the hub face for rust scale identifies whether the vibration is likely to return even after new parts, because new rotors on a dirty hub can still run out. Next, ask whether the shop cleans the hub and re-measures after installing the rotor.
If the shop won’t measure, your “fix” is often just a gamble.
Wheel and tire verification
Even if the vibration appears only during braking, a quick tire balance check and wheel inspection can confirm whether you’re chasing a brake problem or a rolling vibration that becomes noticeable during deceleration. Next, confirm whether any wheel has bent lips, missing weights, or abnormal tire wear.
This is often cheaper than replacing brake parts and hoping the symptom goes away.
How do shops build the estimate: parts, labor, and hidden add-ons?
Most brake-vibration estimates are built from a parts bundle (pads/rotors/hardware) plus labor time per axle, with add-ons for sensors, fluid service, or stuck components. Next, reading the quote line-by-line helps you spot what’s essential versus what’s optional.
Parts: grade, vehicle platform, and axle design
Parts pricing changes dramatically by vehicle type: heavy trucks, performance trims, and luxury models can multiply the parts bill even if labor time is similar. Next, ask whether the quote uses economy, OE-equivalent, or premium parts and what warranty each tier carries.
Hardware kits matter more than most people expect: fresh clips, shims, and properly lubricated contact points can reduce noise and uneven wear that later feels like vibration.
Labor: flat-rate time plus “problem multipliers”
Labor is not just the listed time—rust, seized fasteners, stuck slide pins, and corroded rotors can turn a routine job into a longer one. Next, ask the shop what happens if hardware is seized: is it included, capped, or billed separately?
A quote that looks cheap can spike if it assumes everything comes apart cleanly.
Add-ons: sensors, fluid, machining, and shop supplies
Common add-ons include pad wear sensors, rotor screws, brake fluid exchange, caliper brackets, and shop supplies. Next, separate “needed to solve the vibration” from “recommended maintenance” so you can prioritize safely.
Some add-ons are legitimate—especially if a sticking caliper caused heat damage—but others are “nice to do” rather than essential to fix the shake.
Proof items: measurements and return-risk controls
The best estimates include proof steps such as runout readings, hub cleaning, and a bedding procedure plan, because these reduce comebacks that cost you time and money. Next, ask for these steps in writing if you’ve had repeated vibration after previous brake work.
When is machining a rotor better than replacing it?
Machining can be cheaper and effective only when the rotor is thick enough, not heat-damaged, and the vibration source is rotor surface variation rather than a hub or caliper issue. Next, the decision should be made after measurement—not based on habit.
When resurfacing is a smart cost move
Resurfacing can make sense when rotors have mild scoring or uneven friction layers, and the rotor still meets minimum thickness after machining. Next, confirm that the shop will verify thickness and finish quality, and will correct the underlying cause (hardware, bedding, heat management) so the issue doesn’t return.
Many guides cite typical resurfacing pricing around $40 to $65 per rotor, which can look attractive compared to replacing rotors outright.
When replacement is the safer long-term value
Replacement is often the better value when rotors are near minimum thickness, heat-spotted, cracked, heavily grooved, or when the vehicle design uses thin rotors that don’t leave much machining margin. Next, ask whether the quote includes hub face prep and a runout check, because new rotors alone don’t guarantee a vibration-free result.
This is also where your exact phrase can matter: many quotes present Fix options: resurface vs replace rotors, but the correct choice depends on measurements and root cause, not just the immediate price difference.
How to compare costs fairly
To compare fairly, include expected “return risk.” A cheaper machining job that leads to another vibration fix in a month can cost more than replacing rotors correctly once. Next, ask what the shop will do if vibration returns—recheck runout, re-clean the hub, or discount rework labor.
What does a fair quote look like for common repair packages?
A fair quote clearly states the axle(s) involved, lists parts quality, includes required hardware, and explains what checks prevent repeat vibration. Next, use a package mindset: the right bundle fixes the cause and reduces the comeback rate.
Package A: pads-only (when it’s actually appropriate)
Pads-only can be fair when rotors are within spec, vibration is mild, and there’s no evidence of rotor thickness variation, heat damage, or caliper issues. Next, the shop should still clean and lubricate contact points and verify slide pin movement, because skipping prep is a common reason vibration returns.
Package B: pads + rotors per axle (the most common “real fix”)
Pads + rotors is a fair package when vibration is strong under braking and the rotor condition or measurements suggest a geometry or surface issue that pads alone won’t correct. Next, confirm the quote includes proper hub cleaning and correct wheel torque procedure, because those steps protect your investment.
Package C: pads + rotors + caliper service (when heat or uneven wear appears)
This package becomes fair when the evidence shows sticking calipers, seized pins, or uneven pad wear, because replacing rotors without addressing clamp mechanics often wastes money. Next, insist on bleeding details and whether new hoses or fluid exchange are needed to restore consistent braking feel.
Package D: “not brakes” (when the quote should change direction)
If the vibration is speed-related or present while cruising, a fair quote may begin with wheel/tire balancing or suspension inspection rather than brake parts. Next, treat this as a win: solving the true cause first is usually cheaper than replacing brakes and hoping.
How do you prevent brake vibration from coming back?
Prevention is usually cheaper than another repair cycle: correct installation, clean mating surfaces, proper torque, and correct bedding reduce the conditions that create repeat vibration. Next, focus on the steps that most shops skip when rushing a brake job.
Control heat and friction transfer
Repeated hard stops, dragging brakes, and poor bedding can build uneven friction layers that feel like rotor problems. Next, use a controlled bedding process after new pads/rotors (as recommended by the pad manufacturer) and avoid “panic stops” immediately after installation unless safety requires it.
Also watch for dragging calipers: if you smell burning or feel the car pulling, fix the clamp issue early before it bakes new parts into vibration again.
Clean the hub and mount surfaces every time
Rust scale between the hub and rotor can create runout that new rotors will “inherit.” Next, ask your shop if they clean the hub face and rotor hat, and if they use a method to verify the rotor sits flush.
This small labor step often saves hundreds in repeat repairs.
Torque wheels correctly and recheck after service
Uneven torque can warp clamping forces and contribute to vibration complaints after service. Next, request a torque-wrench finish and a quick re-torque check after a short drive if your vehicle manufacturer recommends it.
Correct torque is especially important when vibration appeared immediately after a wheel-off service.
Fix suspension play before it “prints” into braking feel
Loose bushings and worn joints let the wheel move under braking loads, which can amplify small brake imperfections into a noticeable shake. Next, treat brake vibration as a reason to inspect suspension, not just replace rotors.
FAQ: quick answers about paying for brake vibration repairs
These quick answers help you decide what to approve, what to delay, and what to demand as proof, so you don’t overpay. Next, use them as questions to ask your shop before you sign off on a big estimate.
Is it normal for shops to quote per axle?
Yes—most brake work is priced per axle because pads and rotors are typically serviced in pairs for balanced braking. Next, make sure the quote clearly states “front axle” or “rear axle” and lists what’s included for that axle.
Should I replace pads if I replace rotors?
Usually yes, because old pads can imprint uneven material onto new rotors and recreate vibration. Next, ask whether the shop will reuse pads (rarely recommended) and what the warranty looks like if they do.
Can a cheap brake job still fix vibration?
Sometimes, but only if the root cause is minor and the install is correct; cheap jobs often fail because they skip cleaning, measurement, and hardware. Next, prioritize proof steps (runout check, hub cleaning, correct torque) over the lowest price line.
What if a chain shop advertises a low starting price?
Starting prices can be real, but they often exclude needed parts, rotor condition issues, or add-ons like sensors and fluid. Next, compare the final out-the-door quote, not the headline number.
Pep Boys, for example, advertises a standard brake service starting price per axle, which can be useful as a reference point for “entry-level” pricing in some markets.
Contextual Border: Up to this point, the goal was to estimate and choose a repair path based on common causes and predictable cost bundles. Next, we move into the less obvious cost drivers—rare attributes, modern vehicle features, and lexical “budget vs premium” tradeoffs—that can swing your final bill dramatically.
Advanced cost drivers: budget vs premium brake choices
Advanced cost drivers are the “surprise multipliers” that change your total bill even when the symptom is the same, because they alter parts pricing, labor complexity, or warranty risk. Next, use these factors to forecast whether your repair will sit at the low end or high end of typical ranges.
Economy vs OE vs performance parts: what you’re really paying for
Economy parts can reduce the immediate invoice, OE-equivalent parts often balance cost and longevity, and performance parts may improve heat tolerance but increase parts pricing. Next, choose the tier based on your driving profile (commute, towing, mountain driving) rather than marketing claims.
A practical approach is to pay for quality in the components most likely to cause comebacks: rotors, hardware, and caliper bracket condition are often more important to vibration outcomes than the fanciest pad label.
Rust-belt corrosion: when “simple brakes” become a labor job
In corrosive climates, seized slide pins, rust-welded rotors, and damaged fasteners can raise labor time and trigger extra parts like brackets and hardware kits. Next, budget for the possibility that “removal effort” becomes a meaningful part of the invoice.
Rust also increases the importance of hub surface preparation; skipping it in a rust belt environment is a common reason vibration returns quickly.
Modern tech: sensors, electronic parking brakes, and calibration time
Some vehicles add cost through electronic parking brake procedures, pad wear sensors, and post-service resets, which may require scan-tool time. Next, ask whether your vehicle needs an EPB service mode, a sensor replacement, or a system reset to complete the job correctly.
These are not “upsells” when they are required for safe operation; they are part of doing the repair to spec.
Warranty, comebacks, and the real total cost
A longer warranty can reduce your real total cost if you’re at high risk for repeat vibration, but only if the shop’s process controls are strong. Next, evaluate warranty terms alongside the shop’s prevention steps: runout measurement, hub cleaning, torque procedure, and bedding guidance.
When two quotes are close, the one with better process and warranty often costs less over a full year of driving, even if it’s slightly higher today.