Diagnose Brake Pedal Vibration for Drivers: Pulsation vs Smooth Feel
Brake pedal vibration usually means the braking system is no longer applying force evenly, so the pedal pushes back with a pulse, tremble, or rapid tapping sensation under your foot.
In many cases, brake pedal vibration is tied to friction surfaces (rotors and pads) that have uneven thickness, uneven contact, or uneven heat history, which creates repeating pressure changes each wheel rotation.
Sometimes brake pedal vibration can feel like a mechanical shake even when the brakes are fine, so the smartest approach is to connect the pedal feel to speed, steering feedback, and when the vibration starts.
Giới thiệu ý mới: Below is a step-by-step way to interpret brake pedal vibration patterns, check safety, and narrow the cause before you pay for repairs.
brake pedal vibration, brake rotor, brake caliper, brake pad, wheel hub, runout, rotor thickness variation, hydraulic pressure, brake judder, vibration diagnosis
What is brake pedal vibration, and what does it usually indicate?
Brake pedal vibration is a pulsating or shaking feedback through the pedal that most often indicates uneven braking torque at one or more wheels rather than a purely “soft” hydraulic issue.
To connect that feeling to a real cause, start by identifying when it happens and whether the steering wheel also shakes.

Most drivers describe brake pedal vibration in three common ways: a slow, rhythmic pulse (like a heartbeat), a faster flutter, or a sharp “kick” that comes and goes. Those sensations matter because they often track to wheel-rotation frequency, brake system control events, or mechanical looseness. In practical terms, brake pedal vibration is a symptom—not a diagnosis—and the best diagnosis comes from matching the symptom to operating conditions.
Here’s the core mechanism: when a rotor face is not perfectly flat relative to the hub, or when the rotor’s thickness varies around its circumference, the pads get pushed in and out as the wheel turns. That pad “knock-back” moves fluid, changes line pressure, and you feel it as pedal pulsation. The same overall feel can also happen when the tire/wheel assembly or suspension allows oscillation that is most noticeable under braking load.
In normal conditions, you may feel a brief, rapid pulsing during hard braking on slick pavement; that’s expected from anti-lock control. But if brake pedal vibration repeats consistently at a predictable speed range on dry pavement, you should treat it as a mechanical or friction-surface problem until proven otherwise.
Is mild brake pedal vibration ever “normal”?
Mild brake pedal vibration can be normal only in short bursts during traction-limited stops, because electronic control can pulse pressure rapidly to prevent wheel lock.
Next, compare that short burst to a steady, repeatable pulsation on dry roads, because the second pattern is the one that usually signals a fixable hardware or surface issue.
If the pulsation is repeatable every time you brake from the same speed, lasts through the stop, and happens on dry pavement with gentle braking, it’s rarely “normal.” If it happens only during panic stops, on gravel, on snow, or when you feel the tire slip, it may be normal control behavior. The difference is consistency and context.
Which wheel usually causes the pedal to pulse?
The wheel causing brake pedal vibration is often the one with the greatest unevenness in rotor face geometry or pad contact, but you can’t assume front vs rear without clues.
To narrow it down, pay attention to steering wheel shake (front-biased) versus seat/floor vibration (rear-biased), then confirm with inspection.
Front brake issues more often transmit to the steering wheel because front suspension geometry and steering linkages amplify feedback. Rear brake issues more often feel like a body shudder or a vibration through the seat or floor. Still, a single “bad” rotor can create pedal pulsation that feels centered, so use multiple clues, not one.
Which brake pedal vibration patterns point to friction-surface problems?
Brake pedal vibration patterns that rise and fall with vehicle speed often point to repeating torque variation from the rotor-and-pad interface rather than a one-time event.
Next, you can classify the vibration by how it changes with braking pressure and temperature to separate common surface causes.

A helpful way to think about brake pedal vibration is to treat it like a “signature.” The same car can have different signatures depending on which surface is uneven and why.
Common friction-surface signatures:
- Speed-linked rhythmic pulse: often associated with rotor face issues, rotor thickness variation, or hub mounting irregularities.
- Vibration that worsens after repeated stops: often related to heat history, uneven friction film, or components that distort under temperature.
- Vibration that is strongest with light pedal effort: sometimes linked to friction film irregularities and pad/rotor surface condition rather than severe mechanical runout.
Many drivers call this “warped rotors,” but the real-world cause is frequently not a visibly bent disc. Instead, it’s often a combination of the rotor’s installed geometry and how evenly the pads deposit and remove friction material over time. In other words, your foot is feeling repeating changes in braking torque.
How heat and uneven contact create repeatable pulsation
Heat and uneven pad contact can create repeatable brake pedal vibration because hot spots and uneven friction film change braking force around the rotor’s rotation.
Next, link the heat story to your driving pattern—mountain descents, towing, or repeated hard stops—because that context predicts what you’ll see on the parts.
If the vibration appears after a long downhill, after aggressive driving, or after a track day, suspect a heat-driven surface problem first. If it appears immediately after parts were installed, suspect installation factors first, especially mounting cleanliness and torque practices.
How can you use speed and steering feedback to narrow brake pedal vibration?
You can narrow brake pedal vibration by matching it to speed ranges and where you feel it (pedal only, steering wheel, or body), because different root causes amplify through different paths.
Next, do a controlled road test on a safe road to gather consistent clues before you inspect parts.

Braking vibration is information, and speed is the loudest part of that information. A vibration tied to wheel rotation usually becomes more noticeable as speed increases, then changes as you slow. A vibration tied to a control event might appear suddenly at a threshold of slip. A vibration tied to looseness might appear under braking load but not under cruise.
Use this simple framework during your test:
- Does it appear only above a certain speed? That leans toward rotation-related issues like rotor/hub geometry or wheel/tire imbalance that becomes obvious under braking load.
- Does steering wheel shake with the pedal pulse? That leans toward front-end sources and can also suggest alignment of forces through the steering system.
- Do you feel it mostly in the seat/floor? That leans toward rear sources or overall chassis oscillation.
Now weave in the exact clue set many owners search for: Vibration at high speed vs low speed clues can be decisive when combined with pedal pressure. High-speed-only symptoms often point to geometry, balance, or mounting issues that scale with rotation. Low-speed shudder can sometimes point to uneven friction film or caliper slide issues that show up when the system transitions from static to dynamic friction.
What changes when you brake lightly vs firmly?
When you brake lightly vs firmly, brake pedal vibration that grows with pressure often signals mechanical variation, while vibration that is strongest with light pressure can signal surface-film irregularity.
Next, repeat your test with consistent pedal pressure to avoid mixing patterns and confusing the conclusion.
Light braking can “skim” the rotor and make certain film patterns feel more obvious, while firm braking can overwhelm mild film variation but amplify mechanical knock-back. If the vibration is faint during gentle braking but gets strong as you press harder, suspect mechanical variation and mounting. If it is annoying during gentle braking but reduces with firm braking, suspect surface condition and pad behavior—then confirm with inspection.
Why braking can reveal front-end looseness even if the brakes are okay
Braking can reveal front-end looseness because weight transfer loads bushings, joints, and hubs, making small play feel like vibration during deceleration.
Next, treat the brake system and chassis as one unit, because the pedal can “report” vibration that is actually being generated elsewhere.
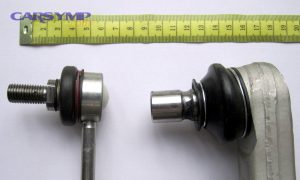
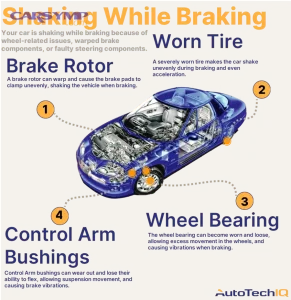
This is where Suspension issues that mimic brake vibration becomes important in real diagnostics. Worn control arm bushings, loose tie-rod ends, hub bearing play, and wheel/tire problems can all feel worse when you brake because braking loads the components differently than cruising. The pedal may pulse because the caliper sees oscillation at the rotor, or because the driver senses vibration through the cabin while also pressing the pedal.
What quick safety checks should you do if brake pedal vibration appears?
If brake pedal vibration appears suddenly, you should prioritize safety by checking stopping distance, warning lights, and obvious mechanical problems before continuing normal driving.
Next, do a short, low-speed test in a safe area to confirm whether the symptom is repeatable or tied to a one-time event.

Start with what you can assess without tools:
- Pedal feel and stopping distance: If stopping distance increases, the car pulls hard to one side, or the pedal drops unusually low, treat it as urgent.
- Dash warnings: Any brake, stability, or traction warnings change the decision tree because control systems may be active or a sensor may be reporting a fault.
- Sounds and smells: Grinding, burning smells, or smoke suggest severe friction material issues or dragging brakes.
Drivers often search for a simple checklist, so use this phrase as a reminder: Safety check if pedal pulsates should always include a low-speed stop test in a safe area, plus a quick walk-around for obvious tire damage, loose wheel hardware signs, or fluid leaks. If anything feels unsafe, stop driving and arrange a tow.
When should you stop driving immediately?
You should stop driving immediately if brake pedal vibration is paired with loss of braking power, loud grinding, a pulling sensation, smoke, or a warning light indicating a brake system fault.
Next, choose safety over diagnosis, because continued driving can damage rotors, calipers, and tires—and can be dangerous.
In practice, “vibration only” with normal braking performance is often not an emergency, but it is still a sign you should address soon. However, if you also have poor braking, the risk rises quickly. A failing bearing or loose wheel can also mimic braking vibration, and those cases can become hazardous fast.
How can you inspect brake pedal vibration causes at home?
You can inspect many brake pedal vibration causes at home by checking wheel security, rotor surface condition, pad wear patterns, and caliper movement before you measure anything precisely.
Next, use a structured approach so you don’t miss simple causes that lead to expensive guesses.

Step 1: Confirm wheel security and mounting basics. If the symptom started after recent work, suspect the basics first. Many real-world cases come down to wheel mounting. The phrase to remember is Wheel lug torque issues after brake work: if lug nuts are unevenly tightened, over-torqued, or tightened in the wrong pattern, the rotor can seat slightly off against the hub, creating variation that you feel as pedal pulsation. Always tighten in a star pattern and to the correct specification.
Step 2: Look for obvious rotor surface clues. Remove the wheel and inspect the rotor faces. You’re looking for heavy grooves, cracks, discoloration bands, and uneven pad imprint patterns. A rotor can look “fine” yet still cause pulsation, but severe surface evidence makes your next steps more focused.
Step 3: Check pads and caliper sliding behavior. Uneven pad thickness side-to-side on the same caliper can point to sticking caliper slides or piston problems. If the inner pad is much thinner than the outer, the caliper may not be moving freely. That unevenness can create uneven braking force and contribute to vibration sensations.
Step 4: Evaluate wheel bearing and hub play carefully. Excess play can let the rotor tilt under braking loads, creating a dynamic variation that mimics rotor issues. If you feel play at the wheel with proper technique, that is a strong clue to address before resurfacing or replacing brake parts.
What simple road test notes should you write down?
Simple road test notes should include the exact speed range, pedal pressure level, whether the steering wheel shakes, and whether the symptom changes after repeated stops.
Next, use those notes to choose the right measurement or professional test instead of buying parts blindly.
Be specific: “Starts at 65 mph, strongest at 50 mph, fades below 20 mph” is more actionable than “it shakes a lot.” Also note whether the first stop is smooth and the second is worse (heat-related) or whether it’s consistent from the first brake application (geometry/mounting-related).
Which professional measurements confirm the source of brake pedal vibration?
Professional measurements confirm brake pedal vibration sources by quantifying rotor geometry, hub condition, and braking force variation rather than relying on visual inspection alone.
Next, use targeted measurements to avoid replacing good parts and missing the real root cause.

Shops that diagnose well don’t guess; they measure. Two core measurement families matter most: installed geometry and force variation.
- Installed geometry checks: These verify whether the rotor sits true relative to the hub and whether thickness is consistent around the disc.
- Force variation checks: These analyze how braking torque varies around a rotation, which is the direct “generator” of pedal pulsation.
If you’re researching this deeply, you’ll see the phrase How to measure rotor runout. In practical terms, a dial indicator on the rotor face can show how much the disc wobbles as it rotates, and that wobble can correlate to pulsation complaints—especially if mounting surfaces are not clean or if the hub face is not true. A good technician also checks hub runout, because a perfect rotor on a flawed hub can still pulse.
Drivers also look for a clear explanation of control-system vs hardware feel, so keep this concept in mind: Warped rotors vs ABS activation diagnosis often comes down to when the pulsation happens, how it feels, and what the road conditions are. ABS-related pulsing is usually rapid and tied to tire slip; rotor-related pulsation is usually rhythmic and tied to wheel rotation even on dry pavement.
What evidence helps a shop avoid “parts cannon” repairs?
Evidence that helps a shop avoid guesswork includes measured variation, repeatable road-test reproduction, and documented mounting condition rather than a generic assumption about rotors.
Next, ask for the measurement results and what they imply, because that forces a clear diagnostic narrative.
A good work order will state what was measured and what was out of specification, not just “customer states vibration.” Even if you don’t see the tool readings yourself, a shop should be able to explain the chain: symptom → test → measurement → conclusion → repair choice.
What repair options reduce brake pedal vibration most effectively?
Brake pedal vibration is most effectively reduced by correcting the root cause—either by restoring rotor-and-pad uniformity, fixing mounting geometry, or repairing chassis looseness—rather than swapping parts randomly.
Next, choose the repair option that matches the evidence so the vibration doesn’t return quickly.

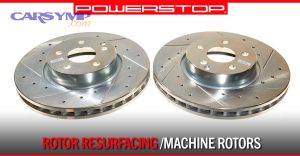
The phrase many people search is Fix options: resurface vs replace rotors, and the correct answer depends on rotor condition, vehicle usage, and what caused the variation in the first place. Resurfacing can restore a uniform surface if the rotor has enough thickness and is not heat-damaged, but replacement can be the better choice when cracks, severe heat spots, or repeated issues exist.
Also consider the “supporting cast” that makes the fix last:
- Clean mounting surfaces: Rust or debris between hub and rotor can create installed variation immediately.
- Correct torque procedures: Uneven torque can distort mounting and create the symptom right after assembly.
- Caliper slides and hardware condition: Sticking slides or worn hardware can create uneven pad contact even with good rotors.
- Pad choice and bedding behavior: Pad friction characteristics and break-in habits affect how evenly friction film develops.
To make the mechanism clear, here is the phrase you’ll see in deeper explanations: Brake pad material transfer explanation. Pads don’t just “rub metal”; they often create a thin, controlled friction layer on the rotor. If that layer becomes uneven—due to overheating, holding the brakes hard when hot, or poor break-in—the result can be torque variation that feels like vibration even if the rotor is not dramatically warped.
What repairs should be paired together to prevent a comeback?
Repairs should be paired together when the cause is systemic, such as correcting rotor condition while also servicing slides and ensuring proper mounting, because a single new part can’t overcome a bad interface.
Next, treat the brake assembly as a system, not a single component, to keep the pedal smooth long-term.
For example, installing new rotors without addressing sticking slides can recreate uneven pad contact quickly. Similarly, installing rotors perfectly but tightening wheels incorrectly can install variation right away. The best repairs are boring: clean, measure, torque correctly, verify.
How much does brake pedal vibration usually cost to fix?
The cost to fix brake pedal vibration varies widely because the symptom can originate from simple mounting corrections or from full component replacement across brakes and chassis.
Next, use a cost framework based on cause category so you can estimate intelligently before approving work.

Owners commonly search the phrase Cost to fix brake vibration because quotes can differ dramatically. The best way to think about cost is to group the cause into three levels:
Level A: Setup and mounting corrections (often lowest cost). This includes cleaning hub faces, correcting wheel torque practices, and verifying that parts are seated correctly. If a shop finds that the core issue is installation-related, the fix can be straightforward.
Level B: Brake friction surface correction (moderate cost). This includes resurfacing or replacing rotors, installing new pads, and restoring caliper slide function. This is the most common “real fix” category for persistent rhythmic pulsation.
Level C: Chassis and rotating assembly repair (variable cost). If the vibration is being amplified by worn components—bearings, bushings, joints, or tires—cost depends on what’s worn and how many components need attention.
To help you compare options, this table summarizes symptom clues, likely categories, and what typically confirms each one.
| Symptom clue | Likely category | What confirms it |
|---|---|---|
| Rhythmic pedal pulse that scales with speed | Rotor/hub geometry or thickness variation | Installed geometry measurement; road-test repeatability |
| Pulsation mostly during slippery stops | Control-system intervention | Occurs with slip; often paired with traction feel and system lights |
| Steering wheel shake plus pedal pulse | Front-end amplification or front brake source | Component inspection; isolation test front vs rear |
| Vibration after recent work | Mounting/torque/setup issue | Hub face condition; torque pattern; immediate onset after service |
| Vibration changes with heat/repeated stops | Surface film and heat history | Rotor surface evidence; pad condition; controlled test stop sequence |
In some cases, the most expensive part is not the brakes at all but the hidden chassis issue that reveals itself only when braking loads shift. That’s why a measurement-first approach can save money even if the diagnostic fee feels annoying.
What should you ask a shop so brake pedal vibration gets fixed correctly?
You should ask a shop for a clear diagnosis path—what they tested, what they measured, and why the proposed repair addresses brake pedal vibration—so you don’t pay for guesses.
Next, request specifics about the work scope and verification steps, because a good shop will welcome clarity.

If you want fewer comebacks, ask questions that force a technical answer:
- “Can you reproduce the vibration on a road test?” If they can’t reproduce it, the risk of guessing increases.
- “What did you inspect besides the rotors?” This reveals whether they considered hub faces, bearings, and suspension play.
- “Will you verify the result after repairs?” A post-repair road test and a torque recheck are signs of good process.
Also make sure you and the shop share language: the phrase brake service is often used broadly, but you want to know exactly what is included—pads only, rotors too, caliper slide work, brake fluid condition checks, and wheel torque procedures.
Frequently asked questions about brake pedal vibration
These FAQs answer common brake pedal vibration concerns by linking the feel you notice to the most likely cause category, so you can decide what to check next.
Next, use the answers to refine your notes and reduce trial-and-error repairs.

Is brake pedal vibration always a rotor problem?
No, brake pedal vibration is not always a rotor problem because wheel mounting, hub condition, chassis looseness, and control-system pulsing can produce similar sensations.
Next, confirm whether the pulsation is rhythmic on dry pavement (more hardware) or tied to slip events (more control behavior).
This is why you should not buy rotors just because a friend said “warped.” Instead, match the vibration to conditions and verify with inspection or measurement.
Can new brakes cause vibration right away?
Yes, new brakes can cause brake pedal vibration right away if the rotor is installed on a dirty hub face, the wheel is torqued unevenly, or the pad/rotor interface develops an uneven friction film early.
Next, recheck mounting cleanliness and torque practices before assuming the new parts are defective.
Immediate onset after parts installation strongly points to installation conditions rather than a long-term wear problem.
Why does the vibration feel worse at certain speeds?
Vibration can feel worse at certain speeds because rotational frequency and chassis resonance can amplify the sensation, making the same underlying variation feel dramatic in one speed band.
Next, treat the “worst speed” as a diagnostic clue and reproduce it consistently for accurate testing.
Record the speed band and whether the vibration changes as you brake harder; this helps isolate the category of cause.
Should I replace pads if I replace rotors?
In many cases, replacing pads when replacing rotors reduces the chance of brake pedal vibration returning because the pad surface and friction film condition strongly influence torque consistency.
Next, evaluate pad thickness and wear pattern, because a healthy pad with even wear may still be compatible depending on the situation and the shop’s best practice.
If you reuse old pads on new rotors, the old pad surface may imprint unevenly and recreate issues. Many technicians prefer new pads with new rotor surfaces for best results.
Contextual Border: The sections above focus on diagnosing and fixing brake pedal vibration from the driver’s perspective. The section below adds deeper prevention and “why it comes back” insights so the repair stays effective.
Extra details that prevent brake pedal vibration from returning
Brake pedal vibration often returns when the underlying interface problems—mounting, friction film stability, or hub geometry—are not addressed during the first repair.
Next, use these deeper checks and habits to keep braking smooth and consistent over time.

How to separate control pulsing from hardware pulsation on one safe drive
You can separate control pulsing from hardware pulsation by comparing when the pulsing appears (slip events vs dry-road repeatability), how it feels (rapid chatter vs rhythmic pulse), and whether it correlates to traction conditions.
Next, use a consistent test route and repeat the same braking inputs so the pattern is unmistakable.
This is the practical application of Warped rotors vs ABS activation diagnosis without needing specialized equipment. If the pulsing happens in a straight line on dry pavement with gentle braking and repeats the same way every time, it leans hardware. If it appears mostly on slick surfaces, during panic stops, or when you feel tires approach lockup, it leans control behavior.
Why uneven friction film feels like “warping” and how to reduce it
Uneven friction film can feel like rotor warping because it creates repeating torque variation even when the rotor is not visibly bent, which translates into brake pedal vibration.
Next, focus on preventing hot spotting and inconsistent pad imprinting right after new parts are installed.
This ties back to Brake pad material transfer explanation: a stable, even friction layer helps braking remain smooth. To reduce uneven film, avoid holding the vehicle stationary with hard brake pressure immediately after aggressive stops when components are very hot, and follow the pad manufacturer’s break-in guidance if provided.
How wheel fastening mistakes create vibration after repairs
Wheel fastening mistakes can create vibration after repairs by distorting the installed relationship between hub, rotor, and wheel, which can introduce variation you feel as brake pedal vibration.
Next, insist on correct torque procedures and rechecks, especially after the first heat cycle and a short drive.
The key phrase is Wheel lug torque issues after brake work. Uneven tightening or using an impact tool without final torque verification can seat parts inconsistently. Correct torque, correct pattern, and clean hub faces are low-effort steps that prevent high-cost frustration.
What to do when the vibration is really a chassis problem
When the vibration is really a chassis problem, you must correct looseness or imbalance first, because brake part replacement won’t stop oscillation that is being generated by worn or unstable components.
Next, inspect bearings, bushings, joints, and tires, because braking loads can magnify small defects into noticeable vibration.
This is why Suspension issues that mimic brake vibration should be part of any serious diagnosis. If you fix the brakes but the vibration remains, a chassis inspection is not “extra”—it is often the missing step that makes the repair final.
rotor thickness variation, hub face cleanliness, wheel torque pattern, friction film, brake judder prevention, diagnostic road test notes
Finally, keep your search language precise when asking for quotes or advice: instead of only saying “my brakes shake,” describe the condition using this common phrasing in your notes—Vibration when braking causes—then list your exact speed range, whether the steering wheel shakes, and whether heat changes the symptom. That specificity makes both DIY checks and professional diagnostics far more accurate.