Master AC Leak Detection for Drivers: Find Leaks, Not “Recharges”
AC leak detection is the fastest way to stop repeat “top-offs,” protect your compressor, and get your cabin cold again without guessing. When refrigerant escapes, cooling performance drops—but the real goal is pinpointing where the system is losing charge so the repair lasts.
To help you choose the right approach, this guide breaks down practical detection methods, what symptoms mean, and how technicians verify a system is tight before recharging—so you can avoid paying twice for the same problem.
It also explains what shop diagnostics typically include, why some “quick fix” cans backfire, and how to prioritize repairs when more than one leak is present—because the smartest fix is usually the one that prevents the next failure.
Giới thiệu ý mới: below are step-by-step detection strategies you can use to narrow the leak source, then confirm it with professional-grade tests.
What is AC leak detection, and what does it actually confirm?
AC leak detection is the process of locating refrigerant escape points by combining visual evidence, instruments, and verification tests so you can repair the exact failure instead of guessing. Next, the key is matching the method to leak size and location.

A vehicle A/C system is sealed, and refrigerant should circulate without being “used up.” When charge drops, it typically indicates leakage at a component, hose, fitting, service port, or seal. A proper detection workflow aims to:
- Identify the leak site (not just “low refrigerant”).
- Confirm repeatability (some leaks only show under vibration, heat, or pressure changes).
- Verify tightness after repair before charging by weight.
According to a self-study training manual used for EPA Section 609 MVAC certification (Seventh Edition), in June 2016, technicians are taught to use multiple detection approaches (visual clues, dye, and electronic methods) rather than trusting a single shortcut.
In practice, you’ll often hear the phrase car AC repair used as a catch-all, but effective repair starts with detection—because replacing parts without evidence is the most expensive form of troubleshooting.
Does low refrigerant always mean there is a leak?
Yes—if the charge is repeatedly low, a leak is the most likely cause, because refrigerant does not get “consumed” during normal operation in a sealed system. To move from suspicion to proof, you’ll confirm with dye, an electronic detector, or a pressure/vacuum test.

If you’re searching for How long refrigerant should last, the practical answer is: it should last indefinitely in a tight system, and “needing a recharge” is a symptom—not a maintenance interval. That’s why professional guidance emphasizes finding the leak before adding more refrigerant, and why verification steps matter.
However, there’s nuance: very small leaks can take months to show, and cooling may fade gradually. That “slow fade” still points to leakage—just at a lower rate. To pinpoint it efficiently, you’ll use a method that can reveal small seepage (UV dye traces, soap bubbles at fittings, or a sniffer around suspected points).
According to SAE’s recommended practice for mobile A/C leak detection procedures, published on 2020-11-30, generally available methods should be applied systematically by technicians to service passenger-compartment A/C systems rather than relying on guesswork.
Where do most vehicle A/C systems leak first?
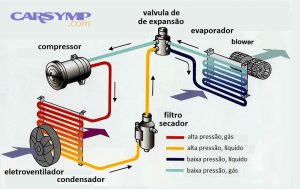
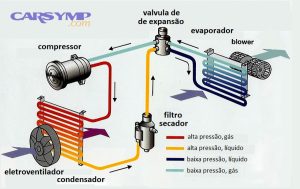
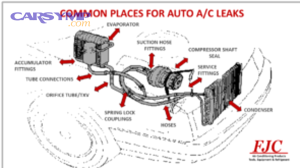
Most leaks start at seals, joints, and heat-exposed components—especially O-rings, service ports, condenser areas prone to impact, and compressor shaft seals. Next, you’ll narrow the list by matching symptoms to location.
Drivers commonly look up Common AC leak points by vehicle because the “usual suspects” vary by platform, but the leak physics are consistent: heat cycling hardens seals, vibration loosens joints, and road debris damages thin heat exchangers.
Start your inspection with these high-probability points:
- Service ports and valve cores: tiny leaks that worsen if caps are missing or seals are damaged.
- Condenser: front-mounted, vulnerable to stones and bent fins that hide pinholes.
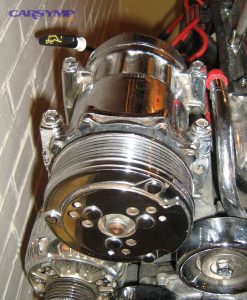
- Compressor shaft seal / body seals: oily residue near the clutch or case seam.
- Hose crimps and line junctions: seepage at crimped fittings or rub-through spots.
- Evaporator: hidden under the dash; leaks often show as dye/oil traces at the drain tube area or persistent odor.
According to an EPA Section 609 training resource, in June 2016, technicians are taught to leak test with the engine off and use only a small amount of refrigerant—about a 50 psi gauge reading is sufficient for leak checking under appropriate temperatures.
How can you look for leaks safely before using tools?
You can often spot leaks by looking for oil residue, grime patterns, and damaged lines—because refrigerant carries oil, and oil doesn’t evaporate like refrigerant does. Next, you’ll use that visual “map” to decide where to test with bubbles, UV, or a detector.

Begin with a cold engine and good lighting:
- Look for wet/oily shine on aluminum lines, at crimp joints, and around the compressor body.
- Check for abrasion where a hose may rub a bracket (a classic slow leak).
- Inspect the condenser face for impact marks and bent fins; small punctures can hide behind debris.
- Inspect service ports and verify the caps are present and snug (caps are not just dust covers).
If you’re specifically trying AC pressure readings for leak clues, treat gauge readings as a screening tool, not a location tool: pressures can suggest “low charge,” but they can’t tell you which O-ring is leaking. That’s why standards and training materials pair pressure checks with direct detection methods.
According to RepairPal’s estimator, updated in October 2025, professional leak inspection commonly includes pressure checks plus confirmation methods like UV dye, and it often precedes evacuation and recharge after repairs.
How can you find small or slow leaks without professional equipment?
You can locate many small leaks by combining a careful visual inspection with soap bubbles at accessible fittings and UV dye evidence at seep points. Next, you’ll confirm with repeat observation because slow leaks may only show after driving time.
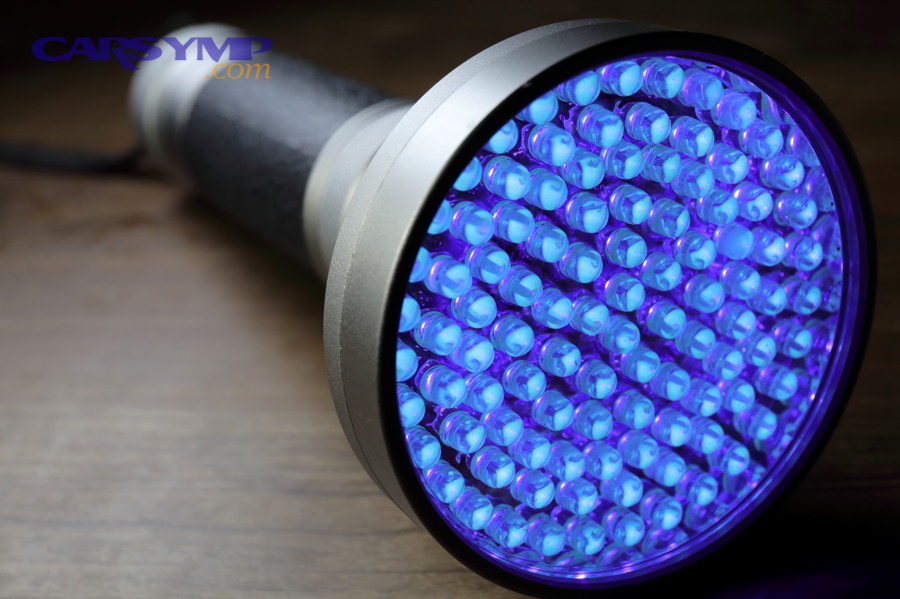
People often search How to find slow AC leaks at home—the safest “home” approach is observational and non-invasive:
- Soap bubble check on accessible joints (service ports, visible fittings). Bubbles indicate gas escaping.
- UV dye inspection if dye is already present from prior service: look for bright residue at joints and around components.
- Re-check after driving: heat cycling and vibration can “activate” leaks that don’t show at idle.
A key warning: avoid venting refrigerant to the atmosphere. Industry standards emphasize refrigerant should be recovered and not vented.
According to an EPA Section 609 MVAC manual (Seventh Edition), in June 2016, UV dye is described as mixing with oil and leaving visible residue at leak sites that fluoresces under UV light—making small leaks easier to find later.
Which detection method should you trust most for real-world cars?
No single method is “best” in every case: bubbles are great for accessible joints, UV dye is strong for intermittent seepage, and electronic detectors help locate small leaks in hard-to-see areas. Next, you’ll pick the method based on access and leak size.
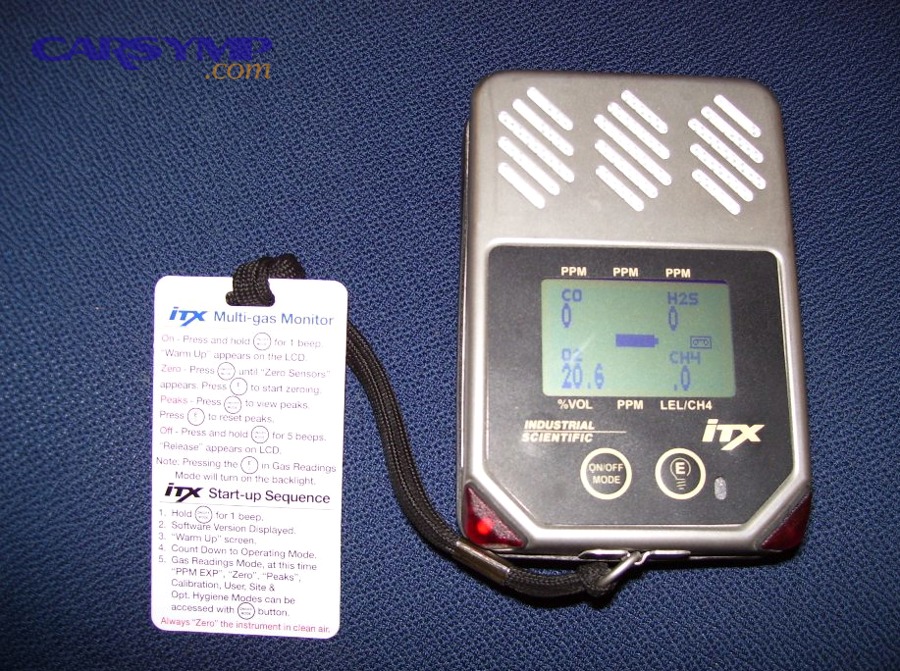
Many guides frame this as UV dye vs electronic sniffer comparison, but the practical decision is about evidence quality and access:
This table helps you choose a method based on what you can access and what you need to prove.
| Method | Best for | Strength | Limitation |
|---|---|---|---|
| Soap bubbles | Ports, fittings, visible joints | Direct, visual confirmation | Needs access; misses hidden leaks |
| UV dye + UV light | Slow/intermittent leaks over time | Leaves a “trail” you can revisit | Requires dye compatibility and cleanup before re-check |
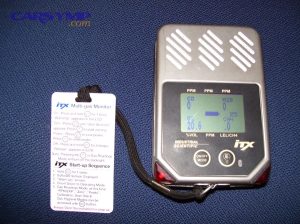
| Electronic detector | Hidden areas, tiny active leaks | Sensitive and fast scanning | Can false-trigger from contaminants or airflow; needs technique |
| Pressure / vacuum verification | Confirming “tightness” after repair | Validates system integrity | Doesn’t pinpoint the exact spot alone |
To make this actionable, use a two-step rule: (1) use a location method (bubbles/UV/sniffer) to find the point, then (2) use a verification method (pressure/vacuum hold) to confirm the repair before charging.
Here’s a solid training-quality video that demonstrates dye use in a practical way:
According to SAE’s leak detection recommended practice listing, published on 2020-11-30, generally available leak detection methods are intended to be applied by service technicians for mobile A/C systems in a structured procedure.
What does a pressure check really tell you?
A pressure check can quickly suggest whether the system is likely undercharged, but it cannot identify the leak location by itself. Next, you’ll treat pressures as “context” that guides where and how you test, not as a final diagnosis.
Use pressure checks responsibly:
- Static pressure (engine off) can indicate whether there is enough charge to perform certain detection steps.
- Operating pressures (engine on) vary with ambient temperature, airflow across the condenser, and compressor control strategy—so they’re best interpreted with training and specifications.
If you see advice online that tries to “diagnose the exact leak” from gauge numbers alone, treat it as incomplete. Training materials for MVAC leak testing emphasize having sufficient static pressure (often around the 50 psi range) to conduct meaningful leak checks, and then using direct detection methods to locate the source.
According to a Section 609 training reference that cites older electronic leak detection procedure guidance, leak testing is performed with the system not operating and with adequate static pressure and ambient temperature so readings and detection are valid.
How does UV dye work, and how do you avoid false positives?
UV dye works by mixing with A/C oil and leaving a fluorescent residue at the leak site, making small leaks visible under UV light. Next, you’ll avoid misreads by cleaning old residue and verifying dye compatibility with the system.
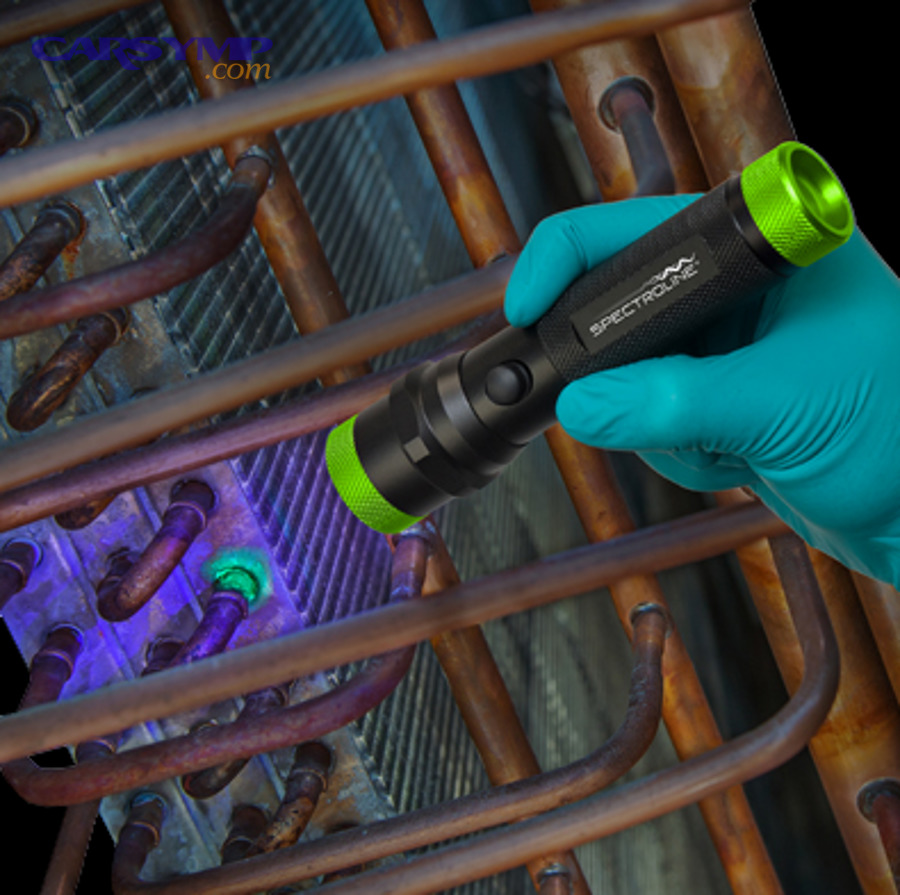
UV dye is most powerful when you treat it like evidence, not magic:
- Confirm it’s new evidence: wipe suspect areas clean after repair so new seepage is obvious.
- Use proper glasses: they improve contrast and help you see faint traces.
- Check the drain area: dye can sometimes appear where oil-laden condensate carries traces.
According to the EPA Section 609 MVAC manual (Seventh Edition), in June 2016, UV dye is described as mixing with oil; at a leak, the oil and dye residue remains and can glow under UV light, and technicians are advised to verify dye compatibility with the oil and refrigerant.
Additionally, MACS (Mobile Air Climate Systems Association) training material published in January 2025 emphasizes using proper eye protection and technique when inspecting dye traces, helping dye stand out and reducing inspection errors.
What is a vacuum hold test, and why does it matter after repairs?
A vacuum hold test checks whether the system maintains a deep vacuum over time; a rapid rise suggests a leak or remaining moisture. Next, you’ll interpret the pattern—because moisture and leaks can look different on a decay curve.
Many technicians describe this concept as Vacuum decay test explained because the “decay” (pressure rise) is what you watch after isolating the pump. A strong vacuum hold is valuable because it helps confirm:
- System tightness (no meaningful leak paths).
- Dehydration quality (moisture removed reduces corrosion and freeze-ups).
ASHRAE Standard 147 addenda publicly available in PDF form includes specific field test practices that pair soap bubble checks, limited pressure decay criteria, and triple evacuation targets with micron-level vacuum benchmarks; for example, it describes deep vacuum targets and a pass criterion that limits vacuum rise above a threshold during a specified time.
According to ASHRAE Guideline 3-1996, approved in June 1996, reducing refrigerant emissions is a formal best-practice objective in refrigeration and air-conditioning systems—reinforcing why verifying tightness after service is part of responsible work, not an optional extra.
How do you tell an evaporator leak from a leak in the engine bay?
An evaporator leak usually shows cabin-side clues—odor, fogging, dye traces at the drain area—while engine-bay leaks more often show visible oil residue on fittings, hoses, condenser, or compressor. Next, you’ll use evidence plus a targeted test around each zone.
Many drivers try to separate Evaporator leak symptoms vs other leaks because the repair difficulty is very different. Use these practical differentiators:
- Cabin smell or musty odor with weak cooling: can coincide with evaporator area issues (though mold and drain issues can mimic it).
- UV dye check at the condensate drain: dye-laced oil may leave traces where the evaporator drains moisture.
- Engine-bay dye/oil: leaks at the compressor, condenser, or fittings often leave obvious residue you can photograph.
Once you suspect an evaporator, an electronic detector used carefully at vents/drain areas can help, but airflow can dilute signals—so technicians often confirm with dye evidence and repeat inspection.
According to RepairPal’s explanation (updated October 2025), technicians may add UV dye and verify leaks by detecting dye on or around an A/C component, then proceed with evacuation and recharge once the system is verified to hold pressure after repairs.
If more than one leak exists, how should you prioritize repairs?
Fix the largest, most active, or most accessible leak first—because it can mask smaller leaks and prevent stable testing. Next, you’ll re-test after the first repair to see what remains.
If you’re searching What to fix first in multiple leaks, follow this practical order:
- Service ports / valve cores (cheap, common, fast to verify with bubbles).
- Obvious rub-through or damaged hose sections (active leaks that drain charge quickly).
- Condenser damage (front-end punctures often cause rapid loss and contaminate the system with debris if ignored).
- Compressor body/seal leaks (often oily and obvious, but confirm before replacing costly parts).
- Suspected evaporator leaks (confirm strongly before dash-out labor).
This order matters because a system that won’t hold pressure or vacuum cannot be meaningfully “fine-tuned” for tiny leaks. Standards-based procedures pair leak location steps (bubbles, electronic detection) with hold criteria so you can trust the result of the next test cycle.
According to ASHRAE’s published addendum guidance for Standard 147 field practices, the workflow explicitly combines soap solution checks, allowable pressure decay limits (accounting for temperature change), and subsequent evacuation steps—illustrating why repair-and-retest is the correct sequencing.
Should you use stop-leak products in automotive A/C systems?
No—stop-leak products are a high-risk gamble that can complicate future service, contaminate equipment, and hide the real failure instead of repairing it. Next, you’ll see why many shops refuse systems exposed to sealants and what to do instead.
Drivers often search AC stop-leak risks and warnings after seeing “sealant” marketed as a quick fix. The core risks are practical, not theoretical:
- Contaminant sensitivity: sealants and particles can damage valves and internal components in recovery/recycling equipment.
- Unpredictable behavior: a partial seal can fail under pressure/temperature swings, returning you to the same problem.
- Service refusal: some shops avoid connecting expensive machines to systems that may contain sealants.
For example, CPS Products (an equipment manufacturer) notes that certain components in recovery/evacuation flow paths can be susceptible to in-field failure when exposed to foreign contaminants such as aftermarket A/C sealants, loose desiccant, and particles that cause valves to leak or seal closed.
So instead of sealing, the better strategy is: locate the leak, repair it, replace any compromised seals, then evacuate and recharge by specification—so the fix lasts and the system stays serviceable.
What does a shop leak diagnosis usually cost, and what are you paying for?
A shop leak diagnosis commonly costs the equivalent of a standard A/C diagnostic labor range, and you’re paying for trained interpretation plus equipment that can confirm and document the leak source. Next, you’ll understand what should be included so you can compare quotes fairly.
If you’re researching Leak detection cost at a shop, a useful benchmark is RepairPal’s estimator: as of October 2025, an “Air Conditioning System Leak Inspection” is often listed in the $122–$179 range on average (before taxes/fees and without counting the repair itself).
What that diagnostic should include:
- Initial performance and pressure evaluation to confirm symptoms and determine if charge is low.
- Leak localization using UV dye evidence and/or an electronic detector where appropriate.
- Repair plan (what part is leaking, why it likely failed, and what must be replaced with it—seals, drier/accumulator, etc. depending on scope).
This table summarizes typical “line items” that may be separate from diagnosis, helping you interpret quotes.
| Service step | Purpose | Why it matters |
|---|---|---|
| Leak inspection/diagnosis | Find and confirm leak source | Prevents unnecessary parts replacement |
| Evacuation | Remove refrigerant/air/moisture | Protects system and ensures correct charge |
| Repair (parts + labor) | Replace leaking component/seals | Stops ongoing loss and contamination |
| Recharge by weight | Restore factory-specified refrigerant mass | Best chance for correct pressures and vent temps |
| Post-repair verification | Confirm system holds | Avoids repeat comebacks and repeat charges |
According to RepairPal’s description (updated October 2025), technicians may verify the system holds pressure after replacing leaky seals or components, then evacuate and recharge with refrigerant and oil—highlighting that diagnosis is tied to a full, correct service sequence.
Contextual border: what’s beyond “finding the leak”?
Once you’ve located a leak, the bigger win is preventing recurrence—by verifying tightness, avoiding contamination, and accounting for intermittent conditions that make leaks hard to reproduce. Next, the supplementary section covers edge cases that commonly cause false confidence or repeat failures.
Advanced leak detection pitfalls and edge cases
Why do some leaks “disappear” during testing?
Some leaks only show under heat, vibration, or high-side pressure conditions, so they may not appear during a quick driveway check. Next, you’ll reproduce operating conditions or use evidence-based methods (dye trails) that persist after the drive cycle.
Intermittent leaks often involve:
- O-rings that seal when cold but seep when hot.
- Compressor shaft seals that leak more while running.
- Condenser pinholes that open under vibration.
According to an EPA Section 609 MVAC manual (Seventh Edition), in June 2016, dye methods are particularly useful on small, hard-to-find leaks because technicians can inspect later and locate the fluorescent residue at the leak source.
How can vacuum tests mislead you?
Vacuum rise can be caused by true leaks or by moisture/outgassing, so interpretation depends on the curve shape and stabilization time. Next, you’ll separate “wet system” behavior from “leaky system” behavior by trend and repeat testing.
Outgassing and moisture boiling can mimic leaks, especially after opening the system. Educational resources on decay testing note that evacuation readings can rise during decay because of outgassing and moisture effects, which is why technicians use stabilization periods and repeat standing tests.
According to ASHRAE Standard 147 addendum field procedures, published as a public PDF, in a structured workflow, pressure/vacuum checks are paired with soap checks and electronic detection to avoid “single-test” false conclusions.
What changes with newer refrigerants and shop equipment?
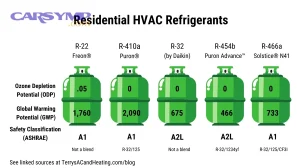
Newer refrigerants and recovery machines increase the importance of contamination control, because equipment components can be sensitive to sealants and debris. Next, you’ll treat unknown additives as a risk factor that affects both diagnosis and serviceability.
This is one reason “quick fix” additives can create downstream problems: once a system is contaminated, technicians may face equipment alarms, service refusal, or added cleanup costs. A manufacturer example notes susceptibility of valves/components to foreign contaminants such as aftermarket A/C sealants and particles that can cause leakage or sticking.
How do you keep the repair from coming back?
You prevent repeat leaks by replacing seals correctly, restoring proper caps and torque at service ports, and verifying the system holds before charging by weight. Next, you’ll document the result—photos of the leak site and a post-repair verification record.
Build a “repeat-proof” closeout checklist:
- Clean and re-check the repaired area so new evidence stands out.
- Replace port caps with good seals and snug them properly.
- Verify tightness with an appropriate hold test before charging.
- Charge by specification (mass/weight) rather than by low-side gauge alone.
According to RepairPal’s process description (updated October 2025), after leaky seals are replaced or the system is verified to hold pressure, the technician evacuates and recharges with refrigerant and oil—illustrating that verification is integral to durable results.
FAQ
Can I just add refrigerant if the A/C is weak?
You can temporarily restore cooling, but if the system is low again later, you likely have leakage and still need AC leak detection to avoid repeat loss and potential compressor damage. Next, treat “recharge” as a symptom check, not the final fix.
Is soap bubble testing accurate for automotive A/C?
Yes for accessible joints and ports: bubbles are direct evidence of gas escaping. Next, combine it with UV or an electronic detector for hidden areas because bubbles can’t reach the evaporator or buried fittings.
Will UV dye damage my A/C system?
When compatible dye is used correctly, it’s a standard diagnostic tool that mixes with oil and leaves detectable residue at leak sites. Next, verify compatibility with your oil/refrigerant and avoid overdosing.
Why do some shops refuse to service systems with sealants?
Because sealants and contaminants can damage recovery equipment or cause operational faults, making service riskier and more expensive. Next, avoid “stop-leak” products and fix the leak mechanically instead.
What’s the quickest path to a lasting fix?
Use a location method (bubbles/UV/sniffer) to find the leak, repair it, then verify the system holds before charging by weight—so you don’t pay for repeated “top-offs.” Next, document the evidence and verification so future troubleshooting is faster.