


Diagnosing coolant leaks at radiator tanks requires a systematic approach that combines visual inspection, pressure testing, and coolant dye tracing to pinpoint the exact failure point on the plastic tank body, seam gasket, or inlet neck. Because radiator tanks are molded from plastic and crimped onto an aluminum core, they are particularly vulnerable to heat cycling, vibration fatigue, and chemical degradation — making them one of the most common origins of slow, persistent coolant loss that many vehicle owners initially overlook.
Understanding the causes behind these leaks is equally important for an accurate diagnosis. Cracked plastic, deteriorated tank-to-core gaskets, corroded seams, and even overpressure from a faulty radiator cap can each produce leaks that look similar on the surface but demand very different repairs. Recognizing which failure mode is at work saves both time and money during the diagnostic process.
The symptoms of a radiator tank leak often announce themselves before the leak becomes catastrophic. Colored puddles beneath the front of the vehicle, a sweet antifreeze odor after engine shutdown, white crystalline deposits along tank edges, and a steadily rising temperature gauge all point toward the tank area as the likely source. Paying attention to these early radiator problems symptoms can prevent an overheating event that damages the engine.
Once the leak is confirmed, DIY mechanics face a decision between temporary sealant products and permanent repairs such as gasket replacement or full radiator replacement. Below, each stage of diagnosis and repair is broken down so you can move confidently from the first warning sign to a completed fix.
What Is a Coolant Leak at the Radiator Tank?
A coolant leak at the radiator tank is a loss of engine coolant that originates specifically from the plastic side tanks, their bonded seams, or the gasket joints that connect the tanks to the aluminum radiator core. Unlike leaks from rubber hoses or the water pump, a tank leak occurs at the structural body of the radiator itself.
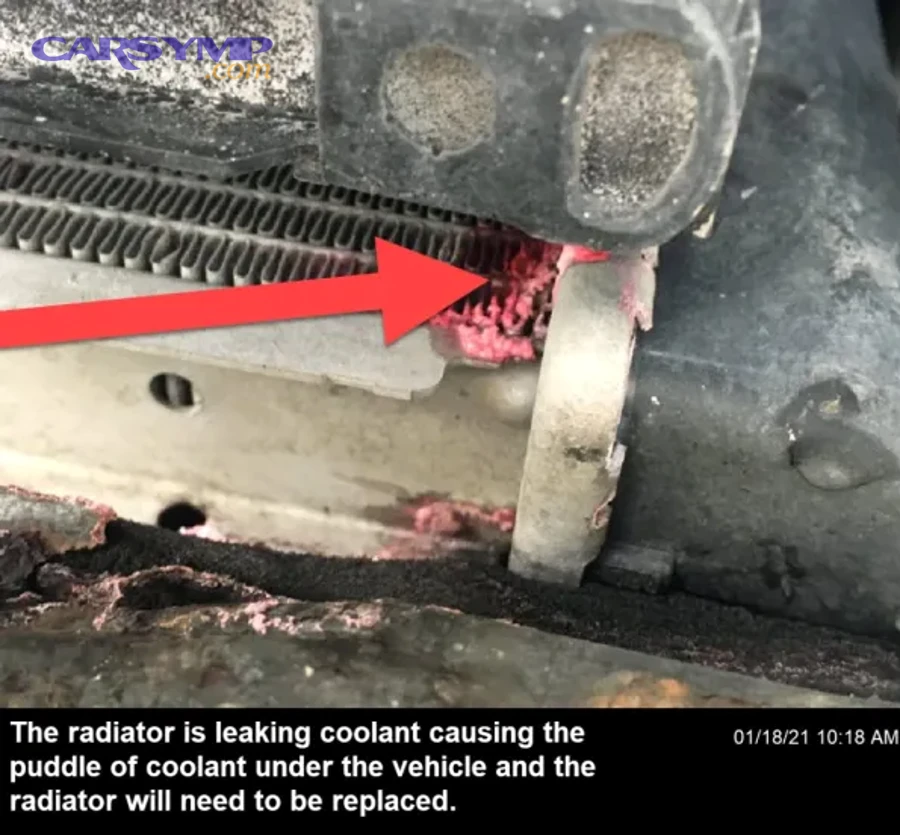
To better understand why this distinction matters, it helps to examine the components that make up the tank assembly and how they differ from other leak-prone parts of the cooling system.
What Are the Parts of a Radiator Tank Assembly?
The radiator tank assembly consists of several integrated components that work together to contain pressurized coolant. Modern vehicles almost universally use a two-tank design: an upper tank (or inlet tank) that receives hot coolant from the engine, and a lower tank (or outlet tank) that routes cooled fluid back through the lower radiator hose.
Each plastic tank is attached to the aluminum core through a crimped metal tab arrangement. Between the tank and the core sits a rubber gasket — sometimes called the tank-to-core seal — that prevents coolant from escaping at the joint. The tanks also feature molded inlet and outlet necks where the radiator hoses attach, a filler neck for the radiator cap (on some designs), and an overflow port connected to the coolant reservoir.
Because these tanks are injection-molded from glass-reinforced nylon or polyamide, they are lightweight and resistant to corrosion. However, years of constant heating and cooling cycles cause the plastic to become progressively more brittle. The crimped seam where the tank meets the core is a particularly high-stress zone, and the rubber gasket seated in that seam degrades from both heat exposure and contact with aging coolant chemistry.
Is a Radiator Tank Leak the Same as a Radiator Core Leak?
No, a radiator tank leak is not the same as a radiator core leak, and the distinction directly affects both your diagnostic method and your repair options. A tank leak originates from the plastic body of the tank, its crimped seam gasket, or the molded hose connection necks. A core leak, by contrast, occurs in the thin aluminum tubes or soldered fin joints that make up the central heat-exchange matrix of the radiator.
Specifically, the difference matters for three practical reasons. First, tank leaks tend to produce visible weeping or dripping along the top or side edges of the radiator, while core leaks often appear as fine misting or pinhole spray across the face of the core. Second, tank cracks can sometimes be observed with the naked eye, whereas core tube failures usually require a pressure test to identify. Third, repair strategies diverge: a leaking tank gasket can occasionally be resealed, but a perforated core tube almost always means full radiator replacement on modern vehicles.
When you are tracing the origin of a puddle beneath the front of the car, running your finger along the tank-to-core seam is one of the fastest ways to rule in or rule out the tank as the source. Wet residue or crystallized coolant deposits concentrated at the seam strongly suggest a tank-side failure rather than a core failure.
What Are the Symptoms of a Coolant Leak at Radiator Tanks?
There are several key symptom categories that indicate a coolant leak at the radiator tanks: visible fluid evidence beneath the vehicle, sensory cues like smell and steam, and dashboard warning indicators. Recognizing these symptoms early is essential because even a slow tank leak can escalate into overheating at speed — a scenario where radiator clues may only become apparent under sustained highway thermal load.
Let’s explore each symptom group so you can identify the problem before engine damage occurs.
What Visible Signs Indicate a Radiator Tank Is Leaking?
There are four primary visible signs that indicate a radiator tank is leaking, based on the location and character of the fluid evidence.
The first and most obvious sign is colored puddles beneath the front of the vehicle. Engine coolant is dyed green, orange, pink, or yellow depending on the formulation, so any brightly colored fluid pooling under the radiator area warrants immediate investigation. The puddle’s position often correlates with the side of the radiator where the tank has failed.
The second visible indicator is wet streaks or residue trailing along the tank seams and crimped edges. Because the tank-to-core gasket is the weakest seal point, coolant frequently weeps along this joint and leaves a damp trail that collects road dust and grime. Over time, this residue bakes into a crusty, white or light-green crystalline deposit — the third key sign. These mineral deposits form when leaked coolant evaporates on the hot tank surface, leaving behind its dissolved salts and corrosion inhibitors.
The fourth sign is visible cracking or warping on the plastic tank body itself. Hairline cracks in aged plastic may be difficult to spot when the engine is cold and the system is depressurized. However, once the engine reaches operating temperature and cooling system pressure builds to its typical 8–14 psi, these cracks open and begin seeping. Inspecting the tank under full operating temperature with a flashlight reveals defects that are invisible when cold.
Can You Detect a Radiator Tank Leak by Smell or Temperature Gauge Alone?
Yes, you can detect a radiator tank leak by smell or temperature gauge alone in many cases, although these indirect indicators should be confirmed with a visual inspection for a definitive diagnosis.
The most distinctive sensory clue is a sweet, almost syrupy odor in or around the engine bay after the engine is shut off. Ethylene glycol — the primary ingredient in most conventional coolants — produces this characteristic scent as it evaporates from hot surfaces. If the smell is concentrated near the front of the engine compartment, the radiator tank area is a likely source.
Meanwhile, the dashboard temperature gauge provides a secondary diagnostic signal. A rising gauge reading — especially one that climbs gradually during normal driving and then spikes during Overheating at speed radiator clues — suggests the cooling system is losing fluid and can no longer dissipate heat effectively. A low coolant warning light serves the same purpose on vehicles equipped with a coolant level sensor in the reservoir.
In more advanced cases, steam or white vapor rising from the radiator area when the engine is running points to an active leak contacting a hot surface. This is especially common when the tank-to-core gasket has partially failed and coolant is seeping onto the aluminum core or nearby exhaust components.
What Causes Coolant to Leak from Radiator Tanks?
There are four main categories of causes that lead to coolant leaks from radiator tanks: plastic degradation, gasket failure, overpressure conditions, and physical damage. Each cause produces a distinct failure pattern, and understanding these patterns accelerates diagnosis.

More importantly, the root cause determines whether a simple gasket reseal will hold or whether the entire radiator must be replaced. Let’s examine each category in detail.
Does Plastic Tank Degradation Cause Most Radiator Tank Leaks?
Yes, plastic tank degradation is the single most common cause of radiator tank leaks on vehicles with more than 80,000 miles. The glass-reinforced nylon used in modern radiator tanks is engineered to withstand years of thermal cycling, but no polymer is immune to long-term heat fatigue.
Every time the engine warms up and cools down, the plastic tank expands and contracts. Over thousands of cycles, this repeated stress initiates micro-fractures in the polymer matrix — particularly at molded stress risers like hose neck bases, mounting bracket points, and the flat surfaces adjacent to the crimped seam. Underhood heat further accelerates the embrittlement process, and UV exposure on tanks visible through the grille opening compounds the degradation.
According to data published by SAE International in their studies on polymer aging in automotive cooling systems, glass-filled nylon tanks can lose up to 40% of their original tensile strength after 10 years of service, making catastrophic cracking significantly more likely beyond the 100,000-mile mark.
What Role Does the Tank-to-Core Gasket Play in Radiator Tank Leaks?
The tank-to-core gasket is a continuous rubber seal that sits in a channel between the crimped aluminum tabs on the core header and the plastic tank flange. Its role is to maintain a leak-free, pressure-tight boundary between the two dissimilar materials — aluminum and plastic — that expand at different rates when heated.
Over time, this gasket hardens, shrinks, and develops compression set from years of being clamped under the crimped tabs. As the rubber loses elasticity, it can no longer accommodate the thermal expansion differential between the aluminum core and the plastic tank. The result is a slow seam leak that typically starts as a barely perceptible weep and gradually worsens. Chemical breakdown from degraded or contaminated coolant accelerates gasket deterioration because acidic coolant attacks the rubber compound.
For example, a cooling system that has not been flushed on the manufacturer’s recommended interval may develop a coolant pH below 7.0, which aggressively erodes both the gasket material and the aluminum core header plate, compounding the leak potential at the seam.
What Other Factors Contribute to Radiator Tank Failures?
Beyond plastic aging and gasket deterioration, several additional factors can contribute to radiator tank failures that DIY mechanics should be aware of.
A faulty or incorrectly rated radiator cap is one of the most overlooked contributors. The radiator cap is designed to maintain a specific pressure — typically between 13 and 16 psi — and vent excess pressure through the overflow circuit. If the cap’s spring weakens or the cap’s pressure rating exceeds the system specification, the tanks experience higher-than-designed internal pressure. This chronic overpressure stresses the crimped seam and accelerates both plastic fatigue and gasket creep.
Corrosion and sediment buildup inside the tank also weaken the structure from within. Mineral deposits from hard water mixed with coolant, or rust particles from degraded engine block surfaces, accumulate along the interior walls and can erode the plastic from the inside out.
Physical impact damage from road debris is another common cause. Because radiators are mounted at the front of the vehicle, rocks, gravel, and other objects thrown up by the tires can strike the tank and cause instant cracking or create a stress point that fails later under pressure.
Finally, neglected coolant flush intervals allow the corrosion inhibitors in the coolant to deplete, leaving the entire system — including the tank interior, gasket, and core header — vulnerable to accelerated chemical attack.
How Do You Diagnose a Coolant Leak at the Radiator Tank Step by Step?
Diagnosing a coolant leak at the radiator tank follows a three-method approach — visual inspection, pressure testing, and UV dye tracing — applied in sequence to narrow down and confirm the exact leak location. This systematic process is the most reliable way to differentiate a tank leak from other cooling system failures.

Specifically, starting with a visual inspection eliminates the most obvious failures before investing time in tool-based methods. Below is each diagnostic step explained in detail.
How Do You Perform a Visual Inspection for Radiator Tank Leaks?
A visual inspection is the first and simplest diagnostic step: wash the entire radiator assembly with water, start the engine, and watch for fresh coolant appearing at the tank seams, body, or hose necks. This method requires no special tools and can isolate obvious failures within minutes.
Begin by using a garden hose or spray bottle to thoroughly rinse the radiator, removing all existing residue, road grime, and old dried coolant deposits. This creates a clean baseline so that any new seepage is immediately visible. Once the radiator surface is clean and dry, start the engine and let it idle until the thermostat opens and the cooling system reaches full operating pressure.
With the engine running and the system pressurized, use a flashlight and inspection mirror to examine the rear side of each tank — the side facing the engine — as well as the full length of the tank-to-core crimped seam. Look for any wetness, fresh drips, or beads of coolant forming along the seam line or on the tank surface. Pay particular attention to the corners of the tanks and the areas around molded hose necks, as stress concentrations at these points make them frequent failure sites.
What Is a Cooling System Pressure Test and How Does It Reveal Tank Leaks?
A cooling system pressure test is a diagnostic procedure that uses a hand-operated pump to pressurize the cooling system to its rated PSI while the engine is off, allowing the mechanic to observe whether and where pressure is lost. This is the most definitive method for confirming a radiator tank leak.
To perform the test, attach a cooling system pressure tester to the radiator filler neck or the pressurized coolant reservoir cap opening. Pump the tester until the gauge reads the system’s rated pressure — typically 13 to 16 psi, as indicated on the radiator cap. Then observe the gauge. If the pressure drops steadily over a few minutes, there is a leak somewhere in the system.
With the system held at pressure, walk around the vehicle and visually inspect the radiator tanks, seams, and hose connections for escaping coolant. Pressure test results for radiator failure are often conclusive: a visible drip or spray appearing at the tank body or seam under sustained pressure pinpoints the leak location definitively. If the gauge drops but no external leak is visible, the failure may be internal — such as a head gasket leak allowing coolant into a combustion chamber — which redirects the diagnostic path away from the radiator tank.
According to the Automotive Service Excellence (ASE) certification guidelines, a cooling system should hold its rated pressure with no more than 2 psi of drop over two minutes. Any greater loss indicates a leak requiring repair.
How Does a Coolant Dye Test Help Pinpoint Radiator Tank Leaks?
A coolant dye test uses UV-reactive fluorescent dye added directly to the coolant to make even the smallest leaks glow brightly under ultraviolet light, making it especially effective for detecting slow, intermittent, or hard-to-see leaks on dark-colored radiator tanks.
To perform this test, pour the recommended amount of UV dye (per the product instructions) into the coolant reservoir or directly into the radiator. Run the engine for 15 to 20 minutes to allow the dye to circulate throughout the entire cooling system. Then shut the engine off and use a UV flashlight to scan the radiator tank surfaces, seams, hose connections, and surrounding areas. Any leak path will fluoresce as a bright yellow-green trail, clearly marking the exact point of failure.
This method is particularly valuable when the leak is too small to produce visible drips during a standard visual inspection or when the tank is located in a tight engine bay where direct observation is difficult. The dye remains in the coolant for several driving cycles, so you can also drive the vehicle normally and recheck the following day for new fluorescent traces.
Can You Diagnose a Radiator Tank Leak Without Professional Tools?
Yes, you can diagnose a radiator tank leak without professional tools by combining a careful warm-engine visual inspection with coolant level monitoring over several days. This approach is accessible to any DIY mechanic with a flashlight and basic observation skills.
Start by marking the coolant level in the overflow reservoir with a piece of tape or marker while the engine is cold. Drive the vehicle normally for two to three days, then recheck the level with the engine cold again. A measurable drop confirms that the system is losing fluid. Next, inspect the radiator tanks by running the engine until warm, then checking for wetness along the seam and tank body with your fingers and a flashlight.
However, this no-tool approach has limitations. Very small or intermittent leaks may not produce enough visible evidence during a brief inspection. Leaks that only occur at full highway operating temperature may not manifest during idle in a driveway. In these cases, a pressure tester (available for rental at most auto parts stores) or a UV dye kit provides the additional sensitivity needed to isolate the source with confidence.
What Are the Best Ways to Fix a Coolant Leak at the Radiator Tank?
There are two main categories of fixes for coolant leaks at radiator tanks: temporary sealant products for emergency or minor leaks, and permanent replacement of the gasket or entire radiator assembly. The right choice depends on the severity, location, and root cause of the leak.

More specifically, understanding when each repair category is appropriate prevents wasted effort on fixes that will not hold and helps you plan the correct level of investment.
Can a Radiator Sealant Product Fix a Radiator Tank Leak Permanently?
No, a radiator sealant product cannot permanently fix a radiator tank leak, but it can serve as a useful temporary measure for minor seepage until a proper repair is completed. Sealant additives work by circulating through the cooling system and forming a chemical or particulate plug at small leak points.
These products are most appropriate when the leak is a slow weep at the tank-to-core gasket seam — a scenario where the sealant particles can accumulate at the breach point and reduce or stop the drip. They are less effective on cracked plastic tank bodies, where the crack may flex under pressure and repeatedly break the sealant bond.
There are important caveats. Sealant products can clog heater core passages, thermostat valves, and narrow radiator tubes if overused or applied in excess of the recommended dosage. They should be treated strictly as a bridge to permanent repair — useful for getting the vehicle safely to a shop or buying time until a replacement radiator is sourced — rather than a long-term solution.
When Should You Replace the Radiator Tank or the Entire Radiator?
A cracked tank body or a significantly deteriorated tank-to-core gasket calls for full radiator replacement, while a minor gasket weep on an otherwise sound radiator may justify an attempted reseal. On most modern vehicles, the radiator is sold as a complete assembly — tanks, core, and gaskets as a single unit — making full replacement the standard repair.
Comparing the two approaches: resealing the gasket requires carefully uncrimping the aluminum tabs, removing the old gasket, cleaning both mating surfaces, installing a new gasket, and re-crimping the tabs to the correct specification. This process is labor-intensive, requires specialized crimping tools, and carries a risk of damaging the aging aluminum header plate. If the plastic tank itself is cracked or warped, a reseal is not viable.
Full radiator replacement, by contrast, is straightforward on most vehicles. Aftermarket replacement radiators for common models typically cost between $50 and $200, and the swap involves draining the coolant, disconnecting upper and lower hoses, unbolting the radiator from its mounts, disconnecting any transmission cooler lines (on automatic vehicles), removing the fan shroud or electric fan assembly, and installing the new unit. The entire job can usually be completed by a DIY mechanic in one to three hours.
For the cost and reliability balance, full replacement is almost always the preferred repair. A new radiator eliminates all existing degradation — in the tanks, the core, and the gasket simultaneously — providing the most durable long-term outcome.
What Related Cooling System Issues Are Commonly Mistaken for Radiator Tank Leaks?
Several cooling system failures produce symptoms that closely mimic radiator tank leaks, including water pump weep hole drips, internal ATF cooler cross-contamination, and electrolysis corrosion at metal-plastic junctions. Misidentifying the source leads to replacing the wrong component and continued coolant loss.
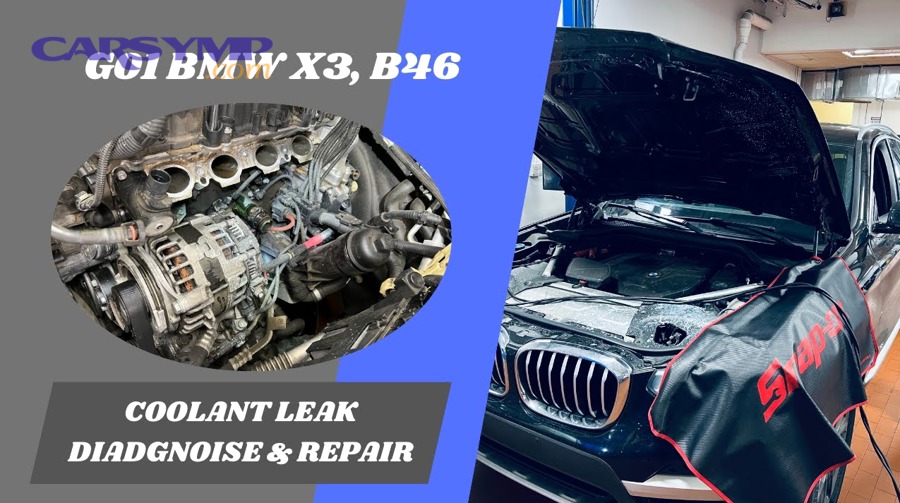
To illustrate, here are the most frequently confused conditions and how to differentiate them from a true tank leak.
How Is a Radiator Tank Leak Different from a Water Pump Leak?
A radiator tank leak originates at the plastic tank body or its crimped seam at the front of the engine bay, while a water pump leak originates at the pump’s weep hole or shaft seal, which is mounted on the engine block — usually behind or below the radiator.
The key diagnostic difference is location. A water pump weep hole leak produces drips directly beneath the pump housing, often slightly behind the radiator and closer to the engine centerline. A radiator tank leak produces drips or residue along the top or side edges of the radiator itself. If you trace the coolant trail upward from the puddle, the path will lead you to the correct component.
Additionally, a failing water pump may produce a grinding or whining noise from the bearing and may allow the pulley shaft to wobble when checked by hand with the belt removed. A leaking radiator tank is silent.
Can an ATF Oil Cooler Leak Inside the Radiator Tank Mimic an External Coolant Leak?
Yes, an ATF oil cooler leak inside the radiator can mimic an external coolant leak and, more dangerously, can contaminate both the coolant and the transmission fluid simultaneously without producing any visible external drip.
On many vehicles with automatic transmissions, transmission fluid is routed through a small oil cooler housed inside one of the radiator tanks. If the internal tubing of this cooler develops a crack, transmission fluid (typically red or brown) can enter the coolant, and coolant can enter the transmission lines. The telltale sign is a milky, frothy, or discolored coolant when you open the radiator cap — often with an oily film floating on the surface.
Because this leak is entirely internal, it will not create an external puddle. However, the resulting fluid contamination can destroy the transmission and corrode cooling system components. If you observe unusual coolant color or texture during your tank leak inspection, the internal ATF cooler should be investigated as the true source. Resolving this issue requires replacing the entire radiator and flushing the transmission fluid.
Does Electrolysis Corrosion Cause Hidden Damage to Radiator Tanks?
Yes, electrolysis corrosion can cause hidden, progressive damage to radiator tanks by allowing stray electrical current to flow through the coolant, accelerating the galvanic reaction between the aluminum core and the plastic tank hardware.
Electrolysis occurs when a poor engine ground or a faulty electrical component creates a voltage potential in the coolant. This voltage drives an electrochemical reaction that aggressively pits and erodes the aluminum header plate where it contacts the tank gasket — precisely the area where leaks develop. The damage is hidden because it occurs on the internal mating surface, invisible until the leak begins.
To test for electrolysis, set a digital multimeter to DC voltage, place one probe in the coolant (with the radiator cap removed and the engine running) and touch the other probe to the negative battery terminal. A reading above 0.3 volts indicates a problematic level of stray voltage. Corrective measures include repairing or adding engine ground straps and ensuring all electrical components are properly grounded.
Is Radiator Re-Coring a Viable Alternative to Full Radiator Replacement?
Yes, radiator re-coring is a viable alternative to full replacement, but only in specific circumstances — primarily for older, classic, or specialty vehicles where an exact-fit aftermarket replacement radiator is not available.
Re-coring involves removing the damaged aluminum core from between the existing tanks and replacing it with a newly manufactured core, while retaining the original tanks, mounting brackets, hose connection locations, and overall dimensions. This preserves the factory fitment of the radiator for vehicles where aftermarket options do not exist or do not match the original specifications.
For the majority of modern vehicles, however, complete aftermarket radiator assemblies are widely available and inexpensive relative to the labor cost of re-coring. A re-core also requires vehicle downtime while the radiator is sent to a specialty shop, whereas a replacement can be installed same-day. For this reason, re-coring is best reserved for restoration projects and rare vehicle platforms where preserving original appearance and fit is a priority.