


After a coolant refill, the safest way to prevent temperature spikes is to bleed (burp) trapped air until coolant circulation is steady, the heater is hot, and the level stays stable through a full warm-up and cool-down cycle.
Next, you’ll learn what “bleeding” really means in a pressurized cooling system, what trapped air does to circulation, and how to spot it before it becomes an overheating problem.
Then, you’ll see when bleeding is truly required (and when your vehicle is “self-bleeding”), so you don’t waste time repeating steps that your system design already handles.
Introduce a new idea: below is a practical, step-by-step process you can follow on most vehicles—plus the most common mistakes and the special cases that change the procedure.
What does “bleeding” (or “burping”) air after a coolant flush mean?
Bleeding air after a flush is the process of removing trapped air pockets from the cooling system’s passages so coolant flows continuously through the engine, radiator, and heater core without bubbles or gaps.
Then, that definition matters because “air” inside a closed cooling loop is not harmless—it changes pressure, reduces heat transfer where it sits, and can interrupt circulation in the exact places that need it most.

When you drain and refill coolant, air naturally enters the system through every opening you create: the radiator neck, the expansion tank, hoses you remove, the thermostat housing, or the drain cock. Because the cooling system has high points (places higher than the fill point) and restrictive pathways (heater core tubes, small bypass lines, turbo coolant lines), air can get trapped and refuse to “float out” on its own.
To keep terminology consistent, think of the cooling system as a loop with key parts (meronyms) that either pass coolant or trap air:
- Fill point: radiator neck or expansion tank
- Pressure seal: radiator cap or expansion tank cap
- Flow gate: thermostat (opens when hot)
- Heat exchanger: radiator
- Cabin loop: heater core (often a frequent air trap)
- Bypass and bleed paths: small hoses and bleed screws (if equipped)
A good bleed is not “just topping off.” A good bleed ends when the system behaves like a solid column of liquid: stable temperature, stable level, stable heater output.
What happens if you don’t bleed the cooling system after a flush?
If you don’t bleed trapped air, you can get overheating, heater failure, and misleading temperature readings because air pockets interrupt circulation and create localized hot spots.
More specifically, air tends to park at high points and narrow channels, and that creates several predictable problems:
- Temperature swings instead of a smooth warm-up: The gauge may climb, drop, and climb again as an air pocket shifts.
- No heat or weak heat from the vents: The heater core can’t transfer heat if it’s partially filled with air instead of coolant.
- Coolant “disappears” after the first drive: Once air purges during driving, the reservoir level drops because the air volume got replaced by liquid.
- Gurgling or sloshing sounds: Air moving through the heater core and small hoses can sound like water in a pipe.
A key safety detail is that trapped air can also make you think the system is full when it isn’t. The fill neck can look full while an upper hose, thermostat housing, or heater core still contains air.
Is “burping” the same as bleeding a cooling system?
Yes—burping is the DIY synonym for bleeding, and both mean removing trapped air so coolant circulation is continuous and stable.
Next, the only practical difference is context: “bleeding” is often used in service procedures (especially when there’s a bleed screw), while “burping” is commonly used when you’re letting bubbles work out through the fill neck or a funnel.
Do you need to bleed air after every coolant flush?
Yes, you should plan to bleed air after a coolant flush because refilling introduces air and most systems will trap some amount of it—especially around the thermostat and heater core—unless the design is truly self-bleeding.
Then, the reason this is a “yes” for most DIY work is simple: a flush is not just topping up; it replaces a large portion of coolant volume, so the chance of trapped air is high, and the consequences (overheating/no heat) are expensive.
However, “need” depends on design details:
- Radiator-cap systems often trap air if the radiator neck isn’t the highest point in the system.
- Pressurized expansion tank systems can be easier to purge, but still trap air in heater core circuits and high hoses.
- Systems with bleed screws typically expect you to use them during fill.
- Some vehicles are engineered to self-bleed through small return lines to the expansion tank, but even those can trap air if filled too quickly or if the heater circuit isn’t opened.
To keep the hook-chain tight: if your goal is a stable temperature after service, treat bleeding as part of the flush, not an optional extra step.
Which coolant systems are more likely to trap air (radiator cap vs expansion tank designs)?
Radiator-cap systems are more likely to trap air when the radiator neck is not the highest point, while expansion-tank systems are better at purging if the tank is the highest point and the return line continuously bleeds air back.
Meanwhile, both designs can still trap air in the heater core and thermostat housing because those zones often sit above the main flow path or remain closed off until warm.
Here’s the practical comparison you should use during a refill:
- Radiator cap on radiator (classic layout):
- Strength: easy to see bubbles at the fill neck
- Weakness: if the engine has higher passages than the radiator neck, air can sit “up top” until you manipulate the system
- Pressurized expansion tank (common on many modern cars):
- Strength: the tank can act as an air separator if it’s the highest point
- Weakness: if the tank sits low relative to hoses/heater core, trapped air can persist longer and show up as “no heat”
The takeaway: your bleeding method should match where air naturally rises in your layout.
What are the clear signs you still have air trapped after refilling coolant?
There are 6 common signs of trapped air after refilling: (1) temperature swings, (2) weak/no cabin heat, (3) gurgling, (4) repeated level drop after cooling, (5) bubbling/foaming at the fill point, and (6) an upper hose that stays cool too long.
In addition, these signs matter because they tell you whether the thermostat has opened and whether the heater core is actually full of coolant.
Use this quick checklist during your first warm-up:
- Cabin heater stays lukewarm even though the gauge climbs
- Bubbles continue long after you expect them to stop
- Coolant level drops noticeably after a full cool-down (not just a tiny adjustment)
- Fans cycle hard and temperature still creeps at idle
- You smell coolant or see wet spots (air can accompany a small leak that prevents proper purge)
If you see these signs, you don’t need to guess: you need to return to a controlled bleeding cycle until the system stabilizes.
How do you properly bleed trapped air after a coolant flush step-by-step?
The most reliable method is manual bleeding in 7 steps—cold fill, controlled warm-up, thermostat-open confirmation, bubble purge, cap-and-pressurize, fan-cycle verification, and cold recheck—so temperature and coolant level stabilize without air pockets.
To better understand why each step exists, remember that the thermostat blocks full circulation while cold, so you must warm the engine in a controlled way and confirm when the system transitions into full flow.
What tools and prep make bleeding safer and easier?
There are 7 practical tools/prep items that make bleeding safer and more successful: a spill-free funnel, gloves/eye protection, correct coolant, distilled water, a catch pan, ramps/jack stands (if needed), and a way to monitor temperature (gauge or OBD).
Next, this prep matters because most DIY bleeding problems come from rushing, filling too fast, or working without a stable fill point.
Core prep checklist (do this first):
- Park on level ground (or raise the front if your fill point is low and the system traps air up front)
- Make sure the engine is fully cold
- Confirm you have the correct coolant type and correct mix ratio
- Set the cabin heat to HOT (and fan to low/medium) so the heater circuit is open on systems that use a blend valve
- Inspect hoses for obvious cracks or loose clamps (air can re-enter through leaks)
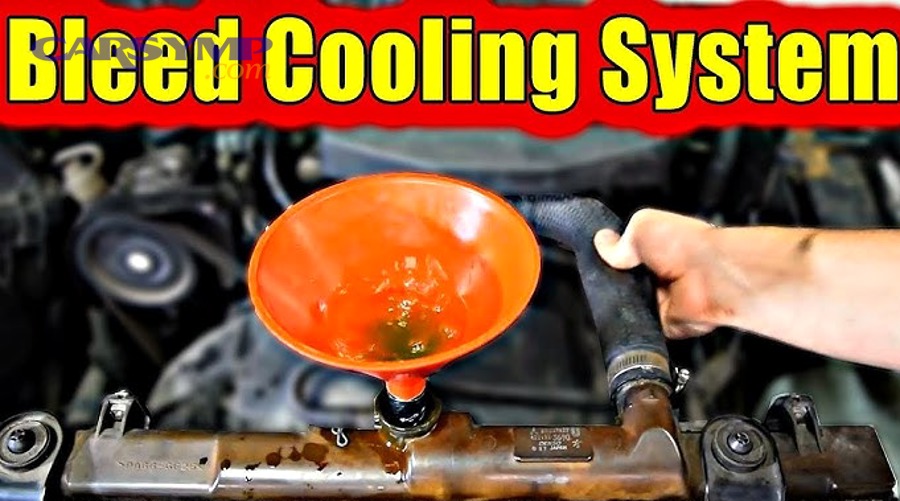
If you use a spill-free funnel, you create a tall “liquid head” above the fill neck, which helps bubbles rise and escape instead of collapsing back into the system.
What is the safest “cold-engine” fill procedure before you start bleeding?
The safest cold fill is slow-filling from the highest fill point until the system is full, the reservoir is at the correct mark, and (if equipped) the bleed screw outputs a steady coolant stream with no bubbles.
Then, slow filling prevents aeration—fast pouring can whip air into coolant like shaking a bottle, creating microbubbles that take longer to purge.
Cold fill steps (before you start the engine):
- Engine cold (radiator hoses cool to touch).
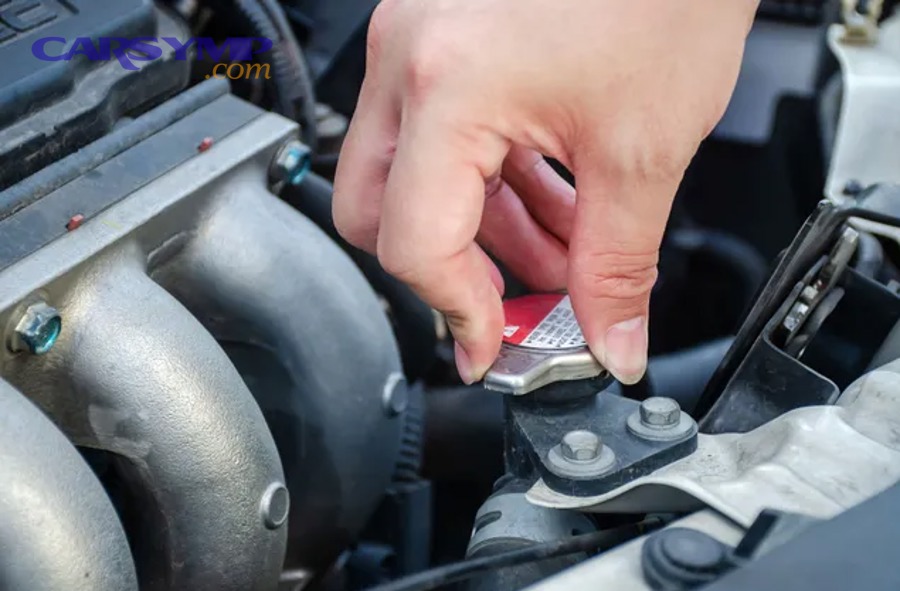
- Remove the radiator cap or expansion tank cap (whichever is the service fill point).
- If equipped, open the bleed screw one to two turns (do not remove it).
- Pour coolant slowly until the fill point stays full.
- Fill the expansion tank to the correct “COLD” mark.
- If there’s a bleed screw: continue filling until coolant flows out bubble-free, then close the screw.
This is also where you naturally incorporate Thermostat and radiator cap checks during service: if the cap seal is cracked, spring is weak, or the thermostat is suspect, bleeding becomes harder and overheating becomes easier. Treat those two parts as “gatekeepers” for a stable cooling system.
How do you bleed the system without a bleed screw (standard radiator-cap method)?
There are 6 main actions to bleed without a bleed screw: stabilize the fill neck with a funnel, warm the engine gradually, purge bubbles as the thermostat opens, maintain level, pressurize with the cap, verify fan cycles, and recheck cold level.
Specifically, your job is to keep the fill point from running low while the system transitions from “small loop” (thermostat closed) to “full loop” (thermostat open).
Procedure (common radiator-cap or high fill neck method):
- Install a spill-free funnel (or keep the fill neck full with careful topping-off).
- Start the engine and let it idle. Keep the cabin heat set to HOT.
- Watch for small bubbles early—this is normal as trapped air begins to move.
- As the engine warms, gently squeeze the upper radiator hose only when safe (avoid belts/fans). This encourages bubbles to move.
- Wait for the thermostat to open: you’ll usually see a sudden coolant level drop in the funnel/neck and/or feel the upper hose get hot quickly. Immediately top off to keep the fill point full.
- Continue idling until you see fewer to no bubbles, heater output is consistently hot, and temperature is stable.
- Remove the funnel carefully (avoid spills), fill to the proper level, then install the cap.
- Let the engine run until the radiator fan cycles at least once (or until it reaches normal operating temperature and remains stable), then shut off.
- After full cool-down, recheck and adjust the reservoir to the COLD mark.
One simple “done” cue: the heater blows consistently hot at idle and doesn’t turn cool when you rev lightly or when the fan changes speed. That consistency often means the heater core is fully liquid-filled.
How do you bleed the system with a bleed screw?
There are 4 main steps for bleed-screw systems: purge during fill, close at steady stream, heat-cycle to thermostat open, and re-purge briefly if procedure requires it so the highest air pockets exit through the designed port.
Moreover, the bleed screw exists for a reason: it’s placed at a known high point, so using it prevents stubborn air pockets from staying trapped.
Procedure (general approach):
- With engine cold, open bleed screw slightly.
- Fill coolant slowly until the bleed screw outputs coolant without bubbles, then close the screw snugly.
- Start engine, heater HOT, idle to operating temperature.
- If your vehicle procedure recommends a second purge: briefly crack the bleed screw once warm (use caution, protect hands), then close once a steady stream appears.
Safety rule: never remove a bleed screw completely on a hot system. Even a small opening can release hot coolant under pressure.
How long should you run the engine to fully burp the cooling system?
You should run the engine until the thermostat has opened, the heater is consistently hot, bubbles have stopped, and you’ve observed at least one full fan cycle (where applicable)—which is typically 10–30 minutes depending on ambient temperature and engine design.
Then, “time” is less important than conditions, because some vehicles warm quickly but purge slowly, while others take longer to open the thermostat.
To keep it measurable, look for these milestones in order:
- Milestone 1: steady warm-up (no wild gauge swings)
- Milestone 2: thermostat opens (upper hose heats rapidly; level changes at fill point)
- Milestone 3: bubble rate drops near zero
- Milestone 4: heater output is stable at idle
- Milestone 5: fan cycles and temperature remains steady
If you stop before Milestone 2, you often trap air behind a closed thermostat and the system “acts fine” briefly—until the first drive.
How do you confirm the cooling system is fully bled and “done”?
There are 5 confirmation checks that prove a full bleed: stable operating temperature, consistent cabin heat, stable coolant level after cool-down, no bubbling/gurgling, and normal hose temperature behavior after thermostat opening.
In short, each check verifies the same truth from a different angle: coolant is circulating everywhere it should.
Below is a simple table that summarizes what “done” looks like and what a “not done” signal means.
| Checkpoint | What “Done” Looks Like | What It Means if It Fails |
|---|---|---|
| Temperature at idle | Stable at normal operating range | Air pocket, thermostat issue, fan/cap problem |
| Cabin heat | Steady hot air, no sudden cold bursts | Air trapped in heater core or low coolant |
| Bubble activity | Minimal/none after thermostat opens | Trapped air still migrating |
| Coolant level after cool-down | Reservoir returns to stable COLD mark | Air replaced by coolant (needs topping off) |
| Hose temperatures | Upper hose hot after thermostat opens | Thermostat not opening or circulation issue |
If all five are true, you can be confident the system is properly burped.
Optional but helpful: a short test drive, then a full cool-down recheck. If the level holds steady and heat remains consistent, you’ve completed the job correctly.
What are the most common bleeding mistakes after a coolant flush, and how do you avoid them?
There are 7 common mistakes that cause repeat trapped air: opening the system hot, filling too fast, not opening the heater circuit, stopping before thermostat opening, ignoring bleed screw sequence, using the wrong cap, and overlooking leaks that reintroduce air.
Besides, these mistakes matter because they don’t just slow you down—they can create a cycle where the system purges air on the road, drops level later, and then overheats at idle.
A quick prevention mindset: air gets trapped when you rush the fill, and air re-enters when you have a sealing problem. Fix both, and bleeding becomes straightforward.
Is it okay to open the radiator/expansion cap when hot?
No, you should not open the radiator or expansion cap when hot because (1) the system is pressurized, (2) coolant can flash-boil and erupt, and (3) hot coolant can cause severe burns.
More importantly, safe bleeding depends on controlled temperature and controlled pressure, so always wait until the engine is cool enough that hoses are not pressurized and the cap can be removed safely.
If you must check level on a warm engine, do it the safe way:
- Let it cool substantially first.
- Use thick gloves.
- Crack the cap slowly to vent pressure (never remove instantly).
- Step back from the fill neck.
Which steps create new air pockets during bleeding?
There are 6 actions that commonly create or preserve air pockets: pouring too fast, letting the fill neck run low during warm-up, leaving the heater off, revving aggressively before the thermostat opens, closing a bleed screw too early, and sealing the cap before bubbles stop.
To illustrate, “fast fill + early cap” is a classic combination that traps air behind the thermostat, because you pressurize the system before it has purged.
Avoid these specific pitfalls:
- Fast pour: creates foam and microbubbles that take longer to purge
- Low fill neck during warm-up: pulls air back into the system
- Heater off: leaves the heater core partially isolated, so air stays trapped
- Aggressive revving early: can churn coolant and create more aeration
- Bleed screw closed too soon: locks air at the highest point
- Cap installed too early: stops visible purge and can trap air pockets
If you want bleeding to be predictable, keep the fill point full and the process slow.
When should you suspect a mechanical issue instead of trapped air?
You should suspect a mechanical problem when temperature is unstable even after a correct bleed, coolant is pushed out repeatedly, the system won’t hold pressure, or you see persistent overheating despite stable coolant level and zero bubbles.
However, the key is to compare “air-pocket behavior” to “hardware failure behavior.”
Air-pocket pattern (often improves with bleeding):
- Heat comes and goes
- Bubbling reduces over time
- Level drops after cool-down but stabilizes after topping off
- Temperature spikes may settle once fully purged
Mechanical issue pattern (does not improve with repeated bleeding):
- Coolant leaks (wet hoses, crust at fittings, sweet smell)
- Cap won’t hold pressure (boils early, pushes coolant into overflow)
- Thermostat stuck closed (upper hose stays cool, rapid overheating)
- Fan not operating correctly (overheats at idle, cools while driving)
- Combustion gas intrusion (continuous bubbles, repeated overflow events)
This is where your service mindset matters: during a coolant flush, don’t treat bleeding as the only step. Combine it with Thermostat and radiator cap checks during service so you don’t chase air when the true issue is a failed thermostat or a weak cap seal.
Evidence: According to a study by Gdynia Maritime University from the Faculty of Marine Engineering, in 2013, testing on an engine cooling model stand found that reducing the coolant fill level (leaving more air volume) altered system temperature behavior and could reduce coolant discharge efficiency under certain pump-speed conditions.
Contextual Border: You now have the core “how-to” process for bleeding air after a flush, plus the mistakes to avoid. Next are special cases—specific system designs and edge conditions—so you can adapt the same principles to vehicles that trap air more stubbornly.
What special cases change the bleeding process after a coolant flush?
Special cases usually involve extra coolant circuits, unusual high points, or refill methods (vacuum fill vs manual) that change where air gets trapped and how it exits, so the “standard” burping routine needs small adjustments to fully purge the system.
Next, the most important idea is to keep the same goal—stable circulation—but adapt the method to the system’s geometry and components.
How do vacuum-fill tools compare to manual bleeding for removing air pockets?
Vacuum-fill wins in speed and air removal consistency, while manual bleeding is best for budget and simplicity; in practice, vacuum-fill is ideal when the system traps air easily or when you want a fast, repeatable refill after service.
On the other hand, manual bleeding still works extremely well if you fill slowly, open the heater circuit, and verify thermostat opening.
What vacuum-fill does differently:
- Pulls a vacuum on the system, which expands trapped air and removes it
- Refills by drawing coolant in, reducing aeration during fill
- Can reveal leaks early because the system won’t hold vacuum
What manual bleeding does well:
- Requires minimal tools
- Lets you see bubbles and confirm behavior step-by-step
- Works on most common systems if done patiently
If you often service vehicles where air is stubborn (long heater circuits, turbo coolant lines, remote radiators), vacuum-fill can reduce repeat warm-up cycles and reduce guesswork.
How do you bleed cooling systems with turbo coolant lines or auxiliary coolant pumps?
You bleed these systems by ensuring all auxiliary circuits are active during purge, maintaining a high fill point, and allowing extra time for small lines to clear bubbles, because turbos and auxiliary pumps add narrow passages that trap air.
More specifically, turbo coolant lines are typically small-diameter and can hold air pockets that only move once flow becomes steady and warm.
Practical adjustments:
- Keep the fill point as high as possible (funnel helps)
- Extend the warm-up and “bubble watch” phase after thermostat opening
- Confirm heat is stable and that return flow to the tank looks consistent
- After cool-down, recheck level again (these systems often “settle” more)
If your vehicle has an electric auxiliary pump that runs after shutoff, let it complete its cycle, then recheck level after cooling—because that pump can move trapped air into the reservoir after the engine is off.
What if your vehicle has a high-mounted heater core or rear heater (SUV/van) that traps air?
You bleed these systems by keeping the heater circuits open, running the engine long enough to push coolant through both heater cores, and sometimes positioning the vehicle so trapped air can rise toward the fill point, because long heater lines and rear heaters create multiple high points.
Especially on SUVs/vans with rear heaters, you can have “good front heat” while the rear circuit still contains air, which later migrates and causes level changes.
Practical adjustments:
- Set HVAC to HOT (and, if applicable, activate rear heat settings)
- Allow a longer idle period after thermostat opening
- Verify consistent heat output from all zones
- Plan for a second cool-down top-off as normal, not as a “problem”
What should you do if the heater is still cold or the engine still overheats after “proper” bleeding?
You should stop repeating the same bleed loop and switch to a simple diagnostic decision tree: verify level and cap seal, check for leaks, confirm thermostat opening, confirm fan operation, and assess coolant condition before assuming it’s still trapped air.
To sum up, the quickest way forward is to test one variable at a time instead of endlessly “burping” without new information.
Decision tree (fast and practical):
- Cold level check: Is the reservoir at the correct mark? If not, top off and repeat a controlled warm-up.
- Cap check: Does the cap seal look damaged or spring weak? Replace if suspect (cheap and common failure).
- Thermostat behavior: Does the upper hose warm rapidly after a normal warm-up? If it stays cold while overheating, suspect thermostat or circulation.
- Fan operation: Does the fan cycle at operating temperature? If not, diagnose fan control system.
- Coolant condition: Look for Signs coolant is contaminated or rusty (brown/orange discoloration, suspended particles, oily sheen, sludge). Contamination can reduce heat transfer and clog small passages like the heater core.
- Leak/pressure integrity: Any wet fittings, crusty residue, or coolant smell suggests leaks that can pull air back in.
If you suspect contamination, the “fix” is not more bleeding—it’s cleaning and correcting the underlying issue (blocked radiator/heater core, degraded coolant, corrosion). At that point, bleeding becomes the final step after the system is restored to good flow and good sealing.