


A thermostat and radiator cap check during cooling system service is a fast, evidence-based way to prevent overheating, boil-over, and repeat coolant loss—because these two small parts control temperature regulation and system pressure.
Next, you’ll learn what each component actually does and how their normal behavior looks during warm-up and steady driving, so your inspection isn’t just “guessing from the gauge.”
Then, you’ll follow a safe, repeatable workflow: visual inspection first, pressure-testing the cap second, and thermostat verification last—so you avoid false positives caused by air pockets, low coolant, or a bad radiator neck.
Introduce a new idea: once the core checks are clear, you can decide when a coolant flush belongs in the same service visit, and how to handle DIY coolant flush steps and safety, Disposal rules for old coolant, and a realistic Coolant flush cost estimate without turning the job into a bigger risk.
What do the thermostat and radiator cap do in a cooling system, and why should you check them during service?
Thermostat and radiator cap checks matter during cooling system service because the thermostat controls coolant flow and operating temperature, while the radiator cap controls system pressure and boiling margin, and either failure can mimic bigger problems.
To better understand why the checks are paired, start with what each part is designed to do—then tie that purpose to what you can observe during service.
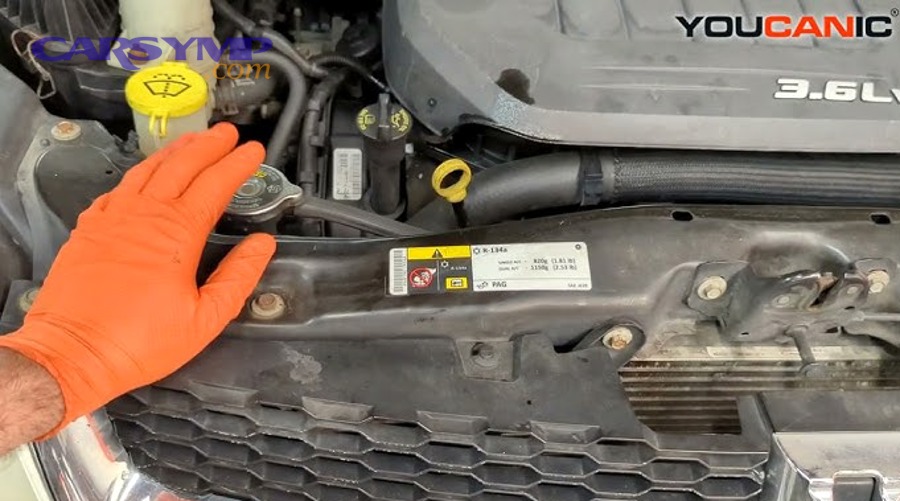
What is a thermostat and how does it regulate engine temperature?
A thermostat is a temperature-controlled valve in the engine’s cooling circuit that stays closed during warm-up and opens near a calibrated temperature to stabilize engine heat and cabin comfort.
Next, focus on the thermostat’s standout feature—controlled restriction—because it’s the reason warm-up time, heater output, and temperature stability change when the thermostat fails.
The thermostat’s job is not “to cool the engine” in a simple sense. Its job is to hit and hold a temperature window:
- Cold start / warm-up: Thermostat stays closed so coolant circulates mainly inside the engine, letting it reach operating temperature quickly.
- Operating temp: Thermostat opens in stages to route hot coolant to the radiator, balancing heat rejection with stable temperature.
- Load changes (hill, towing, highway): Thermostat modulates opening to reduce temperature swings.
When the thermostat behaves normally, you typically see:
- Temperature rises steadily to the normal range and stays stable.
- Cabin heat becomes warm within a reasonable time.
- Upper radiator hose transitions from cool to hot as the thermostat opens (not instantly at startup).
When it fails, behavior often flips:
- Stuck open: slow warm-up, weak heat at idle in winter, temperature drops at highway speeds.
- Stuck closed / restricted: rapid overheating, very hot upper hose, possible coolant push-out.
Evidence: According to a study by Hanyang University from the Department of Mechanical Engineering, in 2013, changing engine coolant and oil temperatures measurably affected fuel economy and emissions trends in engine testing, supporting why thermostat-controlled temperature targets matter for efficiency. (researchgate.net)
What is a radiator cap and how does it control pressure and coolant recovery?
A radiator cap is a pressure-and-vacuum valve assembly that seals the cooling system to hold pressure (raising the boiling margin) and manages coolant expansion into, and recovery from, the overflow/expansion tank.
Then, connect pressure control to service reality: a cap can “look fine” yet fail to hold pressure, so inspection alone is not enough when symptoms point to pressure loss.
A typical radiator cap has two key valve functions:
- Pressure relief valve: Opens at the cap’s rated pressure to protect hoses, radiator seams, and heater core from over-pressure.
- Vacuum (return) valve: Allows coolant to be drawn back from the overflow bottle as the system cools and contracts.
Why you check it during service:
- A weak cap lowers the system’s effective boiling margin, so coolant can boil locally at hot spots.
- A cap that can’t seal can allow micro-venting and slow coolant loss.
- A bad vacuum valve can prevent proper recovery, leaving the radiator low even when the overflow bottle looks “okay.”
Is it safe to check the radiator cap and thermostat during service?
Yes, it’s safe to check the radiator cap and thermostat during service if the engine is cool, pressure is controlled, and you follow at least three safety rules: never open a hot cap, protect skin/eyes, and manage coolant as a toxic waste.
Next, treat safety as part of accuracy—because a rushed cap opening can both injure you and spray coolant, making diagnosis unreliable.

Should you remove the radiator cap when the engine is hot?
No, you should not remove the radiator cap when the engine is hot because (1) hot coolant can flash-boil and spray, (2) the system is pressurized, and (3) sudden depressurization can cause violent overflow and burns.
Then, if you must assess coolant quickly, switch to safer alternatives like checking the overflow bottle level and waiting for a full cool-down for cap removal.
A simple rule that prevents most injuries: if the upper radiator hose is hot and firm, assume pressure exists. Wait until:
- The engine has cooled fully.
- The upper hose feels cool and compressible (not rock-hard).
- The temperature gauge has been at rest for a long time (still not a guarantee—use touch checks carefully).
If you’re diagnosing an overheating complaint, do not “peek under the cap” to confirm boiling. Instead:
- Inspect for dried coolant residue around the cap neck.
- Note coolant level in the reservoir.
- Use a scan tool for actual coolant temperature if available.
What safety steps should you follow before any cooling system inspection?
There are 7 main safety steps before any cooling system inspection: cool the engine, depressurize slowly, use PPE, prevent spills, avoid inhaling vapors, keep pets away, and plan proper disposal based on local rules.
Below is the practical sequence that keeps the work controlled and prevents you from turning a routine check into an emergency cleanup.
Safe-prep checklist (do this every time):
- Cool-down first: Park, shut off, and let the engine cool completely.
- PPE: Gloves + safety glasses (coolant is irritating and can be toxic).
- Cap removal method: Place a thick rag over the cap, turn slowly to the first stop, pause, then remove fully only if no pressure remains.
- Spill control: Use a drain pan and absorbent pads; coolant is slippery and hazardous.
- Ventilation: Work in a ventilated area; avoid breathing fumes.
- Pet/child safety: Ethylene glycol sweet taste can attract animals—keep containers sealed.
- Disposal plan: Treat used coolant as potentially contaminated; don’t pour into drains.
Evidence: According to a study by Colorado State University from the Department of Clinical Sciences (College of Veterinary Medicine and Biomedical Sciences), in 2010, ethylene glycol poisoning treatment research in cats underscores how dangerous glycol exposure can be—reinforcing why spills and access must be prevented during service. (pubmed.ncbi.nlm.nih.gov)
What quick visual checks should you do on the radiator cap during a routine service?
You should do a radiator cap visual check in under five minutes by inspecting sealing surfaces, spring tension, corrosion, and the cap’s pressure rating because these are the most common failure points you can see without tools.
Next, use visual checks to decide whether a pressure test is mandatory—especially during a coolant flush appointment or any service that already involves coolant handling.
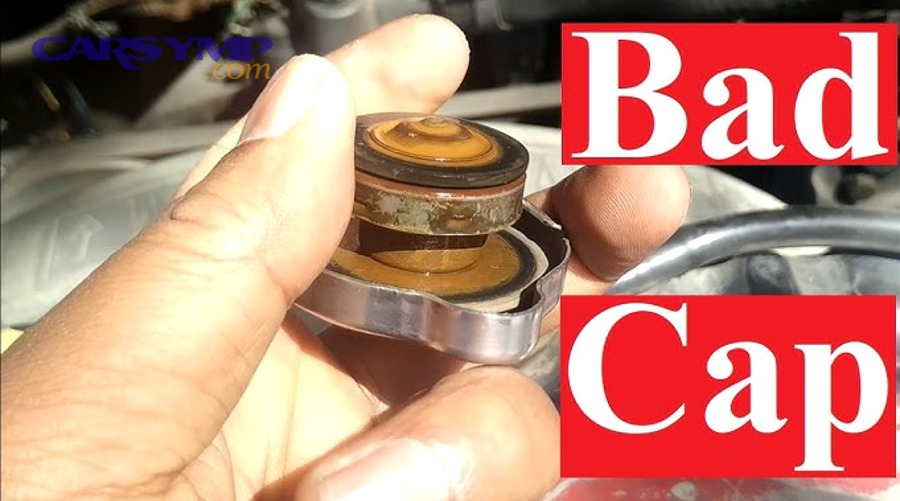
Which radiator cap parts should you inspect (seal, spring, valves, neck) and what do failures look like?
There are 5 main radiator cap inspection targets—seal, spring, pressure valve, vacuum valve, and filler neck interface—based on whether they can hold pressure, release safely, and recover coolant correctly.
Specifically, scan for “soft failures” like flattened rubber and light corrosion, because those often cause intermittent overheating and slow loss.
1) Rubber seal / gasket
- Good: pliable, uniform thickness, no cracks.
- Bad: flattened, hard, torn, swollen, missing chunks.
- What it causes: pressure loss, seepage, crusty residue at the neck.
2) Spring tension
- Good: spring feels firm; cap resists compression.
- Bad: weak or rusty spring; sticky movement.
- What it causes: opens early, reduces boiling margin, pushes coolant out sooner.
3) Pressure valve seat
- Good: clean metal-to-metal contact surface.
- Bad: pitting, scale, gouges, stuck valve.
- What it causes: can’t maintain rated pressure or releases erratically.
4) Vacuum (return) valve
- Good: moves freely; returns to seat.
- Bad: stuck closed or sticky.
- What it causes: hose collapse after cool-down, poor coolant recovery.
5) Radiator filler neck / sealing surface
- Good: smooth, round, not corroded.
- Bad: nicks, heavy corrosion, bent neck.
- What it causes: even a new cap may fail; pressure tests become inconsistent.
Practical service tip: If you’re already doing a DIY coolant flush steps and safety project, you’re handling coolant anyway—so it’s the best time to replace a marginal cap proactively, because the incremental cost is small compared to a comeback.
What’s the difference between a radiator-mounted cap and a pressurized reservoir cap for inspection?
A radiator-mounted cap wins for direct inspection access, a pressurized reservoir cap is best for modern sealed systems, and a non-pressurized overflow cap is not a diagnostic point because it doesn’t control system pressure.
However, the key is identifying what you’re looking at—because many cars have a plastic overflow cap that looks important but is not the pressure cap.
Use this quick identification rule:
- If the cap has a pressure rating (psi/bar) printed on it, it’s likely the pressure cap.
- If the reservoir is part of the pressurized system, it will have a rated cap and thick hoses connected.
- If it’s just an overflow bottle, the cap often has no rating and the bottle is not under pressure in normal operation.
How do you pressure-test a radiator cap, and what pass/fail results matter?
A radiator cap pressure test uses a cap tester in 4 steps—inspect the cap, connect the correct adapter, pump to rated pressure, and verify it holds—so you can confirm sealing and relief behavior instead of guessing.
Then, treat pass/fail as data: a cap that can’t hold its rating is not “probably okay,” it’s a measurable pressure leak.
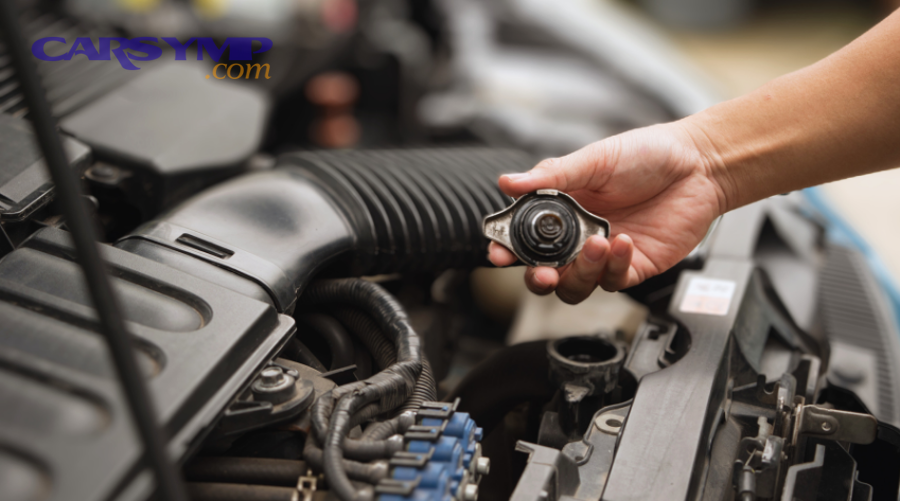
What is a radiator cap pressure test and what does it confirm?
A radiator cap pressure test is a controlled pressurization check that confirms the cap can (1) seal and hold near its rated pressure, (2) relieve at the correct threshold, and (3) reset properly afterward.
Next, pair this with your visual inspection so you can separate a bad cap from a bad filler neck or a tester setup error.
What the test confirms in real-world terms:
- The cooling system can maintain pressure during heat soak and load.
- The cap won’t vent early and push coolant into the overflow too soon.
- The cap won’t over-pressurize the system beyond its rating.
Basic test workflow (cap-only):
- Match the tester adapter to the cap type.
- Lock the cap into the tester.
- Pump slowly to the cap’s rated pressure.
- Watch the gauge: a good cap holds steady with minimal drop.
If the gauge drops quickly, you’ve proven leakage. If it “pops” far below rating, you’ve proven early relief.
If a cap fails to hold pressure, should you replace it?
Yes, you should replace a radiator cap that fails to hold pressure because (1) it reduces boiling margin, (2) it increases coolant loss risk, and (3) it can trigger overheating that looks like a thermostat or head gasket issue.
Moreover, replacement is usually the most cost-effective move—unless the failure is clearly due to a damaged filler neck or a mismatched tester adapter.
Before replacing, verify these two things:
- The tester seal and adapter are correct (no leaks at the tool).
- The radiator neck sealing surface is clean and undamaged.
If those are good and the cap still fails, replacement is the right call.
Disposal note (service reality): If replacing the cap is part of a larger DIY coolant flush steps and safety project, keep old coolant contained—don’t rinse it into the driveway “just to clean up.”
What symptoms suggest the thermostat needs checking during service?
Thermostat checking is indicated when you see temperature instability, slow warm-up, overheating patterns, or heater performance changes because those symptoms directly track how the thermostat opens, closes, and meters flow.

Next, use symptom patterns to decide whether you’re dealing with a thermostat issue, a radiator cap pressure issue, or an air/flow problem after service.
What are the most common thermostat failure symptoms (stuck open vs stuck closed)?
There are 2 main thermostat failure modes—stuck open and stuck closed—based on whether the valve fails to restrict or fails to allow radiator flow.
To illustrate the difference, use warm-up time and temperature stability as the “tell,” because those are the most consistent clues.
Stuck open (or opening too early):
- Very slow warm-up; temperature may never reach normal range.
- Weak cabin heat, especially at idle or cold weather.
- Temperature drops on highway (high airflow cools the engine too much).
- Fuel economy can worsen because the engine stays in a colder operating strategy.
Stuck closed (or restricted):
- Temperature rises quickly into the hot zone.
- Upper radiator hose may stay cooler longer, then spike.
- Heater may go cold if coolant circulation is compromised.
- Coolant may push into overflow due to localized boiling and pressure spikes.
Evidence: According to a study by Clemson University from the Automotive Engineering/Mechanical Engineering dissertation research, in 2016, precise control of coolant temperature is tied to efficiency gains by reducing losses—supporting why thermostat behavior (and warm-up control) matters beyond just “not overheating.” (open.clemson.edu)
How does a thermostat problem differ from a radiator cap problem in real-world symptoms?
A thermostat problem wins as the likely cause when temperature control is unstable during warm-up and driving, a radiator cap problem is best matched to boil-over/overflow and recovery issues, and airflow/fan problems dominate overheating at idle.
However, the most reliable diagnosis comes from combining symptom timing with simple checks, not from any single sign.
Here’s a quick symptom map to reduce confusion (this table summarizes what patterns usually point to which component):
| Symptom pattern | More likely thermostat | More likely radiator cap | More likely something else |
|---|---|---|---|
| Slow warm-up + weak heat | ✅ | ❌ | Low coolant, blend door |
| Sudden overheat after warm-up | ✅ | ✅ (if venting) | Water pump, blockage |
| Coolant pushed into overflow bottle | Sometimes | ✅ | Combustion gas leak |
| Overflow bottle full but radiator low | ❌ | ✅ (vacuum valve) | Leak/air pocket |
| Overheats mostly at idle | Sometimes | Sometimes | Fan, airflow, clogged radiator |
Use the table as a first pass—then confirm with the specific checks in the next section.
How do you check thermostat operation during cooling system service (without guesswork)?
You can check thermostat operation without guesswork by verifying 3 things—warm-up curve, hose temperature transition, and scan/infrared readings—so you confirm opening behavior rather than relying on dashboard gauge impressions.

Next, you’ll combine an “in-car” check with a controlled test only when needed, keeping the service efficient and accurate.
What is the “in-car” thermostat check and what results indicate normal operation?
The in-car thermostat check is a warm-up and stabilization observation that confirms the engine reaches operating temperature, the thermostat opens near its designed range, and temperature stays stable afterward.
Then, use a consistent observation sequence so you can compare results from one service visit to the next.
In-car check sequence (practical):
- Start cold engine and monitor temperature rise (scan tool preferred; gauge is coarse).
- Feel upper radiator hose periodically (carefully) as the engine warms.
- Look for a clear transition: hose warms rapidly when the thermostat opens and hot coolant flows to the radiator.
- After opening, temperature should stabilize rather than continue climbing.
What “normal” looks like:
- Temperature climbs steadily, then levels off.
- Heater output becomes hot and stays consistent.
- Radiator hose temperature increases in a noticeable step, not immediately at startup.
What suggests a problem:
- Temperature never reaches normal range (stuck open).
- Temperature overshoots and continues rising (stuck closed/restricted, low coolant, air pocket).
- Temperature swings up/down repeatedly (thermostat sticking, air in system, fan control issues).
If you did a coolant flush earlier in the day, consider air pockets first—trapped air can mimic thermostat issues until the system is properly bled.
What tools can you use to verify thermostat behavior (scan tool, IR thermometer, boil test), and when?
There are 3 main tool-based methods—scan-tool temperature, infrared thermometer readings, and an off-car hot-water test—based on whether you’re verifying behavior in the vehicle or confirming a suspect thermostat on the bench.
More specifically, the right tool is the one that reduces uncertainty for your exact complaint: warm-up problem, overheating problem, or post-service instability.
1) Scan tool (ECT reading)
- Best for: precise warm-up curve and stabilization.
- What you learn: real coolant temperature vs gauge “normal.”
2) Infrared thermometer
- Best for: comparing hose/housing temps quickly.
- What you learn: temperature differential before/after thermostat opening.
3) Bench hot-water test (off-car)
- Best for: confirming a removed thermostat opens smoothly.
- What you learn: opening behavior, sticking, incomplete opening.
Caution: If you do a bench test, use a thermometer and avoid contaminating cookware. Treat it like chemical work—because coolant residue and corrosion inhibitors don’t belong in kitchen tools.
Should you replace the thermostat or radiator cap during service, or only if testing fails?
It depends: replace the radiator cap or thermostat during service when (1) test results fail, (2) age/mileage risk is high, or (3) symptoms match strongly, because preventive replacement can be cheaper than an overheating event—but only when evidence supports it.
Next, make the decision using a simple risk-and-proof framework so you don’t replace parts blindly.
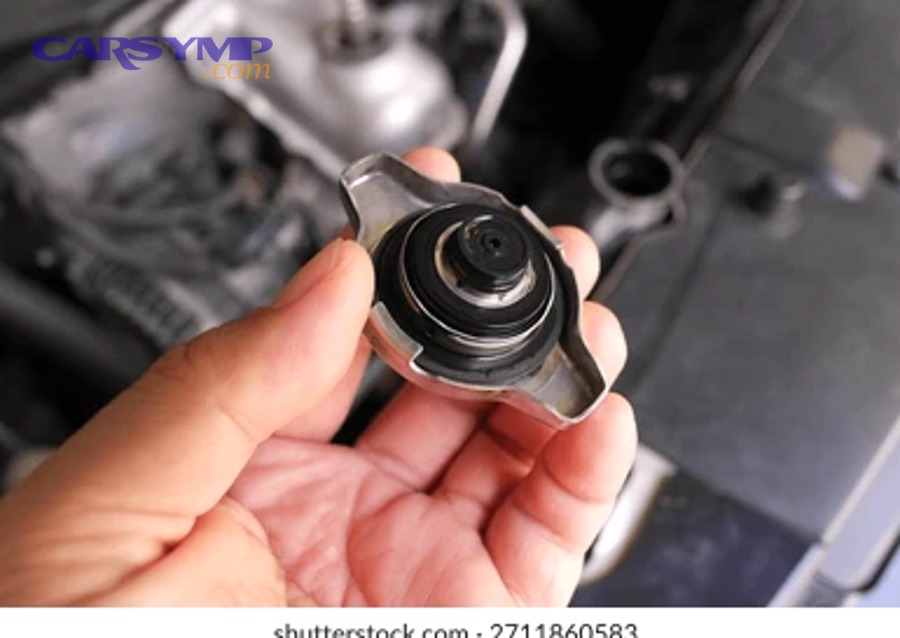
Should you replace the radiator cap as preventive maintenance?
Yes—sometimes you should replace a radiator cap as preventive maintenance because (1) it’s inexpensive relative to overheating risk, (2) rubber seals and springs fatigue with time, and (3) a weak cap can create repeat coolant loss and boil-over complaints.
Besides, a preventive cap is most logical when the cooling system is already open for service, such as during a coolant flush or radiator hose replacement.
Good preventive triggers:
- Cap is old/unknown age and shows gasket hardening or corrosion.
- You’ve had intermittent overflow events with no confirmed leak.
- You’re doing a coolant flush and want to reduce comeback risk.
When to avoid “automatic replacement”:
- The cap is clearly recent OEM and passes pressure test.
- The radiator neck is damaged (fix neck/radiator first).
- The system uses a specialized pressurized reservoir cap and the wrong part is easy to buy.
Disposal reminder: If you’re doing a flush at home, follow Disposal rules for old coolant. The U.S. EPA notes waste antifreeze may be illegal to dump and should not be discharged to storm drains or surface waters. (epa.gov)
When is it smarter to replace the thermostat vs re-test/bleed the system?
Thermostat replacement is smarter when there’s repeated temperature-control evidence, bleeding/re-test is smarter when symptoms follow recent coolant service, and deeper diagnosis is smarter when overheating persists with normal thermostat behavior.
Especially after a DIY flush, trapped air can create false overheating signals—so you should bleed and verify before blaming the thermostat.
Replace thermostat when:
- Warm-up curve is consistently abnormal (too slow or unstable).
- Temperature overshoots repeatedly under similar conditions.
- Bench test shows sticking or incomplete opening.
- You see physical issues: damaged seal, heavy corrosion, broken jiggle valve (if equipped).
Bleed/re-test first when:
- Symptoms started immediately after coolant work.
- You hear gurgling in the heater core.
- Heater output fluctuates with RPM.
- Coolant level changes after each heat cycle (air purging).
Cost context: If you’re budgeting the whole visit, combine parts decisions with a realistic Coolant flush cost estimate. A cap is usually minor; a thermostat can be moderate depending on access (some modern engines require housing assemblies and extra labor).
What special cases can change how thermostat and radiator cap checks work?
Special cases matter because electronic thermostats, wrong cap pressure ratings, vacuum valve failures, and high-heat operating conditions can change test interpretation and replacement choices even when the basic checks look “fine.”
Next, use these micro-scenarios to prevent misdiagnosis—especially on modern sealed systems or vehicles used for towing and track days.
How do electronic/map-controlled thermostats change the inspection and diagnosis process?
Electronic/map-controlled thermostats are thermostats with computer-influenced opening strategy that can target different temperatures by load and emissions needs, so you must verify commanded vs actual temperature rather than assuming one fixed opening point.
Then, shift your diagnosis from “does it open at X°F?” to “does the engine achieve the correct target range under the current operating mode?”
What changes in practice:
- The engine may run hotter under light load for efficiency and emissions strategy.
- Targets can shift based on ambient temperature, speed, and load.
- Codes may appear when actual temperature doesn’t match expected warm-up behavior.
Practical check:
- Use scan data (ECT, thermostat command if available).
- Look for consistent achievement of targets rather than a single “magic number.”
- If targets vary and the system tracks them, that’s often normal.
What happens if you use the wrong radiator cap pressure rating (higher or lower than OEM)?
A higher-than-OEM cap can increase stress on hoses and weak components, a lower-than-OEM cap reduces boiling margin and can cause overflow/boil-over, and the OEM-rated cap is optimal for balanced protection and performance.
However, pressure changes are not “free cooling upgrades”—they’re trade-offs that can expose the weakest part of an aging system.
Too high:
- More stress on radiator seams, heater core, hose joints.
- Can worsen small leaks by forcing seepage.
Too low:
- Earlier venting to overflow.
- Hot-spot boiling risk increases.
- Overheating complaints can appear “random” under load or heat soak.
If you’re tempted to “upgrade the cap” for towing, first ensure the radiator, hoses, and fans are healthy—then stick to OEM spec unless you understand the system margin.
Can a radiator cap’s vacuum valve cause hose collapse or coolant recovery problems?
Yes, a radiator cap vacuum valve can cause hose collapse or poor coolant recovery because (1) it can stick closed and prevent coolant return, (2) it can block proper pressure equalization during cool-down, and (3) it can leave the radiator low while the overflow bottle stays full.
Then, confirm the pattern over two heat cycles so you don’t confuse it with a simple overfill or a small leak.
Common signs:
- Upper hose looks partially collapsed after cool-down.
- Overflow bottle stays high, but radiator level is low (on radiator-cap systems).
- Temperature swings occur because the system draws air instead of coolant.
Simple service check:
- Inspect vacuum valve movement (if accessible).
- Confirm hose condition (a weak hose can collapse more easily under normal vacuum).
- Re-test with a known-good cap if uncertain.
Do altitude, towing, or track driving change thermostat/cap choices or testing priorities?
Yes, these conditions change priorities because (1) heat load increases, (2) boiling margin becomes more critical, and (3) small weaknesses show up faster—so you should prioritize pressure testing, airflow verification, and coolant condition checks first.
In short, the “best upgrade” is usually not a different thermostat or cap—it’s restoring the system to full integrity.
Altitude:
- Boiling points shift with atmospheric pressure, so system pressure control becomes more important.
- Focus on cap health and correct coolant mix.
Towing/heavy load:
- Confirm fans, radiator cleanliness, and cap pressure holding.
- Verify thermostat opens consistently under sustained load.
Track use:
- Consider higher-temp operation strategies carefully (some engines target hotter temps on purpose).
- Ensure hoses, clamps, and radiator are not marginal—track heat will find weak links.
Evidence (quick reference)
- Toxicity and exposure risk context: Colorado State University veterinary research related to ethylene glycol poisoning. (pubmed.ncbi.nlm.nih.gov)
- Temperature management and efficiency context: Hanyang University mechanical engineering research on coolant/oil temperature effects and Clemson University dissertation work linking coolant temperature control to efficiency considerations. (researchgate.net)
- Disposal guidance baseline: U.S. EPA guidance on antifreeze recycling and improper disposal risks. (epa.gov)