

Bleeding the cooling system after a hose replacement is the safest way to remove trapped air, restore steady coolant flow, and prevent overheating—because even a “full” reservoir can hide air pockets that interrupt circulation and cabin heat.
Next, you’ll learn whether you actually need to burp your specific system (radiator cap vs. expansion tank), plus the warning signs that tell you air is still trapped and your bleed isn’t finished.
Then, you’ll get a simple tool-and-supply checklist and the exact step-by-step process—including how to use a spill-free funnel or a bleeder screw without making a mess or introducing more air.
Introduce a new idea: once you understand the core burping procedure, troubleshooting becomes easier because every symptom (temp spikes, cold heater, gurgling) points back to either remaining air, a leak, or a separate cooling-system fault.
Do you need to bleed (burp) the cooling system after replacing a hose?
Yes—after a hose replacement, you usually need to bleed the cooling system because air enters during draining/refilling, air disrupts coolant circulation, and trapped air can cause temperature fluctuations and weak/no cabin heat.
To better understand why “usually” is the honest answer, start by thinking of your cooling system as a sealed loop that only works when coolant flows as a solid column.
 the Cooling System After a Hose Replacement: Step-by-Step for DIY Drivers 2")
Air gets into the system during hose replacement for three common reasons:
- The system is opened at a high point. Many upper radiator hoses and some heater hoses sit above portions of the engine water jacket, so when the hose comes off, coolant drains down and air replaces it.
- Refilling is not instantaneous. When you pour coolant in, it takes time to displace air. If you cap too soon, the remaining air becomes an air pocket.
- Small leaks can “pull” air in. A slightly loose clamp can seep coolant out and suck air in on cool-down cycles, slowly reintroducing air after you think you’re done. AutoZone notes that air can enter during coolant service if the system isn’t bled properly and that fluctuating temperature readings can be a symptom of air interfering with circulation or sensors.
Can you drive without bleeding if the coolant level looks “full”?
No—driving without bleeding is a gamble even if the reservoir looks full because the reservoir is not the whole system, air pockets can sit in the engine/heater core, and the first heat cycle often drops the coolant level once the thermostat opens.
More importantly, the “full” line on the overflow bottle only tells you what’s in the bottle—not whether the radiator and engine jackets are fully purged.
Here’s what often happens after a hose replacement when someone skips bleeding:
- The engine warms up, but the thermostat opens and the coolant level suddenly drops as coolant fills areas that were previously air.
- The heater stays lukewarm or cold because air in the heater core blocks hot coolant flow.
- The temperature gauge wanders or spikes at idle because an air pocket can interrupt flow near a sensor or hot spot.
A simple, safer compromise (if you must move the vehicle) is a very short, low-load drive only after you confirm stable temps and hot heat output—then you still recheck and top off after a full cool-down. In practice, a proper burp takes less time than a tow.
What symptoms tell you there’s still air trapped after a hose replacement?
There are 6 main signs of trapped air after a hose replacement: temperature gauge fluctuations, intermittent overheating, heater blowing cold, gurgling/sloshing sounds, bubbling at the fill point, and a coolant level that drops after cool-down.
Next, use these symptoms like a checklist—because they help you decide whether to keep bleeding, look for leaks, or suspect a component problem.
Common “air still in the system” signs (and what they usually mean):
- Temp gauge bounces up and down → air interrupts coolant flow or creates sensor “dry spots.” AutoZone explicitly lists fluctuating temperature as a common clue when air is present.
- Overheats at idle but improves when driving → airflow at speed helps the radiator compensate, but circulation may still be inconsistent.
- Heater blows cold while engine is hot → hot coolant isn’t moving through the heater core (air pocket or low coolant).
- Gurgling behind the dash → air moving through the heater core circuit.
- Bubbles keep appearing in a funnel/neck → air is still being purged.
- Level drops after the engine fully cools → air was displaced during the heat cycle and coolant replaced it.
What does “bleeding” vs “burping” a cooling system mean?
Bleeding (burping) a cooling system is the process of removing trapped air from a sealed coolant loop after service, typically by running the engine through thermostat-open cycles while topping off coolant until flow stabilizes and bubbles stop.
Then, once you understand the words, you can pick the right method for your car instead of guessing.
People use “bleed” and “burp” as synonyms in DIY contexts (same goal, same outcome), but there’s a practical distinction:
- “Bleeding” often implies using a bleeder screw/port that lets air escape at a designed high point.
- “Burping” often implies using a radiator neck or fill funnel and letting the system “belch” air during warm-up.
CarParts’ guide frames burping as a beginner-friendly way to remove air and discusses differences between radiator-cap fill systems and degas bottle designs.
What’s the difference between bleeding through a bleeder screw and burping through the radiator/expansion tank?
Bleeder screws win for precision, radiator-neck burping is best for simplicity, and vacuum-fill tools are optimal for speed and stubborn air—so the best method depends on what your system provides.
However, the method only works if you follow the system’s design instead of fighting it.
A quick comparison:
- Bleeder screw method
- Best for: vehicles designed with bleed ports (often near thermostat housing or high coolant crossover points).
- Pros: controlled release of air, less waiting for random bubbles.
- Cons: easy to strip if overtightened; you must keep the fill level up while bleeding.
- Radiator neck + spill-free funnel
- Best for: radiator-cap systems and many common DIY situations.
- Pros: easy visual confirmation (bubbles/level), inexpensive.
- Cons: can be messy without the right funnel; you must watch the level when the thermostat opens.
- Expansion tank burping (no radiator cap)
- Best for: “degas bottle” systems.
- Pros: you follow the intended fill point.
- Cons: trapped air can be stubborn if the fill point isn’t the system high point.
 the Cooling System After a Hose Replacement: Step-by-Step for DIY Drivers 3")
What does a properly bled system look like at the end of the process?
A properly bled cooling system shows stable operating temperature, steady cabin heat, no recurring bubbles at the fill point, and a coolant level that remains consistent after a complete cool-down and recheck.
More specifically, you’re looking for repeatability: the second heat cycle should look boring.
A “done” checklist you can trust:
- Temperature rises smoothly to normal and stays stable (no sudden spikes).
- Radiator fans cycle normally (if equipped) and the gauge doesn’t oscillate.
- Heater output is consistently hot at idle and while driving.
- Upper radiator hose gets hot when the thermostat opens (confirming circulation).
- After full cool-down, radiator (if accessible) and reservoir are at the correct level.
If the level keeps dropping after multiple heat cycles, assume either (1) you’re still purging air, or (2) you have a leak or cap issue pulling air back in.
What tools and supplies do DIY drivers need to bleed the cooling system safely?
DIY drivers need a safe fill setup, the correct coolant, and basic monitoring tools—because bleeding is mostly “controlled warm-up + controlled top-off” and the biggest risks are burns, spills, and introducing more air.
 the Cooling System After a Hose Replacement: Step-by-Step for DIY Drivers 4")
Next, set yourself up so you’re not improvising with hot coolant and paper towels.
Minimum (works on many cars):
- Correct coolant (matching spec) + distilled water if mixing concentrate
- Gloves and eye protection
- Catch pan + rags
- Basic hand tools for clamps/bleeder
- Funnel (ideally spill-free)
Recommended upgrades (make it easier and cleaner):
- Spill-free funnel kit with adapters (reduces mess and reintroducing air)
- Infrared thermometer (optional) to confirm thermostat opening and hose temps
- OBD2 scanner (optional) to monitor coolant temp sensor reading
Lisle’s spill-free funnel product notes that such funnels are designed to help remove trapped air pockets that can hamper cooling and heater performance. (homedepot.com)
Is a spill-proof funnel necessary, and when does it help most?
No, a spill-proof funnel isn’t strictly necessary—but it helps most when your radiator neck isn’t the highest point, when the system burps aggressively as the thermostat opens, and when you want a clear visual of bubbles without spilling coolant.
Specifically, it turns a messy “cap off and hope” procedure into a controlled process.
A spill-free funnel helps because it:
- Raises the effective fill point above nearby high spots.
- Provides a stable coolant “column” so the system can burp air without sucking air back.
- Lets you watch bubble activity (useful feedback).
This is also where you can naturally address How to choose correct hose material after a hose replacement: if you used the wrong hose (poor heat resistance, wrong reinforcement), it may soften, seep, or collapse under suction—creating new air-entry problems. Use OEM-quality molded hoses for tight bends and correct diameter; use high-temp coolant-rated hose for straight sections; and always match clamp type to hose material (worm gear vs spring clamps).
Do you need ramps/jacks to raise the front end to bleed air?
No, you don’t always need ramps—but raising the front end helps when the radiator cap/fill point needs to become the highest point, when the heater core sits high, or when your vehicle is known to trap air in upper passages.
Then, if you do raise the car, do it for physics—not folklore.
When raising helps:
- The fill point is low relative to engine/head coolant passages.
- You have persistent gurgling/no-heat symptoms.
- You can’t access a bleeder screw.
When raising doesn’t matter much:
- The fill point is already the system’s high point.
- The vehicle has effective bleed ports.
- The design is a true degas bottle system that self-purges when filled correctly.
Safety note: use ramps on level ground or jack stands properly—never rely on a jack alone.
Which coolant should you top off with after a hose replacement?
You should top off with the exact coolant type specified for your vehicle because mixing chemistries can reduce corrosion protection, and the wrong mix ratio can affect freeze/boil protection and heat transfer.
Moreover, “universal” coolant claims aren’t a license to mix anything into anything.
Practical approach:
- If you lost a small amount during hose replacement and you know what’s in the system, top off with the same type.
- If you don’t know what’s in there, it’s often safer to do a proper drain/refill (or confirm via service records) than to create a mystery cocktail.
CarParts highlights that coolant system designs differ (radiator cap vs degas bottle), which is another reason “one-size-fits-all” habits cause problems.
How do you bleed (burp) the cooling system after hose replacement step by step?
Burping the cooling system after hose replacement follows one main method—fill correctly, run the engine through thermostat-open cycles, keep the heater circuit flowing, and top off until bubbles stop—so you end with stable temperature and consistent heat.
Below is the step-by-step workflow that works across most vehicles, with branches for bleeder screws and expansion-tank systems.
What should you check before starting the bleeding process?
Before you start, confirm the hose replacement job is sealed and ready to hold pressure, because you cannot bleed air out reliably if coolant is leaking or if a clamp is loose.
Then, do these quick checks while everything is cold:
- Verify every clamp is seated behind the bead on the fitting.
- Inspect the new hose for kinks, rubbing points, or contact with sharp edges.
- Confirm the radiator cap and reservoir cap seals look intact (a weak cap can pull air back in).
- Ensure the reservoir hose (overflow line) is connected and not cracked.
- Make sure you’re filling at the correct point (radiator neck vs degas bottle).
If you’re in a breakdown situation, this is also where Emergency hose repair temporary measures belong: tape and sealant might get you off the shoulder, but they don’t restore proper pressure and they often introduce debris or leaks that will complicate bleeding. Use temporary measures only to reach a safe place, then redo the hose replacement properly and bleed again.
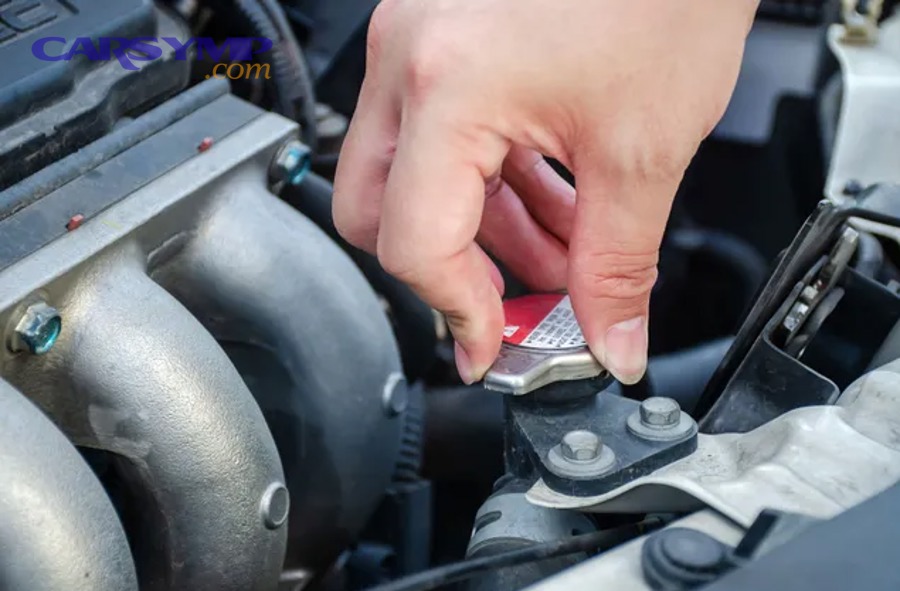
How do you burp a radiator-cap system using the warm-up cycle?
To burp a radiator-cap system, fill the radiator, run the engine until the thermostat opens, keep the fill point topped up while air escapes, and then recheck levels after a full cool-down—so air pockets are replaced by coolant.
Next, follow this sequence exactly to avoid reintroducing air.
Step-by-step (cold engine):
- Set cabin heat to HOT (fan can be low/medium). This opens the heater circuit on many vehicles and helps purge the heater core.
- Remove radiator cap and install a spill-free funnel (or use a standard funnel carefully).
- Fill radiator slowly to reduce foaming and air entrapment. Fill until the funnel has a small level (not full to the brim).
- Start engine and let it idle. Watch coolant level and bubble activity.
- As the engine warms, massage the upper radiator hose gently (careful—hose will get hot). This can help dislodge pockets.
- When the thermostat opens, you often see:
- a level drop in the funnel,
- a surge of bubbles,
- and the upper hose quickly getting hot.
Top off immediately so the system doesn’t gulp air.
- Let it idle until the radiator fans cycle (if equipped) and bubbles slow down.
- When bubble activity stops and the level stabilizes, shut the engine off.
- Let the engine cool completely, then:
- top off the radiator (if accessible),
- set reservoir to the correct “COLD” mark,
- reinstall the cap.
AutoZone’s bleeding guidance emphasizes that air can enter during coolant service and cause temperature fluctuations—your goal is to eliminate that interference by completing the heat cycle and top-off correctly.
 the Cooling System After a Hose Replacement: Step-by-Step for DIY Drivers 5")
How do you bleed a system with a bleeder screw?
To bleed with a bleeder screw, you open the bleed point at the system’s high spot while filling and warming up, then close it once coolant flows without bubbles—so trapped air escapes through the designed port instead of migrating randomly.
However, you must keep the fill level from dropping below the inlet, or you’ll just introduce more air.
General procedure (cold engine):
- Locate the bleeder screw (often near thermostat housing or a high coolant crossover).
- Begin filling at the proper fill point.
- Crack the bleeder open slightly (do not remove it).
- Watch for sputtering air followed by a steady coolant stream.
- Close the bleeder when flow becomes bubble-free.
- Run the engine and repeat if the manufacturer procedure calls for bleeding with the engine running.
A visual example of a bleeder screw location near a thermostat housing can look like this (vehicle layouts vary):
 the Cooling System After a Hose Replacement: Step-by-Step for DIY Drivers 6")
Tip: If the bleeder is plastic, treat it gently. “Snug” is enough—overtightening strips threads and creates leaks.
How do you bleed an expansion-tank (degas bottle) system with no radiator cap?
To bleed a degas-bottle system, you fill and purge from the pressurized expansion tank, run the engine through warm-up cycles while monitoring level changes, and follow any OEM bleed ports—so the system self-purges without a radiator neck fill point.
Next, the key is accepting that the tank is the control point.
Process:
- Fill the expansion tank to the “COLD” mark (or OEM specified).
- Start engine, set heat to HOT.
- Monitor level as the thermostat opens; top off as needed.
- If the system has a bleed port, follow the bleed-port procedure while maintaining tank level.
- Allow full cool-down, then recheck and set to “COLD” mark again.
CarParts specifically points out that you must know whether you have a degas bottle vs other tank types, because the fill/bleed approach changes with the design.
How long does bleeding take, and when is it “done”?
Bleeding typically takes 15–45 minutes plus a full cool-down, and it’s “done” when temperature is stable, heat output is consistently hot, bubbles stop, and coolant level stays consistent after a complete cool-down recheck.
 the Cooling System After a Hose Replacement: Step-by-Step for DIY Drivers 7")
In addition, some vehicles require more than one heat cycle after a hose replacement, especially if you lost a lot of coolant.
Factors that change the time:
- How much coolant drained during hose replacement
- Whether the system has bleed ports
- Whether the fill point is the highest point
- Thermostat opening temperature and warm-up time
- Cooling fan behavior (and ambient temperature)
Should you recheck coolant level after the engine cools down completely?
Yes—you should always recheck after a full cool-down because coolant contracts as it cools, remaining air can migrate and purge during the first drive, and the reservoir level can drop even when the engine ran “fine” initially.
Then, treat the cool-down check as part of the procedure, not optional “extra caution.”
Recheck rules of thumb:
- If the radiator has a cap, check radiator level when cold (if safe and accessible).
- Set the reservoir to the correct “COLD” line.
- Inspect for dried coolant residue around hose connections and the water pump area.
How many heat cycles are usually needed after a hose replacement?
There are 3 common outcomes: one heat cycle is enough for minor coolant loss, two cycles are typical after major loss or upper-hose work, and repeated cycles indicate either stubborn trapped air or a leak/cap issue pulling air back in.
More importantly, “more cycles” is not a solution if the level keeps dropping without explanation.
A practical grouping:
- 1 cycle: small top-off, no heater issues, no gurgling, stable temp.
- 2 cycles: big coolant loss, heater core involved, system design traps air.
- 3+ cycles: suspect leak, incorrect fill point, bad cap, thermostat issue, or combustion gas intrusion (rare but serious).
What should you do if the system still overheats or the heater stays cold after bleeding?
If overheating or cold heater persists after bleeding, you should treat it as a diagnostic problem: compare symptoms to air-pocket behavior, check for leaks and cap integrity, verify thermostat and pump function, and stop driving if temperatures spike—because continued overheating can damage the engine.
 the Cooling System After a Hose Replacement: Step-by-Step for DIY Drivers 8")
Next, use a structured “air vs leak vs component” approach instead of repeating the same burp process endlessly.
Professional tech guidance notes that air pockets can cause overheating and often appear after a system is drained and refilled, and that checking for bleeder ports and using technical resources is important. (motor.com)
Is the problem air pockets, a leak, or a stuck thermostat? How can you tell?
Air pockets usually cause fluctuating temps and gurgling, leaks typically cause repeated level loss and residue, and a stuck thermostat most often causes slow warm-up or overheating patterns depending on failure mode—so the “when and how” of overheating matters.
However, symptoms can overlap, so you confirm with simple tests.
Use this comparison:
- Air pocket likely if:
- temp gauge swings,
- heater is cold then suddenly hot,
- you hear sloshing,
- the level drops after the first heat cycle but stabilizes afterward.
- Leak likely if:
- level keeps dropping every day,
- there’s crusty residue at clamps/fittings,
- you smell coolant,
- the system won’t hold pressure.
- Thermostat issue likely if:
- engine takes unusually long to warm up (stuck open),
- overheats with a cold upper hose (stuck closed),
- you get a coolant temperature code (vehicle dependent).
If your heater blows cold, NAPA’s troubleshooting guidance reminds that multiple components can be involved (pump, heater core, actuator), so don’t assume it’s always “just air” if bleeding doesn’t change anything. (knowhow.napaonline.com)
Also keep your terminology straight: Vacuum hose leaks causing rough idle is a different system entirely. A vacuum leak can make the engine run lean and idle rough, but it won’t directly cause trapped air in the coolant loop. It can, however, distract you—so don’t chase vacuum symptoms when the real issue is cooling-system bleeding (or vice versa).
What common mistakes cause repeated air in the cooling system?
There are 7 common mistakes that keep reintroducing air: filling only the reservoir, capping too early, ignoring bleed ports, not running the heater circuit, using the wrong coolant mix, leaving clamps slightly loose, and using a weak radiator/pressure cap.
Then, fixing the mistake often fixes the symptom faster than “burping longer.”
Most common errors after a hose replacement:
- Only filling the overflow bottle (radiator remains low).
- Capping before the thermostat opens (air remains trapped).
- Not using the bleeder screw when the vehicle has one.
- Leaving heat OFF so the heater core doesn’t purge.
- Overfilling the funnel so it spills when the thermostat opens.
- Using mismatched hose/clamp combos (micro-leaks suck air on cool-down).
- Skipping the cool-down recheck (you miss the level drop).
When should you stop and get professional help immediately?
Yes—stop and seek professional help immediately if the engine overheats rapidly, the coolant boils over repeatedly, you see persistent bubbles that never stop, the heater remains cold after correct bleeding, or the coolant level drops continuously—because these signs can indicate serious faults beyond trapped air.
More importantly, “just one more drive” is how minor issues become engine damage.
Red flags:
- Temperature spikes into the danger zone within minutes.
- Coolant pushes out violently or pressurizes excessively.
- White smoke, coolant contamination, or repeated unexplained coolant loss.
- Persistent bubbles in the fill funnel even after multiple heat cycles (possible combustion gas intrusion).
A careful, limited diagnostic step is checking for obvious leaks and verifying correct procedure—but don’t keep driving an overheating engine “to see if it fixes itself.”
What advanced or vehicle-specific bleeding methods can prevent stubborn air pockets?
Advanced bleeding methods—like vacuum filling, OEM-specific bleed sequences, and temperature verification tools—are designed to remove stubborn air pockets faster and to distinguish “air problems” from look-alike failures that bleeding won’t fix.
 the Cooling System After a Hose Replacement: Step-by-Step for DIY Drivers 9")
Next, treat these as upgrades after you’ve done the standard burp correctly.
Should you use a vacuum fill tool (airlift) instead of manual burping?
Manual burping wins for cost, vacuum filling is best for speed and completeness, and bleeder-port bleeding is optimal when the vehicle is designed for it—so vacuum fill is most valuable when your system repeatedly traps air or you want near-zero mess.
However, vacuum fill requires the right tool and a good seal.
NAPA explains that radiator vacuum tools eliminate air by drawing a vacuum and then using that vacuum to pull coolant in, replacing the air with coolant.
This is why shops often prefer vacuum fill after major coolant service: it reduces the “burp and wait” time and lowers the chance of leaving a hidden pocket.
Which vehicles most often require a specific OEM bleed sequence or special bleed points?
There are 4 broad groups that often need special bleed attention: vehicles with remote degas bottles, engines with high-mounted coolant passages, platforms known to trap air without bleed ports, and designs with multiple bleed points—based on where the system’s high spots live.
Then, instead of guessing, check the service manual procedure for your exact model.
Common “special-sequence” patterns:
- No radiator cap + pressurized expansion tank (fill and bleed at tank/ports)
- Long coolant runs (some SUVs, rear-heater circuits, certain layouts)
- Multiple bleed screws (common on some European models)
- Known tricky fills (industry tech sources note some makes can be difficult to fill without creating air pockets) (motor.com)
How can you verify bleeding success using an OBD2 scanner or infrared thermometer?
You can verify success by confirming steady coolant temperature readings, consistent fan cycling thresholds, and predictable hose temperature changes—because stable heat transfer and circulation look consistent when measured.
More specifically, these tools reduce guesswork.
Practical checks:
- OBD2 scanner: watch live coolant temperature; look for smooth warm-up and stable plateau rather than saw-tooth spikes. AutoZone also notes scan tools can help diagnose coolant-temperature-related issues and codes. (autozone.com)
- Infrared thermometer: compare radiator inlet/outlet temps after warm-up; check heater hose temps (both should be hot if flow is good).
Evidence: According to a study by Institute of Space Technology (Islamabad) from the Department of Mechanical Engineering, in 2023, improving coolant-side heat transfer in a liquid-cooled spark-ignition engine reduced peak temperature load at hot zones by enhancing heat transfer pathways—supporting why stable coolant contact (not air gaps) matters for thermal control. (mdpi.com)
What problems mimic trapped air but won’t be fixed by bleeding?
Air pockets are fixable by bleeding, but a failing cap, collapsing hose, weak water pump, clogged heater core/radiator, or combustion gas intrusion can mimic “air symptoms” while requiring repair—so the antonym of “burpable” problems is “mechanical/chemical faults.”
In short, if correct bleeding changes nothing, stop treating it like an air-only issue.
Look-alike faults:
- Bad radiator/pressure cap pulling air back in on cool-down.
- Hose collapse under suction .
- Water pump impeller wear reducing circulation at idle.
- Heater core restriction causing cold cabin air even with proper coolant level.
- Combustion gas intrusion creating persistent bubbles and pressure.
If you’re stuck in a loop—bleed, top off, repeat, still overheats—use a pressure test and a professional diagnosis rather than “burping forever.”
Evidence (if any)
 the Cooling System After a Hose Replacement: Step-by-Step for DIY Drivers 10")
- AutoZone notes air can enter during coolant service if the system isn’t bled properly and that temperature fluctuations can be a symptom of air interfering with circulation or sensors.
- NAPA describes radiator vacuum tools drawing a vacuum to eliminate air and then using that vacuum to pull coolant in, replacing air with coolant.
- Lisle’s spill-free funnel listing highlights removing air pockets that hamper cooling and heater performance. (homedepot.com)
- MOTOR (professional tech publication) notes air pockets can develop after draining/refilling and can contribute to overheating, and recommends checking technical resources for bleed ports. (motor.com)