How to Diagnose and Fix Radiator Fan Problems: Complete Repair Guide for Car Owners
A malfunctioning radiator fan can lead to engine overheating, reduced AC performance, and costly damage if left unaddressed. Radiator fan problems typically stem from failed motors, blown fuses, faulty relays, damaged wiring, or malfunctioning temperature sensors, and diagnosing the exact cause requires systematic testing of electrical components and mechanical parts. This complete repair guide walks you through identifying common symptoms, performing step-by-step diagnostics, and implementing effective fixes whether you’re tackling a simple relay replacement or a full fan assembly overhaul.
Understanding how to diagnose radiator fan failures saves you time and money by pinpointing the root cause before replacing unnecessary parts. The diagnostic process moves from simple checks—testing fuses and relays—to more complex procedures like direct motor testing and sensor verification, ensuring you address the actual problem rather than guessing at solutions. Each diagnostic step builds on the previous one, creating a logical troubleshooting workflow that works for most vehicle makes and models.
Knowing when to repair versus replace components depends on the type of failure, repair costs, and your mechanical skill level. A blown fuse costs under $5 and takes minutes to replace, while a failed fan motor might run $200-$500 depending on whether you replace just the motor or the entire assembly. The decision between DIY repair and professional service hinges on your comfort with electrical diagnostics, access to proper tools, and the complexity of your vehicle’s cooling system configuration.
Beyond immediate repairs, preventive maintenance and understanding modern fan technologies help you avoid future failures and extend component life. Variable-speed fans controlled by PWM modules require different diagnostic approaches than traditional single-speed fans, and recognizing early warning signs like unusual noises or intermittent operation allows you to address issues before complete failure occurs. Let’s explore the comprehensive diagnostic and repair process that keeps your cooling system functioning reliably.
What Are the Common Signs That Your Radiator Fan Is Not Working?
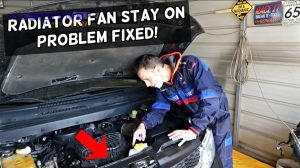
Your radiator fan is failing when your engine temperature gauge rises above normal, your AC blows warm air, the fan doesn’t spin when the engine reaches operating temperature, or you hear no fan motor noise after the car has been running for several minutes. Recognizing these symptoms early prevents engine damage and identifies whether you’re dealing with a complete fan failure or an intermittent electrical issue that requires deeper investigation.
How Can You Tell If It’s the Fan Motor or a Related Component?
The fan motor itself fails when direct 12-volt power application produces no spinning, while related component failures show different symptoms. If your fan doesn’t operate automatically but spins when you apply direct battery power, the motor works fine and the problem lies in the electrical control circuit—typically the relay, fuse, temperature sensor, or wiring connections. This simple distinction guides your diagnostic path and prevents unnecessary motor replacement.
Listening for clicks when the ignition turns on helps identify relay activity, while a visual inspection reveals corroded connectors, damaged fan blades, or loose mounting bolts. The fan motor should show minimal resistance when you spin the blades by hand with the engine off and cool—excessive friction indicates bearing failure or internal motor damage requiring replacement.
When Should the Radiator Fan Turn On?
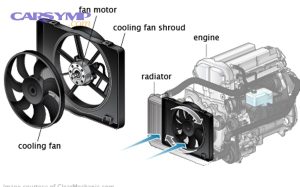
The radiator fan activates when coolant temperature reaches approximately 200-220°F (93-104°C) or immediately when you turn on the air conditioning system. Most modern vehicles use temperature sensors that send signals to the engine control module, which then activates the fan relay to supply power to the motor. Single-speed fans run at full power once triggered, while variable-speed fans adjust their RPM based on cooling demands, running slower at moderate temperatures and faster as heat increases.
Some vehicles employ dual fan systems where one fan serves the radiator and another cools the AC condenser, with each operating independently based on different temperature thresholds or AC system demand. Understanding your specific vehicle’s fan activation logic helps you determine whether delayed fan operation indicates a sensor problem or represents normal behavior during cool weather when the fan rarely needs to run.
How Do You Diagnose Radiator Fan Problems Step-by-Step?
Diagnosing radiator fan problems follows a systematic workflow starting with fuse and relay checks, progressing to direct motor testing, then examining wiring integrity, and finally verifying sensor operation. This logical sequence moves from the simplest, most common failures to more complex issues, saving time by eliminating obvious causes before diving into advanced diagnostics. Each test builds on the previous results, creating a diagnostic pathway that identifies the exact failed component.
Before starting any diagnostics, ensure the engine is completely cool to prevent burns from hot coolant or moving fan blades. Gather essential tools including a digital multimeter, test light, jumper wires, owner’s manual or repair database access for fuse/relay locations, and basic hand tools for component removal. Safety requires disconnecting the battery negative terminal before working near the fan motor to prevent unexpected fan activation during testing.
How to Check the Fuse and Relay?
Locate the fuse box—typically under the hood or beneath the dashboard—and consult your owner’s manual or the fuse box cover diagram to identify the cooling fan fuse and relay positions. Remove the fuse and inspect it visually for a broken metal strip inside the transparent casing, or use a multimeter set to continuity mode to confirm the fuse conducts electricity from end to end. A blown fuse indicates excessive current draw, often caused by a shorted motor or damaged wiring that must be identified before installing a replacement fuse.
Testing the relay requires removing it from its socket and using a multimeter to check for continuity between the relay terminals when power is applied to the coil pins. Most automotive relays are four or five-pin designs where applying 12 volts to the coil terminals should produce an audible click and create continuity between the power terminals. If the relay fails to click or doesn’t create continuity, replacement costs $15-$30 and takes less than a minute. Some advanced vehicles use solid-state fan control modules instead of simple relays, requiring dealer-level diagnostic equipment for proper testing.
How to Test the Fan Motor Directly?
Direct motor testing bypasses all control circuits to determine if the motor itself functions properly. Disconnect the fan motor electrical connector, identify the positive and negative terminals using a wiring diagram, and apply 12 volts directly from the battery using jumper wires—positive to positive, negative to ground. A functioning motor spins immediately at full speed, confirming the motor works and the problem lies in the control circuit.
If the motor fails to spin or runs slowly and draws excessive current (measure amperage if possible), motor replacement is necessary. Before condemning the motor, check that the fan blades rotate freely by hand with no power applied—a seized fan blade bearing or debris jamming the assembly creates similar symptoms. Variable-speed motors may show partial function, spinning at some speeds but not others, indicating internal controller failure within the motor assembly.
How to Diagnose Wiring and Connector Issues?
Wiring failures manifest as corroded connections, broken wires, melted insulation, or pushed-out connector pins that prevent proper electrical contact. Visually inspect all wiring from the fuse box through the relay to the fan motor, looking for green corrosion at connections, damaged wire insulation exposing copper, or connectors that appear heat-damaged with melted plastic. Wiggle connectors while observing fan operation or measuring voltage—intermittent function during wiggling confirms a poor connection.
Use a multimeter to test continuity along each wire from connector to connector, ensuring unbroken electrical paths throughout the circuit. Common Wiring repairs for fan circuit faults involves cutting out damaged sections, splicing in new automotive-grade wire, and sealing connections with solder and heat-shrink tubing to prevent future corrosion. Replacing entire connector pigtails provides more reliable long-term repairs than attempting to repair individual corroded pins, with pre-made pigtail assemblies available for most common vehicles at auto parts stores.
How to Check Temperature Sensors and Switches?
Temperature sensors and coolant temperature switches signal the engine control module when fan activation is necessary. Locate the sensor—usually threaded into the radiator or thermostat housing—and use a multimeter to measure resistance while the engine heats up from cold. Resistance should decrease smoothly as temperature rises, following specifications in your repair manual (typically thousands of ohms when cold, dropping to hundreds of ohms at operating temperature).
Testing the sensor signal requires a scan tool capable of reading live data streams, showing whether the sensor reports accurate coolant temperature to the computer. If sensor readings match actual coolant temperature but the fan still doesn’t activate, the problem shifts to the engine control module programming, wiring between the module and relay, or the relay itself. Some older vehicles use simple mechanical temperature switches that close contacts at a specific temperature—these can be tested by removing them, heating them in a water bath with a thermometer, and checking for continuity at the rated temperature.
What Are the Most Common Radiator Fan Failures and How Do You Fix Them?
The most common radiator fan failures include blown fuses ($3-$10 repair), faulty relays ($15-$30 replacement), failed motors ($150-$400 for motor only), damaged wiring requiring pigtail replacement ($20-$50 in parts), and broken fan blades necessitating assembly replacement ($200-$500). Understanding the repair difficulty and time investment for each failure type helps you decide between DIY repairs and professional service, with electrical component replacement generally being straightforward while motor and assembly replacement may require radiator removal on some vehicles.
Electrical failures account for approximately 60% of radiator fan problems, with mechanical motor failures and physical damage making up the remainder. To better understand the cooling system repair landscape, categorizing failures by type reveals patterns that inform preventive maintenance strategies and realistic repair expectations.

How to Fix a Faulty Relay or Blown Fuse?
Replace a faulty relay by pulling the old relay straight out of its socket and pushing a new relay with matching amperage rating and pin configuration firmly into place until it seats completely. Relays fail due to internal contact wear from repeated cycling, heat exposure in the engine compartment, or voltage spikes from other electrical system problems. Installing a new relay restores fan function immediately when the relay was the sole problem, making this the fastest and cheapest radiator fan repair.
Replacing a blown fuse requires identifying why the fuse blew before installing a new one—simply replacing the fuse without fixing the underlying short circuit results in another immediate failure. If the new fuse blows instantly upon installation, a direct short exists in the wiring or motor, requiring thorough inspection and repair before the system can function safely. Never install a higher-amperage fuse than specified as this removes critical circuit protection and can cause wiring fires or component damage.
How to Repair Damaged Wiring and Connectors?
Repairing damaged wiring involves cutting out the damaged section at least one inch beyond visible damage on each side, stripping 1/2 inch of insulation from the wire ends, and creating a proper splice using either crimp connectors or solder with heat-shrink tubing. Solder joints provide superior conductivity and mechanical strength compared to crimp connectors, but require proper technique—heat the wire until solder flows into it, creating a shiny, smooth joint rather than a dull, lumpy connection indicating a “cold solder joint” with high resistance.
Cover all exposed metal with heat-shrink tubing sized appropriately to the wire gauge, shrinking it with a heat gun or lighter while avoiding direct flame contact that damages the tubing. Route repaired wiring away from sharp edges, hot exhaust components, and moving parts, securing it with zip ties to factory wire looms or mounting points. Replacing connector pigtails eliminates the common problem of corroded pins inside connectors where individual wire repair proves difficult—pigtails come with pre-attached connectors and several inches of wire, allowing you to splice them into the existing harness and restore factory-quality connections.
How to Replace a Failed Fan Motor?
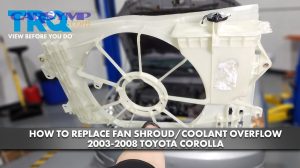
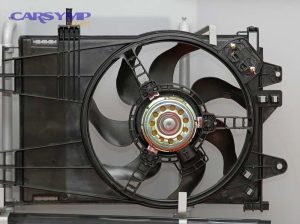
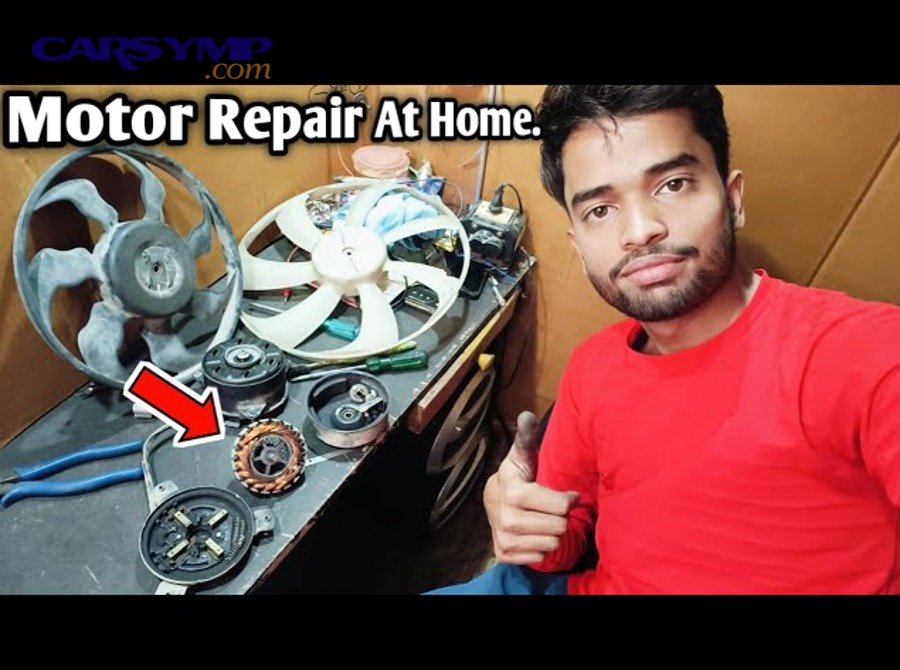
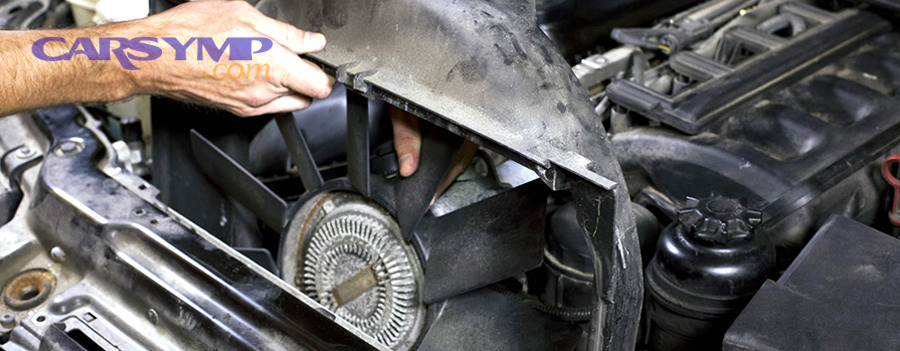
Replace a failed fan motor by first draining coolant if radiator removal is necessary for fan access, disconnecting the battery, removing the fan shroud bolts or clips, unplugging the electrical connector, and removing the bolts securing the fan motor to the radiator or shroud assembly. Some vehicles allow motor-only replacement where you separate the motor from the fan blade assembly, while others require complete fan assembly replacement as motors and blades come as integrated units from the manufacturer.
Motor-only replacement saves money but requires careful alignment when bolting the motor back to the fan blade assembly to prevent vibration and premature bearing failure. When replacing fan shroud assembly becomes necessary due to cracked plastic or missing mounting tabs, the Radiator fan repair labor time increases significantly as the radiator often must tilt forward or come out completely for shroud removal. Torque all mounting bolts to specification—over-tightening cracks plastic shrouds while under-tightening allows vibration that fatigues mounting points.
After installation, verify fan-on temperatures by running the engine until the cooling fan activates, confirming proper operation before closing the hood. According to data from RepairPal, radiator fan motor replacement costs average between $350-$475 including parts and labor, with radiator fan repair labor time typically ranging from 0.5 to 2.5 hours depending on vehicle accessibility and whether additional cooling system components require removal for fan access.
How to Fix Broken or Damaged Fan Blades?
Replace broken or damaged fan blades immediately as unbalanced fan assemblies create severe vibration that damages motor bearings, cracks radiator tanks, and breaks mounting brackets. Never attempt to operate the vehicle with missing or broken fan blade sections—the resulting imbalance can cause catastrophic failure where the entire fan assembly breaks free, puncturing the radiator or damaging other engine compartment components.
Most modern fan assemblies integrate molded plastic blades directly with the motor housing as a single non-serviceable unit, requiring complete assembly replacement rather than blade-only repair. Some older vehicles and heavy-duty applications use metal fan blades bolted to a motor-driven hub, allowing blade replacement independent of the motor, but these designs have become increasingly rare in passenger vehicles. When damage extends beyond the blades to include cracked shrouds or bent mounting brackets, comprehensive cooling system repair addressing all damaged components ensures reliable long-term operation and prevents cascade failures where one damaged part destroys newly installed components.
Should You Repair or Replace Your Radiator Fan?
You should repair your radiator fan when the failure involves inexpensive electrical components like relays, fuses, or wiring that cost under $50 and take less than an hour to fix, while replacement becomes necessary when the motor itself fails, blades are damaged, or the shroud assembly is cracked, with costs ranging from $200-$1,200 depending on parts and labor. The repair versus replacement decision balances immediate costs against long-term reliability, considering factors like vehicle age, the extent of damage, and whether related cooling system components show wear that makes comprehensive replacement more economical than piecemeal repairs.
Making an informed decision requires understanding the typical costs for different repair scenarios and honestly assessing your mechanical abilities. Below is a detailed Radiator fan repair cost estimate covering common failure modes and associated expenses.
| Failure Type | Parts Cost | Labor Time | Total DIY Cost | Professional Cost | Repair Difficulty |
|---|---|---|---|---|---|
| Blown Fuse | $3-$10 | 5-10 min | $5-$10 | $50-$80 | Easy |
| Faulty Relay | $15-$30 | 5-10 min | $15-$30 | $60-$100 | Easy |
| Damaged Wiring | $20-$50 | 1-2 hours | $25-$60 | $150-$250 | Moderate |
| Fan Motor Only | $80-$200 | 1-2 hours | $100-$250 | $350-$500 | Moderate |
| Fan Assembly | $150-$400 | 1.5-3 hours | $200-$500 | $500-$900 | Moderate-Hard |
| Dual Fan System | $300-$700 | 2-4 hours | $400-$800 | $800-$1,400 | Hard |
| Fan Control Module | $150-$400 | 1-2 hours | $200-$500 | $450-$750 | Hard |
This table illustrates the significant cost savings possible with DIY repairs, particularly for electrical component replacement that requires minimal technical expertise and no specialized tools beyond basic multimeters and hand tools.
What Are the Repair Costs for Different Components?
Relay replacement represents the most economical repair at $20-$50 total including parts and minimal labor, while full assembly replacement including motor, blades, and shroud reaches $800-$1,200 when performed professionally. Fan relay and resistor repair options provide cost-effective solutions for variable-speed fan systems where the relay controls fan speed through resistor packs—these components cost $30-$80 and install in minutes by plugging into existing harness connectors.
Wiring repairs for fan circuit faults typically cost $150-$250 professionally as technicians charge diagnostic time to trace the exact fault location plus repair time for proper soldering and insulation work. Professional shops may quote higher prices if extensive harness damage requires replacement of large sections or if repairs involve removing major components like the intake manifold to access buried wiring. Some repair shops refuse wiring repair jobs entirely, insisting on complete harness replacement at costs exceeding $500-$1,000, making DIY wiring repair particularly attractive for those with basic soldering skills.
Motor replacement varies significantly based on whether your vehicle allows motor-only replacement (saving $50-$150 compared to full assembly) and whether radiator removal is necessary for fan access (adding 1-2 hours of labor). Vehicles with tightly packaged engine bays may require AC system evacuation and recovery to remove the radiator for fan access, adding $150-$200 to professional repair costs for refrigerant handling that DIYers cannot legally perform without certification.
When Is DIY Repair Appropriate vs Professional Service?
DIY repair suits you when the problem involves simple component replacement like fuses, relays, or accessible motors, you own basic automotive tools including a multimeter, you can safely support your vehicle on jack stands for undercar access, and you’re comfortable working with 12-volt electrical systems without risk of shock or short circuits. Successfully completing DIY radiator fan repairs requires following manufacturer procedures for any cooling system draining and refilling, properly bleeding air from the system after reassembly, and verifying repair success through test drives and temperature monitoring.
Professional service becomes necessary when diagnostics require dealer-level scan tools to read proprietary control modules, repairs demand AC system evacuation beyond DIY scope, extensive disassembly of engine components blocks your access to the fan assembly, or you lack the time and workspace for multi-hour repair projects. Modern vehicles with Fan control module diagnosis requirements often need computerized programming after module replacement, a service only dealerships and well-equipped independent shops can provide.
Safety considerations override cost savings—never attempt repairs beyond your skill level where mistakes risk engine damage, cooling system failure, or personal injury from moving fan blades or hot coolant. According to ASE-certified mechanics, approximately 30% of DIY radiator fan repairs require professional correction due to improper diagnosis, incorrect part installation, or inadequate testing before assuming the repair succeeded.
What Tools and Parts Do You Need for Radiator Fan Repair?
Radiator fan repair requires a digital multimeter for electrical testing ($20-$100), test light for quick circuit checks ($10-$20), jumper wires with alligator clips for direct motor testing ($5-$15), basic hand tools including sockets and wrenches ($50-$200 if purchasing new), and access to a repair manual or online database for component locations and specifications ($30-$50 annual subscription or free through some public libraries). Proper tool selection determines diagnostic accuracy and repair success, with quality multimeters providing reliable voltage and resistance measurements essential for pinpointing electrical faults.
Replacement parts must match your vehicle’s year, make, model, and engine configuration exactly as fan assemblies vary significantly between trim levels and engine options. Gathering the vehicle identification number (VIN) before purchasing parts ensures correct matching, particularly for vehicles with multiple cooling fan options where single-fan and dual-fan systems use completely different assemblies despite identical external appearance.
Essential tools for comprehensive radiator fan diagnostics and repair include:
- Digital multimeter with DC voltage, resistance, and continuity testing capabilities
- Automotive test light with sharp probe for piercing wire insulation
- Jumper wires rated for at least 15 amps with secure alligator clips
- Socket set including metric and standard sizes from 8mm-19mm
- Screwdriver set with Phillips and flathead tips
- Wire strippers and crimping tool for electrical repairs
- Heat gun or lighter for shrinking heat-shrink tubing
- Drain pan for coolant if radiator removal is necessary
- Safety glasses and gloves for protection from hot coolant and sharp edges
- Jack stands and wheel chocks if undercar access is required
- Repair manual or online service information subscription
Advanced diagnostics benefit from infrared thermometers ($20-$60) for verifying coolant temperatures match gauge readings, automotive scan tools ($100-$400) for reading trouble codes and live sensor data, and amp clamps ($30-$80) for measuring fan motor current draw to identify failing motors before complete failure occurs.
Where Can You Find the Right Replacement Parts?
Find replacement radiator fan parts at AutoZone, O’Reilly Auto Parts, Advance Auto Parts, NAPA, dealership parts departments, and online retailers like RockAuto or Amazon, with part availability and pricing varying significantly between sources. Providing your VIN to parts counter staff ensures they look up the correct application, though visual verification of the new part against your old part before installation catches lookup errors that sometimes occur with vehicles that had mid-year changes or multiple fan options.
OEM (Original Equipment Manufacturer) parts from dealerships cost 20-40% more than aftermarket equivalents but guarantee exact fit and function identical to the factory installation. Aftermarket parts from reputable brands like Dorman, Four Seasons, or TYC provide reliable performance at lower prices, though quality varies among manufacturers—reading online reviews specific to your vehicle application reveals which aftermarket brands experience premature failures. Some auto parts stores offer lifetime warranties on electrical components including fan motors and relays, providing free replacement if failures occur, though labor costs for reinstallation remain your responsibility.
Cross-referencing part numbers across multiple suppliers identifies the lowest prices while ensuring you purchase the identical part rather than cheaper alternatives with reduced specifications. Online parts shopping typically offers 30-50% savings compared to local stores, though shipping times delay repairs and return processes for incorrect parts involve shipping hassles that walk-in purchases at local stores avoid entirely.
How Can You Prevent Radiator Fan Failures and Extend Component Life?
Preventing radiator fan failures requires maintaining clean electrical connections through annual inspection and contact cleaning, flushing the cooling system every 30,000-50,000 miles to prevent corrosion that damages sensors and switches, protecting wiring from heat damage by ensuring proper routing away from exhaust manifolds, and addressing minor issues like intermittent operation before they cascade into complete failures. Proactive maintenance extends fan motor life from the typical 80,000-120,000-mile range to 150,000+ miles by eliminating corrosion, reducing electrical resistance that strains motors, and preventing the gradual deterioration that leads to unexpected breakdowns.
Environmental factors accelerate radiator fan wear, with road salt causing connector corrosion in winter climates, excessive heat degrading wiring insulation in desert regions, and high-humidity coastal environments promoting electrical connection oxidation. Understanding your climate’s specific challenges allows targeted preventive measures that address the most likely failure modes for your geographic location.
What Regular Maintenance Should You Perform on Your Cooling System?
Perform cooling system flushes every 30,000 miles or per manufacturer recommendations to remove corrosion and contaminants that foul temperature sensors and reduce heat transfer efficiency requiring fans to run longer and more frequently. Flushing involves draining old coolant, circulating a cleaning solution through the system, draining the cleaner, and refilling with fresh 50/50 coolant mixture that provides optimal corrosion protection and heat transfer properties. Using the coolant type specified by your vehicle manufacturer (typically OAT, HOAT, or conventional green coolant) prevents chemical incompatibilities that cause premature sensor and gasket failures.
Inspect electrical connections at the fan motor, relay, and fuse annually by disconnecting connectors, checking for green corrosion or white oxidation deposits, and cleaning contacts with electrical contact cleaner and a small wire brush. Apply a thin coating of dielectric grease to connector pins before reassembly to seal out moisture and prevent future corrosion—this five-minute maintenance task prevents 80% of wiring-related fan failures according to automotive electrical specialists.
Check fan operation monthly by running the engine until the fan activates, verifying smooth quiet operation without rattling, squealing, or vibration indicating bearing wear or blade imbalance. Catching early warning signs allows proactive replacement before roadside breakdowns or cascading damage where a seized motor damages wiring or a broken blade punctures the radiator.
How Do Modern Variable-Speed Fans Differ from Traditional Single-Speed Fans?
Modern variable-speed fans adjust RPM continuously based on cooling demands using PWM (Pulse Width Modulation) control signals from the engine computer, providing quieter operation, reduced electrical load, and more precise temperature control compared to traditional single-speed fans that run at full power whenever activated. Variable-speed systems require different diagnostic approaches as partial function—like running only at low speed—indicates controller failures rather than complete motor or relay problems seen in single-speed systems.

PWM-controlled fans integrate solid-state controllers within the motor assembly or use separate fan control modules mounted on the shroud, with failures requiring complete assembly or module replacement as individual components aren’t serviceable. Diagnostic procedures for variable-speed fans involve scanning for trouble codes related to fan speed deviation, monitoring commanded versus actual fan speeds using live data streams, and testing PWM signal integrity with oscilloscopes or advanced multimeters capable of measuring duty cycle.
Brushless DC motor technology appears in premium vehicles, offering extended service life over traditional brushed motors by eliminating the carbon brush wear that typically limits motor lifespan to 1,000-1,500 operating hours. These sophisticated motors cost $400-$800 to replace but rarely fail before 200,000 miles when properly maintained, and their failures often relate to control electronics rather than mechanical wear.
What Are the Warning Signs of Future Fan Failure?
Warning signs of impending fan failure include intermittent operation where the fan occasionally fails to start then works normally after restart, unusual bearing noise progressing from slight whir to audible grinding or squealing, slow fan startup taking 2-3 seconds longer than normal to reach full speed, and vibration felt through the radiator or visible as wobbling fan blades. These symptoms indicate deteriorating bearings, weakening motor windings, or corroding electrical contacts that soon progress to complete failure.
Monitoring the AC performance impact of fan repairs reveals cooling system health, as weak fan performance shows up first as reduced AC effectiveness on hot days when maximum fan airflow is crucial for condenser cooling. If your AC gradually blows warmer air over weeks or months despite proper refrigerant levels, suspect declining fan performance even if the fan still operates during normal engine cooling cycles.
Addressing early warning signs prevents roadside breakdowns and reduces total repair costs by catching failures before damaged components destroy related parts—a failing motor drawing excessive current can melt relay contacts and fuse holders, requiring more extensive repairs than simple motor replacement would have involved if performed proactively.
How Does Climate Affect Radiator Fan Performance and Longevity?
Hot climates reduce fan motor lifespan by 30-40% compared to moderate climates as motors run more frequently and at higher temperatures that degrade bearing lubricants and stress electrical windings. Desert environments accelerate plastic shroud degradation through UV exposure, causing mounting tabs to become brittle and break during routine maintenance or minor impacts. Vehicles operating in sustained high-temperature conditions benefit from upgrading to heavy-duty or performance fan assemblies designed for continuous-duty operation rather than the intermittent cycling typical of moderate climates.
Cold climates extend motor mechanical life but accelerate electrical corrosion through road salt exposure, with connector pins and relay contacts suffering the most damage as salt residue absorbs moisture and creates electrolytic corrosion. Annual connector cleaning and dielectric grease application provides essential protection in winter climates, while upgrading to sealed weatherproof connectors available from aftermarket sources eliminates most salt-related failures.
Climate-specific fan configurations exist for some vehicle models, with northern-market versions using different fan blade designs or motor specifications optimized for cold-weather operation where lower airflow suffices due to naturally cool ambient temperatures. Understanding your climate’s impact on cooling system components helps set realistic expectations for service life and identifies when environmental factors rather than defects cause premature failures requiring more frequent replacement than national average data suggests.