How to Replace Spark Plugs: Complete DIY Guide for Car Owners (Tools + Steps)
Replacing spark plugs is a straightforward DIY car repair task that requires basic tools, proper technique, and approximately 30 minutes to 3 hours depending on your vehicle’s engine configuration. This maintenance procedure involves removing worn spark plugs, inspecting them for damage, adjusting the gap on new plugs, and installing them with the correct torque specification to ensure optimal engine performance and fuel efficiency.
Understanding what tools you need before starting prevents delays and ensures a smooth replacement process. The essential toolkit includes a spark plug socket (typically 5/8″ or 13/16″), a ratchet wrench, extension bars, a torque wrench for proper tightening, a gap gauge for measurement, and dielectric grease to protect electrical connections. Additional items like compressed air, a flashlight, and anti-seize compound make the job easier and help avoid breaking plugs in the head.
Recognizing Spark plug symptoms helps you determine when replacement becomes necessary rather than waiting for complete failure. Common indicators include rough idle, difficulty starting the engine, decreased fuel efficiency, sluggish acceleration, and engine misfires that may trigger your check engine light. These symptoms often appear gradually as the electrodes wear down and the gap widens beyond manufacturer specifications.
The Spark plug replacement interval by engine varies significantly based on plug type and driving conditions, with conventional copper plugs requiring changes every 30,000 miles while premium iridium or platinum plugs can last 60,000 to 100,000 miles. Below, we’ll walk through the complete replacement process, from preparation and removal to installation and testing, ensuring you can confidently perform this essential maintenance task.
What Tools Do You Need to Replace Spark Plugs?
You need six essential tools to replace spark plugs: a spark plug socket, ratchet wrench, extension bar, torque wrench, gap gauge, and dielectric grease. These tools allow you to safely remove old plugs, verify new plug specifications, and install replacements with proper torque to prevent damage.
To better understand each tool’s role, let’s examine the specific requirements and why each piece matters for successful spark plug replacement.
What Size Spark Plug Socket Do You Need?
The correct spark plug socket size is either 5/8 inch (16mm) or 13/16 inch (21mm), depending on your vehicle’s make and model. Most four-cylinder and V6 engines use the 5/8-inch size, while some larger V8 engines and European vehicles require the 13/16-inch variant.
Specifically, spark plug sockets differ from standard sockets in three critical ways. First, they feature a deep-well design that accommodates the spark plug’s extended length, typically 3 to 6 inches deep compared to standard sockets. Second, they include either a rubber insert or magnetic core that grips the spark plug porcelain insulator, preventing the plug from falling during removal and installation. Third, the interior walls are cushioned to protect the ceramic insulator from cracking during the extraction process.
You can identify the correct size by consulting your vehicle’s owner’s manual or by measuring the hex portion of your current spark plug with calipers. Most auto parts stores also provide fitment guides based on your vehicle’s year, make, and model. Purchasing a socket set that includes both common sizes ensures you’re prepared for different vehicles.
The magnetic insert design offers advantages over rubber inserts for deep plug wells. The magnet maintains a firm grip even when the socket is fully extended, reducing the risk of dropping a plug into the engine bay. However, rubber inserts provide better cushioning and work well for easily accessible plugs where drop risk is minimal.
Do You Need a Torque Wrench for Spark Plugs?
Yes, you need a torque wrench for spark plug installation because proper torque prevents combustion gas leaks, cylinder head thread damage, and spark plug breakage during future removal. Under-torquing allows gases to escape and can cause the plug to vibrate loose, while over-torquing crushes the gasket, strips threads, or cracks the porcelain insulator.
Moreover, spark plug torque specifications typically range from 10 to 20 foot-pounds for gasket-style plugs and 15 to 25 foot-pounds for taper-seat plugs, though exact values vary by manufacturer. Modern aluminum cylinder heads are particularly susceptible to thread damage because aluminum is softer than the steel threads on spark plugs. Exceeding the specified torque by even 5 foot-pounds can strip the threads, requiring expensive thread repair with a heli-coil insert or, in severe cases, cylinder head replacement.
The consequences of incorrect torque extend beyond immediate installation concerns. Under-torqued plugs allow hot combustion gases to blow past the threads, creating a phenomenon called “blow-by” that erodes both the plug threads and the cylinder head threads. This erosion makes future plug removal difficult and increases the likelihood of breaking a plug during the next service interval.
If you don’t have a torque wrench, you can use the “quarter-turn method” as an alternative, though it’s less precise. After hand-threading the plug until it seats against the cylinder head, use a ratchet to tighten it an additional quarter turn (90 degrees) for gasket-style plugs or one-sixteenth turn (approximately 15 degrees) for taper-seat plugs. This method works reasonably well but carries higher risk of error, particularly for inexperienced mechanics.
How Do You Replace Spark Plugs Step-by-Step?
You replace spark plugs by following seven sequential steps: prepare your vehicle, locate and access the plugs, remove ignition components, extract old plugs, inspect and gap new plugs, install replacements with proper torque, and reconnect all components before testing. This process takes 30 minutes for easily accessible four-cylinder engines or up to 3 hours for V6 and V8 configurations requiring intake manifold removal.
However, success depends on careful preparation and attention to detail at each stage. Let’s explore the specific procedures that ensure safe, effective spark plug replacement.
How Do You Prepare Your Vehicle for Spark Plug Replacement?
Preparing your vehicle requires allowing the engine to cool completely (minimum 2 hours), disconnecting the negative battery terminal, removing any engine covers, and cleaning debris from around the spark plug wells. These steps prevent burns, electrical shock, contamination of the combustion chamber, and damage to sensitive components.
Specifically, engine bay temperature can exceed 200°F immediately after operation, making spark plug removal dangerous and difficult. Hot aluminum cylinder heads expand, tightening their grip on spark plug threads and increasing the risk of thread damage or plug breakage during removal. Waiting for complete cooling allows the metal to contract, loosening the threads and making extraction significantly easier.
The battery disconnection prevents accidental starter engagement while your hands are near the engine and protects sensitive electronic modules from voltage spikes that can occur when disconnecting ignition coils. Simply loosen the bolt on the negative terminal and move the cable away from the battery post, ensuring it cannot accidentally make contact during your work.
Cleaning the spark plug well area before removal is crucial because any debris—dirt, leaves, oil, or carbon deposits—can fall into the cylinder when you remove the plug. Even small particles can score cylinder walls, damage piston rings, or become trapped between valve seats, causing compression loss and costly engine damage. Use compressed air to blow debris away from the plug wells, directing the airflow laterally rather than downward to avoid pushing contaminants deeper into crevices.
For vehicles with plastic engine covers, removal typically requires loosening several bolts or pull-clips. Take photos of the cover position and any vacuum lines or electrical connectors you disconnect to ensure correct reassembly. Label each connector with tape if multiple similar plugs are present.
How Do You Remove Old Spark Plugs Safely?
You remove old spark plugs safely by first disconnecting the ignition wires or coil packs using a twisting motion, then using a spark plug socket with extension to turn the plug counterclockwise while applying steady, controlled pressure. If resistance occurs, stop immediately and apply penetrating oil rather than forcing the plug, which can break the ceramic insulator or strip the threads.
To illustrate, coil-on-plug systems require removing the electrical connector by pressing the release tab and pulling straight up, then unscrewing the retaining bolt (typically 8mm or 10mm) before lifting the coil from the plug well. Traditional ignition wire systems need you to grasp the boot—not the wire—and twist approximately one-quarter turn in each direction to break the seal before pulling straight up. Pulling on the wire instead of the boot damages the internal conductor and causes future misfires.
Once the ignition component is removed, inspect inside the plug well with a flashlight. Look for oil pooling, which indicates a leaking valve cover gasket that should be addressed before installing new plugs. Oil-contaminated plugs foul quickly and won’t last their expected service life.
Insert the spark plug socket onto the extension bar and attach your ratchet, ensuring the socket fully engages the plug’s hex portion. Apply steady counterclockwise pressure, listening and feeling for the initial break of the threads. If the plug doesn’t begin to turn within the first 10 to 15 degrees of rotation, stop and reassess.
For stuck plugs, spray a small amount of penetrating oil around the base of the plug where it enters the cylinder head. Allow 10 to 15 minutes for the oil to seep into the threads, then try again with gentle pressure. Severely stuck plugs may require alternating between slight clockwise and counterclockwise movements to gradually work them free. Never use excessive force, as broken plugs require special extraction tools and can turn a simple maintenance task into an expensive repair.
Keep removed plugs in order by cylinder number, laying them on a clean surface or placing them in a numbered container. This organization allows you to inspect each plug and correlate any unusual wear patterns with specific cylinders, providing diagnostic information about your engine’s condition.
How Do You Install New Spark Plugs Correctly?
You install new spark plugs correctly by first verifying the part number matches your old plugs, checking and adjusting the gap to manufacturer specifications, hand-threading the plug clockwise until it seats firmly, then tightening to the specified torque value before reconnecting ignition components. This sequence prevents cross-threading, ensures proper combustion chamber sealing, and maintains correct electrode spacing for reliable ignition.
More specifically, compare the new spark plug side-by-side with the old one you removed, checking that the thread length, hex size, and electrode configuration match exactly. Installing a plug with incorrect thread reach (the length of the threaded portion) can cause serious engine damage—too short leaves a gap where carbon builds up, while too long interferes with piston movement.
Checking the gap is essential even though many modern spark plugs come pre-gapped from the factory. Shipping and handling can alter the gap, and the gap measurement on the package represents a general specification that may not match your vehicle’s exact requirement. Insert your gap gauge between the center electrode and the ground electrode (the L-shaped metal piece) and measure the distance. Most vehicles require gaps between 0.028 and 0.060 inches, with the exact specification listed in your owner’s manual or on the underhood emissions label.
If adjustment is needed, use the gap tool to carefully bend only the ground electrode—never the center electrode, especially on platinum or iridium plugs where the precious metal tip is fragile. To increase the gap, gently pry the ground electrode away from the center; to decrease it, lightly tap the ground electrode on a firm surface until the gap narrows to specification.
Before installation, some mechanics apply a small amount of anti-seize compound to the threads, though this practice is debated. Modern spark plugs with nickel-plated shells generally don’t require anti-seize, and manufacturers like NGK specifically recommend against it because it can cause over-torquing. The compound acts as a lubricant, causing you to achieve the target torque reading with less actual clamping force, potentially leaving the plug loose. However, for aluminum heads with steel plugs in harsh environments, a very thin coating on the first few threads (avoiding the last threads near the gasket) provides insurance against seized plugs during future removal.
Start threading the new plug by hand, turning it clockwise. The plug should spin freely and smoothly for the first several turns. If you feel any binding or resistance before the plug seats against the gasket, back it out completely and try again—you may be cross-threading. Use the extension bar without the ratchet attached for better feel during initial threading, especially in deep plug wells where alignment is difficult.
Once the plug is hand-tight against the cylinder head (you’ll feel firm resistance), attach your torque wrench and tighten to the manufacturer’s specification. Most torque wrenches click when the set value is reached; stop immediately when you hear or feel this signal. After installation, apply a small amount of dielectric grease inside the boot of the ignition wire or coil, coating the ceramic insulator’s terminal. This grease prevents moisture intrusion, improves electrical conductivity, and makes future removal easier.
Reconnect the ignition wire or coil pack, ensuring it seats fully with an audible click or firm seating. For coil-on-plug systems, tighten the retaining bolt to specification (usually 7-10 foot-pounds). For plug wires, verify each wire connects to its correct plug according to the firing order—crossing wires causes severe misfires and can damage the catalytic converter.

What Are the Signs That You Need to Replace Spark Plugs?
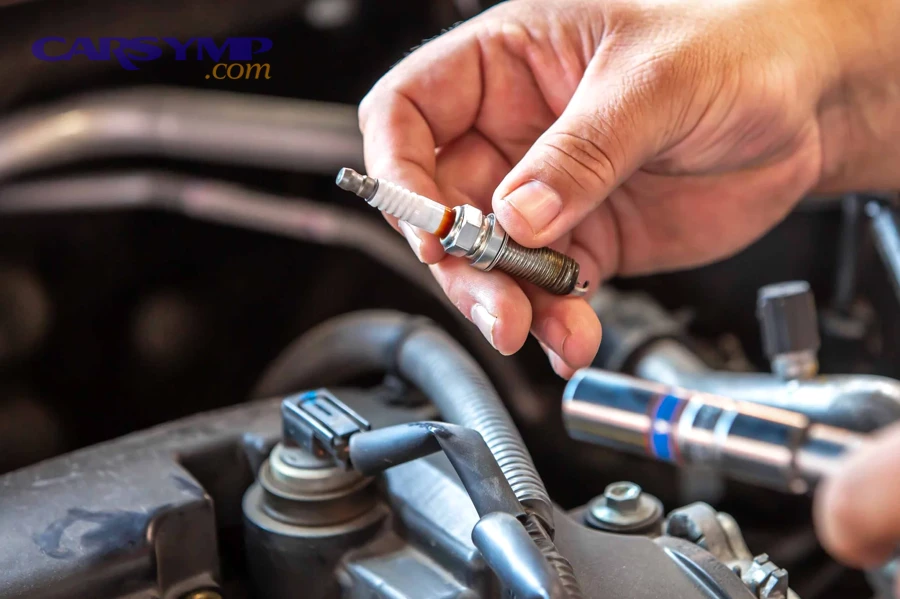
You need to replace spark plugs when you experience rough engine idle, difficulty starting, decreased fuel efficiency, sluggish acceleration, or engine misfires—symptoms caused by worn electrodes, widened gaps, or carbon buildup that prevents reliable spark generation. These indicators often develop gradually over thousands of miles as normal combustion erodes the center and ground electrodes.
In addition, understanding both performance symptoms and visual inspection criteria helps you determine the optimal replacement timing. Let’s examine the specific warning signs and maintenance intervals.
What Symptoms Indicate Worn Spark Plugs?
Worn spark plugs cause six primary symptoms: rough or unstable idle with noticeable engine vibration, hard starting that requires extended cranking, reduced fuel economy of 10-30%, hesitation or sluggish acceleration during throttle application, engine misfires producing a stumbling sensation, and illuminated check engine light with misfire codes P0300-P0308. These symptoms worsen progressively as electrode wear increases gap width beyond specification.
Specifically, rough idle occurs because worn spark plugs fail to ignite the air-fuel mixture consistently across all cylinders. When one or more cylinders misfire intermittently, the engine’s power output becomes uneven, causing the vibration you feel through the steering wheel and floorboard. At idle, the engine typically runs at 600-900 RPM, and even slight inconsistency in combustion becomes immediately noticeable.
Hard starting happens when the widened electrode gap requires higher voltage to produce a spark than the ignition system can reliably deliver, especially during cold starts when engine oil is thick and compression is slightly reduced. You’ll notice the engine cranks longer than normal—3 to 5 seconds instead of 1 to 2—before it catches and runs. In severe cases, the engine may start then immediately stall, requiring multiple attempts.
Decreased fuel efficiency results from incomplete combustion caused by weak or mistimed sparks. Modern engines rely on precise ignition timing and complete fuel burn to achieve optimal miles per gallon. When spark plugs degrade, some fuel passes through the cylinder unburned, wasting gasoline and potentially damaging the catalytic converter over time. You might notice 2-4 fewer miles per gallon initially, increasing to 10-30% fuel economy loss as the plugs approach complete failure.
Sluggish acceleration and hesitation occur because worn plugs cannot reliably ignite the richer air-fuel mixture provided during hard acceleration. When you press the accelerator pedal, the engine control module commands more fuel, but if the spark isn’t strong enough to ignite this denser mixture, the engine hesitates or stumbles. This symptom is particularly dangerous when merging into highway traffic or passing slower vehicles.
Engine misfires produce diagnostic trouble codes that your vehicle’s computer stores, illuminating the check engine light. Code P0300 indicates random misfires across multiple cylinders, while codes P0301 through P0308 specify which cylinder is misfiring (P0301 = cylinder 1, P0302 = cylinder 2, etc.). Modern vehicles can detect misfires as infrequent as 1-2% of combustion events, providing early warning before performance significantly degrades.
After replacement, clearing misfire codes using an OBD-II scanner allows the engine computer to relearn baseline parameters with the new plugs. Some vehicles clear codes automatically after several successful drive cycles, but manually clearing them provides immediate confirmation that the new plugs have resolved the misfires.
How Often Should You Replace Spark Plugs?
You should replace spark plugs every 30,000-40,000 miles for conventional copper plugs, every 60,000 miles for single platinum or single iridium plugs, and every 80,000-100,000 miles for double platinum or double iridium plugs, though severe driving conditions may require more frequent changes. These intervals represent manufacturer recommendations under normal operating conditions.
Moreover, the spark plug replacement interval by engine type varies because different engines operate under different stress levels. Four-cylinder engines typically run at higher RPM for highway cruising compared to V6 or V8 engines, generating more spark events over the same distance. Turbocharged engines subject spark plugs to higher combustion pressures and temperatures, accelerating electrode erosion despite using premium plug materials.
Driving conditions significantly impact plug life beyond the base material lifespan. Severe conditions include frequent short trips (less than 10 miles) where the engine never reaches full operating temperature, stop-and-go city driving with extensive idling, towing heavy loads, or operating in extremely dusty environments. These conditions can reduce spark plug life by 20-40% compared to highway driving at steady speeds.
The Spark plug replacement labor time varies from 0.5 hours for easily accessible four-cylinder engines to 3-4 hours for V6 and V8 engines requiring intake manifold removal. This labor difference significantly affects the total Spark plug replacement cost estimate—a job that costs $150-200 for a simple four-cylinder might reach $400-600 for a complex V8 where the rear plugs require major component removal.
Consulting your vehicle’s maintenance schedule in the owner’s manual provides the most accurate replacement interval for your specific engine. Manufacturers test extensively to determine optimal service intervals that balance plug performance, engine protection, and maintenance costs. Following these recommendations prevents both premature replacement (wasting money) and delayed replacement (risking engine damage).
However, if you purchase a used vehicle with unknown maintenance history, inspect the spark plugs at your earliest opportunity. Severely worn plugs indicate neglected maintenance and suggest you should check other service items like air filters, transmission fluid, and coolant. Replacing questionable plugs immediately provides peace of mind and prevents potential breakdowns.
How Do You Inspect Spark Plugs for Problems?
You inspect spark plugs for problems by examining electrode condition, insulator color, gap width, and the presence of deposits or damage after removal. These visual indicators reveal not only spark plug wear but also underlying engine conditions like rich fuel mixture, oil consumption, overheating, or coolant leaks that require attention.
Furthermore, proper spark plug reading techniques help diagnose engine problems before they cause expensive damage. Let’s explore what normal and abnormal spark plugs look like.
What Does a Healthy Spark Plug Look Like?
A healthy spark plug displays light tan to grayish-brown deposits on the insulator, minimal electrode erosion with sharp, well-defined edges, and a gap within 0.005 inches of the original specification. This appearance indicates proper air-fuel mixture, correct heat range selection, and normal combustion temperatures.
To illustrate, the insulator color provides the most important diagnostic information about combustion quality. Light tan or grayish-brown indicates the ideal air-fuel ratio of approximately 14.7:1 (stoichiometric mixture) and combustion temperatures in the optimal 1,300-1,500°F range. This color results from normal carbon and chemical deposits that accumulate during thousands of combustion events without excessive buildup or burning.
The center electrode should show slight rounding of edges due to normal spark erosion but should maintain its general shape and size. Conventional copper-core plugs erode faster, developing a noticeably rounded center electrode after 20,000-30,000 miles, while platinum and iridium plugs maintain sharper electrode profiles for 60,000-100,000 miles due to their superior resistance to spark erosion.
The ground electrode experiences less erosion than the center electrode because the spark jumps from center to ground, concentrating erosion at the center point. However, the ground electrode should remain properly aligned with the center electrode, not bent toward or away from it. Misalignment indicates either impact damage (dropped plug) or severe overheating that softened the metal.
Gap width measurement reveals how much electrode erosion has occurred. Most spark plugs widen by 0.001-0.002 inches per 10,000 miles of service. A plug gapped at 0.040 inches when new might measure 0.044-0.048 inches after 30,000 miles—still within acceptable range but approaching replacement. When the gap exceeds 0.055-0.060 inches, the ignition system struggles to generate sufficient voltage, causing misfires especially during cold starts or acceleration.
The shell threads should be clean and undamaged, showing silver or nickel plating without rust, carbon buildup, or aluminum deposits from the cylinder head. Thread condition indicates whether proper torque was used during installation and whether anti-seize compound was applied appropriately on previous installations.
What Do Damaged Spark Plugs Look Like?
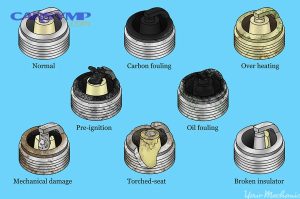
Damaged spark plugs display black carbon deposits (carbon fouling), white blistered insulators (overheating), wet oil coating (oil fouling), ash deposits (burning oil), broken porcelain (mechanical damage), or severely eroded electrodes with rounded edges (normal wear exceeded). Each condition indicates specific engine problems requiring diagnosis and repair.
Specifically, carbon-fouled plugs appear coated with dry, black, sooty carbon deposits that insulate the electrodes and prevent spark generation. This condition results from an overly rich air-fuel mixture (too much fuel, not enough air), often caused by faulty oxygen sensors, leaking fuel injectors, or restricted air filters. Engines that idle extensively or only drive short distances before shutdown are particularly prone to carbon fouling because they never reach temperatures high enough to burn off deposits.
Oil-fouled plugs show wet, black, oily deposits coating the threads, insulator, and electrodes. This oil enters the combustion chamber through worn piston rings, damaged cylinder walls, or leaking valve stem seals. Cylinder leakdown testing can determine whether the oil source is the rings or valves. Oil fouling requires engine repair—simply replacing the plugs provides temporary improvement but the new plugs will foul again within a few thousand miles.
White or blistered insulators indicate severe overheating from pre-ignition (fuel igniting before the spark fires) or detonation (uncontrolled explosion after the spark). Common causes include lean air-fuel mixture, incorrect ignition timing, low-octane fuel in high-compression engines, or spark plugs with too high a heat range. Continued operation with overheating plugs can cause piston damage, blown head gaskets, or catastrophic engine failure.
Ash deposits appear as light brown or white crusty buildup on the insulator and around the ground electrode, indicating oil burning from the same sources as oil fouling but in smaller quantities. The deposits accumulate because oil additives don’t burn cleanly during combustion, leaving mineral ash residue. While less immediately problematic than wet oil fouling, ash buildup gradually insulates electrodes and widens the gap as crusty deposits push the ground electrode away from center.
Broken or cracked porcelain insulators result from mechanical damage—typically dropping the spark plug during installation or over-torquing during tightening. A cracked insulator allows voltage to arc to the metal shell instead of jumping the gap, preventing combustion in that cylinder. Never install a spark plug with any visible cracks, chips, or damage to the porcelain.
Severely eroded electrodes with deep grooves and rounded, mushroom-shaped tips indicate plugs far beyond their service life. The center electrode may wear down to half its original diameter, and the ground electrode develops a deep groove where the spark repeatedly strikes the same spot. These plugs require significantly higher voltage to fire, stressing the ignition coil and potentially causing coil failure.
According to research by Champion Spark Plugs published in their technical service bulletin, spark plugs with gaps widened beyond 0.060 inches require up to 30% more voltage to fire compared to properly gapped plugs, dramatically reducing ignition system reliability and service life.
Is Replacing Spark Plugs Difficult for Beginners?
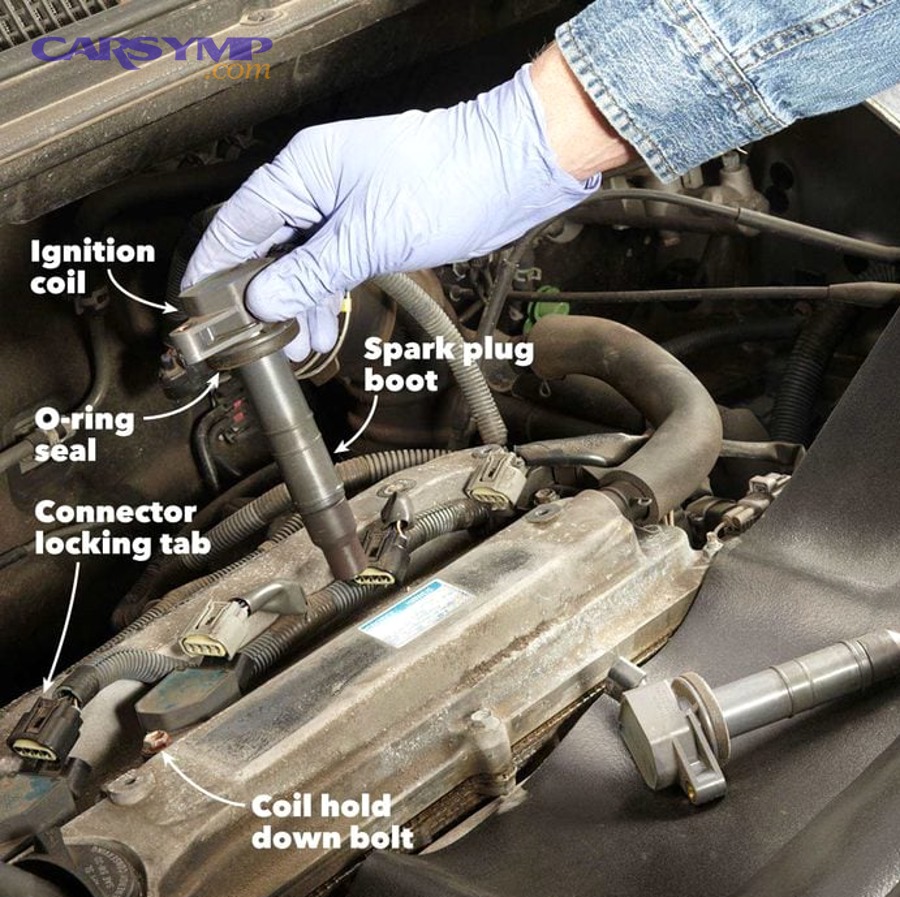
Replacing spark plugs is not difficult for beginners on most four-cylinder engines with easily accessible plug wells, but becomes moderately challenging on V6 and V8 engines where rear plugs require removing intake manifolds, coil packs, or other components. The task requires basic mechanical skills, attention to detail, and proper tools rather than advanced automotive knowledge.
Nevertheless, understanding the specific challenges and time requirements helps you decide whether to tackle this DIY car repair or seek professional assistance. Let’s examine the factors that make the job easy or difficult.
What Makes Spark Plug Replacement Easy or Difficult?
Spark plug replacement becomes easy when plugs are accessible from the top of the engine, when the vehicle uses a simple coil-on-plug system with visible retaining bolts, and when cylinder heads are aluminum without stuck plugs. Conversely, difficulty increases with rear-cylinder access requiring intake removal, transverse-mounted V6 engines with firewall clearance issues, and stuck plugs in iron heads that risk breakage during removal.
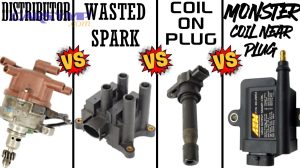
For example, inline four-cylinder engines like those in Honda Civics, Toyota Corollas, and Ford Focus models position all spark plugs along the top of the engine with open access and no obstruction. You can complete the entire job in 30-45 minutes with minimal tool requirements. These engines often use individual ignition coils (Coil-on-plug vs wire ignition differences) that simply unbolt and lift off, providing immediate access to spark plug wells.
In contrast, transverse-mounted V6 engines—common in front-wheel-drive sedans and crossovers—position three cylinders toward the front of the vehicle and three toward the rear, against the firewall. The rear plugs on these engines require removing the upper intake plenum, throttle body, and various hoses and cables to create access. This work transforms a simple 30-minute task into a 2-3 hour job requiring intake manifold gasket replacement and careful reassembly to prevent vacuum leaks.
Longitudinally-mounted V8 engines in rear-wheel-drive trucks and SUVs present different challenges. While the front-cylinder plugs may be easily accessible, rear plugs often hide behind air conditioning lines, power steering pumps, or transmission bell housings. Some vehicles require raising the engine or removing accessories to access certain plugs, significantly increasing complexity.
Stuck plugs create the most significant difficulty for beginners because removing them without breakage requires patience and experience. Ford’s Triton V8 engines (4.6L and 5.4L) from 1997-2008 are notorious for spark plugs that break during removal, leaving the lower threaded portion in the cylinder head and requiring special extraction tools. This design flaw results from two-piece plugs where the shell separates from the electrode assembly under the thermal cycling and carbon buildup that occurs over 100,000+ miles.
Stripped threads and anti-seize guidance become critical when working with aluminum cylinder heads. If previous mechanics over-torqued plugs or if carbon buildup has effectively welded the plug to the head, removal can strip the soft aluminum threads. Thread repair kits using heli-coil inserts can restore the threads, but installation requires precise drilling and tapping—beyond most beginners’ capabilities.
The coil-on-plug vs wire ignition differences also affect difficulty. Traditional plug wire systems simply require pulling boots off plugs and tracking which wire connects to which cylinder—a simple organization task. Coil-on-plug systems require disconnecting electrical connectors and removing multiple bolts, but provide better reliability and easier troubleshooting since each coil is independent.
How Long Does It Take to Replace Spark Plugs?
It takes 30 minutes to 1 hour for beginners to replace spark plugs on four-cylinder engines with easy access, 1.5 to 2.5 hours on V6 engines with moderate access, and 2 to 4 hours on V8 engines or vehicles requiring intake manifold removal. Professional mechanics complete the same jobs in approximately half the time due to experience and specialized tools.
More specifically, the spark plug replacement labor time factors into total cost when considering professional service versus DIY. A dealership or independent shop typically charges 1 hour of labor for a straightforward four-cylinder job, 2-2.5 hours for a V6, and 3-4 hours for complex V8 or horizontally-opposed engines. With shop labor rates ranging from $80-150 per hour depending on location and facility type, labor often exceeds parts cost.
First-time DIYers should budget extra time for organization, double-checking work, and consulting repair manuals or online resources. If you’ve never changed spark plugs before, allocate an entire afternoon for a straightforward job and a full day for complex engines. This conservative approach prevents rushing, which leads to cross-threaded plugs, incorrect torque, or misrouted ignition wires.
Professional mechanics achieve faster completion through established procedures and specialized tools. They might use flexible magnetic retrieval tools that instantly grab dropped parts, pneumatic ratchets that speed bolt removal, and diagnostic scanners that quickly verify repair success. Additionally, they’ve performed the procedure hundreds of times and can identify potential problems—like stuck plugs or damaged coil boots—before they become major issues.
Time also varies based on whether you’re performing related maintenance simultaneously. Many mechanics recommend replacing spark plug wires or ignition coils at the same time as spark plugs if these components show wear, since the access work is already complete. This bundled approach saves labor cost on future service but extends the current job by 30-60 minutes.
According to data from RepairPal, the average spark plug replacement labor time ranges from 0.6 hours for a 2020 Honda Civic to 3.2 hours for a 2015 Chevrolet Silverado 5.3L V8, demonstrating how dramatically vehicle design impacts service complexity.
What Are the Different Types of Spark Plugs and Which Should You Choose?
Different spark plug types include copper, single platinum, double platinum, single iridium, double iridium, and ruthenium, with copper offering the lowest cost but shortest lifespan (20,000-30,000 miles), platinum and iridium providing mid-range performance (60,000-100,000 miles), and ruthenium delivering the longest service life (120,000-150,000 miles) at premium prices. Your choice should match manufacturer recommendations while considering your budget, driving conditions, and how long you plan to keep the vehicle.
However, understanding the specific differences in materials, performance characteristics, and applications helps you make an informed decision that balances cost and reliability. Let’s examine each type in detail.
What Is the Difference Between Copper, Platinum, and Iridium Spark Plugs?
Copper spark plugs use a solid copper core electrode with nickel-alloy coating ($2-4 each, 20,000-30,000 mile lifespan), platinum plugs feature a platinum disc welded to the center electrode ($4-8 each, 60,000 mile lifespan), and iridium plugs use a laser-welded iridium tip ($8-15 each, 80,000-100,000 mile lifespan)—each offering progressively better durability, heat resistance, and electrode erosion resistance.
To illustrate the Iridium vs platinum plug comparison, the fundamental difference lies in material properties and electrode design. Platinum has a melting point of 3,215°F and excellent corrosion resistance but remains relatively soft compared to iridium. Iridium melts at 4,471°F—the second-highest melting point of all metals—and is approximately six times harder than platinum, allowing manufacturers to use much smaller electrode diameters.
Smaller electrode diameters provide performance advantages beyond simple longevity. Iridium plugs typically use 0.4-0.6mm diameter center electrodes compared to 2.5mm for conventional copper plugs. This reduction concentrates the electrical field, requiring lower voltage to generate a spark and producing a more focused, intense spark that ignites lean fuel mixtures more reliably. Engines designed for maximum fuel efficiency often specify iridium plugs because they fire consistently even with air-fuel ratios as lean as 16:1 or 17:1.
Copper spark plugs, despite their short lifespan, excel in specific applications. High-performance engines, especially turbocharged or supercharged variants, generate extreme cylinder pressures and temperatures that can damage the precious metal tips on platinum or iridium plugs. Copper’s superior heat dissipation characteristics prevent pre-ignition and detonation in these demanding conditions. Additionally, copper plugs cost $8-16 for a complete set, making frequent replacement economically practical for track-day vehicles or racing applications where plugs require changing every 5,000-10,000 miles regardless of material.
Platinum plugs occupy the middle ground in both performance and cost. Single platinum plugs feature a platinum disc only on the center electrode and work best in distributor-based ignition systems. Double platinum plugs add a platinum disc to the ground electrode and are designed for waste-spark ignition systems where the spark alternates polarity, requiring durability on both electrodes.
The spark plug replacement cost estimate for materials varies significantly by type and engine cylinder count. A four-cylinder engine equipped with copper plugs costs $8-16 for parts, platinum runs $16-32, single iridium costs $32-60, and premium double iridium or ruthenium reaches $60-120. When factoring in replacement frequency, iridium’s higher initial cost often provides better value—spending $50 for 100,000 miles ($0.50 per 1,000 miles) versus $15 every 30,000 miles for copper ($0.50 per 1,000 miles) equals similar lifetime cost with significantly less labor.
Are Ruthenium Spark Plugs Worth the Extra Cost?
Yes, ruthenium spark plugs are worth the extra cost ($12-25 each) if your vehicle will accumulate 120,000-150,000 miles during your ownership, if you drive in severe conditions requiring maximum durability, or if your engine specifically benefits from the finest possible electrode tips. The 20-50% longer service life compared to iridium justifies the 50-150% higher purchase price for long-term owners.
Specifically, ruthenium—a platinum-group metal with a melting point of 4,423°F—allows even smaller electrode diameters than iridium, typically 0.4mm or less. This ultra-fine electrode design delivers the strongest electrical field concentration available in production spark plugs, ensuring reliable ignition even with extremely lean fuel mixtures or high levels of exhaust gas recirculation (EGR) designed to reduce emissions.
Manufacturers like NGK developed ruthenium technology to meet the demands of modern turbocharged direct-injection engines that combine high boost pressures, lean operation, and extended service intervals. The Toyota Prius, for example, specifies ruthenium plugs to maintain reliable ignition during the frequent engine start-stop cycles inherent to hybrid operation. These plugs must fire dependably even when the engine has been off and is relatively cool, conditions that challenge conventional spark plugs.
The cost-benefit analysis depends on your ownership timeline and driving patterns. If you lease vehicles on 3-year cycles or trade cars every 50,000 miles, you’ll never realize ruthenium’s longevity advantage—standard iridium plugs will outlast your ownership period. However, if you drive 20,000+ miles annually and plan to keep your vehicle for 5-7 years, ruthenium’s extended service interval eliminates one or two replacement cycles, saving both parts and labor costs over the vehicle’s life with you.
Severe driving conditions—extensive towing, racing, extreme temperature operation, or frequent short trips—accelerate spark plug wear regardless of material. In these applications, ruthenium’s superior durability prevents premature failure and maintains consistent performance longer than less durable alternatives. Commercial vehicles and fleet applications particularly benefit from extended service intervals that reduce maintenance downtime and associated costs.
However, cost considerations must be balanced against actual benefits. For a naturally aspirated four-cylinder commuter car driven 12,000 miles annually under normal conditions, premium ruthenium plugs provide minimal practical advantage over quality iridium plugs at half the price. The ignition system and fuel mixture don’t stress the plugs sufficiently to justify the upgrade.
What Is the Difference Between Single and Double Platinum/Iridium Plugs?
Single platinum or iridium plugs feature precious metal only on the center electrode, while double platinum or double iridium plugs add precious metal to the ground electrode as well, making them essential for waste-spark ignition systems where current flows bidirectionally. Single precious metal plugs cost $4-10 each compared to $8-20 for double precious metal variants.
Moreover, understanding waste-spark ignition system operation clarifies why electrode configuration matters. Traditional distributor-based ignition systems fire each spark plug once per engine cycle using a single ignition coil. The spark always jumps from center electrode to ground electrode in the same direction, concentrating erosion on the center electrode. Single precious metal plugs perfectly suit these systems because only the center electrode experiences significant wear.
Waste-spark systems, common on 1990s-2000s vehicles before coil-on-plug became standard, use one ignition coil for two cylinders. The coil fires both plugs simultaneously—one during its power stroke (firing the air-fuel mixture) and one during its exhaust stroke (wasting the spark). The system alternates polarity with each firing, so the spark sometimes jumps from center to ground and sometimes from ground to center. This bidirectional operation erodes both electrodes equally, requiring precious metal protection on both.
Coil-on-plug systems use individual coils for each cylinder and maintain consistent polarity, technically requiring only single precious metal plugs. However, many manufacturers specify double precious metal plugs for these systems anyway, arguing that the ground electrode’s proximity to combustion heat justifies additional protection even without erosion from alternating polarity.
Installing single precious metal plugs in a waste-spark system or vice versa creates premature failure. The unprotected electrode erodes rapidly, widening the gap and causing misfires within 20,000-30,000 miles despite the precious metal center electrode remaining in good condition. Always verify your ignition system type and match the plug specification accordingly.
The performance difference between correctly matched single and double variants is negligible in most applications. A single platinum plug in a distributor system performs identically to a double platinum plug if both are properly gapped and installed. The price difference—typically $2-5 per plug—exists purely to account for the additional precious metal content, not for superior performance.
How Do You Choose the Right Spark Plug for Your Vehicle?
You choose the right spark plug by consulting your vehicle owner’s manual or the underhood emissions label for the OEM specification, then selecting plugs that match the correct thread size, reach, heat range, and electrode configuration. Cross-referencing manufacturer part numbers using spark plug catalogs from NGK, Denso, Champion, or Autolite ensures compatibility and prevents engine damage from incorrect specifications.
Specifically, the owner’s manual lists spark plug specifications in the maintenance section, typically including the manufacturer part number (like NGK ILZKR7B11 or Denso K20TXR-U11), thread diameter and pitch (14mm x 1.25 is most common), reach length (typically 19mm or 26.5mm), and recommended gap setting. These specifications are critical—installing a plug with incorrect thread diameter causes immediate damage, while wrong reach length leads to poor performance or piston contact.
Heat range represents the spark plug’s ability to dissipate combustion heat through its insulator into the cylinder head. Plugs with low heat range numbers run cooler and suit high-performance engines with advanced timing, while high heat range numbers run hotter and prevent fouling in engines that operate at lower temperatures. Installing a plug with incorrect heat range causes either fouling (too cold) or pre-ignition (too hot).
The spark plug manufacturer coding system varies by brand, making cross-referencing essential. NGK uses a complex alphanumeric system where the first letter indicates thread diameter, subsequent letters describe features, and numbers represent heat range. For example, in “ILZKR7B11,” the “I” means iridium center electrode, “L” indicates extended insulator nose, “Z” denotes projected insulator tip, “K” means removable terminal nut, “R” adds resistor, “7” is the heat range, and “11” represents a 1.1mm gap.
Aftermarket performance spark plugs claim benefits like increased horsepower, improved throttle response, and better fuel economy, but these claims are largely marketing unless your engine is significantly modified. A stock engine already uses spark plugs optimized for its design—switching to a different brand or style while maintaining correct specifications provides no measurable benefit. However, modified engines with altered compression ratios, forced induction, or aggressive tuning may benefit from colder heat range plugs designed for racing applications.
When purchasing replacement plugs, verify the part number matches your vehicle’s year, make, model, engine size, and sometimes even the transmission type. Many auto parts stores offer online fitment tools where you enter this information and receive recommended plug specifications. Always buy the complete set—mixing old and new plugs or different brands creates inconsistent performance.
Correct spark plug gap and torque specifications appear in the vehicle service manual or on comparison charts in spark plug catalogs. Modern vehicles with precise fuel injection and ignition timing require gaps accurate within ±0.002 inches. Deviating from specification by even 0.005 inches can cause misfires or hard starting, particularly in cold weather or during rapid acceleration.
According to technical guidance published by NGK Spark Plugs, using spark plugs with incorrect heat range is one of the three most common causes of preventable engine damage, alongside improper gap settings and incorrect torque application during installation.

This comprehensive guide covers everything from basic tool requirements through advanced spark plug selection, giving you the knowledge to confidently perform this essential maintenance task. Following these procedures ensures reliable engine performance, optimal fuel efficiency, and prevents costly damage from worn or improperly installed spark plugs.