Fix EGR Valve Problems: Repair vs Replace Costs & Step-by-Step Guide for Car Owners
If your car is running rough or the check engine light points to EGR flow, the fastest way to “fix it” is to confirm the failure mode (stuck, clogged, leaking, or control fault) and then choose the right remedy—cleaning passages, repairing controls, or replacing the valve if it has failed—so the problem doesn’t return.
Most drivers get stuck on the decision moment: repair vs replace. The practical answer depends on what failed (carbon blockage vs electronic failure), how accessible the valve is, and whether related components are causing false EGR symptoms.
Cost is the next friction point. An accurate estimate comes from separating the job into diagnosis time, parts quality (OEM vs aftermarket), and the biggest variable of all—how many components must be removed to reach the valve.
Introduce a new idea: once you understand how EGR works and how to test it, you can fix the problem confidently, avoid common DIY mistakes, and verify the repair with real scan data instead of guessing.
What is an EGR valve and what does “EGR valve repair” actually mean?
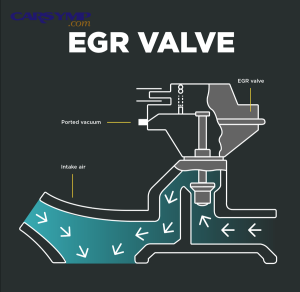
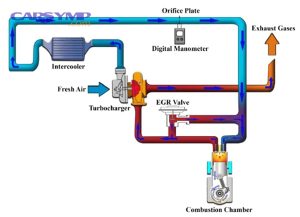
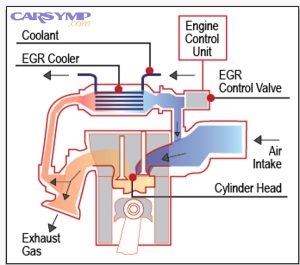
An EGR valve is an emissions-control valve that meters a small amount of exhaust back into the intake to lower combustion temperature and reduce NOx, and “EGR valve repair” usually means one of three things: cleaning carbon restrictions, fixing the control system, or replacing the valve if it has failed.
To better understand why the “repair” label is confusing, it helps to picture the EGR system as a simple loop: exhaust source → EGR valve → passages/tube → intake manifold, with the engine computer commanding flow based on load and temperature.
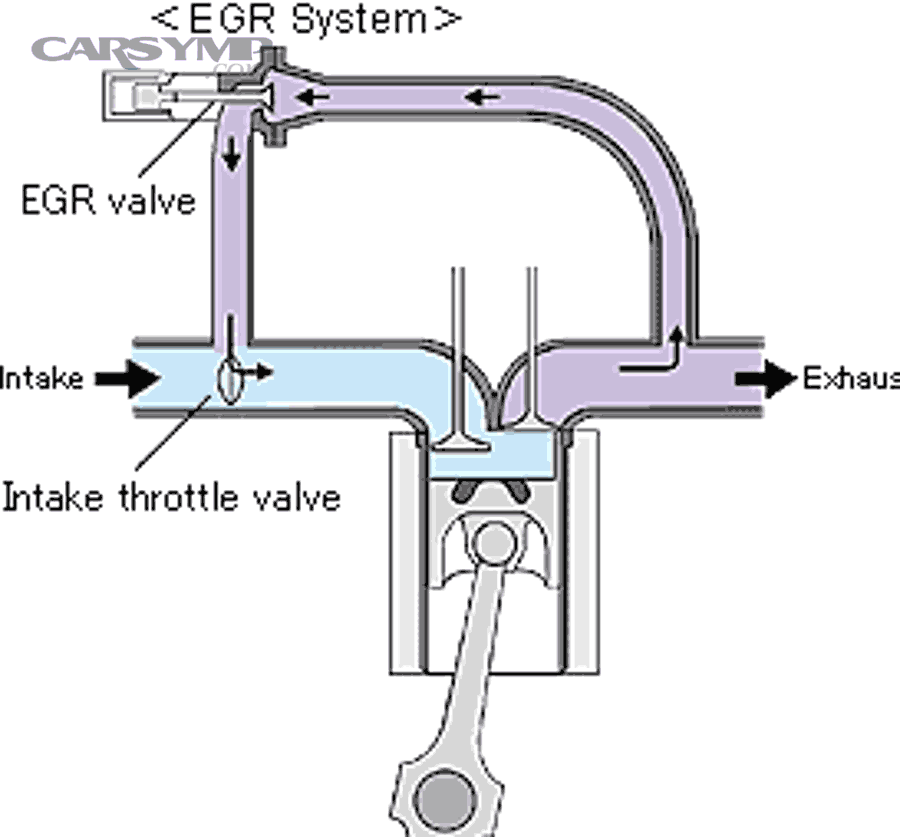
At the root level, the EGR valve’s job is not “performance”—it’s controlled dilution. That dilution can stabilize combustion in some conditions, but it can also cause drivability issues when the valve sticks or the passages clog. The reason you feel it is simple: EGR must be off during idle on most engines (to keep combustion stable) and on during certain cruise/load conditions (to reduce NOx). When the valve behaves differently than the engine computer expects, the vehicle reacts with roughness, hesitation, pinging, or stalling.
EGR design also matters because Vacuum vs electronic EGR valve differences change how you test and fix the system. A vacuum-operated EGR uses engine vacuum and an EGR solenoid to control a diaphragm; an electronic EGR uses a motor/stepper and often an internal position sensor. Both can clog, but electronic valves can fail electrically in ways cleaning cannot fix.
What symptoms point to an EGR valve problem?
There are 6 common symptom groups that point to EGR trouble, and the pattern often hints whether you’re dealing with EGR valve stuck open vs closed symptoms:
- Rough idle and stalling (especially when warm)
Most consistent with “stuck open” or a valve leaking when it should be closed. - Hesitation or surge on light throttle
Often caused by unstable EGR flow or passages partially restricted. - Knocking/pinging under load
More consistent with “stuck closed” or “insufficient flow” when the engine expects EGR. - Reduced fuel economy and sluggish response
Can happen both ways—misfire/overfueling (stuck open) or higher combustion temps (stuck closed). - Hard starting or misfires (some vehicles)
Usually tied to excessive EGR at the wrong time or vacuum leaks in the EGR plumbing. - Exhaust smoke and EGR connection
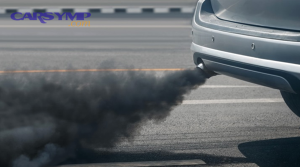
EGR faults don’t “create smoke” by magic, but they can contribute indirectly: a stuck-open valve can cause misfire and incomplete combustion, and restricted EGR on some diesels can shift combustion and soot behavior, which may be seen as darker exhaust under certain conditions.
A quick practical shortcut: if the engine idles poorly and sometimes dies when coming to a stop, suspect stuck-open behavior. If the engine feels hot, pings, or throws “insufficient flow” during cruise/load, suspect stuck-closed behavior or blocked passages.
What OBD-II codes are most associated with EGR faults?
There are 5 common EGR code groupings (often within P0400–P0409), and they’re best read as “directional clues,” not final diagnoses:
- Flow insufficient (commonly P0401) → usually clogged passages/tube, weak vacuum supply, bad DPFE/flow sensing, or a valve that doesn’t open when commanded. (autozone.com)
- Flow excessive (commonly P0402) → valve stuck open, leaking seat, wrong command/control, or a vacuum/solenoid issue holding it open.
- Position or circuit faults (varies by manufacturer) → electrical problems, connector corrosion, internal position sensor failure (electronic valves).
- Temperature sensor-related EGR faults (some platforms) → carbon on an EGR temp sensor or incorrect readings.
- Manufacturer-specific EGR performance codes → often trigger when commanded flow doesn’t match measured change.
Think of codes like P0401 as “the computer asked for EGR, didn’t see enough effect.” That “effect” could be true lack of EGR flow—or it could be a measurement/control problem.
Can you drive with an EGR valve problem, and when should you stop driving?
Yes, you can often drive short distances with an EGR valve problem, but you should stop driving if the engine is stalling, misfiring heavily, or overheating because those conditions create immediate safety risk and can damage the catalytic converter.
Next, the key is to classify severity by what the engine is doing in real time. Some EGR failures are “annoying but manageable,” while others turn into “unsafe in traffic” quickly.
Does a rough idle or stalling mean you should stop driving immediately?
Yes—if you’re experiencing rough idle and stalling, you should treat it as urgent for three reasons: (1) safety, (2) secondary damage risk, and (3) misdiagnosis escalation.
- Safety: A stall when merging, turning left, or stopping can put you in a dangerous position fast. If the engine dies when you come off throttle, you lose predictable power assist and acceleration response.
- Secondary damage: Repeated stalling and restart attempts can foul plugs (gas engines), increase unburnt fuel events, and in some cases worsen deposits.
- Escalation: Drivers often keep “trying fixes” (additives, random parts) and end up creating new vacuum leaks, cracked hoses, or connector damage around hot components.
If the idle is merely “a bit shaky,” you may be able to drive carefully to a shop—but if it stalls even once in an intersection scenario, stop and fix first.
Will an EGR issue damage the engine or catalytic converter?
Yes, an EGR issue can damage components over time for three main reasons: higher combustion temperatures (stuck closed), misfires/unburnt fuel (stuck open), and prolonged knock or poor combustion control.
- Stuck closed / insufficient EGR: Higher combustion temps increase NOx and can increase knock/pinging risk under load. Sustained knock is what you want to avoid.
- Stuck open / excessive EGR: Too much inert exhaust at idle can cause misfires. Misfires can overheat the catalytic converter because raw fuel or oxygen enters the catalyst in the wrong proportions.
- Long-term drivability and emissions: Even if nothing “breaks” immediately, the vehicle may fail emissions readiness or inspection, and the underlying deposit problem often spreads into other intake areas.
According to a study by North Carolina State University from the Department of Civil, Construction and Environmental Engineering, in 2012, researchers measured a 98% decrease in NOx per gallon in a 2010-compliant truck compared with older standards, with EGR and SCR identified as key contributors. (news.ncsu.edu)
How do you diagnose an EGR valve problem before spending money?
An efficient diagnosis is a short workflow: confirm symptoms, identify the EGR control type, test commanded/actual response, and inspect passages and related sensors—so you only replace parts when you can prove they’re the cause.
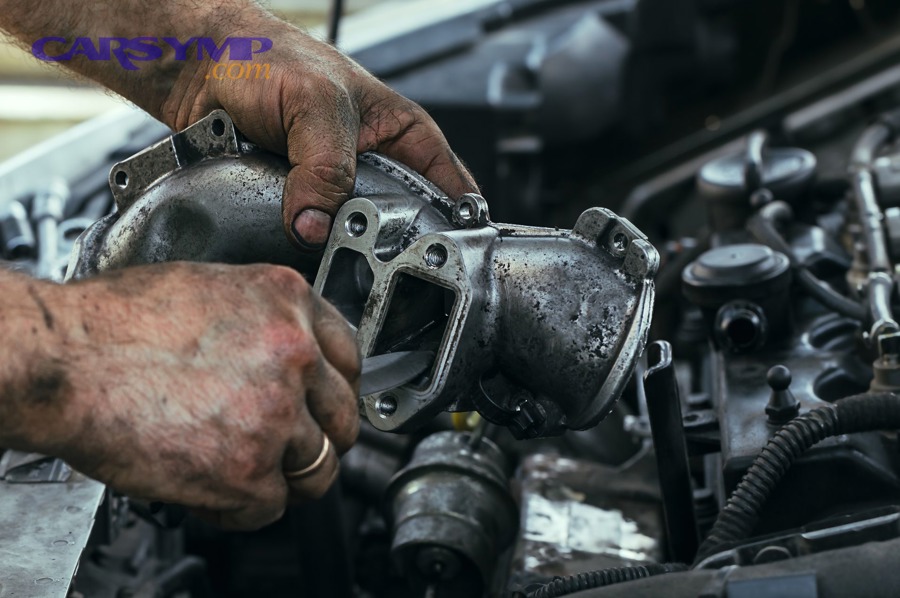
Then, instead of guessing, you use a few targeted checks that answer the real question: does the valve move when it should, and does the engine respond when it does? That’s the foundation of How to test EGR valve operation.
What quick checks confirm whether the valve is stuck open or stuck closed?
Stuck-open is confirmed by idle instability plus proof of unwanted EGR at idle, while stuck-closed is confirmed by insufficient-flow behavior plus failure to create a response when you manually/commandedly open the valve.
Here’s the practical “quick check” set, starting from easiest to more informative:
- Visual + touch inspection (engine off, cool enough):
- Check for cracked vacuum hoses (vacuum EGR).
- Check for loose, oil-soaked, or corroded connectors (electronic EGR).
- Look for soot tracking around a gasket or flange (possible leak).
- Idle reaction test (vacuum EGR):
- Use a hand vacuum pump to open the valve slightly at warm idle.
- Expected: RPM changes noticeably or engine stumbles if passages are clear and valve opens.
- If nothing changes: passages may be clogged, the valve may be stuck closed, or you’re not actually moving it.
- Commanded test (electronic EGR + scan tool):
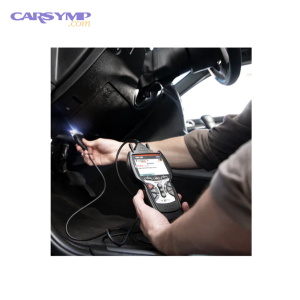
- Command EGR open/close with a bidirectional scan tool if available.
- Watch desired vs actual position (if supported) and engine response.
- Physical pintle check (some valves):
- With the valve removed, confirm the pintle isn’t seized and returns smoothly.
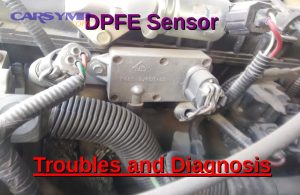
If you’re working a platform that uses a differential pressure sensor, be aware of Related parts: DPFE and EGR solenoid issues. A DPFE (or similar flow sensor) can falsely indicate insufficient EGR even when the valve itself is fine, and an EGR solenoid can fail to deliver vacuum so the valve never opens. (autozone.com)
How can you tell EGR problems from intake carbon buildup or vacuum leaks?
EGR problems usually show “flow mismatch,” intake carbon buildup shows “restricted airflow and deposits beyond EGR,” and vacuum leaks show “unmetered air” patterns—so you separate them by where the restriction/leak is and how the engine reacts to controlled EGR movement.
Specifically, these are the most useful separators:
- EGR flow issue clues:
- Codes like “insufficient flow” plus no RPM change during a deliberate EGR opening test.
- Carbon deposits concentrated at EGR passages/tubes and EGR port entries.
- Intake carbon buildup clues:
- Broad drivability issues not linked to EGR command windows.
- Heavy deposits in throttle body/intake runners (common on some direct-injection engines).
- EGR cleaning helps temporarily but symptoms persist because the restriction is elsewhere.
- Vacuum leak clues:
- High or hunting idle, lean codes, strong response to carb-cleaner/brake-cleaner (used carefully) around suspected leak points.
- Cracked hoses, intake gaskets, PCV/vacuum plumbing issues.
A helpful mental model: EGR is “controlled exhaust dilution.” Vacuum leaks are “uncontrolled fresh air.” They can feel similar—but they fail in opposite directions.
Should you repair, clean, or replace an EGR valve?
Repair wins when the control system or passages are the root cause, cleaning is best for carbon restriction, and replacement is the most reliable fix when the valve has mechanical wear or electrical failure—so the right choice depends on what failed, not what the code says.
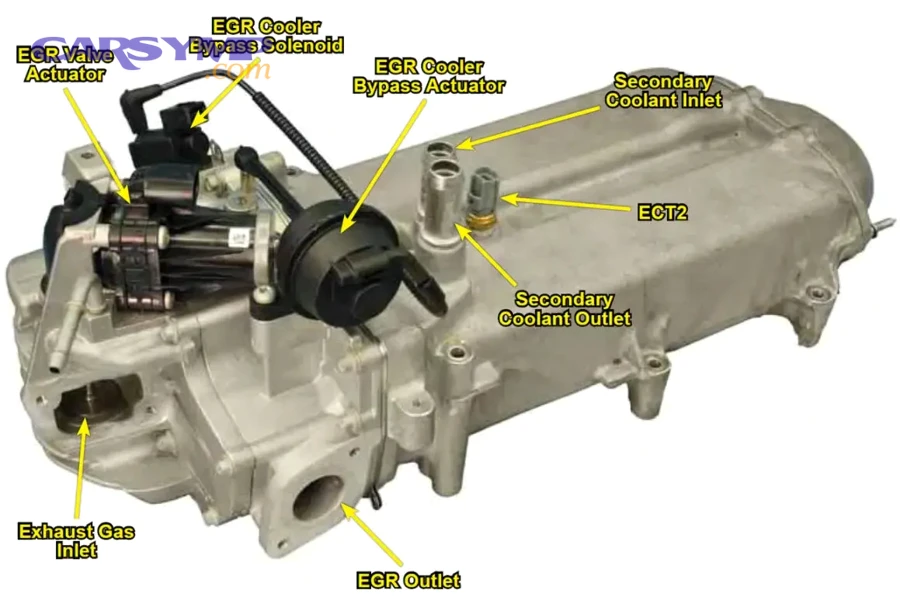
However, most people need a decision tool they can apply quickly, so here’s a simple matrix you can use during engine service:
The table below maps the most common symptom-and-test outcomes to the likely root cause and the best first action, so you can decide between repair work, cleaning, or replacement without guessing.
| Symptom/Proof | Most likely cause | Best first action |
|---|---|---|
| RPM changes when valve is opened, but code returns | sensor/control mismatch | repair control/inspect sensor & wiring |
| No RPM change when valve is opened and ports look sooty | clogged passages/tube | clean passages + valve |
| Valve position doesn’t track command or circuit fault present | electrical/position failure | replace valve (and inspect harness) |
| Rough idle + stalls, valve leaks at idle | stuck open/leaking seat | replace valve (clean ports too) |
This is the real meaning behind “Cleaning an EGR valve vs replacing it”: cleaning solves restriction, replacing solves failure.
When does cleaning the EGR valve and passages actually work?
Yes, cleaning works when carbon clogging is the primary problem for three reasons: (1) it restores flow, (2) it stabilizes combustion at idle/cruise, and (3) it prevents immediate repeat codes caused by restricted passages.
Then the key is to clean the right surfaces, not just spray the valve and hope. A proper “EGR clogged passages cleaning procedure” means you treat the system as connected parts:
- Clean the valve seat/pintle area so it can close fully (prevents stuck-open idle stalling).
- Clean the port openings and EGR tube so the engine actually receives flow when commanded.
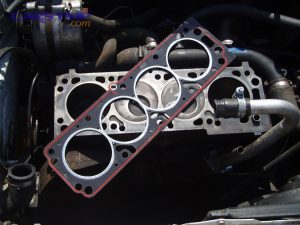
- Clean mating surfaces so the gasket seals and doesn’t create a leak.
Important caution: on electronic valves, avoid soaking the motor/connector side in harsh chemicals. Use controlled application and keep solvents away from sensors and electronics.
Cleaning is most effective when:
- The valve moves freely (not seized).
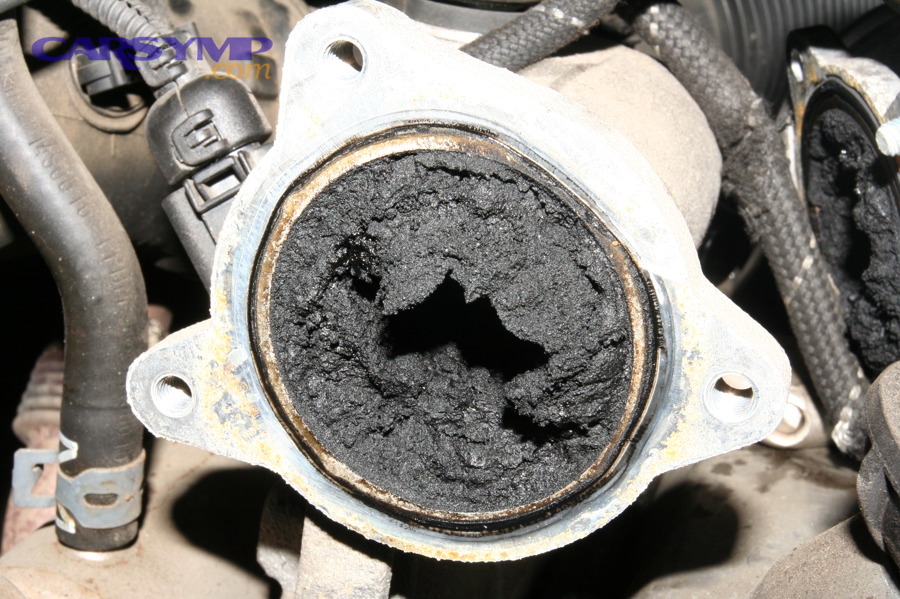
- The passages are clearly restricted (visible carbon).
- The problem is “insufficient flow” rather than “circuit failure.”
When is replacement the only reliable fix?
Yes, replacement is the only reliable fix when the valve has failed mechanically or electronically for three reasons: (1) cleaning cannot repair a burned solenoid or failed position sensor, (2) a worn valve seat can keep leaking even after cleaning, and (3) repeated sticking often returns quickly under heat cycles.
Common “replace-only” triggers include:
- Electrical faults: position sensor errors, motor/stepper issues, circuit codes that persist after connector and wiring checks.
- Mechanical failure: seized pintle, broken diaphragm (vacuum EGR), cracked housing, warped mounting surface.
- Repeat failure pattern: cleaning buys you days/weeks, then symptoms return with the same code window.
If your vehicle is critical for commuting and you’re already deep into intake removal to reach the valve, replacement can be the more rational choice—because labor is the expensive part.
How much does EGR valve repair cost, and what changes the estimate?
EGR valve repair cost is driven by access and diagnosis time, so the “real” estimate is diagnosis + labor time + parts quality, with cleaning usually cheaper and replacement costing more when the valve is buried or integrated.
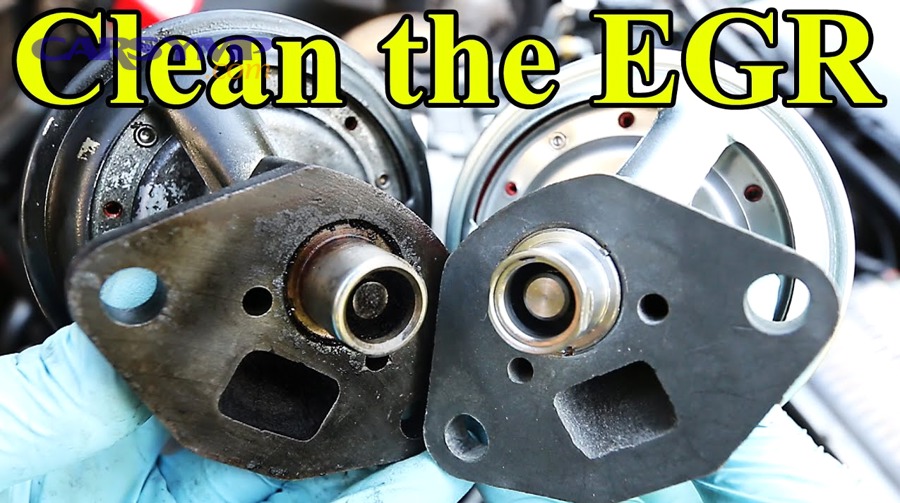
Next, it’s useful to separate your cost into three buckets: (1) diagnosis, (2) cleaning/repair work, (3) replacement parts and installation—because your quote can jump if a shop must remove major components to reach the valve.
For a quick baseline, RepairPal lists an average EGR valve replacement cost between $444 and $597, with labor estimated $153–$224 and parts $292–$373 (location and vehicle vary). (repairpal.com) That range is a practical reference point for your own EGR valve repair cost estimate, but your car may be below or above it depending on how hard the valve is to access.
What is the typical price range for cleaning vs replacing an EGR valve?
Cleaning wins in low-access jobs, replacement is more predictable when failure is confirmed, and “repair” (control system fixes) can land anywhere in between depending on what’s wrong.
Here’s a realistic way to think about pricing without pretending every car is the same:
- Cleaning-only (valve + passages): often the lowest cost when the valve is easy to reach, but price rises sharply if the intake must come off.
- Control repair (vacuum lines, solenoid, wiring, DPFE/flow sensor diagnostics): cost varies because diagnosis is the main time.
- Replacement: parts cost plus EGR valve replacement labor time, which can be short on some engines and long on others.
A common “gotcha” is that cleaning is sometimes charged like replacement if the valve is buried—because the labor to reach it is similar. That’s why good diagnosis matters: you don’t want to pay access labor twice.
What factors make EGR repairs expensive on some cars?
There are 6 factors that make EGR repairs expensive: poor access, integrated assemblies, seized fasteners, required relearn procedures, collateral cleaning needs, and emissions verification time.
More specifically:
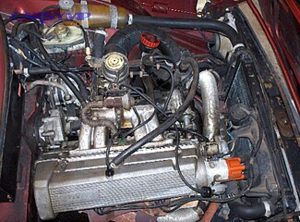
- Location/access complexity: Some EGR valves sit on top of the intake; others are tucked behind it or near heat shields and exhaust plumbing.
- Integrated EGR components: Some vehicles combine valve + cooler + piping, increasing both parts cost and labor.
- Heat + corrosion: EGR fasteners live in a harsh zone; rusted bolts can add significant labor.
- Collateral carbon: If passages are heavily clogged, a “quick swap” can still throw a flow code unless you clean the ports.
- Scan-tool diagnostics: Some shops include bidirectional tests and readiness verification in the quote.
- Repeat-visit prevention: A careful shop may quote extra time for post-repair confirmation because comebacks are common in EGR work.
If you want deeper symptom-to-cost mapping, you can cross-check your pattern with one diagnostic guide on carsymp.com—but only after you’ve confirmed the valve type and failure mode so you don’t fall into “parts cannon” repairs.
How do you replace an EGR valve step by step (DIY-friendly)?
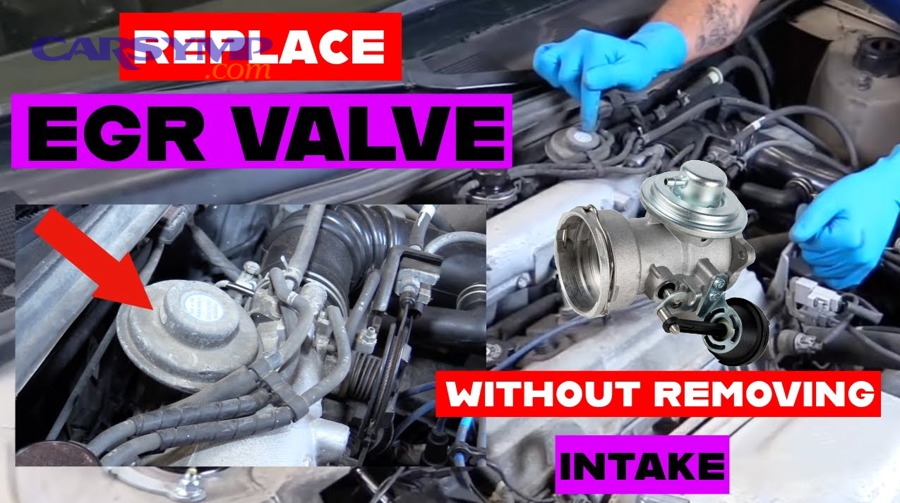
Replacing an EGR valve is a straightforward method with 6 steps—locate and access the valve, remove it safely, clean surfaces, install a new gasket and valve, reconnect lines/connectors, and verify the fix—so you can restore proper EGR control without repeat codes.
Below is the core idea that makes DIY EGR work succeed: access carefully, keep debris out of the intake, and treat gasket sealing as non-negotiable. That’s where most DIY failures happen.
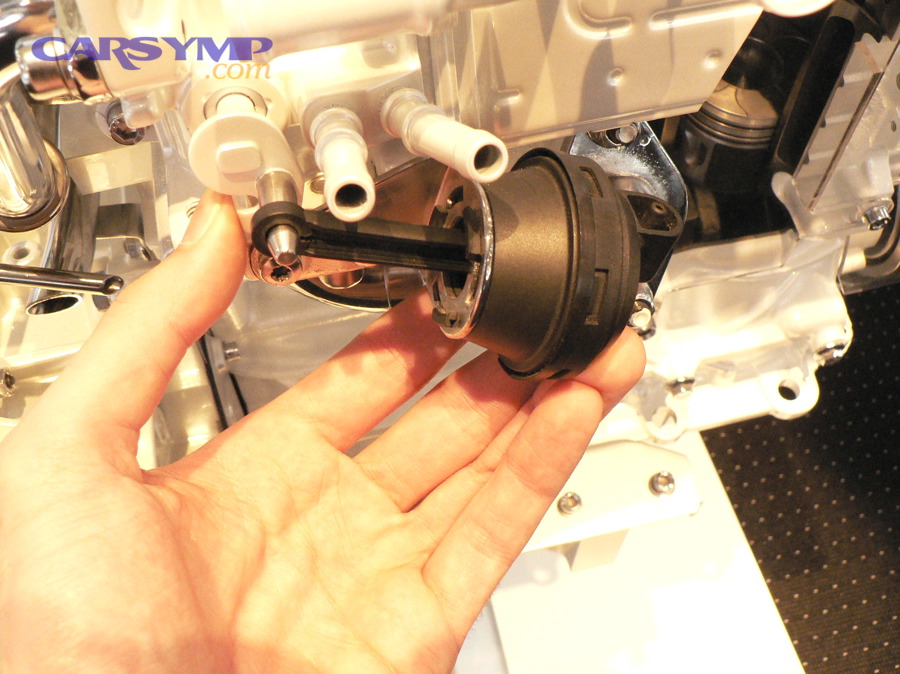
A common reference-style step list matches what many DIY guides emphasize: remove the valve, remove the gasket, clean the surrounding area, install a new gasket, and install the new valve.
What tools and parts do you need before starting?
There are 8 essentials you should gather before starting: basic hand tools, penetrating oil, a scraper, cleaner, a torque approach, a new gasket, and optional test tools—because missing a simple item is what turns a 1-hour job into an all-day problem.
Here’s the practical list:
- Socket set and extensions (EGR bolts can be awkward)
- Penetrating oil (apply early; EGR fasteners can seize)
- Scraper/plastic razor for gasket residue (avoid gouging aluminum)
- Throttle body / intake-safe cleaner for carbon around ports
- Rags + shop vacuum to keep debris out of the intake opening
- New gasket (recommended every time) — this is the heart of DIY pitfalls and gasket replacement tips
- Gloves and eye protection (cleaners + carbon debris)
- Optional but valuable:
- Hand vacuum pump (vacuum EGR testing)
- Scan tool capable of reading live data and clearing codes (helps with verifying the repair)
DIY safety note: EGR plumbing sits near hot exhaust components. Work on a cool engine whenever possible.
What are the most common mistakes that cause repeat EGR codes after replacement?
There are 7 repeat-code mistakes after EGR replacement: reusing old gaskets, failing to clean passages, mixing up vacuum lines, damaging connectors, leaving carbon debris in ports, under/over-tightening bolts, and skipping verification.
Specifically:
- Reusing the old gasket
Even if it “looks fine,” it can leak after heat cycles. A small leak can skew flow behavior or create drivability issues. - Not cleaning the EGR passages
A new valve can’t flow through a blocked port. This is the #1 reason “I replaced the valve and P0401 came back.” - Vacuum routing mistakes (vacuum EGR)
Incorrect hose routing can hold the valve open or keep it from opening at all. - Connector damage (electronic EGR)
The connector lock tabs get brittle. A loose connector can mimic a failed valve. - Carbon debris falling into the intake
Debris can cause new drivability issues. Use controlled cleaning and keep openings covered. - Incorrect tightening
Over-tightening can warp flanges; under-tightening can leak. - No after-check
Clearing codes isn’t a fix. Without a short verification plan, you won’t know whether you solved the underlying cause.
If you replaced the valve and a flow code returns immediately, assume passages or a related sensor/control fault—not “bad new part”—until you prove otherwise.
What should you do after the repair to confirm it’s fixed?
After an EGR repair, you confirm the fix by clearing codes, running a targeted test drive, checking readiness/pending codes, and comparing commanded vs observed EGR behavior—so you know the system works under the conditions that originally triggered the fault.
Then you complete the last step many DIYers skip: Verifying repair with scan data rather than relying on “the light stayed off for now.”
Do you need a relearn or adaptation after replacing an EGR valve?
Yes, you may need a relearn after replacing an EGR valve for three reasons: (1) some vehicles store EGR position offsets, (2) idle control adapts to airflow changes, and (3) readiness monitors need a complete drive cycle to validate flow.
However, whether it’s mandatory depends on the vehicle and the EGR type:
- Many vehicles: clear codes + drive cycle is sufficient.
- Some vehicles (especially electronic control-heavy platforms): benefit from an idle relearn, throttle adaptation, or an EGR-related procedure via scan tool.
A safe universal approach is: clear codes → warm up fully → perform mixed driving (idle, steady cruise, mild acceleration) → re-scan for pending codes and readiness status.
How do you confirm the EGR fault won’t come back?
Yes, you can confirm the fault won’t come back by checking three things: no pending codes, stable drivability under the original trigger conditions, and normal live data response when EGR is commanded.
Here’s a simple verification checklist:
- Immediately after repair (engine idling):
- Idle is stable (no surging or near-stall events).
- No obvious leaks (listen for hiss; check gasket area for soot trace later).
- During test drive:
- Recreate the original condition (light cruise, moderate load, decel to stop).
- Watch for symptoms that used to appear (surge, ping, stumble).
- After drive:
- Scan for pending and stored codes (pending is your early warning).
- If available, observe EGR-related PIDs:
- commanded EGR %
- actual EGR position (electronic valves)
- related flow/pressure signals (platform-dependent)
If you’re working a P0401-style insufficient-flow scenario, AutoZone’s diagnostic guidance highlights a practical approach: use a vacuum pump to open the valve while monitoring RPM and DPFE voltage, then inspect/clean tubing and consider DPFE replacement if readings don’t match expected values. (autozone.com)
How can you prevent EGR clogging with maintenance and reduce repeat failures?
Preventing EGR clogging is realistic when you control deposits at their source, keep the intake path clean, and address combustion issues early—because carbon buildup usually comes from short-trip operation, neglected maintenance, or upstream faults that increase soot and deposits.
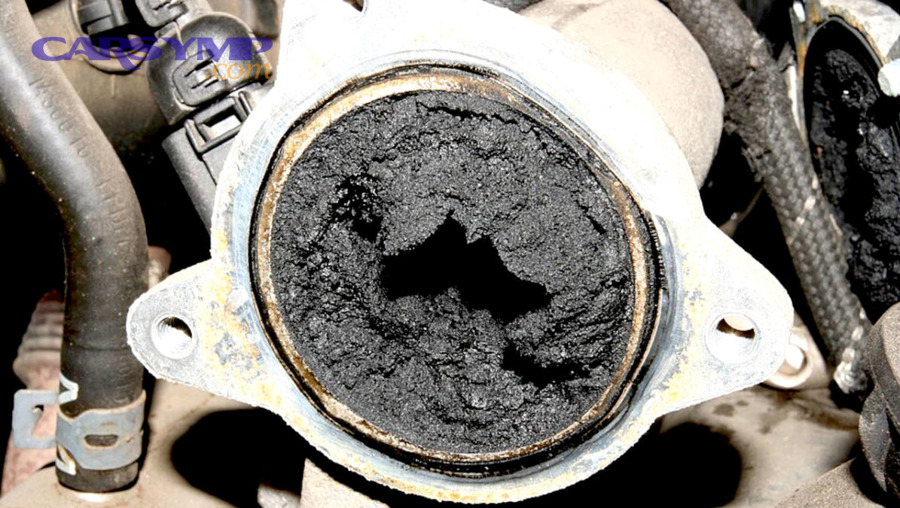
In addition, prevention works best when you treat EGR as part of an “airflow and combustion hygiene” strategy, not a one-time cleaning event.
What driving habits and maintenance items reduce carbon buildup in the EGR system?
There are 5 habits that reduce carbon buildup: regular full warm-ups, periodic steady-speed driving, timely oil service, keeping the air path sealed, and fixing misfires quickly.
More specifically:
- Avoid endless short trips when possible: Short trips increase condensation and deposit formation.
- Give the engine steady cruise time: Occasional longer drives help stabilize operating temperatures.
- Keep up with oil changes: Oil vapor and blow-by contribute to deposits in the intake system.
- Maintain the air filter and intake seals: Unfiltered debris and leaks change airflow patterns and contamination.
- Fix misfires and rich running early: Poor combustion increases soot and residue that EGR recirculates.
This is why EGR problems often show up as a “maintenance debt” issue as much as a single failed part.
Which parts should you inspect together with the EGR valve (passages, intake, sensors)?
There are 7 related areas you should inspect with the EGR valve, based on how the system is physically connected : EGR passages, EGR tube, intake ports, vacuum hoses or wiring, the EGR solenoid, flow sensing (like DPFE), and gasket surfaces.
Use this grouped checklist:
- EGR valve mounting surface + gasket
- EGR tube / pipe (look for restriction and cracks)
- EGR passages in the intake/manifold (common clog point)
- Vacuum supply and routing (vacuum EGR systems)
- Electrical connector and harness (electronic EGR systems)
- EGR solenoid (if used to control vacuum or flow)
- DPFE / differential pressure or flow sensor (platform-dependent; common false-fault contributor) (autozone.com)
If you’re trying to stop repeat failures, these related checks matter more than buying a “better” valve alone.
Is cleaning the EGR valve a long-term solution or just a temporary fix?
Cleaning can be a long-term solution when deposits are the only issue and the engine’s underlying combustion/maintenance conditions are healthy, but it becomes a temporary fix when wear, electrical failure, or chronic soot formation is present.
Here’s the honest comparison:
- Long-term cleaning success:
- First-time clogging event
- Good valve movement and sealing
- No electrical faults
- You also clean the passages, not only the valve
- Temporary cleaning outcome:
- Valve seat wear or repeated sticking
- Electronic actuator issues
- Heavy, fast-return deposits caused by upstream problems (misfire, rich running, excessive oil vapor)
A practical rule: if cleaning restores operation and the problem stays away for months, it was likely deposit-driven. If it returns quickly, treat it as a signal to look deeper—or replace.
When should you choose a shop instead of DIY for EGR repairs?
Yes, you should choose a shop instead of DIY when three conditions apply: (1) access requires intake/exhaust disassembly, (2) fasteners are likely seized, or (3) you need scan-tool tests or readiness verification for inspection compliance.
Besides, the “break-even” point is often about risk, not ability:
- Choose a shop if: the valve is buried, the job requires coolant/EGR cooler handling, or you’re not comfortable with hot-zone fasteners and torque practices.
- DIY is reasonable if: the valve is accessible, you can replace the gasket correctly, and you can run a basic scan-and-verify routine afterward.
If your goal is a reliable fix—not just turning the light off—prioritize diagnosis, correct sealing, and verification. That’s what makes an EGR fix behave like proper engine service instead of a repeated check engine loop.