


If your car clunks, knocks, squeaks, or vibrates over bumps, the fastest way to stop guessing is to separate control arm bushing problems from sway bar bushing problems using a location-first, symptom-second diagnostic flow.
Many “front-end noise” complaints feel identical from the driver’s seat, but the root cause often isn’t—control arm bushings usually change wheel geometry under load, while sway bar bushings more often create play and noise when the bar twists.
Beyond noise, the right diagnosis also protects tires and stability: misdiagnosing a control arm bushing as a sway bar issue can leave braking wander or uneven tire wear unresolved, while misdiagnosing sway bar bushings can waste money on parts that won’t quiet the car.
Giới thiệu ý mới: Next, you’ll use a simple “where + when + how” method—where the noise originates, when it appears, and how it reacts to steering/braking/bump inputs—to pinpoint the correct bushing without specialty shop equipment.
What’s the real job difference between control arm bushings and sway bar bushings?
Control arm bushings manage wheel position under load, while sway bar bushings manage body-roll transfer—so one tends to change alignment behavior, and the other tends to change roll/noise behavior. However, because both are rubber isolators, their failures can overlap in sound and feel until you test them correctly.

Control arm bushings sit at the pivot points where the control arm attaches to the chassis/subframe. Their primary role is to allow controlled movement while resisting unwanted fore-aft and lateral shift. When they soften, tear, or separate from the sleeve, the wheel can “move” in ways it shouldn’t—especially during braking, acceleration, pothole hits, or hard cornering. That’s why control arm bushing wear often creates directional symptoms: pull, wander, vague steering, or tire wear patterns.
Sway bar (stabilizer bar) bushings clamp the bar to the chassis. Their main role is to let the bar rotate smoothly as it twists, transferring roll resistance from one side to the other. When these bushings wear or dry out, you often get rotational friction noises (squeak/creak) or a knock if the bar shifts inside the bracket. Because the sway bar mostly “wakes up” when left and right suspension move differently, sway bar bushing problems often show up more in one-wheel bumps, driveway entries at an angle, or low-speed uneven surfaces.
According to research by SAE International from the vehicle NVH research community, in 04/2018, a sensitivity study reported that changing suspension component stiffness measurably changes structure-borne road noise behavior inside a vehicle.
To connect that to diagnosis: if the symptom feels like noise without geometry change, sway bar bushings move up your suspect list; if it feels like geometry change under load, control arm bushings move up.
Where are these bushings located, and how can you identify them in 60 seconds?
You can identify control arm bushings by following the wheel hub back to the arm pivots, and identify sway bar bushings by following the bar to its frame clamps. To start, look for a thick “A-arm” or “wishbone” running from the wheel knuckle to the chassis, then look for a round bar spanning left-to-right with clamp brackets.
However, the fastest identification is a two-line map: control arm bushings are at arm-to-chassis pivots; sway bar bushings are at bar-to-chassis clamps.
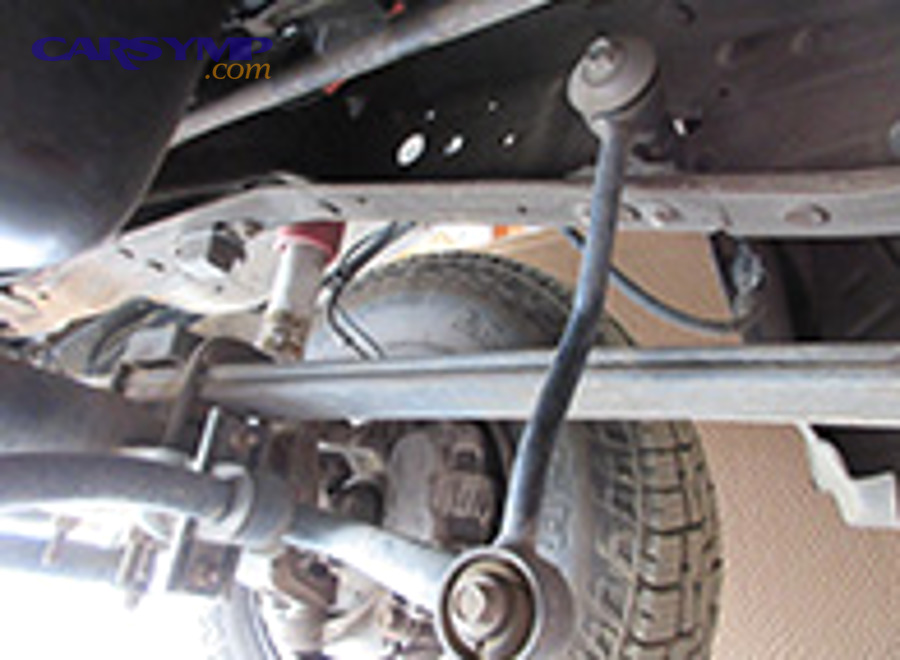
Quick visual checklist (no tools):
- Control arm bushing: large rubber “donut” or bonded rubber sleeve at the inner end(s) of the control arm (often two per arm). You may see cracking, separation, or a shifted inner sleeve.
- Sway bar bushing: rubber split bushing wrapped around the sway bar under a metal clamp/bracket (usually two, one per side). Often visible from the front of the car behind the bumper line or under the engine cradle.
- Sway bar link bushings (if equipped): small bushings at each end of the link connecting sway bar to strut/control arm. Some designs use ball joints instead of bushings.
If your vehicle has plastic splash shields, you may only need to turn the steering to full lock and use a flashlight to see the control arm bushing area behind the wheel.
According to research by Nature Portfolio (Scientific Reports) from its materials/mechanical behavior publishing channel, in 01/2022, researchers emphasized that rubber bushing dynamic behavior depends strongly on frequency and operating conditions—meaning a bushing can “look okay” but behave poorly under real loads.
That’s why location-based identification should be followed by a behavior test, not appearance alone.
Which noise patterns point to control arm bushings vs sway bar bushings?
Control arm bushings more often create a deep clunk on load change, while sway bar bushings more often create a squeak/creak or a lighter knock on uneven, one-wheel inputs. However, road conditions and temperature can blur the difference, so listen for timing and repeatability.
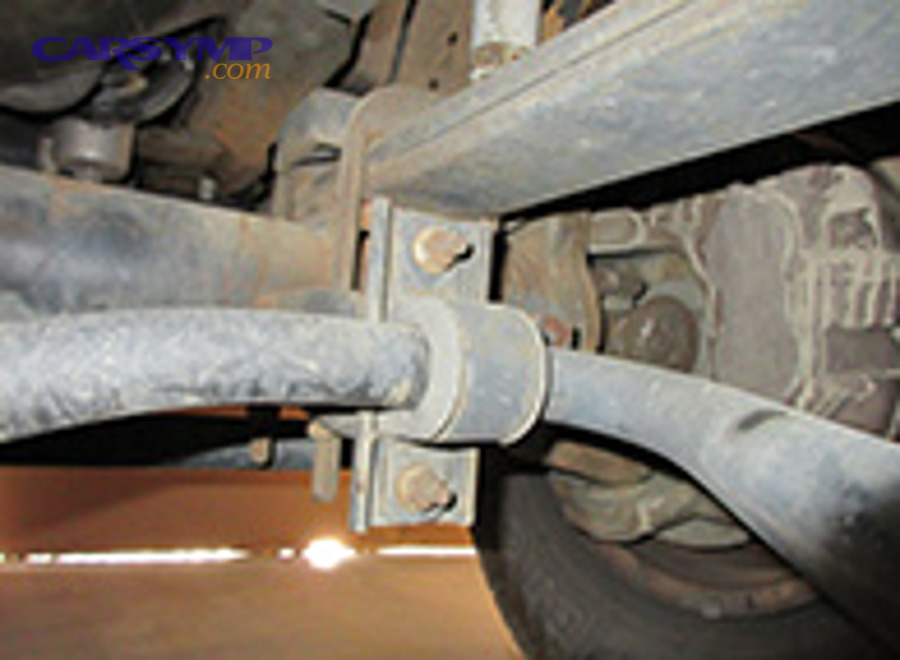
Noise grouping by “when it happens”:
- Single clunk when braking or releasing brake: commonly control arm rear bushing compliance (arm shifts fore-aft).
- Clunk on acceleration from stop: can be control arm bushing or other mounts, but control arm bushings rise if you also feel steering vagueness.
- Repeated knock over small bumps: often sway bar link play or sway bar bushing shift in brackets (especially low speed).
- Squeak/creak at low speed over driveway angle: often sway bar bushing friction or dry interface.
- Metallic “thunk” on pothole impact: can be either, but control arm bushings rise if the wheel feels like it “moves back” or steering changes after the hit.
To make this practical, do a short “sound diary”: repeat the same bump at 10–15 mph, then repeat at 25–35 mph, then repeat with light brake pressure. If braking changes the noise sharply, control arm bushings become more likely.
According to a Technical Service Bulletin published via NHTSA from the Office of Defects Investigation distribution channel, in 02/2024, a front suspension NVH bulletin notes that “popping” or “knocking” noises can be linked to bushing inspection points.
Use that idea as a diagnostic mindset: the noise type matters, but the conditions that trigger it matter more.
What driving behaviors strongly suggest control arm bushing wear?
Yes—if you have braking wander, steering drift, or tire wear changes alongside noise, control arm bushings are a top suspect because they directly influence wheel position under longitudinal and lateral loads. However, you must rule out ball joints and alignment issues to avoid a false conclusion.

High-signal control arm bushing clues:
- Brake steer / wander: the car tugs left or right when braking on a smooth road, even with equal tire pressure.
- “Delayed” steering response: you turn the wheel slightly, and the car reacts with a soft delay, then catches up.
- Uneven tire wear: inner-edge wear or feathering that returns quickly after alignment.
- Harsh impact feel: a pothole feels like it “kicks” the wheel backward.
- Noise on load transfer: one clunk as weight shifts (brake on/off, shift from reverse to drive, or quick throttle changes).
Here’s the key logic: the control arm is part of the wheel’s locating triangle. If its bushings deform too easily, the wheel’s caster/toe can shift moment-to-moment. That can create a “floating” highway feel—especially at 55–75 mph with crosswinds or grooved pavement.
According to research by SAE International from the vehicle dynamics research community, in 03/2001, a study on front suspension parameters reported measurable sensitivity of wheel toe dynamics to suspension parameters, which supports why compliance at pivot points can change steering behavior.
So if your symptom set is “noise + directional instability,” your next step is to load the control arm bushing and watch for excessive movement (you’ll do that in a later test section).
What driving behaviors strongly suggest sway bar bushing wear?
Yes—if your main issue is a knock or squeak over uneven, low-speed inputs without steering wander, sway bar bushings move to the top because the stabilizer system is most active when left and right suspension travel differs. However, sway bar links can mimic the same noises, so treat them as a pair in diagnosis.
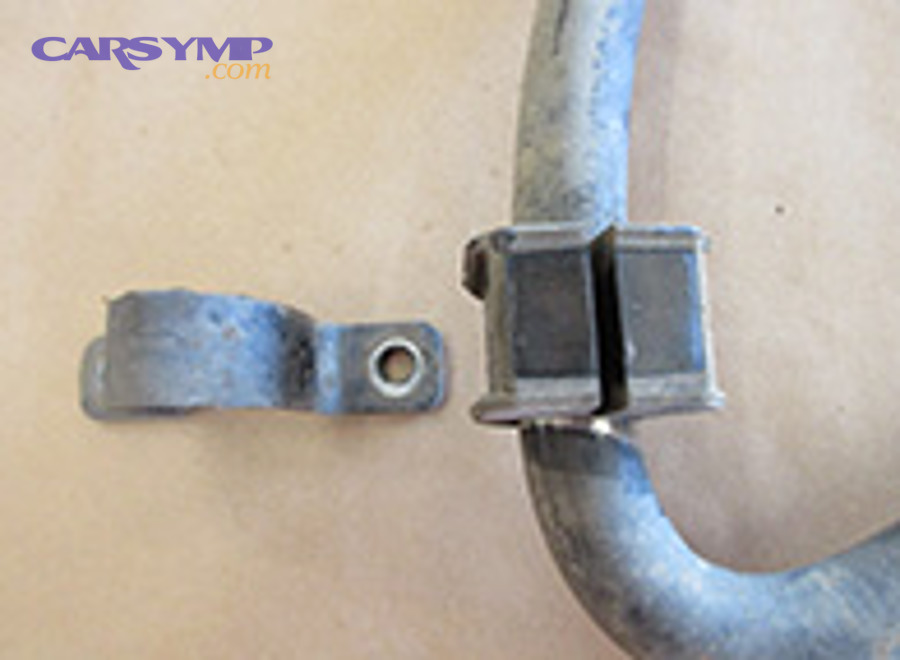
High-signal sway bar bushing/link clues:
- Rattle/knock on small bumps: especially at neighborhood speeds, rough pavement, or speed bumps.
- Noise over one-wheel bumps: right wheel hits a small bump and you get a knock; left wheel alone also triggers it.
- Driveway/parking lot creak: slow turning into a driveway at an angle produces a squeak/creak.
- Noise that disappears on smooth highway: because the sway bar is relatively quiet when both wheels move together.
One useful pattern: sway bar bushing issues often sound “near the firewall” or “under your feet,” because the sway bar mounts to the subframe close to the cabin. If you can reproduce the noise by rocking the vehicle side-to-side (engine off), sway bar bushings and links climb higher on the suspect list.
According to research by a vehicle dynamics modeling study (published in an engineering journal), in 2021, authors describe that suspension bushing deformation affects vehicle handling stability—supporting why stabilizer-system compliance can change feel even when alignment seems unchanged.
In practical diagnosis, that means sway bar bushings can cause annoying noise and slight roll-feel changes, but they rarely create the strong braking wander typically associated with control arm bushings.
How do you test control arm bushings at home without special equipment?
Use a loaded pry test at the bushing, then verify with a brake-torque “shift” test—these two methods catch most control arm bushing failures by forcing the arm in the direction it normally fails. However, do not pry on thin aluminum edges or press on brake lines; use safe leverage points only.
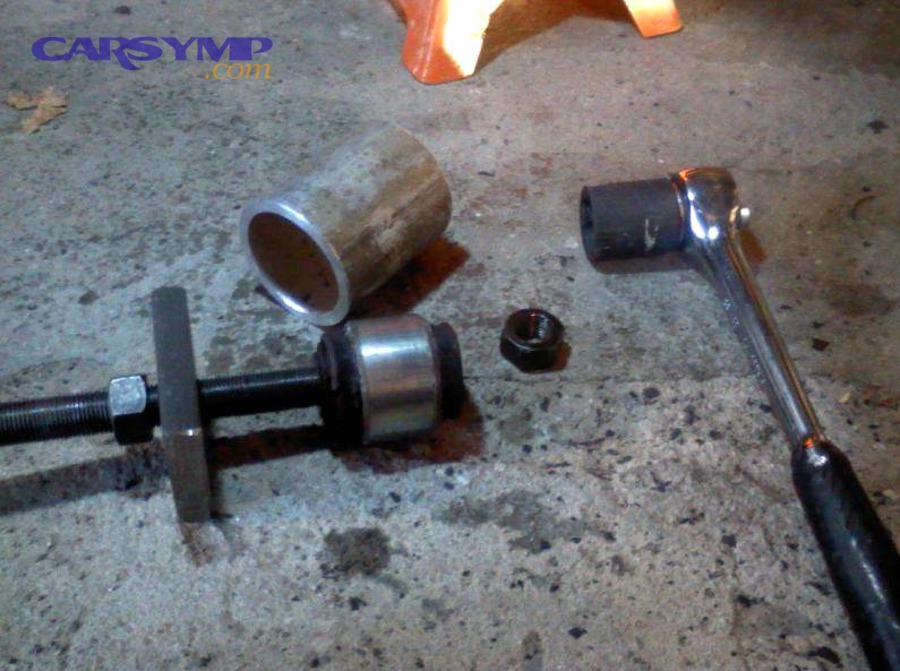
Method A: Loaded pry test (best accuracy in driveway)
- Lift safely (jack + stands) so the wheel is off the ground, then support the control arm lightly if needed to avoid full droop extremes.
- Find the bushing at the inner control arm mount (front and/or rear).
- Apply gentle leverage with a pry bar between the control arm and subframe bracket, watching the bushing.
- Interpret movement: a healthy bushing flexes elastically but returns; a failing bushing shows sleeve shift, visible separation, or “clunk” movement with minimal force.
Method B: Brake-torque shift test (no lifting)
- On a flat surface, hold the brake firmly.
- Shift from drive to reverse (or reverse to drive) gently.
- Listen for a single clunk and feel for a fore-aft “lurch” beyond normal drivetrain movement.
This second test is not definitive (other mounts can clunk), but paired with a pry test it becomes highly informative.
According to research hosted in PubMed Central on rubber bushing design, in 09/2014, the authors emphasized that tuning bushing stiffness targets ride quality outcomes—supporting why softened/failed bushings can create a “floaty” or unstable feel.
During the detailed check, keep this phrase in mind as a symptom label you can share with a mechanic: Worn suspension bushing symptoms are not just noise—they’re also geometry changes under load that you can reproduce with controlled tests.
How do you test sway bar bushings and links at home without guessing?
Check for bar shift in the frame clamps and check link play by hand-loading the link ends—these two checks isolate sway bar bushing noise from control arm bushing noise quickly. However, because the sway bar is preloaded differently depending on wheel position, test with the suspension at normal ride height when possible.
Method A: Clamp-area inspection (bushing + bracket)
- Locate the sway bar frame clamps (usually two brackets bolted to subframe).
- Look for polished metal on the sway bar near the bushing—this can indicate the bar has been shifting or rubbing.
- Look for split, crushed, or missing rubber around the bushing slit.
- Grab the bar near the bushing and attempt to rotate/shift it. Excessive shift or a “tap” sound suggests wear.
Method B: Link check (bushing-style links or ball-joint links)
- With the vehicle on the ground (or with both wheels equally supported), grab the sway bar link and attempt to move it up/down and in/out.
- If it’s a bushing-style link, look for compression-set rubber and loose washers.
- If it’s a ball-joint link, feel for clicking or free play.
According to a service/repair guide describing sway bar link and bushing behavior, worn link bushings can create slack that produces knocking as the suspension cycles over bumps.
When you need a repair phrase that’s clear and actionable, you can describe it as bushing replacement for the stabilizer system after confirming play at the brackets or links—rather than replacing random parts upstream.
How do you separate bushing problems from ball joints, tie rods, and strut mounts?
Compare the symptom triggers: bushings react to load transfer and twist, ball joints react to vertical/steering articulation, and tie rods react to steering input. However, because multiple worn parts can coexist, you should isolate one variable at a time and retest after each confirmed fix.
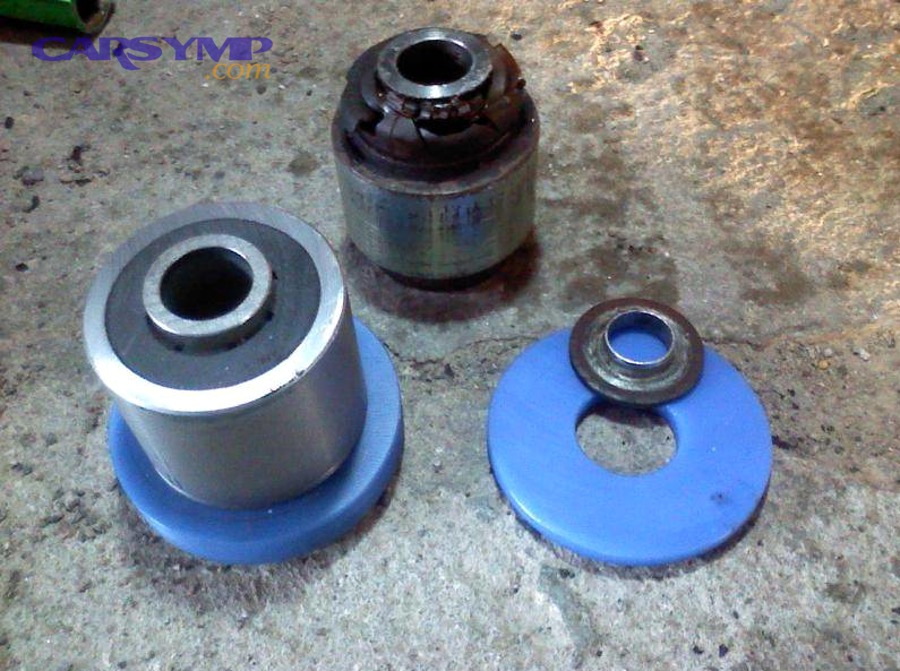
Fast differential diagnosis matrix (logic, not guesswork):
- If noise changes when steering left-right at standstill: suspect strut mount/bearing or tie-rod/ball-joint articulation more than sway bar bushings.
- If noise changes when lightly braking over the same bump: suspect control arm bushings more than sway bar bushings.
- If noise happens mostly on one-wheel bumps at low speed: suspect sway bar bushings/links more than control arm bushings.
- If you feel looseness at the steering wheel and see toe wear: suspect tie rods/alignment; control arm bushings can contribute, but tie rods usually show clearer steering play.
One practical check: have a helper rock the steering wheel slightly while you watch the tie rod and control arm bushings. If the wheel turns but the knuckle movement is delayed or jerky, steering linkage may be involved. If the knuckle moves cleanly but the arm pivots shift under brake torque or pry load, bushings are involved.
According to a Technical Service Bulletin distributed via NHTSA, in 07/2010 (document revision history shown), clacking or clunking noise in a front suspension area was linked to a worn/torn front upper link bushing—illustrating how bushings can mimic “front end” joint noise.
In other words, don’t assume a “joint-like” noise must be a ball joint—bushings can clack when a sleeve shifts or when rubber separates internally.
Which symptom combinations mean it’s unsafe to keep driving?
Yes—stop driving for diagnosis if you have severe wandering, sudden steering changes after bumps, or a loud repeated clunk paired with visible bushing separation, because wheel location can become unpredictable. However, a mild squeak from sway bar bushings is often annoying rather than immediately dangerous, as long as steering remains stable.
“Do not delay” indicators (prioritize safety):
- Steering correction required constantly at speed (wandering that feels new or escalating).
- Brake pull that appeared suddenly and is reproducible on smooth pavement.
- Visible bushing separation where the inner sleeve is off-center or the rubber is torn through.
- Hard clunk + instability after potholes or during braking transitions.
Why this matters: control arm bushings help maintain caster and toe under load. If the bushing is torn, the wheel can shift enough to change braking and cornering behavior. That can also accelerate tire wear and stress other suspension joints.
According to a Technical Service Bulletin distributed via NHTSA, in 11/2016, a bulletin described creaking noise caused by a front lower arm bushing making stick-slip noise in wet conditions—showing how bushings can produce noise, but also how the underlying mechanism can worsen with environment and movement.
Use that as a decision rule: noise alone can be tolerable, but noise plus handling instability is not.
What fixes actually match each diagnosis, and what should you expect afterward?
Control arm bushing issues are often solved by replacing the bushing or the complete control arm, while sway bar issues are often solved by replacing bushings and/or links. However, the correct fix depends on design (press-in vs bonded vs hydraulic) and on whether the arm’s ball joint is serviceable separately.
Fix options for control arm bushing diagnosis:
- Replace bushings only: best when the arm and ball joint are in excellent condition and the bushing is serviceable (often press-in). Requires tools and careful pressing to avoid arm damage.
- Replace complete control arm: common modern approach because it bundles bushings + ball joint and saves labor time; often more consistent outcome.
- Re-torque at ride height: critical for bonded rubber bushings; tightening at full droop can preload the bushing and shorten life.
Fix options for sway bar bushing diagnosis:
- Replace sway bar frame bushings: typically straightforward; confirm bar diameter to match bushing size.
- Replace sway bar links: especially if link play exists or boots are torn (ball-joint-style links).
- Clean and lubricate (where appropriate): some polyurethane setups require specific grease; many OEM rubber designs do not require lubrication and can be damaged by the wrong chemicals.
What to expect afterward:
- After control arm work: alignment is commonly needed because bushing position affects caster/toe; even small changes can affect steering feel and tire wear.
- After sway bar bushing work: alignment is usually not changed directly, but you should still road test on the same bumps to confirm the noise is gone.
According to research published in PubMed Central on rubber bushing optimization, in 09/2014, authors stated that designing bushings to target stiffness characteristics is used to achieve desired ride quality—so the “feel” change after replacement is expected, not a surprise.
If your before/after notes include Clunking and vibration from bushings, keep the same test route and repeat the same inputs (light brake over a known bump, angled driveway entry, and a steady-speed lane hold) to verify the diagnosis was correct.
Diagnosis summary table: quickest way to tell which bushing is at fault
This table contains a side-by-side symptom and test map so you can match your noise/feel to the most likely bushing type. It helps reduce part-swapping by focusing on trigger conditions and simple confirmation checks.
| Category | Control Arm Bushing | Sway Bar Bushing / Link |
|---|---|---|
| Primary job | Locates wheel under braking/turning loads | Transfers roll resistance; allows bar rotation |
| Most telling trigger | Brake on/off, acceleration shifts, pothole “kick” | One-wheel bumps, angled driveway, low-speed roughness |
| Common noise character | Deep clunk on load transfer | Squeak/creak or light knock/rattle on uneven inputs |
| Handling impact | Wander, pull, vague steering, rapid tire wear | Mostly noise; minor roll feel change |
| Best home test | Pry test at inner pivot + brake-torque shift | Bar shift at clamps + link play hand-load |
| Most common fix | Replace bushing or complete arm; align after | Replace bushings/links; verify on same bumps |
Video: a practical way to confirm sway bar bushing clunk before replacing parts
A short, targeted diagnostic video can help you recognize the sound and the test motion so you don’t confuse stabilizer-system clunks with control arm movement. However, always prioritize safe lifting and proper support if you inspect underneath the vehicle.
According to the YouTube diagnostic content listed for sway bar bushing clunk identification, the focus is isolating stabilizer-bar mount play as a common cause when the rest of the suspension appears visually fine.
Micro checks that change the diagnosis when symptoms overlap
When both bushing types seem plausible, micro checks—material behavior, torque position, and environmental triggers—often reveal the true source. However, you must keep the test controlled: change one variable (wet vs dry, bar loaded vs unloaded, torque at ride height) and retest.
Rubber vs polyurethane changes the sound signature
Rubber bushings are tuned for isolation; polyurethane typically increases sharpness and can amplify certain noises if not lubricated correctly. If a vehicle has aftermarket polyurethane sway bar bushings, a squeak is more likely to be friction at the bar interface than a control arm pivot problem.
According to research published in PubMed Central on rubber bushing design, in 09/2014, the paper highlights stiffness targeting to achieve ride quality—implying that changing material/stiffness can change perceived noise and harshness.
Wet-weather squeaks often point to stick-slip at bushings
If the noise appears mainly after rain or washing, and it’s a squeak/creak rather than a heavy clunk, bushings experiencing stick-slip friction become more likely. This can happen at sway bar bushings or certain control arm bushings, depending on design and contamination.
According to a Technical Service Bulletin distributed via NHTSA, in 11/2016, a creaking noise was described as being caused by a front lower arm bushing making stick-slip noise during wet road conditions.
Torque-at-ride-height prevents false “new bushing” problems
Bonded rubber bushings are designed to sit at a neutral twist angle at normal ride height. If tightened while the suspension is hanging, the bushing is pre-twisted at rest and can fail early or squeak/clunk soon after repair, which can look like a misdiagnosis.
According to research (Scientific Reports) discussing rubber bushing dynamic behavior dependence on operating conditions, in 01/2022, the study emphasizes condition sensitivity—supporting why installation state and preload can change behavior.
Fluid leaks accelerate bushing wear and mimic “random” noises
Oil and certain solvents can degrade rubber, softening it and increasing compliance. If you see oil residue near control arm bushings or sway bar mounts, address the leak; otherwise, new bushings may degrade again and symptoms can return quickly.
According to engineering research on rubber bushing friction and NVH improvement approaches, in 2023, authors discuss how bushing behavior and friction characteristics relate to NVH performance considerations.
FAQ
Can sway bar bushings cause steering wander like control arm bushings?
No, not usually—sway bar bushings mainly affect noise and roll behavior; steering wander is more strongly linked to components that locate the wheel, such as control arm bushings, ball joints, tie rods, or alignment. However, multiple worn parts can overlap, so confirm with the targeted tests.
Do cracked bushings always need replacement immediately?
No—surface cracks can be cosmetic, but separation, sleeve shift, or excessive movement under load indicates functional failure and should be addressed soon. However, if handling changes or you hear repeated clunks, treat it as urgent and inspect promptly.
Why did the noise disappear for a week and then come back?
Because bushing friction and preload can change with temperature, moisture, and settling. However, “temporary silence” is common after washing, lubrication, or a change in weather; retest under the same conditions that originally triggered the noise.
Is it better to replace just the bushing or the whole control arm?
It depends: replacing the whole arm is often faster and more consistent when the ball joint is integrated or near end-of-life, while bushing-only replacement can be cost-effective if the arm and joint are excellent. However, bushing-only work requires proper pressing technique to avoid arm damage.
What’s the simplest first step if you only have 10 minutes?
Start with a sway bar check—grab the sway bar near its clamps and links, look for shifting/rubbing marks, then do a low-speed angled driveway test. However, if you also have braking pull or wander, prioritize a control arm bushing load test next.