Replace Suspension Bushings: Symptoms, Costs, Rubber vs Poly
Bushing replacement is a targeted suspension & steering repair that restores precise wheel control by removing worn, cracked, or separated bushings and installing new ones where the chassis and moving parts meet.
Beyond stopping noise, it addresses handling drift, braking instability, and uneven tire wear by correcting looseness at key pivot points such as control arms, sway bars, and subframes.
It also helps you decide whether to repair a single bushing, replace an entire arm, and whether an alignment is needed after bushing work to protect your tires and steering feel.
To begin, “Giới thiệu ý mới” matters: once you know what a bushing does, you can diagnose Clunking and vibration from bushings faster and choose the safest repair path.
What is bushing replacement and why does it affect handling?
Bushing replacement is the process of removing a worn elastomer (rubber or polyurethane) joint insert and installing a new one to restore controlled flex at suspension & steering pivots.
After that, the key is understanding how a small part controls big geometry changes under load, so you can connect symptoms to specific locations.
What does a suspension bushing do in real driving?
A suspension bushing isolates vibration and allows limited movement, but it also “locates” the arm or bar so the wheel stays aligned under braking, cornering, and acceleration.
Next, focus on the idea of controlled compliance: the bushing must flex, then return, without letting the metal sleeve shift or the rubber tear.
In practice, bushings manage three competing forces: impact absorption, directional stiffness, and noise isolation. A good bushing absorbs bumps without letting the arm “walk” backward (caster change) or sideways (toe change). When it fails, the wheel can briefly steer itself over bumps, which feels like tramlining, wandering, or a sudden tug during braking.
That is why a car may feel “fine at low speed” but unstable at highway speed—the loads rise exponentially with speed and braking force.
Which parts commonly need bushing replacement?
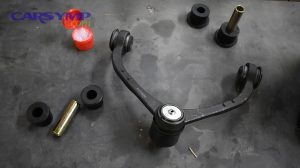
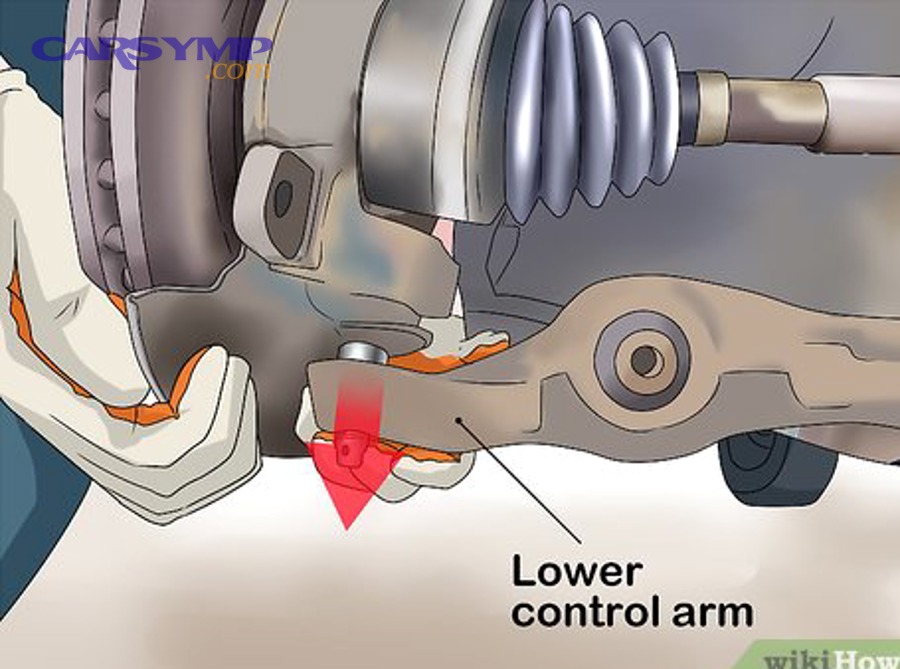
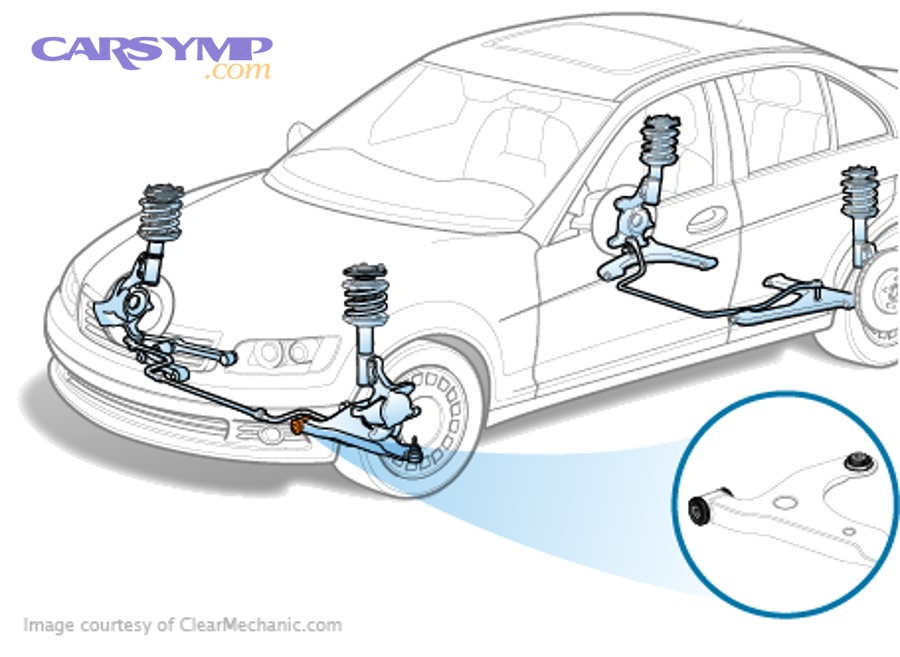
The most common bushing locations are control arms, sway bar mounts and end links, strut rod/tension rod bushings, trailing arms, subframe bushings, and steering rack mounts.
After that, the fastest way to narrow the search is to map symptoms to load direction—braking, turning, or straight-line bumps.
Control arm bushings usually take the largest longitudinal loads (braking/acceleration). Sway bar bushings see torsional loads (body roll in turns). Subframe bushings manage broad chassis movement and can create whole-car vibration or “thump” on takeoff. Steering rack bushings can create vague on-center steering and clunks when reversing direction.
Some vehicles integrate bushings into complete assemblies; others offer press-in bushings separately. Knowing which architecture your car uses will influence both cost and labor time.
When is replacement urgent vs “monitor it”?
Replacement is urgent if the bushing has separated, the sleeve is moving, the wheel can be shifted by prying, or you have braking pull/instability—otherwise you may monitor minor surface cracks if handling is stable.
Next, use safety-driven priorities: movement that changes alignment under load is a tire- and control-risk, not just a comfort issue.
Urgent signs include: audible clunk with visible bushing shift, steering that changes over bumps, rapid inside-edge tire wear, or a steering wheel that is off-center after hitting bumps. Monitoring is reasonable for light cracking with no play, no metal-to-metal contact, and stable alignment readings. However, “monitoring” should still mean scheduling a re-check, because bushings can fail quickly once torn.
What are the worn suspension bushing symptoms you should not ignore?
Worn suspension bushing symptoms include clunks over bumps, steering wander, vibration under load, uneven tire wear, and braking instability because the suspension pivots no longer hold geometry consistently.
After that, match each symptom to a driving condition—braking, cornering, acceleration, or rough-road impacts—to locate the likely bushing group.
Why do bushings cause clunking and vibration?
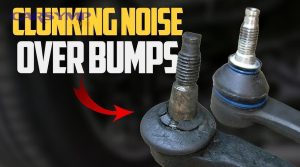
Yes—clunking and vibration from bushings happens because torn rubber or loose sleeves let metal components shift, creating impact noise and transmitting harshness into the body.
Next, treat sound as a “timing clue”: a single clunk at compression suggests a pivot shift, while repeated knocking can indicate sleeve movement or a linked component.
Clunking is commonly produced when a control arm shifts fore-aft under braking or when a sway bar rotates and snaps inside a dried or oversized bushing. Vibration can come from subframe movement, rack mount compliance, or a bushing that allows wheel hop. If vibration increases during braking, suspect front control arm rear bushings (or tension strut bushings) because they resist braking loads.
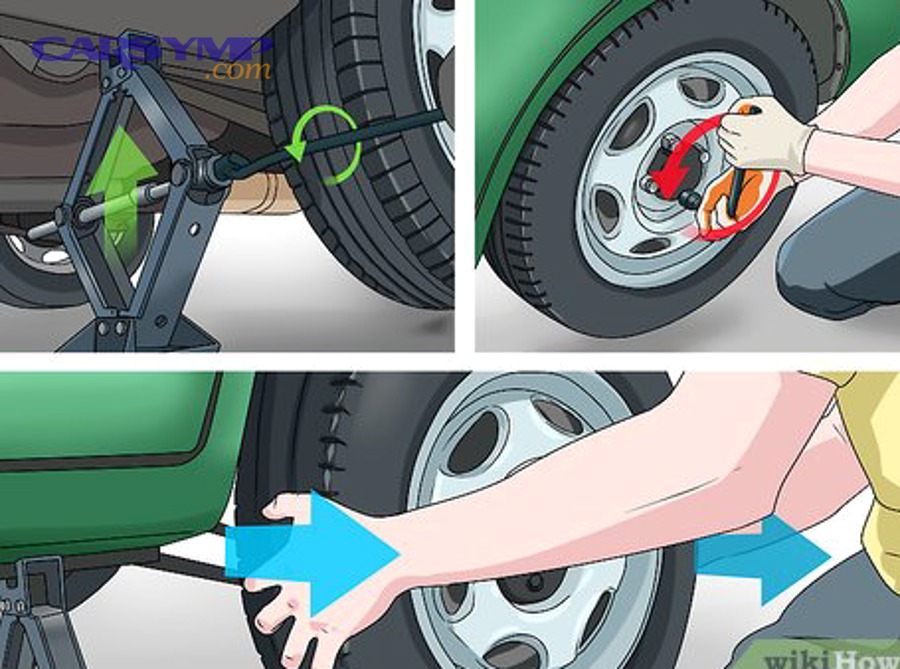
To confirm, safely lift the car and use a pry bar to load the bushing in the direction that reproduces the symptom. Movement should be elastic (rubber flex) rather than a hard shift (sleeve slip).
How do bushings create wandering steering and uneven tire wear?
They do it by allowing toe and caster to change under load, so the wheel points slightly different directions during bumps and braking, which scrubs tires and feels like drift.
After that, look for patterns: inner-edge wear often pairs with toe-out movement, while cupping can reflect repeated geometry changes over bumps.
A healthy alignment spec on a rack does not always mean the car drives straight—if bushings are loose, alignment values can be “good at rest” but change dynamically. This is why some cars pull only during braking or only on rough roads. Also, a steering wheel that won’t stay centered, despite repeated alignments, often points to compliance in control arm bushings or subframe shift.
According to research by the University of Michigan Transportation Research Institute (UMTRI) from the Vehicle Safety Research & Development group, in March 2020, increased compliance in suspension joints measurably alters toe under braking loads, which correlates with reduced straight-line stability.
What does a failed bushing feel like in the cabin?
It often feels like a dull thud, a looseness before the car responds, or a shudder when transitioning between acceleration and deceleration.
Next, notice “delay”: if you turn the wheel slightly and the body reacts a beat later, bushings or mounts may be absorbing motion they shouldn’t.
Drivers commonly describe it as: “The car is floating,” “It changes lanes on its own,” or “It clunks when I back out.” Cabin clues also include increased road noise, a droning boom on rough asphalt, or a vibration that disappears when you lift off the throttle. These aren’t exclusive to bushings, but when combined with visible rubber cracking, leakage (hydraulic bushings), or abnormal movement, bushings become a prime suspect.
How do you diagnose control arm bushing vs sway bar bushing issues?
Control arm bushing problems usually show braking/acceleration instability and alignment drift, while sway bar bushing issues most often cause low-speed squeaks or clunks during turns and one-wheel bumps.
After that, the most efficient diagnosis is to reproduce the noise with a specific motion—brake loading, steering input, or body roll—and inspect the corresponding joint.
Control arm bushing vs sway bar bushing diagnosis: what’s the quickest test?
The quickest test is a load-direction check: brake hard at low speed for control arm movement, then do a slow parking-lot turn over a small bump for sway bar noise.
Next, confirm with inspection: control arm bushings show fore-aft arm shift; sway bar bushings show bar rotation slack or dry binding.
For control arm bushings: watch the wheel position as someone gently rocks the car forward/back (or applies brake and shifts between drive/reverse in an automatic, safely with brakes held). Excess arm movement indicates bushing compliance or separation. For sway bar bushings: listen for rubber squeak or a repetitive clunk when one wheel rises. Inspect for shiny rub marks on the bar, split bushings, or loose brackets.
Also check end links: a worn end link can mimic bushing noise. If the link joint has play, replacing bar bushings alone will not fix the clunk.
How do you tell if the bushing is “cracked but okay” vs actually failed?
Surface cracking can be normal aging; failure is when the rubber separates, the sleeve shifts, or there is measurable play that changes alignment under load.
After that, use three proof points: visible separation, abnormal movement under prying, and symptom reproduction while loading that joint.
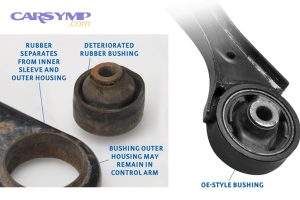
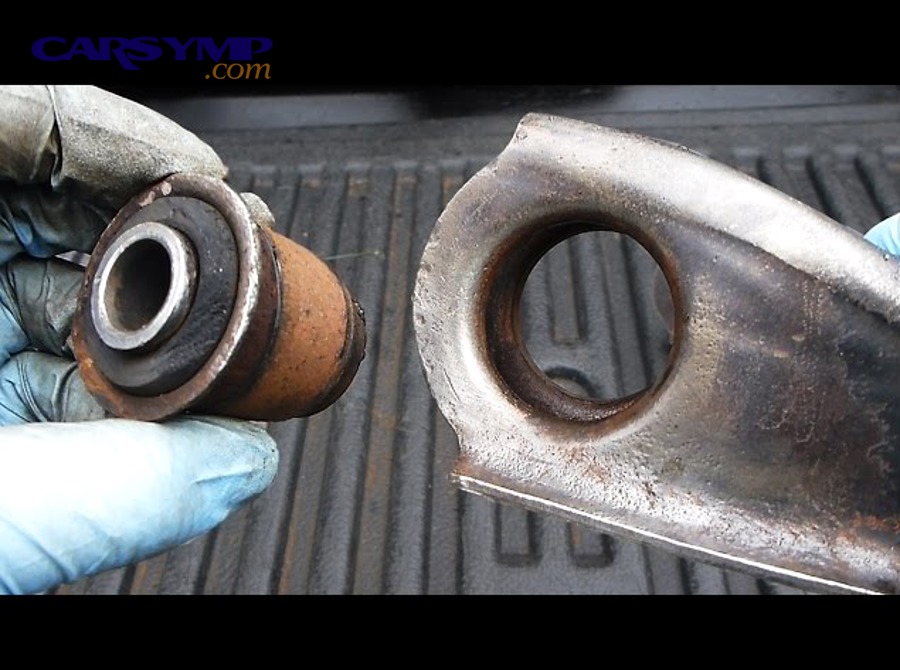
Many OEM rubber bushings develop superficial cracks without immediate performance loss. But if you see tears reaching the inner sleeve, leaked fluid from a hydraulic bushing, or a gap where rubber pulled away from the housing, it’s no longer just cosmetic. Under a pry bar, the arm should move smoothly with elastic resistance—if it jumps, clunks, or the sleeve walks, it’s failed.
When do subframe or steering rack bushings become the real culprit?
They become likely when the whole chassis shifts—thumps on takeoff, vague on-center steering, or clunks during quick left-right transitions despite tight ball joints and tie rods.
Next, think “system”: if multiple noises appear at once or the steering feels inconsistent, suspect mounts that locate entire assemblies.
Subframe bushings can create a heavy thud and a “loose front end” sensation, especially during acceleration changes. Steering rack bushings can produce a knock in the steering column feel when you flick the wheel left/right. These failures can masquerade as internal steering issues, so locating the rack physically and checking for movement during steering input is critical.
What is the press-in bushing replacement overview?
Press-in bushing replacement is a method where the old bushing is pressed out of a control arm or housing and a new bushing is pressed in with correct alignment to restore pivot stiffness.
After that, the critical point is orientation and support—pressing forces must be applied straight, and some bushings must be clocked to a specific angle.
How is a press-in bushing removed safely?
It’s removed by supporting the arm/housing properly and using a shop press or bushing tool to push the sleeve out straight, avoiding arm deformation.
Next, prioritize control: heat and cutting can help, but uncontrolled force can bend arms or damage aluminum housings.
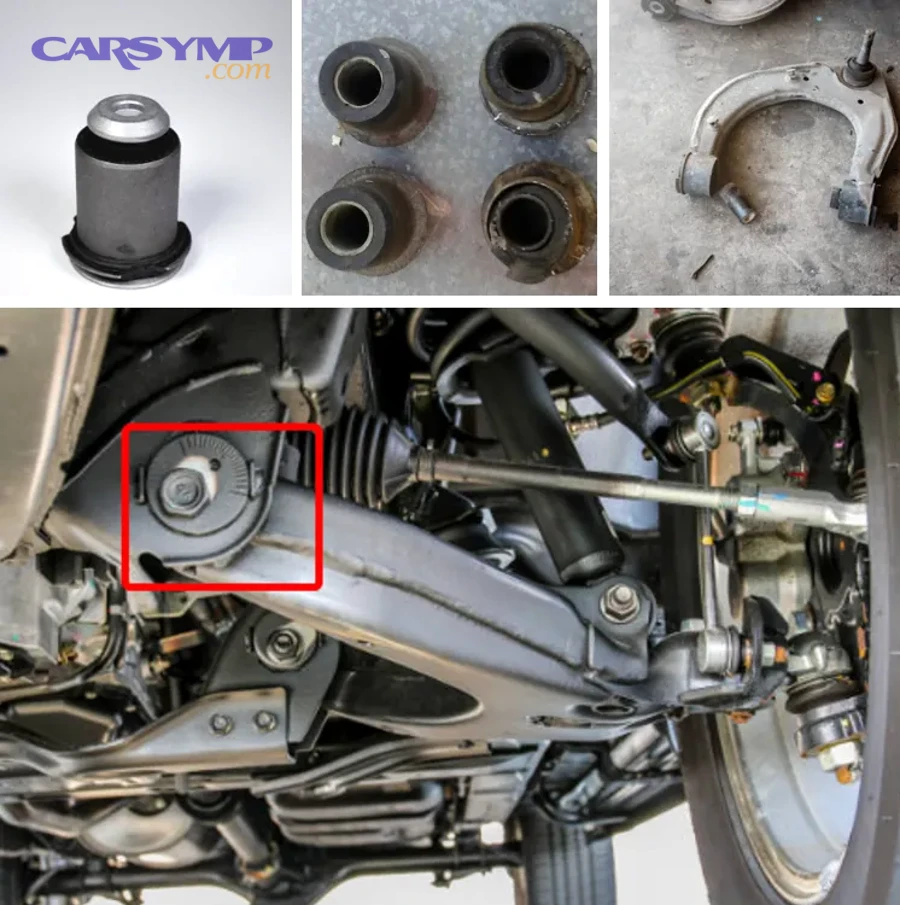
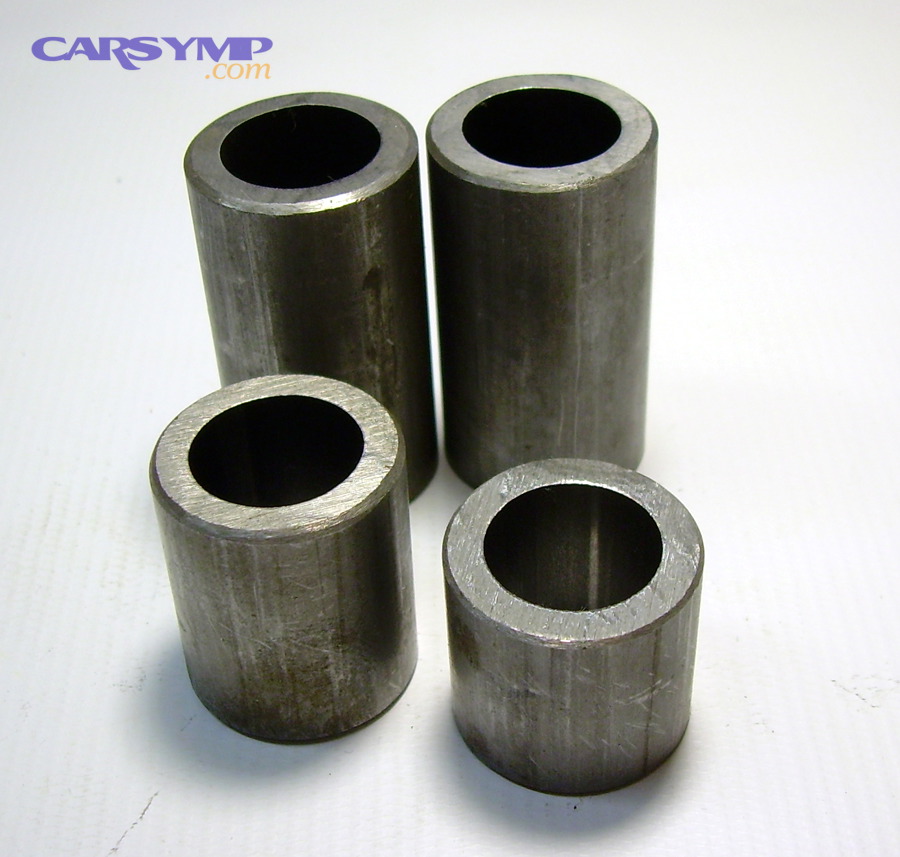
Common approaches include: press-and-receiver cups, specialty threaded bushing tools, or removing the arm and using a hydraulic press. For stubborn steel-sleeve bushings, technicians may relieve tension by cutting the sleeve (carefully) after pressing partially. Aluminum arms require extra caution because gouges and distortion can ruin the bore, leading to a loose-fit bushing that fails early.
Before installing, the bore must be cleaned of corrosion and old rubber residue, and the new bushing must match the arm’s diameter precisely.
Why does bushing orientation matter?
Because many OEM bushings are voided or hydraulic, and their voids are designed to flex in specific directions; misclocking can cause harshness, early tearing, or alignment change.
After that, treat the bushing like an engineered spring: its “soft” axis and “stiff” axis are intentional.
Void orientation affects how the suspension absorbs impacts and resists braking loads. A common example is a rear control arm bushing with voids that allow vertical compliance but resist fore-aft movement. If rotated incorrectly, you may get a harsh ride but still have braking instability—or the rubber may tear quickly. Always follow service manual markings, alignment arrows, or OEM installation notes.
What’s the difference between replacing only bushings vs the entire control arm?
Replacing only bushings can be cheaper in parts but higher in labor; replacing the whole arm is faster and often includes a new ball joint, but parts cost is higher.
Next, choose based on total value: labor time, tool access, and whether other joints are near the end of life.
If the ball joint is integral or worn, a complete arm often makes sense. If only the bushing is bad and the arm is expensive (or performance-oriented), pressing bushings can be the better option. Corrosion, seized bolts, and alignment cams can also swing the decision—sometimes an “arm assembly” avoids fighting a rusted bushing sleeve for hours.
What are DIY bushing replacement risks and when should you avoid DIY?
DIY bushing replacement can be done, but risks include damaging control arms, installing bushings misaligned, under-torquing at ride height, and creating unsafe handling if alignment changes aren’t corrected.
After that, the decision should be based on tool access and precision—not just confidence—because bushings control geometry.
Which mistakes cause repeat failure after DIY bushing work?
The biggest mistakes are pressing bushings in crooked, tightening pivot bolts with the suspension hanging, and ignoring torque specs or orientation marks.
Next, remember the “twist preload” issue: rubber bushings are bonded and meant to sit neutral at ride height.
If you torque a bonded rubber bushing while the suspension is hanging, the bushing is pre-twisted at rest. When the car sits on the ground, the rubber is already stressed, which can tear it early and change ride height slightly. Correct technique: loosely assemble, lower to ride height (or simulate with stands under the control arm), then torque to spec.
Another error is using lubricants incorrectly. Some bushings require specific assembly lube; petroleum grease can degrade certain rubber compounds. Polyurethane often needs the correct grease to prevent squeaks, but rubber bushings generally should not be “greased” unless the kit specifies it.
When should you use a shop instead of DIY?
You should use a shop if the bushing is press-fit in aluminum, requires special clocking, involves subframe alignment, or if you can’t perform a reliable post-repair alignment check.
After that, prioritize safety: if the repair affects steering mounts or load-bearing pivots, professional tools and inspection reduce risk.
Subframe bushings and steering rack mounts often require lifting and repositioning assemblies with precise torque sequences. Similarly, some vehicles use eccentric alignment bolts that seize; extracting them can escalate into cutting and replacing hardware. If you lack a press or the correct bushing cups, improvisation can bend arms or crack housings.
How do you verify your DIY work before driving normally?
Verify by checking for free movement without binding, confirming all fasteners are torqued at ride height, and doing a cautious test drive focusing on braking stability and straight-line tracking.
Next, re-check after 50–100 miles: some bushings settle, and hardware can reveal looseness if not fully seated.
Start with low-speed turns and gentle braking, then gradually add speed. Listen for new squeaks (often poly lube issue) or knocks (often loose hardware). Inspect for shifted bushing sleeves, torn rubber, or witness marks where parts are contacting. If the steering wheel is off-center or the car pulls, schedule alignment immediately.
Bushing replacement labor time: what should you expect?
Bushing replacement labor time varies from about 0.5–1.5 hours for sway bar bushings to 2–4+ hours for control arm bushings per side, and longer for subframe bushings due to access and press work.
After that, the main drivers are: whether the bushing is press-in, whether the arm must be removed, and whether bolts are seized or require cutting.
Why does press-in work increase time so much?
Because it adds disassembly, press setup, cleaning the bore, and careful installation orientation—each step demands precision and can be slowed by corrosion.
Next, consider access: many cars require removing the arm entirely to press bushings, which adds alignment-sensitive steps.
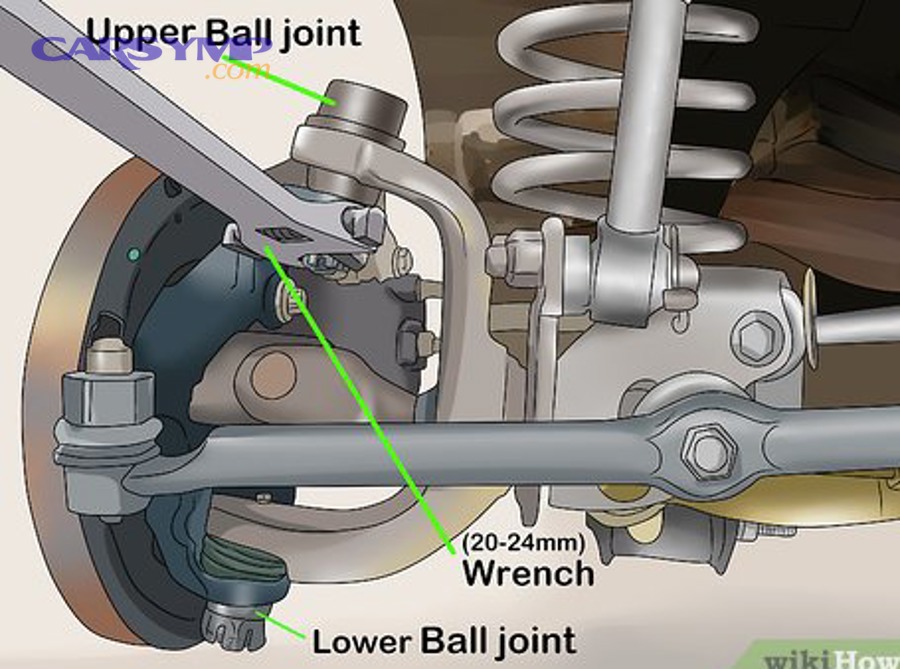
Even with the right tools, a press-in bushing job often includes: removing wheels, detaching ball joints, separating tie rod or sway links, extracting the arm, pressing out the bushing, pressing in the new one, reinstalling, and torquing at ride height. Rust multiplies time; a seized inner sleeve can turn a “simple” bushing into a hardware replacement job.
How does “replace the whole arm” compare for time?
Replacing the whole arm is usually faster because it avoids pressing; many shops can swap an arm in 1–2 hours per side depending on design.
After that, total time may still increase if the vehicle uses eccentric bolts or requires subframe loosening for access.
Complete arms reduce time but may raise parts cost. They also reduce uncertainty: you replace the bushing, ball joint (if included), and sometimes additional mounts in one assembly. This can improve long-term value when multiple components are worn.
What other jobs commonly pair with bushing work?
Common pairings include ball joints, sway bar links, struts, tie rods, and wheel alignment because these components share disassembly steps and influence geometry.
Next, bundling can reduce total labor: once the suspension is apart, doing adjacent wear items is often more efficient.
If your car has high mileage, it’s often smart to inspect boots, joints, and links while access is open. However, avoid “parts cannon” replacement—confirm wear and prioritize safety-related play first.
Alignment needs after bushing work: is it always required?
No, an alignment is not always required, but it is strongly recommended when control arm, subframe, or any cam-bolt/adjustable mount is disturbed because bushing position affects toe and caster.
After that, use a simple rule: if the repair can move the wheel’s pivot points, alignment is a safeguard against tire wear and steering pull.
Which bushing jobs most often require alignment?
Control arm bushings, tension rod bushings, trailing arm bushings, and subframe bushings most often require alignment because they directly locate the wheel and can shift toe/caster/camber.
Next, even if you “marked” the bolts, slight shifts still happen—rubber compliance and new bushing centering change resting geometry.
Any time you remove the control arm, loosen eccentric bolts, or shift a subframe, alignment becomes a near-mandatory follow-up. Also, replacing a worn bushing can “restore” original geometry, which changes where the steering wheel sits even if nothing was adjusted.
When can you skip alignment safely?
You may skip it after simple sway bar bushing replacement if no alignment-sensitive parts were moved and the car drives straight with no steering wheel change.
After that, still monitor tires: a quick visual check and a short test drive can reveal hidden geometry problems.
Sway bar bushings typically don’t set alignment angles, but if you had to loosen subframe brackets or drop a cradle for access, that changes the equation. If you notice any pull, wheel off-center, or new tire scrub sound, get alignment immediately.
How soon should alignment be done after bushing work?
Ideally the same day or within a few days, especially if you replaced control arm bushings, because even short-distance driving can start uneven tire wear if toe is off.
Next, treat it as part of the repair—not an optional add-on—when geometry might have shifted.
If scheduling delays happen, keep speeds moderate and avoid long highway trips until alignment is confirmed. This is particularly important for front suspension work where toe errors quickly destroy tires.
Bushing replacement cost estimate: what drives price the most?
Bushing replacement cost depends most on labor complexity, whether bushings are press-in vs complete assemblies, and whether rust or seized hardware adds time and parts.
After that, the most helpful approach is to break cost into parts, labor hours, alignment, and “risk factors” like corrosion.
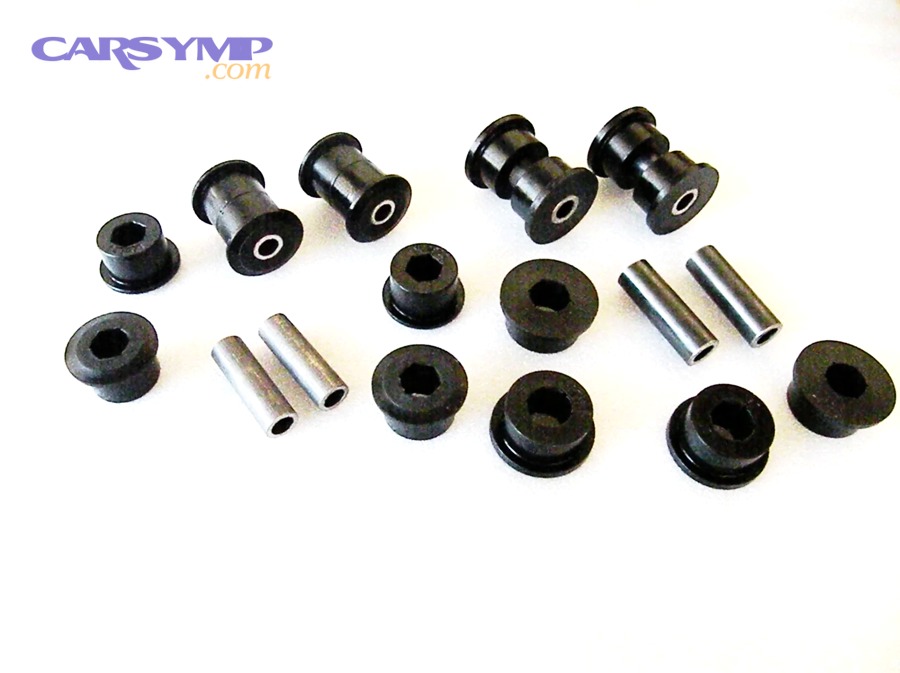
This table helps you estimate typical cost ranges by common bushing locations and whether the job is press-in or assembly replacement.
| Repair type | Typical parts approach | Common labor range | Often needs alignment? | Typical total range (USD) |
|---|---|---|---|---|
| Sway bar bushings | Bar bushings only | 0.5–1.5 hr | Usually no | $120–$350 |
| Control arm bushings (press-in) | Press-in bushings | 2–4+ hr/side | Usually yes | $350–$900+ |
| Control arm assembly replacement | Complete arm (often w/ ball joint) | 1–2.5 hr/side | Often yes | $300–$850+ |
| Trailing arm bushings | Press-in or arm assembly | 2–5 hr | Often yes | $400–$1,200+ |
| Subframe bushings | Press-in mounts | 4–10+ hr | Yes | $800–$2,500+ |
Why can two shops quote very different prices?
Because quotes vary by parts strategy (press-in vs arm), hourly labor rates, expected rust risk, and whether the shop includes alignment and hardware replacement.
Next, compare quotes line-by-line: ask if they plan to replace bolts, if they’ve included alignment, and whether they’re replacing the whole arm.
Some shops avoid press work and quote complete assemblies for speed and warranty consistency. Others prefer pressing bushings to reduce parts cost. Both can be valid—what matters is correct installation and post-repair verification. If a quote seems unusually low, confirm they’re not skipping alignment-sensitive steps like torquing at ride height or road-testing for stability.
How do you decide between rubber and polyurethane without wasting money?
Decide by your priority: rubber is best for comfort and NVH control, polyurethane offers sharper response and longer resistance to oil/ozone but can transmit more noise and may squeak if not maintained.
After that, pick the material that matches driving style and tolerance for harshness, not just “performance hype.”
Daily drivers usually benefit from OEM-style rubber. Performance or off-road builds may prefer polyurethane in specific locations (like sway bars) where added stiffness improves response without harshness. However, full poly kits can make the ride busy and may require periodic lubrication depending on design.
Polyurethane vs rubber bushing comparison: which is better for your car?
Rubber is better for factory-like comfort and quietness, polyurethane is better for steering precision and durability in harsh conditions; the best choice depends on where the bushing sits and how you drive.
After that, compare by location: sway bar and rack mounts tolerate poly well, while some control arm positions feel harsher with poly.
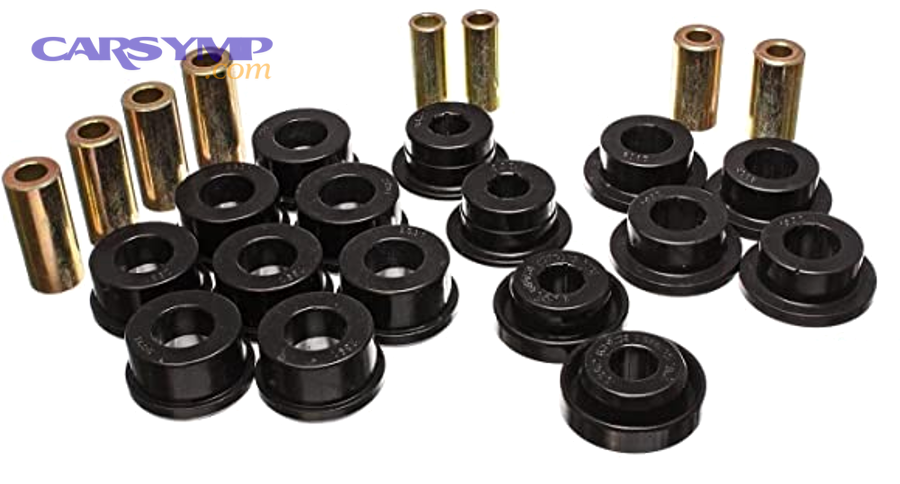
Comparison by NVH, handling, and longevity
Rubber is strongest for NVH isolation, polyurethane is strongest for crisp response, and high-quality rubber is often the best “set-and-forget” option for daily use.
Next, avoid extremes: mixing materials strategically often delivers the best balance.
Rubber bushings are bonded designs that work silently and handle torsion without requiring grease. They can crack with age, heat, and oil exposure. Polyurethane resists oil and ozone better and holds alignment more firmly, but it can squeak if dry and can transmit vibration. For many drivers, a hybrid setup works: OEM rubber in control arms for comfort, polyurethane in sway bar mounts for sharper roll control.
According to research by SAE International’s materials-focused technical papers from the Elastomers and Rubber Compounds domain, in October 2019, bushing compound and stiffness significantly influence noise transmission and steering response trade-offs under dynamic load testing.
Which material is safer for winter, salt, and rough roads?
Both can be safe, but polyurethane often resists chemical exposure better, while rubber’s bonded design can handle torsional flex smoothly; corrosion protection of hardware matters more than the bushing material alone.
After that, protect the system: anti-seize on appropriate bolts (where allowed), new hardware when required, and proper torque reduce failures in salted climates.
In winter regions, seized bolts and corrosion can ruin bushings during removal or cause clunks later if fasteners don’t clamp properly. Regardless of material, ensure sleeves and bolts are clean, and replace stretched or rust-thinned hardware. Also, avoid petroleum contamination—oil leaks can swell or soften some rubber compounds, accelerating failure.
Does polyurethane always improve handling?
No—polyurethane improves handling only when bushing compliance is the limiting factor; if tires, alignment, dampers, or ball joints are the real issues, poly may add harshness without meaningful benefit.
Next, diagnose before upgrading: fix play and geometry first, then tune stiffness.
Handling is a system: tires set grip, dampers control motion, alignment sets direction, and bushings keep geometry stable. If you install poly bushings into a suspension with worn struts, you may feel more impact harshness but still have poor body control. A balanced approach is to restore OEM-level tightness first, then selectively stiffen if your driving goals justify it.
How to extend bushing life after replacement?
You can extend bushing life by preventing oil contamination, keeping suspension bolts properly torqued, avoiding chronic overload, and maintaining alignment so bushings aren’t constantly stressed by incorrect geometry.
After that, focus on the biggest killer: contamination and abnormal motion caused by worn adjacent parts.
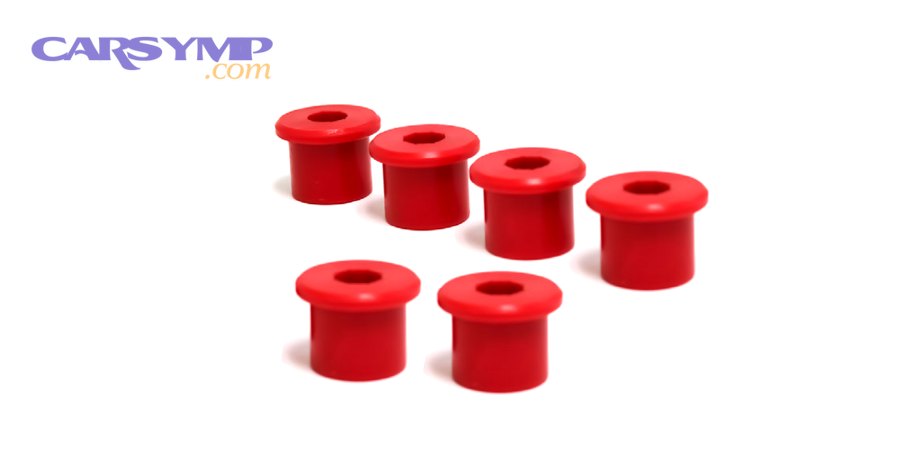
What maintenance habits protect bushings the most?
The best habits are fixing fluid leaks promptly, inspecting boots and mounts during oil changes, and rotating tires while checking for uneven wear that signals geometry stress.
Next, use tire wear as a “silent sensor”: it reveals misalignment and dynamic toe changes that overwork bushings.
Oil leaks (like valve cover or power steering leaks) can drip onto bushings and soften rubber. Also, worn struts allow more uncontrolled movement, which can tear bushings through excessive travel. Keeping the suspension dampers healthy reduces peak loads. Lastly, correct tire pressures and avoiding potholes at speed reduce impact loads that shear bushing rubber.
Should you lubricate bushings?
Rubber bushings generally should not be lubricated unless specified; polyurethane bushings often require the correct grease to prevent squeaks and wear.
After that, follow the kit and manufacturer guidance: the wrong lubricant can damage rubber or attract grit that accelerates wear.
If you have polyurethane sway bar bushings, periodic re-greasing may be needed depending on design and sealing. For rubber, the bond and friction are part of the engineered behavior; adding grease can allow slip where it shouldn’t occur, changing stiffness or causing noise. Always use the lubricant recommended by the bushing manufacturer for poly applications.
How do driving style and loads change bushing lifespan?
Aggressive braking, sharp pothole impacts, heavy towing, and oversized wheels increase bushing loads and shorten lifespan by raising shear forces and heat cycling.
Next, if your use-case is demanding, choose durable designs and inspect more often.
Lifted vehicles, off-road use, and heavy cargo create larger suspension angles and higher bushing articulation demands. In these cases, higher-durometer bushings in specific locations can help, but the trade-off is NVH. The best strategy is targeted reinforcement paired with frequent inspection and keeping other joints (ball joints, tie rods) tight to prevent compounded movement.
Contextual Border
After covering what bushing replacement is, how to diagnose it, how labor and alignment factor in, and how material choice affects outcomes, the next section expands into rarer scenarios and decision details that help you avoid unnecessary parts and repeat failures.
Advanced bushing decisions for tricky symptoms and rare failure patterns
This section focuses on unique and rarer attributes—how hydraulic bushings fail, how to interpret borderline play, and how to choose between partial repairs and assemblies without misdiagnosing the root cause.
What makes hydraulic bushings different, and how do they fail?
Hydraulic bushings contain fluid chambers to control movement in specific directions; they fail by leaking fluid, collapsing internally, or separating rubber bonds, which can cause sudden NVH changes.
Next, use a visual cue: oily residue around a bushing that is not engine oil is often a hydraulic bushing leak.
Hydraulic bushings are engineered to be soft in one mode and stiff in another, using fluid flow through internal passages. When they leak, stiffness changes and you may notice a new thump or vibration even if external cracking seems minor. If the bushing looks wet, swollen, or collapsed, it’s often beyond “monitor.”
How do you avoid misdiagnosing bushings when the real issue is tires or bearings?
Avoid it by separating noise types: bearing growl changes with speed, tire roar changes with pavement, while bushing clunks correlate with load transitions and bumps.
After that, combine a road test with an inspection: bushings show visible movement under prying or braking load, while tires/bearings won’t.
Use a structured drive: constant-speed cruise for bearing noise, gentle lane change to shift load, then a low-speed bump test with light braking. If the symptom appears primarily during load transitions and you can reproduce movement at a pivot, bushings are more likely. If it’s a steady hum that rises with speed, focus on tires/bearings first.
When is “replace one bushing” a bad idea?
It’s a bad idea when the paired bushing on the same arm is similarly aged, when the arm bore is corroded/ovalized, or when the design makes single-bushing replacement unreliable for long-term alignment stability.
Next, consider symmetry: uneven stiffness side-to-side can create pulls and unpredictable response.
If one bushing failed from contamination (like an oil leak) and the other is healthy, single replacement may work. But if age and cracking are similar, replacing both (or the arm) prevents a near-term second repair. Also, if the arm is stamped steel with heavy rust around the bore, a press-in bushing may not seat correctly, leading to early loosening.
How do you choose the “best repair plan” when clunks persist after bushing replacement?
Choose by re-checking torque at ride height, verifying alignment, and inspecting adjacent joints like sway links, strut mounts, and ball joints because multiple wear points can overlap the same clunk symptom.
Next, follow the load path: if the clunk happens in turns, re-check sway links; if during braking, re-check control arm pivots and subframe shift.
Persistent clunks often come from either incorrect torque sequence, hardware not seated, or a different joint that was masked by the old bushing’s noise. A quick diagnostic is to inspect witness marks (fresh shiny contact points) and to isolate with a chassis ear tool if available. If everything is tight but the steering still knocks, steering rack bushings or intermediate shaft play may be involved.
FAQ
Is it safe to drive with worn suspension bushings?
It depends: minor cracking with no play may be drivable, but loose or separated bushings are not safe because they can change alignment under braking and cause sudden handling instability.
Next, if you notice braking pull, severe clunks, or rapid tire wear, reduce driving and schedule inspection immediately.
Do I always need new bolts or hardware during bushing replacement?
No, but many suspension bolts are torque-to-yield or corrode and seize; replacing critical hardware is often recommended to ensure proper clamping and prevent future loosening.
After that, follow the service manual guidance for your vehicle’s specific fasteners and torque procedure.
Can I replace bushings without removing the control arm?
Sometimes yes with on-car bushing tools, but many designs require arm removal for proper press support and correct bushing alignment.
Next, prioritize correctness over convenience: a crooked or misclocked bushing can fail quickly and create worse handling.
What’s the most common reason bushings fail early after replacement?
The most common reasons are improper torque at ride height, wrong bushing orientation, contamination from fluid leaks, and leaving adjacent worn parts that overload the new bushing.
Next, a post-repair inspection and alignment check are the best defenses against repeat failure.
How can I explain my symptoms clearly to a mechanic?
Describe when it happens (braking, turning, bumps), where you hear/feel it (front left, steering wheel, floor), and what changes it (speed, temperature, wet roads).
After that, mention any recent work and whether the steering wheel is off-center, because those clues help pinpoint the correct bushing group quickly.
bushing replacement, suspension bushing symptoms, control arm bushing, sway bar bushing, press-in bushing, alignment after bushing work, polyurethane vs rubber bushings, clunking over bumps, vibration under braking, suspension & steering repairs, Car Symptoms