How to Replace a Control Arm (Wishbone): Costs, Symptoms, and Safe Steps for DIYers & Daily Drivers
Control arm replacement is the right fix when the arm’s bushings or ball joint develop play that you can feel in the steering wheel, see in tire wear, or hear as clunks over bumps—because the control arm (also called a wishbone) literally locates your wheel in space while the suspension moves.
Most people search this topic because their car is making noise, pulling, wandering, or eating tires, and they want a clear “replace it or not” answer based on real symptoms—not guesswork.
You also want to know what the job typically costs and how much time a shop charges, so you can decide whether to DIY or pay for labor without getting surprised by add-ons like an alignment.
Introduce a new idea: once you understand what the control arm does and how it fails, you can diagnose the root cause, choose the right parts strategy, and replace it safely without creating new problems.
What Is a Control Arm (Wishbone) in the Suspension System?
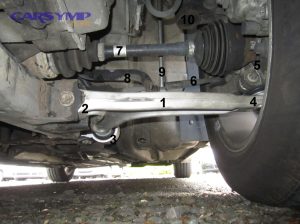
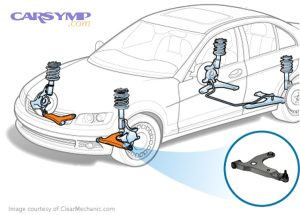
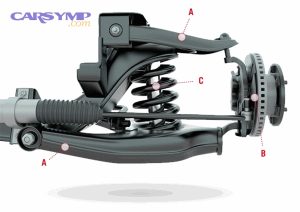
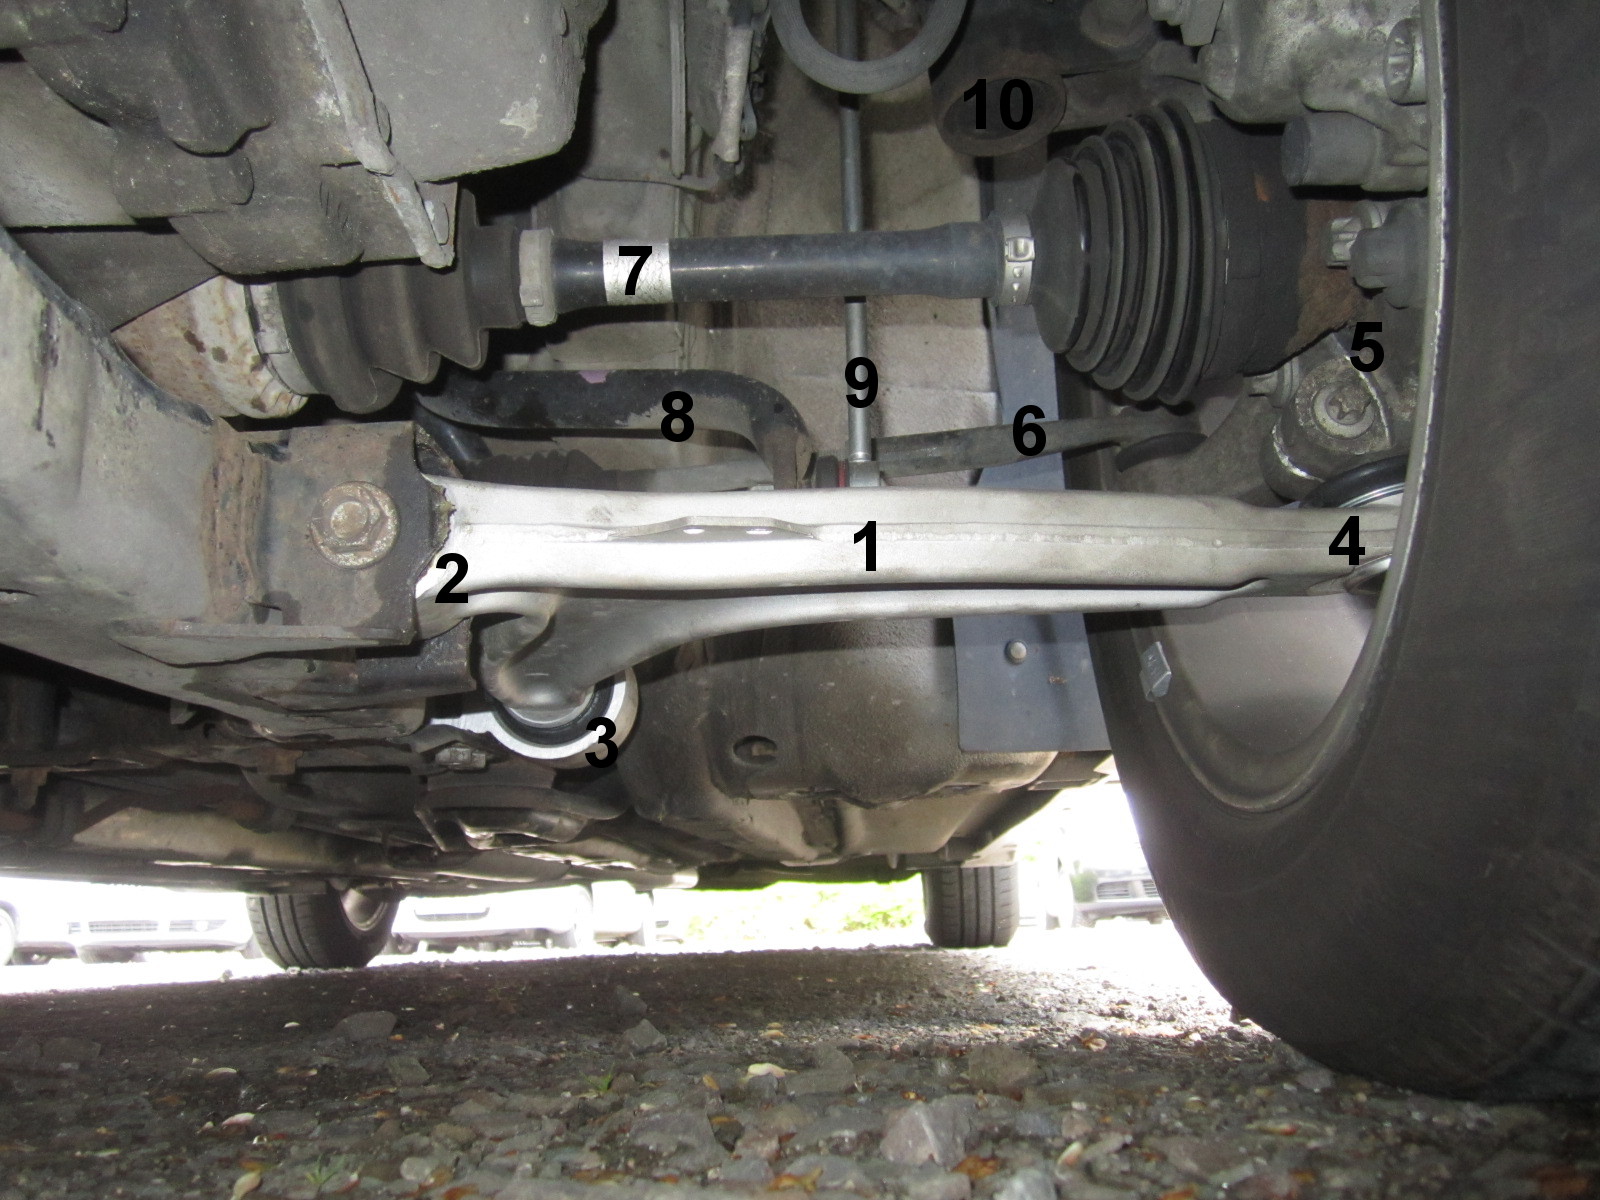
A control arm (wishbone) is a suspension link that connects the vehicle’s chassis to the steering knuckle using bushings and a ball joint, controlling wheel position while allowing vertical travel.
To better understand why this part matters, start by picturing your wheel moving up and down over bumps while still needing to stay pointed straight and planted in corners.
Is the control arm part of “suspension & steering”?
Yes—because the control arm is a suspension locating link that also affects steering geometry (toe, camber, caster) as the knuckle pivots and the suspension compresses.
More specifically, even though you don’t steer the control arm directly, any looseness or deformation changes how the knuckle tracks, which shows up as pull, wander, or unstable braking.
- Suspension role: holds the wheel/knuckle in the correct path through bump and rebound.
- Steering role: maintains alignment angles that determine straight-line stability and turning feel.
- Safety role: prevents sudden geometry shifts that can cause loss of control if a joint separates.
What are the main parts of a control arm assembly?
A typical control arm assembly has (1) the arm body, (2) one or two bushings, and (3) a ball joint (either built-in or separate), plus mounting bolts and sometimes a bracket.
Next, the important nuance is that the “arm” often gets blamed when the actual wear is in the bushing rubber or the ball joint socket.

Why does a control arm affect tire wear and alignment angles?
Because the control arm sets the wheel’s lateral and longitudinal position, worn bushings let the wheel shift under load, changing toe and camber dynamically.
In addition, those dynamic changes are why a car can “measure okay” sitting still but still feel unstable when braking, accelerating, or hitting bumps.
Evidence (why alignment and geometry matter): According to a National Academies report on tires and fuel economy, maintaining proper tire alignment is important for safety and fuel economy by minimizing rolling resistance. (nationalacademies.org)
Should You Replace a Control Arm? Control Arm Failure Symptoms and Handling Clues
Yes—if control arm replacement is on the table, you should do it when you have (1) measurable play, (2) handling instability, and (3) repeatable noise/tire-wear patterns that trace back to the arm’s bushings or ball joint.
Next, use the symptoms to narrow which side and which joint is failing, so you don’t replace the wrong part.

What are the most common Control arm failure symptoms?
The most common Control arm failure symptoms are clunking over bumps, wandering or pulling steering, uneven tire wear, and braking instability (the car “shifts” or darts).
To illustrate how this feels in real driving, many drivers describe Clunking and wandering steering causes as “the car can’t decide where it wants to go,” especially on rough pavement.
- Clunk/knock when turning into driveways or over speed bumps (often bushing movement).
- Wandering on the highway (often rear bushing compliance or ball joint play).
- Steering shimmy over bumps (can be ball joint, tie rod, wheel balance—verify).
- Uneven tire wear (inner/outer edge wear can link to camber; feathering links to toe).
- Vibration when braking (can be control arm bushings or brakes—don’t assume).
Can you keep driving with a bad control arm?
No—because once a bushing tears or a ball joint develops excessive play, wheel position can shift unpredictably, accelerating tire wear and raising the risk of sudden separation in extreme cases.
However, the smarter move is to reduce driving and schedule diagnosis quickly, since the “last 10%” of wear can create the biggest handling change.
How do you separate control arm symptoms from other front-end noises?
You separate them by matching when the noise happens with what load is applied: braking load, acceleration load, steering angle, or bump impact.
More importantly, that pattern tells you whether you’re chasing a bushing (load-direction dependent) or a spherical joint (movement-direction dependent).
- Clunk on braking → rear bushing compliance allowing the wheel to shift rearward.
- Clunk on acceleration (FWD) → front bushing or other drivetrain mounts; verify.
- Clunk over sharp bumps → ball joint play or stabilizer link play; inspect both.
- Wander with crosswinds/road grooves → toe changes under load (bushings/alignment).
How Much Does Control Arm Replacement Cost and How Long Does It Take?
There are 3 main cost buckets for control arm replacement—parts, labor, and post-repair services (often alignment)—and the total changes most with vehicle design, corrosion, and whether the ball joint is integrated.
Next, use cost ranges and time ranges to sanity-check quotes and decide whether DIY savings are worth the risk.
What is a realistic Control arm replacement cost estimate?
A realistic Control arm replacement cost estimate often lands in the mid-hundreds per side, but it can climb with premium parts, complex suspension layouts, and seized hardware.
Specifically, J.D. Power notes many replacements fall roughly between $220–$530 (and labor can add about $150–$200), depending on the vehicle.
For a broader “what shops charge” reference, RepairPal lists an average total range of about $766–$912 for control arm replacement (location and vehicle-dependent). (repairpal.com)
Here’s a quick table to show what the quote usually includes and what triggers higher totals:
| Cost item | What it covers | What makes it higher |
|---|---|---|
| Parts | Control arm assembly or separate bushing/ball joint | OEM pricing, integrated ball joint, performance arms |
| Labor | Removal + install + torque at ride height | Rusted bolts, subframe access, eccentric alignment bolts |
| Alignment/related | Alignment check/adjust + possible cam bolts | Prior damage, worn tires masking issues |
What is typical Control arm replacement labor time?
Typical Control arm replacement labor time is often about 1–3 hours per arm, but corrosion and access can turn it into a longer job.
In addition, independent front suspension layouts vary a lot: a simple MacPherson setup is usually quicker than multi-link designs that require more disassembly.
- Rust belt hardware (bolts seize in sleeves).
- Eccentric cam bolts for alignment (must be marked and re-set).
- Press-fit joints (requires a press or special tool).
- Sensor brackets (ABS wire routing, ride-height sensors) add careful steps.
Is Alignment required after control arm replacement?
Yes—Alignment required after control arm replacement is the safe default because the control arm directly influences camber and toe, and even small changes can produce rapid tire wear.
Moreover, some service bulletins emphasize settling/jouncing the suspension before alignment to ensure accurate readings after suspension work. (static.nhtsa.gov)

Ball Joint vs Bushing vs Control Arm Diagnosis: What’s the Difference?
Ball joint vs bushing vs control arm diagnosis works like this: the ball joint fails by developing play in a spherical socket, the bushing fails by tearing or softening and letting the arm shift, and the control arm fails when the arm itself bends/cracks or its mounting points deform.
Next, you’ll use a load-based inspection so you replace only what’s actually worn—or replace the full assembly when that’s the smarter reliability play.
Which symptoms point to a ball joint problem?
Ball joint issues most strongly show up as vertical or lateral play at the wheel, popping when steering, and uneven wear that doesn’t resolve with alignment because the joint can’t hold geometry.
Specifically, if you can reproduce movement with the wheel unloaded and you see the stud/socket moving, that’s a high-confidence indicator.
- Lift safely and unload the joint (method depends on suspension design).
- Check for play with pry bar and by rocking the wheel at key positions.
- Inspect the boot for tears/grease loss (not proof alone, but a strong clue).
Which symptoms point to a control arm bushing problem?
Bushing failures show up as fore-aft wheel movement under braking/acceleration, clunks on transitions, and alignment that “changes while driving.”
More importantly, a bushing can look “okay” until you load it—then you see the arm shift.
- Watch the wheel while a helper lightly brakes in drive/reverse (in a safe, controlled area).
- Look for excessive arm movement or a visible bushing gap opening/closing.
Evidence (why bushings matter to wheel angles): According to a Chalmers University of Technology thesis (Department of Mechanics and Maritime Sciences), suspension bushing compliance is a key design variable affecting kinematics/compliance behavior, and a target-driven method can reduce suspension design lead time by about half in a case-study workflow. (research.chalmers.se)
When do you replace the entire control arm instead of one component?
You replace the whole arm when the ball joint is integrated, when bushings are not serviceable, when corrosion makes pressing bushings risky, or when you want a one-and-done repair with warranty coverage.
On the other hand, if the arm is solid and only a bushing is worn—and you have the right tools—component replacement can be cost-effective.
To keep decisions clear, here’s a quick comparison table of repair strategies and what they optimize:
| Strategy | Best for | Tradeoffs |
|---|---|---|
| Replace full arm | Speed, reliability, integrated joints | Higher parts cost |
| Replace ball joint only | Arms with serviceable joints | Tooling/press may be needed |
| Replace bushings only | Rare cases where bushings are serviceable | Time-consuming; risk of poor press job |
How Do You Replace a Control Arm (Wishbone) Safely, and When Is Professional Help Better?
A safe control arm replacement follows 7 core steps—secure the vehicle, remove the wheel, support the knuckle, disconnect the ball joint, remove arm bolts, install and torque correctly at ride height, then align—so the new arm restores geometry without stressing bushings.
Let’s explore the job in a way that reduces mistakes that cause repeat noise, torn bushings, or unsafe fasteners.

What are the biggest DIY control arm replacement risks?
The biggest DIY control arm replacement risks are unsafe lifting, damaging the ball joint/knuckle during separation, incorrectly torquing hardware, and tightening bushing bolts with the suspension hanging (which can preload and tear the bushing).
Besides safety, DIY errors often show up later as new clunks, accelerated bushing wear, or steering pull.
- Support points: use rated jack stands on proper lift points.
- Ball joint separation: wrong tool use can tear boots or crack knuckles.
- Torque specs: “good-n-tight” is not good enough for suspension fasteners.
- Ride-height torque: many bushings must be final-torqued at normal ride height.
What are the essential steps for a safe control arm replacement?
A safe replacement is: (1) loosen lug nuts, (2) lift and support, (3) remove wheel, (4) support knuckle, (5) separate ball joint, (6) remove arm bolts, (7) install new arm and torque correctly, then road test and align.
Specifically, each step prevents a predictable failure mode—like brake hose strain, stripped threads, or bushing twist.
- Prep and mark: If you have cam bolts, mark their positions for a baseline.
- Lift and support: Place jack stands; confirm stability with a gentle push.
- Support the knuckle: Use a jack under the knuckle/lower arm so hoses aren’t strained.
- Disconnect attachments: Sway bar link, ABS wire brackets, or splash shields as needed.
- Separate the ball joint: Use the correct separator tool; avoid hammering the knuckle aggressively.
- Remove mounting bolts: Control arm bolts may be long; note orientation and washers.
- Install new arm loosely: Start bolts by hand to avoid cross-threading.
- Set ride height for final torque: Use ramps or jack under the arm to simulate normal height.
- Torque to spec: Use manufacturer torque specs; replace one-time-use hardware if specified.
- Road test carefully: Listen for new noises; then schedule alignment.
One helpful walkthrough video (example):
What should you check immediately after installation?
Right after installation, check that all fasteners are torqued, boots are intact, hoses and wires are routed correctly, and the steering wheel is centered enough to drive safely to alignment.
To sum up the “first drive,” keep speeds low and listen for any clunk that appears only during braking or turning—those are the fastest clues that something is loose or misrouted.
- No brake hose tension at full lock.
- ABS wire clips secured.
- Ball joint nut torqued and cotter pin installed if applicable.
- No contact between arm and wheel/tire at full lock/bump.
- Confirm Alignment required after control arm replacement is scheduled.
What Are Rusted Bolt Removal Tips and Press-in Bushing Options vs Full Arm Replacement?
There are 2 main ways to handle stubborn control arm hardware—(1) preserve and remove fasteners with heat/penetrant and correct tools, or (2) plan a replacement strategy (new bolts, sleeves, or full arm) when corrosion has bonded the bolt to the bushing sleeve.
Next, you’ll decide whether you’re doing a clean “swap” job or a corrosion battle that changes the time, tools, and risk profile.
What are the most effective Rusted bolt removal tips?
The most effective Rusted bolt removal tips combine penetrant + time, mechanical shock, proper six-point sockets, controlled heat (where safe), and a backup plan (cutting tools and replacement hardware).
More importantly, you should assume rust-belt bolts can seize inside the bushing sleeve, which turns “unbolt it” into “extract it.”
- Soak with penetrant and reapply.
- Use a breaker bar with a 6-point socket.
- Apply shock (hand impact or careful hammering on the bolt head).
- Use heat on the surrounding bracket (avoid fuel/brake components).
- If it spins but won’t come out, be ready to cut the bolt and replace.
Are press-in bushings a good option compared with replacing the whole arm?
Press-in bushing options vs full arm replacement depends on tool access and time: bushings can save parts cost, but full arms usually win on speed and reliability for most DIYers.
On the other hand, if you have a press, correct adapters, and the arm is otherwise excellent, bushings can be a precise repair.
- The arm is not corroded or bent.
- Bushings are readily available and correctly indexed.
- You can torque at ride height and verify alignment afterward.
- Integrated ball joint.
- Rust damage at bushing shells.
- You need predictable results fast.
How long control arms typically last, and what shortens their lifespan?
How long control arms typically last varies widely, but lifespan drops quickly with potholes, curb impacts, salt corrosion, torn boots, and aggressive driving that overloads bushings.
Especially if your vehicle has low-profile tires or you drive rough roads daily, you’ll often see bushing wear before the arm structure fails.
- Repeated impact (potholes/curbs).
- Contaminants (salt, oil leaks softening rubber).
- Incorrect torque procedure (preloaded bushings).
- Misalignment and worn tires masking early symptoms until damage accelerates.
When should you stop DIY and use a professional shop?
You should stop DIY when you can’t safely support the vehicle, when corrosion requires cutting/torch work you’re not equipped for, when you suspect knuckle/subframe damage, or when the car’s handling is unsafe to drive.
In short, the “money saver” becomes expensive fast if you crack a knuckle, strip a subframe thread, or skip alignment and destroy tires.
If your notes (even a simple “Car Symp” checklist) show worsening pull, loud clunks, or visible wheel tilt, treat it as a priority repair—diagnose correctly, replace confidently, and align immediately.