

Fix Central Locking Problems: Keyless Entry vs Switch Guide for Drivers
Central locking repair restores consistent locking and unlocking across your vehicle’s doors by finding the exact failure point—command, power, or mechanical movement—and correcting it with the least invasive fix.
Many drivers first notice the issue as “random” behavior: one door stays unlocked, locks chatter, or the car responds only sometimes. The good news is that most faults follow repeatable patterns that you can test in minutes.
Beyond convenience, reliable central locking is tied to safety and security: an intermittent lock can leave a door unlatched, trigger nuisance alarms, or create a false sense that the vehicle is secured.
To introduce a new idea, the most efficient repair is not a part swap—it’s a structured diagnosis that separates “input problem” from “door hardware problem,” then targets only the failed link in the chain.
What does central locking repair actually fix in the locking system?
Central locking repair fixes the power-and-control chain that turns a lock/unlock request into physical movement at each door latch, typically by restoring signal, power delivery, or actuator motion.
Next, it helps to view central locking as a simple pipeline: a command is created, routed, and executed at the door.

What are the main components involved from button press to latch movement?
Central locking is a coordinated set of inputs (key fob, interior switch, door cylinder sensor), a controller (often a body control module), and outputs (door lock actuators tied to the latch), all protected by fuses and sometimes relays.
To be more specific, each door contains a latch-and-linkage assembly plus an electric motor/solenoid that moves a rod or lever; the controller times and powers that movement to lock or unlock.
In practical terms, “repair” can mean cleaning a connector, replacing a weak actuator motor, fixing a broken wire in the hinge area, or addressing a controller that isn’t sending the right command.
Why symptoms feel inconsistent even when the fault is simple
Lock faults often look random because vibration, temperature, and door movement change electrical resistance at weak points—especially in flexing wires and aging motors—so the same command may succeed once and fail the next time.
In addition, voltage drop during cranking or low battery moments can reduce actuator torque, making a marginal mechanism seem “intermittent” rather than clearly broken.
Where “auto electrical repair” fits in a lock problem
Many lock issues are classic auto electrical repair cases: the mechanical latch may be fine, but the electrical path (power, ground, command signal) is compromised by corrosion, poor grounding, or wiring fatigue.
So, before removing door panels or ordering parts, you want tests that prove whether the fault is upstream (inputs/controller) or downstream (actuator/latch).
What are the most common central locking not working patterns and causes?
The most common causes are weak or failed actuators, blown protection devices, wiring breaks at moving door areas, and controller or keyless-entry command faults.
To start, treat the symptom pattern as your map: what works, what doesn’t, and under what conditions.
How to group failures by where they happen in the chain
There are three major groups of faults: (1) command problems (key fob, interior switch, receiver), (2) distribution problems (fuse, relay, module output, wiring), and (3) execution problems (actuator motor, linkage bind, latch wear).
For example, if the interior switch locks all doors but the remote does nothing, the door hardware is likely fine and the issue is in the remote/receiver/learning state.
Why actuators fail so often compared with other parts
Door actuators live in a high-vibration, moisture-prone space and do repetitive work. Over time, brushes wear, gears loosen, and grease stiffens, reducing torque until the actuator can’t fully move the lock mechanism.
In cold weather, marginal actuators are exposed quickly because thicker grease and tighter seals increase the load right when battery voltage may be lower.
How to describe the problem clearly to avoid misdiagnosis
A clear description should include: which doors fail, whether you hear a motor sound, whether the lock knob moves partially, and whether the issue changes with temperature or door movement.
That’s the difference between guessing and pinpointing Central locking not working causes in a way that makes the next test obvious.
Is it one door not locking or do all doors fail together?
If only one door fails, suspect that door’s actuator, latch linkage, or door wiring; if all doors fail, suspect the fuse/relay, controller output, or command input.
After that, you can confirm the pattern with a simple, repeatable checklist done in under five minutes.
Fast pattern test you can do without tools
Lock and unlock using three methods: the key fob, the interior lock button, and the door key cylinder (if it triggers central locking on your model). Record what works and what fails.
Next, repeat the same test with the driver door open, then closed, and finally while gently moving the rubber boot area between the door and body—this can reveal flex-wire breaks.
What “one door vs all doors” reveals immediately
This is where One door not locking vs all doors diagnosis becomes powerful: one-door failures point to localized hardware or wiring; all-door failures point to shared power, shared ground, shared module logic, or shared command input.
In other words, the symptom scope tells you whether to open a door panel or open a fuse-box cover first.
Why the driver door is a special case
The driver door often houses the master switch, key cylinder sensor, and higher wire traffic through the jamb. A driver-door issue can “look global” if the master signal never reaches the module correctly.
So, if all doors fail but you also see weird window/mirror behavior in the same door, prioritize harness and connector inspection.
How do you separate key fob, door switch, and actuator problems quickly?
You separate them by comparing which commands work, listening for actuator movement, and measuring whether voltage reaches the actuator during a lock command.
To begin, treat each input as a different way to ask the car to do the same job—then see which request is ignored.
Three-scenario logic that narrows the fault fast
If the interior switch works but the remote fails, suspect the remote battery, remote pairing, receiver, or module input interpretation. If the remote works but the interior switch fails, suspect the switch, its ground, or its signal line. If both fail for one door, suspect that door’s actuator or wiring.
To illustrate, a weak actuator often makes a sound (buzz/click) but doesn’t move the lock knob fully, while a command problem usually produces no actuator sound at all.
What a basic voltage test tells you in seconds
With the door panel removed (only if needed), you can probe the actuator connector during lock/unlock. A healthy command path usually shows a brief 12V pulse (polarity may reverse for lock vs unlock). If the pulse is present but the actuator doesn’t move, the actuator or mechanical load is the culprit.
On the other hand, no pulse points upstream: wiring, module output, fuse/relay, or command input.
Where this fits in “Key fob vs door switch vs actuator diagnosis”
This is the core of Key fob vs door switch vs actuator diagnosis: use multiple inputs to isolate whether the system is refusing the request or failing to execute it at the door.
Once you’ve isolated the stage, the repair becomes straightforward rather than expensive guesswork.
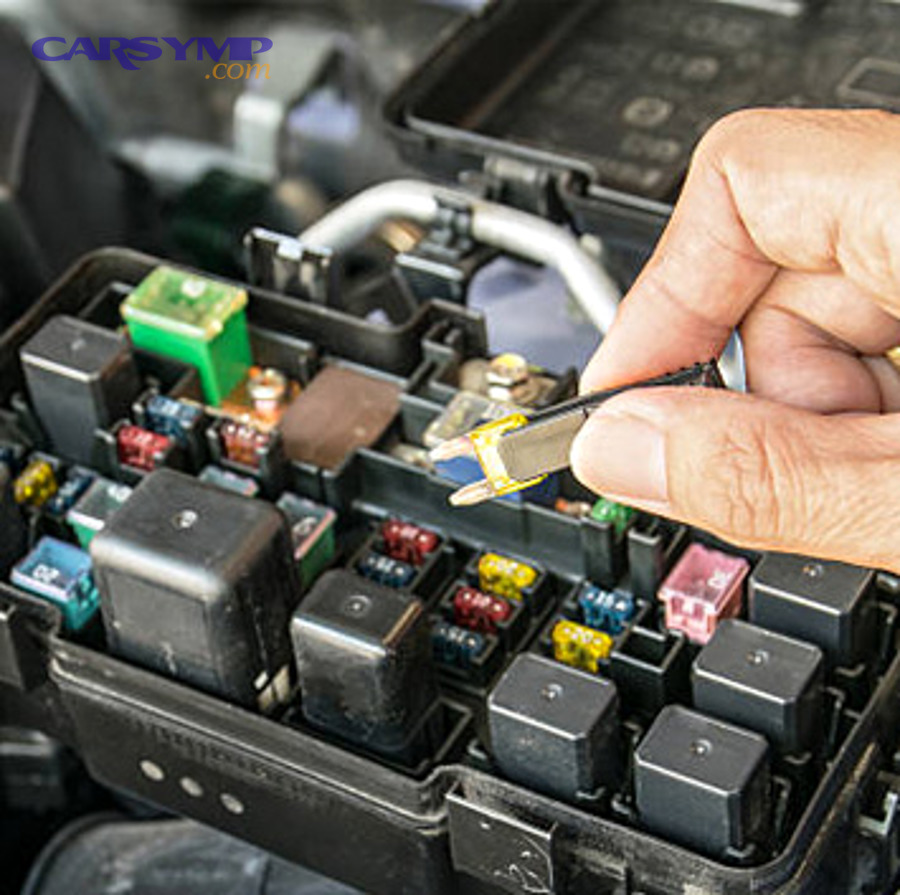
How do you perform fuse and relay checks for central locking safely?
You perform fuse and relay checks by identifying the correct circuit protection, confirming power on both sides of the fuse, and verifying the relay (if used) clicks and delivers voltage under command.
Next, do it methodically, because “looks good” fuses can still be open under load or seated poorly.

What to check first inside the fuse box
Start with the fuse(s) labeled for door locks, body control, keyless entry, or “BCM/ETACS.” Use a test light or multimeter to confirm battery voltage on both test points of the fuse with the ignition in the required position (some circuits are ignition-switched).
Then, reseat the fuse and inspect for heat discoloration that suggests high resistance.
How relays show different failure behavior than fuses
Relays can fail mechanically (no click), electrically (click but no output), or intermittently (works when tapped or after warming). If your vehicle uses a door lock relay, verify coil command and output voltage during lock commands.
In many cars, the module drives actuators directly without a traditional relay, so your service information matters—when unsure, treat “relay present” as a hypothesis and test it.
Practical checklist in plain language
Use this mental script: “Is power entering the fuse box? Is it leaving the lock fuse? Is the module awake? Is voltage reaching the door?” That sequence prevents you from skipping the simplest fix.
And when documenting your process, label it exactly as Blown fuse and relay checks for locks so you don’t repeat steps when you return to the job later.
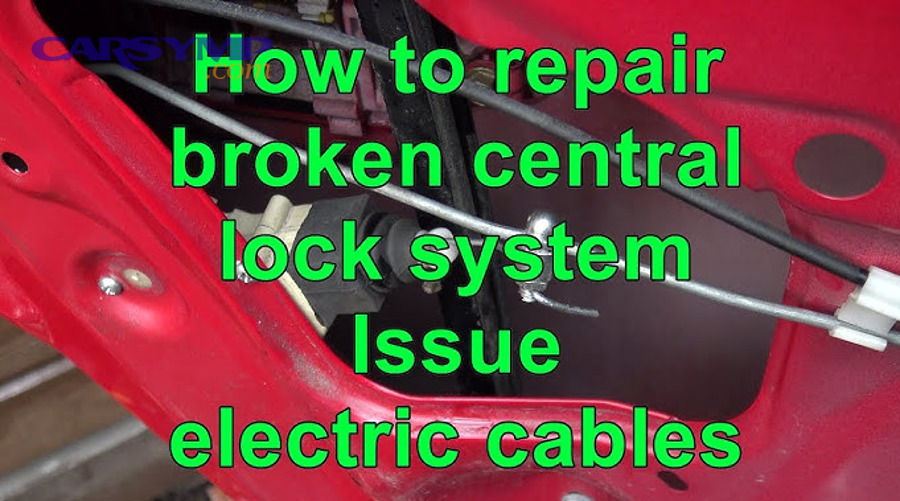
What are the warning signs of wiring failure in the door jamb area?
Wiring failure signs include locks working only when the door is in a certain position, intermittent operation after slamming/closing, and multiple functions (locks/windows/mirrors) glitching together on the same door.
After that, you can confirm suspicion with a visual inspection and a continuity test, focusing on flex points.
Why the door jamb is a high-failure zone
Every time you open the door, the harness bends. Over thousands of cycles, copper strands fatigue and break inside intact insulation, creating intermittent opens that fool simple “wiggle-free” tests.
In addition, moisture can travel along the harness into connectors, adding corrosion that raises resistance and weakens actuator torque.
How to inspect without creating new damage
Peel back the rubber boot gently and look for cracked insulation, rubbed-through sections, and greenish corrosion at pins. Use a light and take photos before moving anything so you can restore routing correctly.
Then, flex the harness while commanding lock/unlock; if the behavior changes reliably, you’ve found a strong lead.
How to phrase and document the evidence
Write down the specific Wiring in door jamb failure signs you observed (door position dependency, multi-function glitches, visible insulation damage). This prevents you from replacing an actuator when the real fix is a repair splice and proper strain relief.
Once wiring integrity is confirmed, you can move deeper into door hardware only if needed.
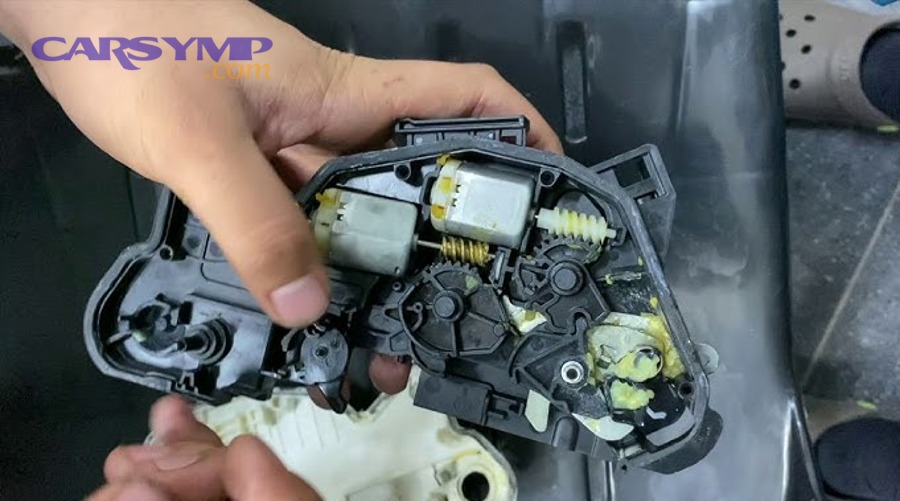
When is the door lock actuator the likely culprit, and what does replacement involve?
The actuator is likely at fault when power reaches it during commands but movement is weak, noisy, partial, or inconsistent—even after confirming the latch linkage isn’t binding.
Next, if you’re hearing a buzz or click without full lock travel, treat the actuator as suspect and validate load versus output.
How to distinguish a weak actuator from a binding latch
A weak actuator often struggles more when locking than unlocking (or vice versa) and may work after repeated presses. A binding latch typically feels stiff even with manual operation and may not return smoothly.
To be more specific, disconnect the actuator rod (if accessible) and test latch movement by hand; smooth manual movement suggests the load is reasonable and the motor is weak.
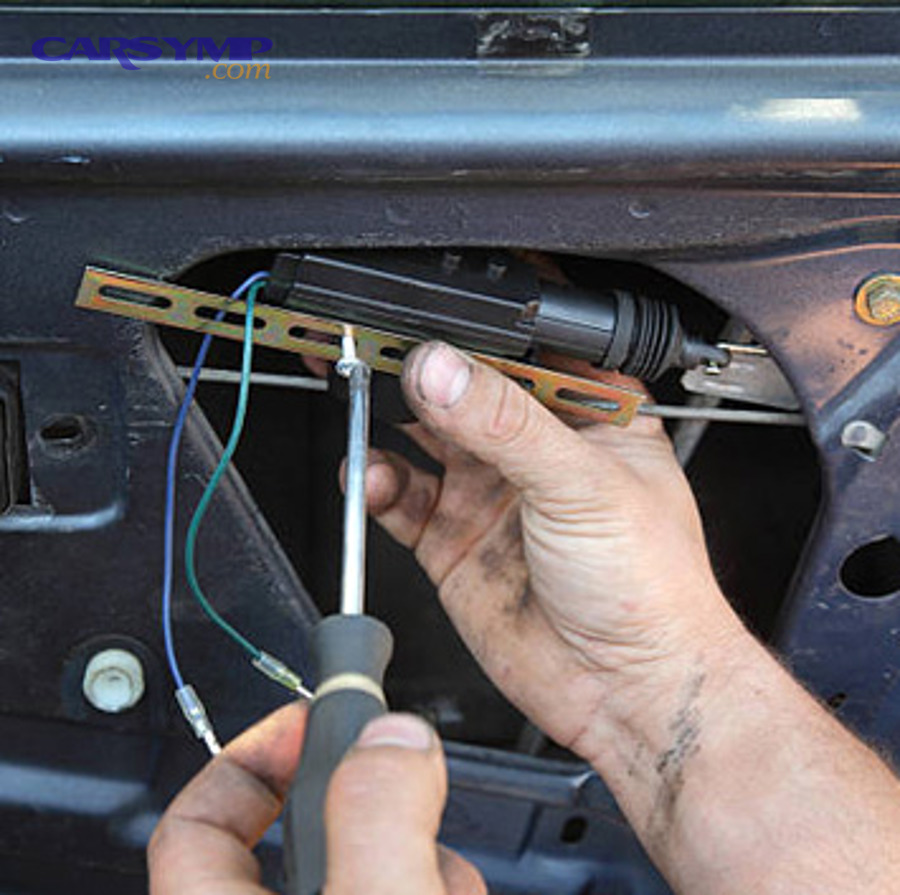
What you should expect during actuator service
A proper Door lock actuator replacement overview includes: removing the door trim panel, peeling back the moisture barrier carefully, accessing the latch/actuator assembly, transferring linkages or cables, and confirming full travel before reassembly.
Because door panels use fragile clips and hidden screws, slow, organized disassembly is often the difference between a clean repair and new rattles.
Video reference for typical replacement steps
If you learn best by watching, a step-by-step replacement demonstration can help you visualize clip locations and fastener order before you touch the door.
After viewing, compare the general steps to your specific model’s layout, because cable routing and latch fasteners vary widely.
How do you troubleshoot the keyless entry module and central locking logic?
You troubleshoot module logic by confirming it receives valid inputs, stays powered and grounded, communicates on the vehicle network, and outputs a lock/unlock command under the right conditions.
To start, remember that modern vehicles may block lock commands if a door is reported ajar or if a security condition isn’t satisfied.
Input conditions that can silently prevent locking
A faulty door-ajar switch, latch sensor, or interior switch can report “door open” even when closed, causing the module to refuse a lock request or immediately unlock after locking.
In addition, aftermarket alarms or remote starters can intercept lock commands and introduce confusing symptom patterns that look like a bad actuator.
Using scan data and body codes to confirm logic-level faults
On many cars, a scan tool that reads body control data will show door-ajar status, lock command requests, and sometimes actuator outputs. If the module sees the request but doesn’t drive outputs, you’ve narrowed the problem to logic, programming, or module hardware.
Conversely, if the module never sees the request from the remote, the issue is at the receiver, antenna path, or remote pairing state.
Where this sits in structured module work
Think of this stage as Keyless entry module troubleshooting: you’re no longer chasing a single door, you’re validating system rules, inputs, and network behavior that decide whether the car will lock at all.
Once module logic is confirmed healthy, remaining faults are almost always wiring or actuator-level.
What is a step-by-step workflow to repair central locking without wasting money?
The best workflow is a staged process: verify the symptom pattern, check power protection, isolate input vs output, validate wiring at flex points, then open the door only when tests prove a door-level fault.
Next, follow the steps in order and stop as soon as you find a proven failure—because every deeper step costs time and risk.
Stage 1: Confirm pattern and reproduce it on demand
Test lock/unlock from the remote, interior switch, and key cylinder if applicable. Note whether failure is isolated to one door, one method, or all doors. Repeat with engine running and off to see if voltage sensitivity is involved.
Then, record the exact condition that triggers the fault (door position, temperature, time since last drive). This becomes your “reproduction recipe.”
Stage 2: Verify protection and power delivery
Check lock-related fuses for voltage on both sides and inspect terminals for heat or looseness. If the circuit uses a relay, verify control and output during a lock command. Confirm battery health if multiple electrical symptoms exist.
In other words, don’t open a door panel while a shared power feed is missing.
Stage 3: Prove whether the door gets a command pulse
If the pattern points to one door, measure for a lock/unlock pulse at the actuator connector. A pulse with no movement indicates an actuator or mechanical load issue; no pulse indicates wiring or module output issues.
At this point, you’ve transformed a vague complaint into a measurable electrical truth.
Stage 4: Open the door carefully and avoid clip damage
Use trim tools, protect painted edges, and store screws by location. Keep the moisture barrier intact as much as possible; it prevents water from reaching speakers and connectors.
For a smoother job, follow DIY door panel removal tips such as: pull straight on clips, don’t pry on fabric edges, and always check for hidden screws behind covers and handles.
Stage 5: Re-learn or re-sync the remote if needed
If your repair involved a module reset, battery disconnect, or remote replacement, pairing may be required. Always use your model’s procedure, because some require ignition cycles while others require scan-tool programming.
When documenting this step, label it exactly as How to reprogram key fob after repair so it’s easy to reference later, especially if multiple drivers use the same vehicle.
How much does central locking repair cost, and what affects the estimate?
Costs vary widely: simple electrical fixes can be inexpensive, while actuator replacement or module work can be more costly due to labor and programming requirements.
Next, you can build a realistic expectation by separating diagnostics, parts, labor time, and any programming or calibration steps.

What usually drives cost up or down
Repairs are cheaper when the fault is a single actuator or a visible wiring break, and more expensive when the issue is intermittent, requires deep disassembly, or involves module programming. Luxury vehicles may also have higher part costs and tighter packaging that increases labor time.
In addition, corrosion or water intrusion can multiply the workload because cleaning one connector isn’t enough—you must restore multiple compromised contact points.
A practical table to understand typical line items
This table lists common central-locking repair line items and what each one covers, helping you compare quotes and avoid paying twice for the same diagnostic step.
| Line item | What it usually includes | When it’s likely |
|---|---|---|
| Diagnosis / inspection | Symptom verification, command tests, basic electrical checks | Any intermittent or multi-door issue |
| Fuse/terminal service | Fuse testing, terminal cleaning, reseating, minor repairs | All-door failures or low-voltage symptoms |
| Wiring repair | Harness inspection, continuity tests, splice/repair, re-wrap | Door-position-dependent failures |
| Actuator replacement | Door panel removal, actuator/latch service, reassembly tests | One door weak/noisy/partial movement |
| Programming / pairing | Remote pairing, module coding, initialization procedures | Module replacement or lost remote sync |
How to talk about pricing without guessing blindly
A helpful way to request a quote is to present your symptom pattern and the tests you’ve already done. Ask whether the shop charges separately for diagnosis and whether any programming is included.
When you need a simple label for budgeting content, use Central locking repair cost estimate to keep your planning consistent across vehicles, regions, and repair approaches.
Contextual Border: The sections above focus on the core diagnosis-and-repair pipeline. Below are edge cases and prevention angles that help you avoid repeat failures and recognize unusual triggers.
Edge cases and prevention tips that keep central locking reliable
Edge cases matter because they create “false failures” that mimic bad actuators, so prevention focuses on moisture control, harness strain relief, and avoiding conflicting aftermarket control paths.
Next, use these scenarios to sanity-check your diagnosis if the symptom pattern doesn’t fit the common categories.
Cold weather, stiff seals, and borderline actuator torque
In freezing conditions, door seals and latch grease can stiffen, increasing load right when battery output may be reduced. If locks fail mostly on cold mornings but work later, focus on voltage drop, actuator strength, and latch lubrication rather than assuming a module failure.
Water intrusion and corrosion that returns after “successful” repairs
If the moisture barrier was torn or not resealed, water can drip onto connectors and speakers, causing recurring lock issues. Prevention means resealing the barrier properly and ensuring door drains are clear so water exits instead of pooling.
Aftermarket alarms, remote starters, and conflicting commands
Aftermarket systems may inject lock commands or cut factory lines. If your issue appeared after an install, inspect splices and confirm the factory controller sees consistent inputs; otherwise, you can chase symptoms that are created by a competing control module.
Long-term habits that reduce repeat failures
Keep the key fob battery fresh, avoid slamming doors when the harness boot is stiff, and address slow window motors or sticky latches early—those loads and vibrations accelerate harness and actuator wear.
If you maintain a troubleshooting library, you can tag your internal notes with Car Symp for easy retrieval and consistent terminology across related electrical issues.
FAQ: Central locking repair questions drivers ask most often
Can a weak car battery cause central locking to fail intermittently?
Yes—low voltage can reduce actuator torque and confuse modules that need stable power, especially right after startup or during cold weather. If multiple electrical features are acting up, test battery health before replacing lock parts.
Why do I hear a clicking sound but the door still won’t lock?
Clicking often means the actuator is receiving a command but can’t move the mechanism fully due to low torque, worn gears, or a binding latch. Confirm by checking for a voltage pulse at the actuator and testing latch movement manually.
Is it safe to keep driving if one door won’t lock?
It’s usually drivable, but it’s a security risk and can be a safety concern if the door isn’t latching consistently. If the lock issue is paired with a “door ajar” warning or latch problems, prioritize repair.
Do I always need to remove the door panel to diagnose central locking?
No—many faults are found faster at the command and power level (remote vs switch tests, fuse checks, and door-jamb harness inspection). Door panel removal should come after tests point to a door-level execution problem.
What should I tell a shop to speed up diagnosis?
Share which doors fail, which control methods work, whether you hear actuator noise, and whether the issue changes with door position or temperature. A clear symptom map reduces labor time and helps avoid unnecessary part replacement.
How can I avoid paying for the wrong repair?
Ask what test result supports the recommended part (for example, “voltage pulse present at actuator but no movement”). Good diagnosis ties the recommendation to a measurable observation, not a guess.


