

Decode and Fix Check Engine Light Diagnosis for Drivers, Symptoms vs Causes
A check engine light is not a verdict—it’s a message. The goal of check engine light diagnosis is to translate that message into a safe next action: keep driving normally, drive gently to service, or stop before damage spreads.
Most drivers lose time (and money) by reacting emotionally—clearing codes, replacing random parts, or ignoring the light until the car starts running poorly. A structured approach turns the light into a roadmap that points to the highest-probability causes first.
In this guide, you’ll learn how the light is triggered, how to interpret what you see and feel, and how to narrow the fault quickly using evidence instead of guesses—especially when the car drives “almost normal.”
To begin, let’s separate urgency from uncertainty and build a repeatable process you can use on any vehicle.
Is the check engine light always serious, and what should you do first?
No—check engine light diagnosis starts with triage: a steady light often means “needs attention soon,” while a flashing light usually means “stop damage now,” especially if the engine is misfiring.
To make the first decision correctly, use a simple three-signal check: light behavior (steady vs flashing), drivability (smooth vs shaking), and engine temperature (normal vs overheating). After that, you can choose the safest next step.
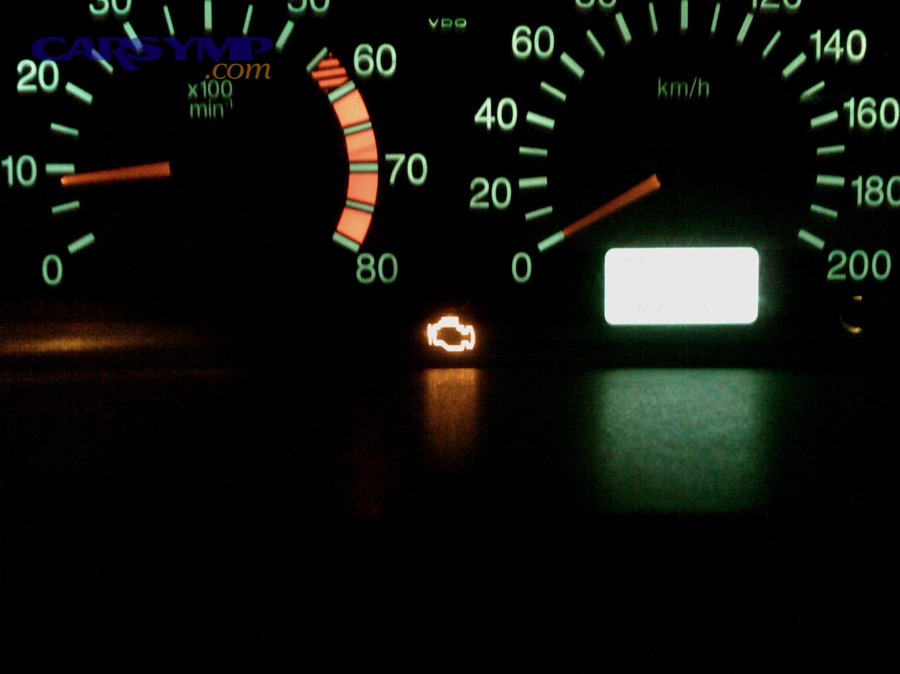
Step 1: Look at the light behavior and act immediately if it flashes
A flashing malfunction indicator typically signals an active problem that can rapidly harm emissions hardware. Next, if the car shakes, lacks power, or smells like raw fuel, reduce load immediately—ease off the throttle, avoid hills, and prepare to stop safely.
The reason is simple: a severe misfire can send unburned fuel into the exhaust, overheating the catalytic converter. The U.S. emissions rules for OBD systems explicitly require misfire monitoring for catalyst-damaging events, and EPA rule text also describes a blinking MIL when catalyst damage is imminent.
Step 2: Note what changed in the last 48 hours
Quick wins often come from context. Did you fuel up at a new station? Drive through heavy rain? Replace a battery? Do maintenance under the hood? Even a loose fuel cap after refueling can trigger an EVAP-related code on many cars.
Next, write down any symptom timing: “only at idle,” “only when cold,” “only under hard acceleration,” or “only after highway driving.” This timing becomes your filter for which tests matter.
Step 3: Do a “safe-to-drive” check before you chase the root cause
Before you diagnose, confirm basic safety: oil level, coolant level, overheating warning, severe knocking sounds, or smoke. If the engine is overheating or oil pressure is low, stop diagnosis and protect the engine first.
After that, plan your next step: either retrieve codes (best), or if you can’t, limit driving to essential short trips until you can scan.
check engine light diagnosis, steady vs flashing MIL, misfire catalyst risk, immediate next steps
How does the car decide to turn on the check engine light?
The check engine light turns on when the vehicle’s computer detects a fault pattern that violates emissions or performance thresholds, then records a diagnostic trouble code and, depending on severity, requests the MIL.
This matters because the “same” light can represent very different situations: a one-time glitch, a repeating failure under specific conditions, or a persistent issue that must be confirmed across multiple drive cycles. Next, understanding how the system decides helps you avoid misdiagnosis.
Confirmed vs pending faults: why the light sometimes appears “late”
Many faults begin as pending codes—meaning the computer saw something suspicious once, but wants to see it again before turning on the light. This prevents false alerts from one-off events like a brief voltage dip or a momentary sensor glitch.
Next, if the condition repeats under the right enabling conditions (temperature, speed, load), the code becomes confirmed and the light turns on. That’s why you may feel a minor issue before you see the light—or see the light even when the car feels fine.
One-trip vs two-trip logic: why “flashing” is different from “steady”
Some faults are serious enough that they can trigger the MIL quickly. Emissions regulations require the OBD system to monitor for misfire conditions that can damage the catalyst.
Next, for many vehicles, catalyst-threatening misfire behavior is handled with stronger warning logic than small leaks or slow sensor drift. Practically, that’s why flashing should be treated as urgent even if the car still moves.
Why codes don’t equal parts: what a code truly means
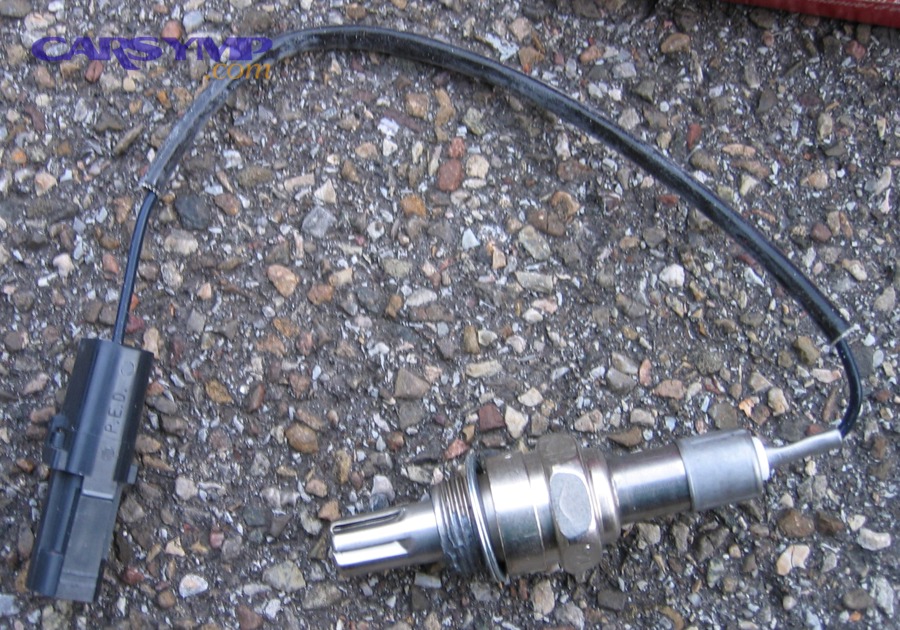
A code is a test result, not a guaranteed broken component. For example, an oxygen-sensor-related code can be triggered by exhaust leaks, wiring issues, rich/lean fueling problems, or sensor aging. Similarly, an EVAP leak code often points to “system leak detected,” not “replace the canister.”
Next, your job is to interpret the code in context of symptoms and conditions, then verify with targeted checks.
OBD monitoring logic, pending vs confirmed DTC, one-trip two-trip, MIL request criteria
What are the fastest DIY steps to narrow the cause without guessing?
The fastest approach is a short workflow: scan codes, capture freeze-frame data, check the obvious mechanical basics, and then test the most likely failure path before replacing anything.
This workflow prevents the two most expensive DIY mistakes: swapping parts based on the code name, and erasing evidence by clearing codes too early. Next, follow these steps in order and you’ll usually isolate the true direction within one hour.
Step 1: Scan and record before you touch anything
Use an OBD2 reader to pull codes and note whether they are current, pending, or stored. Then save freeze-frame data (RPM, coolant temp, fuel trims, speed) because it tells you the moment the fault happened.
After that, write down the exact code strings (example: P0302, P0171) and any “bank” or “sensor” labels. This is the raw evidence you’ll use to choose checks.
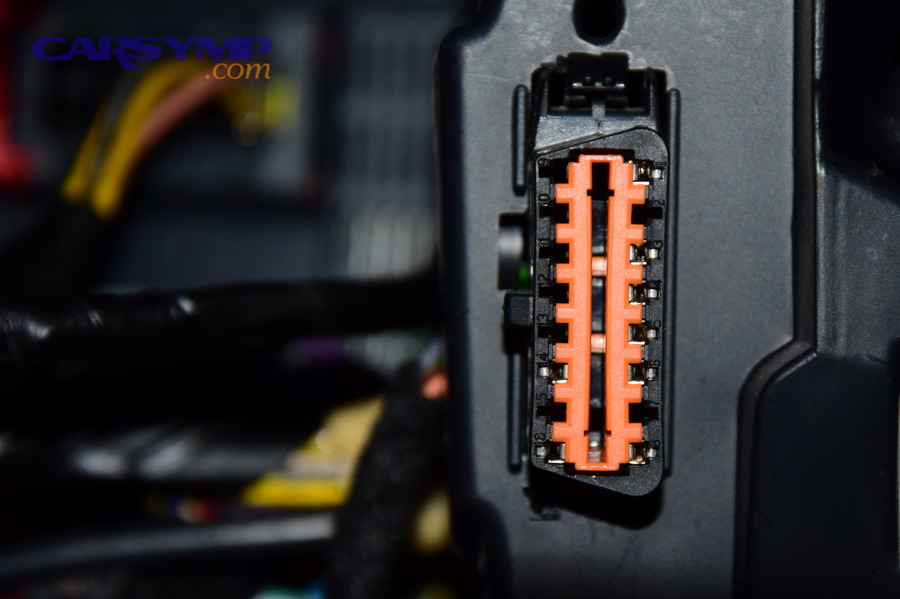
Step 2: Do a quick visual and connector inspection
Pop the hood and look for: disconnected vacuum hoses, cracked air-intake boots, loose electrical connectors, damaged wiring near hot exhaust parts, and oil/coolant contamination in connectors. For EVAP-related faults, always confirm the fuel cap is properly seated and the seal is intact.
Next, if the light came on right after a repair, assume a connector or hose is misplaced until proven otherwise. This single mindset prevents many “phantom” issues.
Step 3: Use simple data checks to choose the right branch
If your tool shows live data, check: short- and long-term fuel trim, coolant temperature plausibility, and misfire counters (if available). High positive fuel trims at idle that improve at higher RPM often suggest unmetered air (vacuum leak). Misfire counts concentrated in one cylinder point to ignition, injector, compression, or a vacuum leak localized to that cylinder.
Next, you can decide whether to focus on air/fuel control, ignition, EVAP, or exhaust aftertreatment—without guesswork.
Step 4: Learn with a visual walkthrough video
Once you’ve seen the scanning sequence, practice it on your own vehicle even when it has no light. That builds confidence and helps you recognize normal values.
In the body of your diagnosis notes, you can explicitly label your process as car diagnostics so you consistently record: codes, conditions, symptoms, and tests performed.
scan codes, freeze-frame, fuel trims, live data checks, evidence-first workflow
Which symptoms point to the most likely system: ignition, EVAP, fuel, or sensors?
There are four high-frequency buckets of causes—ignition misfire, EVAP leak, air/fuel measurement errors, and exhaust aftertreatment—and your symptoms usually indicate which bucket is most likely.
This is where check engine light diagnosis becomes fast: you match how the car behaves to what the computer is monitoring. Next, use the symptom map below to prioritize tests that have the highest payoff first.
This table contains a symptom-to-system map to help you pick the most likely direction before spending time or money on parts.
| What you notice | Most likely direction | High-payoff checks |
|---|---|---|
| Rough idle, shaking, flashing light, fuel smell | Misfire / ignition / fuel delivery | Misfire counters, spark plugs/coils, injector balance, compression test |
| Runs fine but light appears after refueling | EVAP leak or purge issue | Fuel cap seal, purge valve behavior, cracked EVAP hoses |
| Hesitation on acceleration, high fuel trims, whistling | Unmetered air / vacuum leak / airflow sensor error | Smoke test (if available), intake boot cracks, MAF sensor readings |
| Reduced power, rattling exhaust, sulfur smell, heat | Catalyst efficiency / exhaust restriction | Backpressure, upstream/downstream sensor patterns, misfire history |
How to interpret “misfire-like” behavior
A true misfire often feels like a rhythmic shake at idle or a stumble under load, sometimes paired with a blinking MIL. Regulations require monitoring for misfire that can cause catalyst damage, reinforcing why you shouldn’t ignore a severe misfire pattern.
Next, determine if the misfire is cylinder-specific (often ignition/injector/compression) or random/multiple (often vacuum leak, low fuel pressure, or sensor-driven fueling error).
How to interpret “EVAP-like” behavior
EVAP issues commonly show no drivability symptoms—your car can feel perfect. That’s why people dismiss the light. However, an EVAP leak can still fail emissions inspections and can hide secondary issues like a stuck purge valve that creates rough idle after fueling.
Next, inspect the simplest sealing points first, then move upstream to purge and vent controls.
How to interpret “sensor-like” behavior
Sensor-related issues often present as hesitation, poor fuel economy, or a light that appears under specific temperatures and loads. In the body of your notes, you can include a dedicated section labeled Common check engine light causes by symptoms so you consistently connect behavior to likely systems.
Next, compare sensor plausibility (does the reading match reality?) before you condemn the sensor.
When you need a clear labeling phrase in your notes, you can use Misfire vs EVAP vs oxygen sensor diagnosis to separate decision branches without forcing that phrase into headings.
symptom-based diagnosis, misfire bucket, EVAP bucket, airflow measurement bucket, catalyst bucket
What do trouble-code patterns mean, and how should you prioritize them?
Most codes fall into patterns: misfire (P0300–P030x), fuel/air mixture (P0171/P0172), catalyst efficiency (P0420/P0430), EVAP leaks (P0440–P0456), and sensor circuits—each pattern suggests a different test order.
Rather than memorizing every code, prioritize by risk (damage potential) and certainty (how strongly the code points to a subsystem). Next, use the principles below to avoid chasing the wrong target.
Priority level 1: codes that can cause immediate damage
Active misfire and severe fuel-control faults can overheat the catalyst or cause drivability hazards. EPA-aligned rule text describes a blinking MIL when misfire is occurring and catalyst damage is imminent.
Next, treat these as “fix before commute” items, not “monitor for a week” items—especially if the light flashes or the engine runs rough.
Priority level 2: codes that can hide the real root cause
Mixture codes (lean/rich) often reflect downstream effects: vacuum leaks, exhaust leaks, weak fuel pressure, contaminated sensors, or intake system issues. The code points to the direction of imbalance, not necessarily the component named in the description.
Next, check air leaks and intake integrity before replacing sensors.
Priority level 3: codes that affect inspection readiness and emissions compliance
EVAP leaks and catalyst efficiency issues may not be felt in daily driving but can affect emissions compliance and inspection outcomes. Readiness monitors and inspection rules differ by state and program; for example, California BAR has published evolving guidance and regulations around readiness monitor requirements.
Next, plan enough drive time after repairs for monitors to complete, especially if you must pass an inspection window soon.
If you want a single phrase in your notes for learning, you can add OBD2 codes list and what they mean as a section label in your personal checklist—without putting that phrase into your headings.
code families, misfire P030x, lean/rich P0171 P0172, EVAP P0440-P0456, catalyst P0420
When should you stop driving immediately, and when can you drive carefully?
If the light is flashing or the engine is running rough, you should minimize driving and avoid heavy throttle because misfire under those conditions can quickly damage the catalytic converter.
This decision is about protecting expensive components and preventing a minor fault from becoming a major repair. Next, use the quick rules below to decide whether you can drive to service or you should stop and arrange help.
Stop or limit driving: flashing light, shaking, or raw-fuel smell
A flashing MIL is a strong warning signal in emissions rule language: misfire monitoring must detect catalyst-damaging conditions, and EPA text describes a blinking MIL once per second when catalyst damage is imminent.
Next, if you must move the vehicle for safety, do so gently and only as far as needed, then shut it down and arrange service.
Drive carefully to service: steady light with minor symptoms
If the light is steady and the car drives normally, you can usually drive short distances while you arrange diagnosis. Avoid heavy acceleration and towing, and keep an eye on temperature and oil pressure warnings.
Next, scan codes as soon as possible so you don’t accidentally ignore a misfire developing into a more harmful state.
Usually safe to drive short-term: steady light with no symptoms (but don’t ignore it)
Many EVAP and minor sensor faults fall here. You may feel nothing, but the vehicle is telling you a monitored test failed. If you’re near an inspection deadline, treat it as urgent for compliance even if it’s not urgent for drivability.
Next, schedule a scan and basic checks within a few days rather than weeks.
For a clear label inside your notes, you can include Can you drive with check engine light on as a checklist header—again, in the body of your document rather than in article headings.
flashing MIL guidance, catalyst protection, safe-to-drive triage, urgency rules
How do you confirm the root cause before replacing parts?
Confirming the root cause means proving a failure path with at least one test that can’t be faked by coincidence—like a swap test for ignition, a smoke test for leaks, or a measured data change that matches the suspected fault.
This is where many people lose money: they replace the component named in a code description without proving it’s actually failed. Next, use confirmation tests that match your code pattern and symptoms.
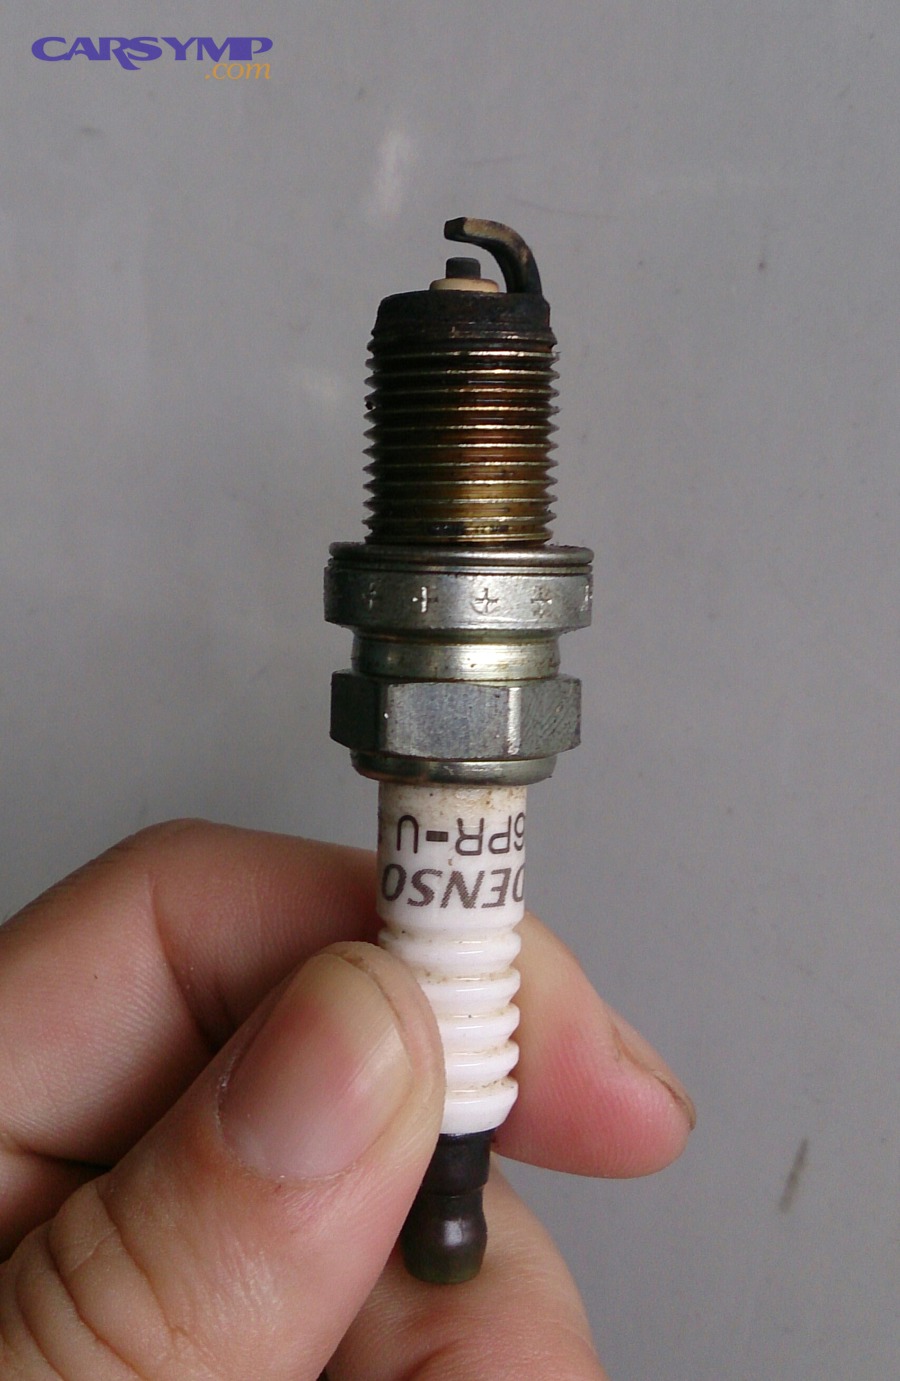
Ignition confirmation: isolate cylinder-specific misfires
If you have a single-cylinder misfire code, move the coil (or plug) from the misfiring cylinder to another cylinder and see if the misfire code follows. This “swap test” is powerful because it converts a guess into evidence.
Next, if the misfire does not follow, focus on fuel injector operation, compression, and vacuum leaks near that intake runner.
EVAP confirmation: check sealing, then control behavior
Start with the fuel cap seal and the filler neck surface. Then evaluate purge behavior: a purge valve stuck open can cause rough idle and lean conditions after fueling. Conversely, leaks in EVAP hoses can set small-leak codes without drivability symptoms.
Next, if you have access to a smoke machine, it can find leaks that your eyes can’t.
Airflow and mixture confirmation: use fuel trims and intake integrity
High positive fuel trims at idle that improve with RPM often indicate unmetered air. Intake boot cracks, loose clamps, and leaking gaskets are common culprits. When airflow measurement is suspected, compare MAF readings to engine load and RPM plausibility and inspect for contamination.
Next, only replace sensors after wiring integrity and air leaks are ruled out.
In your personal checklist, you can add a section titled When to clear codes vs fix the issue and keep it alongside your test results so you don’t erase evidence prematurely.
confirmation testing, swap test, smoke test, fuel trim logic, wiring integrity checks
Why does the light come back after repairs, and how do you verify the fix?
The light returns after repairs mainly for three reasons: the root cause wasn’t fixed, a new error was introduced (hose/connector), or monitors haven’t completed yet—so the system can’t confirm the repair under real driving conditions.
This is a crucial phase of check engine light diagnosis because you’re no longer guessing—you’re validating. Next, use a verification routine that focuses on repeatability and monitor completion.
Verification step 1: confirm the same code, not a different one
Scan again and compare: did the original code return, or did a new one appear? A new code right after repair often points to a disturbed connector, vacuum line, or sensor harness routing issue.
Next, re-check your work area for anything you touched, even if it “looks fine.”
Verification step 2: watch readiness status and drive-cycle completion
Many emissions checks rely on readiness monitors. Some programs and jurisdictions publish specific monitor requirements and rules; for example, California BAR has documented readiness monitor regulations and requirements around passing Smog Check.
Next, if you cleared codes or disconnected the battery, expect monitors to reset and require driving to complete. Don’t assume “no light” equals “ready for inspection.”
Verification step 3: use a “return-proof” checklist
After a repair, do a short checklist: cold start behavior, warm idle stability, gentle acceleration, highway cruise, and a final scan for pending codes. If you see a pending code reappear under the same conditions, you’ve likely found either an incomplete fix or an intermittent wiring/connection issue.
Next, document what conditions trigger it so a shop (or you) can reproduce it.
In your own records, include a section called Check engine light after repairs troubleshooting so you capture what changed, what was fixed, and what evidence confirms the outcome.
post-repair validation, readiness status, pending codes after repair, reproducible conditions
Contextual Border: Up to this point, you’ve learned the core macro workflow for check engine light diagnosis: triage, scan, interpret patterns, confirm the failure path, and verify the repair. Next, we’ll expand into micro details that affect inspection outcomes, code clearing strategy, and what to expect from a professional diagnostic process.
Advanced details that change inspection results, clearing strategy, and shop outcomes
These advanced details don’t always change drivability, but they can change whether you pass an inspection, whether a cleared light returns, and how efficiently a shop can pinpoint the fault.
Readiness monitors and inspection implications
Readiness monitors are the system’s self-tests for emissions controls; if they are incomplete, many inspection programs will fail the vehicle even if the MIL is off. Some agencies publish updated rules and references—California BAR has described readiness monitor regulations and requirements that became effective October 1, 2025 for Smog Check readiness, and has also published regulatory reasoning documents on readiness monitor limits.
Next, if you cleared codes recently, plan for enough real driving to complete monitors before inspection. In your notes, you can label this section Readiness monitors and inspection implications so you treat “no light” and “ready” as two separate goals.
When to clear codes, and when clearing makes diagnosis harder
Clearing codes resets valuable evidence: freeze-frame data, pending status, and often readiness monitors. Clear only after you’ve recorded codes and conditions, and ideally after you have fixed something and want to confirm whether it returns.
Next, if a shop is diagnosing your car, avoid clearing beforehand—otherwise they may need extra time to recreate the fault under the right conditions.
Diagnosis cost and what a shop process typically looks like
A professional diagnostic process usually follows a test plan: verify the complaint, scan and capture data, inspect connectors/hoses, run targeted tests (smoke, fuel pressure, misfire analysis), then provide an estimate tied to evidence rather than assumptions.
Next, you can speed up and reduce cost by bringing your recorded codes, freeze-frame conditions, and a clear symptom timeline. In your records, label this as Diagnosis cost and shop process so you consistently prepare the same “evidence packet.”
A compact “do-not-miss” checklist for common causes by symptoms
This is where you combine symptoms, code patterns, and recent changes: loose fuel cap after refueling, intake leaks after air-filter service, misfire after rain (moisture in ignition), and wiring damage near hot exhaust components. The fastest wins come from checking what’s most likely to have changed.
Next, if the situation includes active misfire or a flashing light, treat it as urgent and minimize driving to protect the catalyst, aligning with EPA-oriented misfire/MIL warning language.
Below are short FAQs (not headings) that address common decision points:
- Q: Should I buy parts based only on a code description? A: No—codes indicate a failing test, not a guaranteed bad part; confirm with a targeted test first.
- Q: If the car feels fine, can I ignore the light? A: You can often drive short-term if the light is steady and there are no symptoms, but you should scan soon to avoid hidden damage or inspection failure.
- Q: Why did the light turn off by itself? A: Some faults become “history” if they don’t repeat; the underlying condition may still exist intermittently, so scan for stored/pending codes.
- Q: Why did I fail inspection with no light on? A: Readiness monitors may be incomplete after clearing codes or battery disconnect; confirm monitor status before testing.
If you maintain a learning log, you can include the phrase How to use an OBD2 scanner at home as a section label in your checklist, and you can also tag entries with Flashing check engine light emergency guidance so urgent cases are easy to spot later.
Finally, if you are building symptom-based notes for long-term reference, add a tag like Car Symptoms to your entries so you can quickly filter past cases by what the vehicle did—not just what code appeared.
readiness monitors, inspection readiness, clearing codes strategy, professional diagnostic workflow, symptom-based shortcuts


