

Change Car Battery: How-To for Drivers, Terminals and Cables
If you want to change car battery safely and get a reliable start afterward, the winning formula is simple: pick the right replacement, protect your vehicle’s electronics, and follow a clean disconnect/reconnect sequence.
You’ll also avoid the most common mistakes—wrong size, loose clamps, and hidden electrical drains—by checking the battery label, the hold-down, and the charging system before calling the job “done.”
Beyond the basic swap, many newer vehicles may require a scan-tool step or a reset so the charging system behaves correctly, which is why “it starts today” is not always the same as “it will last for years.”
Giới thiệu ý mới: after you confirm the battery is the real problem, you can move step-by-step from selection to installation to post-replacement checks—so you don’t end up troubleshooting a no-start you accidentally created.
When should you change car battery, and how can you confirm it’s the culprit?
You should change car battery when it consistently can’t hold starting voltage, shows repeated slow cranking, or fails a load test—especially if recharging only helps briefly. To start, confirm the symptoms match a weak battery rather than a starter, alternator, or cable issue.
To begin, treat this like a fast diagnosis: verify what you feel (cranking speed), what you see (dash behavior), and what you can measure (voltage and drop). Then you can decide whether replacement is the correct “fix,” or just a bandage over a deeper problem.
What are the most common “Car Symptoms” of a failing battery?
Typical Car Symptoms include slow cranking after the car sits, headlights that dim noticeably during cranking, repeated clicking with no crank, or electronics that reboot when you turn the key. Next, you should connect those symptoms to conditions—cold mornings, short trips, or extended parking—because those patterns often reveal whether the battery is weak or simply undercharged.
Specifically, a battery can appear “fine” after a highway drive yet struggle the next morning. That usually points to low reserve capacity, internal sulfation, or a parasitic draw that drains the battery when the car is off.
Also watch for a battery that needs frequent jump starts, even though the alternator seems to charge while driving. That pattern is often the battery reaching end-of-life, not a random fluke.
How do you do a quick voltage sanity check before buying anything?
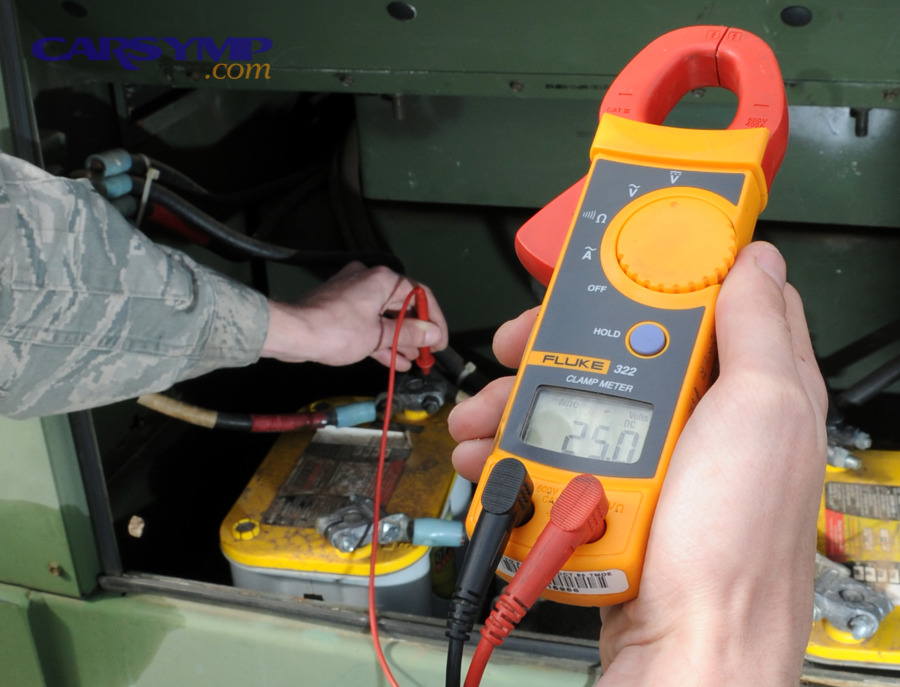
A quick check is: engine off, measure at the battery posts; then measure again while cranking. After that, compare what you see to expected behavior: a healthy fully charged 12-volt lead-acid battery typically rests around 12.6V, while much lower resting voltage suggests it’s discharged or degraded.
For example, if the battery rests low and sags dramatically during cranking, it’s more likely the battery itself. If it rests okay but you still get no crank, you may be dealing with cable issues, a bad ground, or a starter problem.
To illustrate, measuring on the cable clamps (not the posts) can reveal a “false good” scenario where a corroded connection hides the real voltage.
When is it smarter to test the charging system first?
If the battery is new-ish, repeatedly goes flat, or dies shortly after you change car battery, you should test charging and parasitic draw before blaming the replacement. Next, look for clues: a battery warning light, electrical accessories acting strange, or a burning smell near the alternator can point away from the battery.
In particular, frequent short trips can leave the battery undercharged, making a good battery behave like a bad one. Meanwhile, a failing alternator diode can drain the battery overnight even if the car charges “enough” while driving.
And if the battery is older than typical service life in your climate (heat and vibration shorten lifespan), replacement is still reasonable—but it’s best to confirm the alternator is not the real villain.
What battery should you buy so the replacement actually fits and lasts?
The best replacement battery matches your vehicle’s required group size, terminal orientation, hold-down style, and minimum starting power rating, so it installs securely and starts reliably in your climate. Next, choose the correct technology (flooded vs AGM) based on your car’s equipment and charging strategy.
After that, you can fine-tune for your usage: lots of short trips, heavy accessory loads, and hot/cold extremes justify a higher-quality battery with stronger reserve capacity. This is where the “right” battery becomes a long-term decision, not just a quick purchase.
How do you interpret size, terminals, and hold-down like a mechanic?
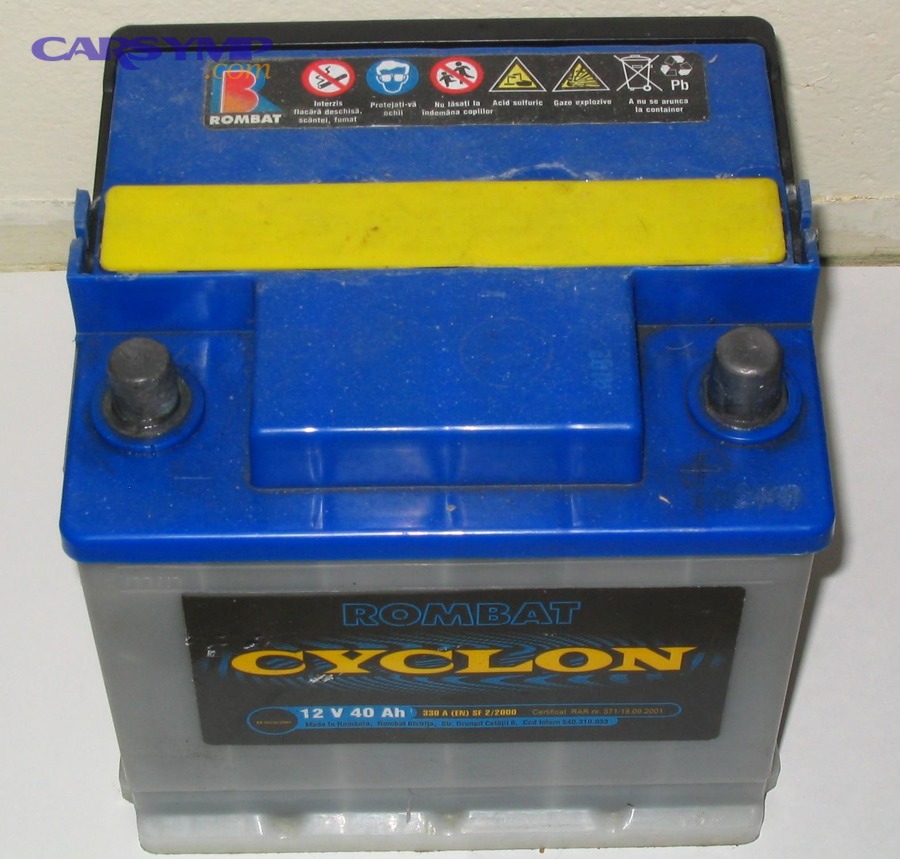
Start with the battery group size listed for your vehicle, because it encodes case dimensions and often the terminal layout. Next, verify terminal orientation: the positive post must align with the positive cable without stretching or crossing, because reversed reach can force unsafe routing.
Specifically, check: overall length/width/height, whether the hold-down clamps the bottom lip or uses a top bracket, and whether the terminals are top-post or side-post. If any of those don’t match, the battery may “fit” but won’t be secured correctly, which accelerates vibration damage.
To make this practical, take a photo of your current battery from above (showing both posts and cables), then compare it to the replacement before paying.
When you want a single mental shortcut for shopping, remember the phrase How to choose correct battery size and CCA—it’s the difference between “installs today” and “works for years.”
How much CCA do you need, and why “more” isn’t always “better”?
CCA (cold cranking amps) is the battery’s ability to deliver high current in cold conditions, so you should meet or modestly exceed the vehicle’s specification, especially in cold climates. Next, treat extremely oversized CCA as optional rather than mandatory: higher CCA often comes with higher cost, and it won’t fix a weak starter or corroded cables.
More importantly, prioritize correct fit and correct technology first. A mismatched case or wrong battery type can shorten life even if the CCA number looks impressive.
Also, if you live in hot climates, heat is often the bigger battery killer than cold starts. In that case, build quality, heat resistance, and proper mounting matter more than chasing the highest CCA number on the shelf.
Should you choose AGM, EFB, or flooded lead-acid?
Flooded lead-acid is common and affordable, AGM offers better cycling and vibration resistance, and EFB sits between them—so you should match what the vehicle is designed for. Next, pay attention to start-stop systems and energy management: many start-stop cars require AGM or EFB, and downgrading can cause early failure or charging issues.
In practice, if your original battery was AGM, replacing it with flooded is often a false savings. Meanwhile, upgrading from flooded to AGM can be fine on some vehicles, but on others it may require coding or adaptation so the charging profile is correct.
This is why a “cheap battery today” can become “another battery next year” if the charging strategy and battery chemistry don’t agree.
What safety steps and tools prevent sparks, acid exposure, and broken electronics?
The safest battery swap uses basic PPE, correct tools, and a controlled disconnect/reconnect sequence to prevent short circuits and protect vehicle electronics. Next, prepare your work area: stable parking, ignition off, key away from the car, and good ventilation if you’re in a garage.
After that, you can treat the job like a checklist—because battery work is less about strength and more about preventing one accidental metal-to-metal contact.
What belongs in a pre-job kit, and why does it matter?
A smart kit includes gloves and eye protection, the correct socket/wrench size for terminals and hold-downs, a battery brush or cleaning tool, and a way to secure the battery upright during removal. Next, add small but critical items: a flashlight, a rag, and baking soda/water for neutralizing corrosion on the tray (not on the battery vents).
To be explicit, keep this phrase in your workflow: Battery safety and tools checklist. That mindset prevents the two worst outcomes—sparks near hydrogen gas and damaged electronics from accidental shorting.
- PPE: gloves + eye protection (corrosion is irritating; acid is dangerous).
- Tools: terminal wrench, hold-down socket, extension, and possibly a swivel for tight spaces.
- Cleaning: battery terminal brush, baking soda solution, and terminal protectant.
- Support: strap/handle for lifting; batteries are heavy and awkward.
Do you need a memory saver, and when is it worth using?
You don’t always need one, but a memory saver can reduce annoyances like radio presets reset, clock changes, and some module relearns—especially on vehicles sensitive to voltage loss. Next, recognize the trade-off: the safest approach for beginners is often to disconnect fully and accept re-learning, rather than risk incorrect memory-saver hookup.
In other words, Memory saver use and when it’s needed depends on your car. If your vehicle loses steering angle calibration, window auto-up settings, or needs special idle relearn procedures, a memory saver may be helpful—provided you know the correct connection method.
However, if you’re unsure, prioritize safety and correctness of the physical install first. You can always reprogram clocks and windows; you can’t “un-short” a tool across terminals.
Why do sparks happen, and how do you prevent them?
Sparks happen when a tool bridges positive to ground, or when a live circuit is suddenly connected and draws current. Next, you prevent them by removing the negative cable first, keeping metal tools away from the positive post, and avoiding jewelry that can conduct electricity.
Specifically, keep the positive terminal covered until you’re ready to connect it, and never rest a wrench across the battery top. Also, don’t smoke or create open flames near the battery—hydrogen gas is a real hazard during charging and under certain fault conditions.
How do you change car battery step by step without damaging terminals or modules?
To change car battery correctly, follow a simple sequence: secure the car, disconnect negative then positive, remove the hold-down, lift the battery out, clean the tray and terminals, install the new battery, reconnect positive then negative, and verify charging and starting. Next, focus on the most important step: cable removal order and clamp integrity.
After that, you’ll finish strong by confirming the battery is clamped firmly, the terminals are tight, and the car’s electrical systems behave normally.
What is the correct terminal removal and installation order?
Remove the negative (ground) cable first, then the positive; install the positive first, then the negative. Next, understand why: the negative cable ties the chassis to the battery, so removing it first reduces the chance that a tool touching metal will complete a circuit from the positive post to ground.
Keep this exact concept in mind: Proper terminal removal order explained. It’s the most effective “one rule” for preventing accidental shorts during battery work.
To be extra safe, wrap the disconnected cable ends with a clean rag so they can’t spring back and contact the terminals while you work.
What are the exact steps from hood open to final test?
Here is a clean, repeatable process that works for most vehicles. Next, read it once before you touch any tools so you can keep your flow smooth and avoid mid-job improvisation.
- Power down: turn off ignition, remove the key/fob from the vehicle, and wait 2–5 minutes so modules can sleep.
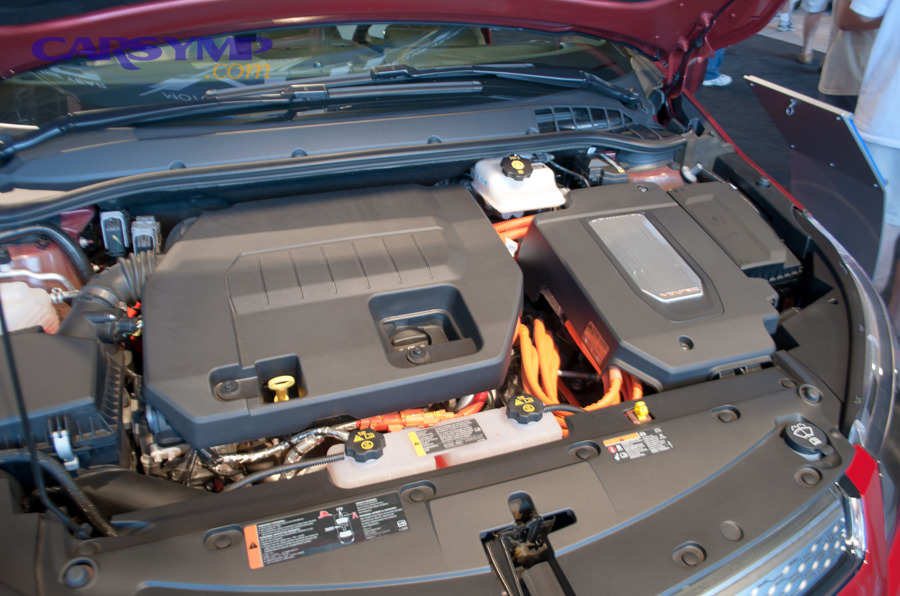
- Locate the battery: engine bay, trunk, or under a seat; identify the positive (+) and negative (–) posts.
- Disconnect negative: loosen the negative clamp and move it aside so it can’t contact the post.
- Disconnect positive: loosen the positive clamp; keep tools controlled and avoid touching body metal.
- Remove hold-down: unbolt the bracket or clamp that secures the battery.
- Lift out battery: keep it upright; avoid tipping (especially if the old battery is damaged).
- Inspect tray and cables: look for acid residue, corrosion, and cable damage.
- Clean: neutralize corrosion on the tray, brush terminal clamps, and wipe dry.
- Install new battery: confirm it sits flat and matches the hold-down design.
- Secure hold-down: tighten until snug; the battery should not move by hand.
- Reconnect positive: seat the clamp fully down; tighten until it won’t rotate.
- Reconnect negative: repeat clamp seating and tightening.
- Final checks: start the car, confirm no warning lights related to power, and verify accessories function.
Many owners treat this as Step-by-step car battery replacement because the order matters more than speed. If anything feels forced—cables too short, clamp not seating—stop and re-check battery size and terminal orientation.
What does the cost look like, and how do you compare shop vs DIY?
Battery replacement costs vary by battery type and vehicle complexity, so the real comparison is “battery price + tools + time” versus “battery price + labor + shop fees.” Next, compare fairly: include corrosion cleanup supplies, diagnostic fees (if any), and the risk cost of mistakes if you’re brand new.
Many drivers search for Battery replacement cost vs DIY cost because the savings can be real—especially on easy-access batteries—but the best value is the option that avoids repeat failures and electrical issues.
This table helps you estimate what you’re actually paying for.
| Scenario | Typical What You Pay For | Best For |
|---|---|---|
| DIY replacement | Battery + basic tools/cleaners + your time | Simple access, standard flooded battery, confident with hand tools |
| Parts store install | Battery + possible install fee + core return | Drivers who want convenience but still control battery choice |
| Independent shop | Battery + labor + testing + proper resets on some cars | Hard-to-access batteries, corrosion problems, suspected charging issues |
| Dealer service | OEM battery + higher labor + coding/registration | Vehicles requiring coding, warranty concerns, complex energy management |
Do modern vehicles require battery registration or coding after replacement?
Some modern vehicles do require battery registration/coding because the charging system uses battery age, type, and capacity data to control alternator output and protect the battery. Next, identify whether your car is in that group before you leave the driveway—because improper adaptation can shorten battery life even if the car starts today.
Think of it as the car “learning” the battery: if the vehicle believes an old battery is still installed, it may charge too aggressively or not aggressively enough, depending on the strategy.
What is battery registration, in plain English?
Battery registration is a software update step that tells the vehicle a new battery has been installed, resetting battery age counters and adjusting charging behavior. Next, coding goes further: it may change the vehicle’s stored battery type and capacity so charging maps match the new battery specification.
In the real world, this matters most for vehicles with intelligent battery sensors, start-stop systems, and tight energy management. If your car tracks battery condition and adapts charging, it’s more likely to need registration.
Use this reminder in your workflow: Battery registration/coding on modern vehicles can be the difference between a battery that lasts and a battery that gets cooked by incorrect charging.
How do you know if your car needs it without guessing?
The most reliable path is to check your owner’s manual, factory service info, or a reputable scan-tool guide for your exact model and year. Next, look for clues: start-stop equipped, AGM from factory, battery located in trunk, IBS/energy management sensor on the negative cable, or a vehicle known for adaptive charging behavior.
Also, if the battery is replaced with a different type or capacity (for example flooded to AGM), coding becomes more important because the charging profile may need to change—not just the “new battery” flag.
Theo nghiên cứu của Midtronics từ bộ phận kỹ thuật, vào 07/2022, việc đăng ký pin giúp hệ thống sạc tái điều chỉnh mức sạc tối ưu và tránh sạc quá mức trên các xe hỗ trợ chức năng này.
What should you do if you replaced the battery and now features act weird?
If windows lose auto-up, steering feels off, or warning lights appear after you change car battery, you may need basic re-initialization steps—or, on some vehicles, a scan-tool adaptation. Next, don’t panic: many cars just need a short drive cycle, window relearn, or steering angle sensor calibration.
However, persistent battery/charging codes, start-stop disabled messages that don’t clear, or repeated low-voltage warnings can indicate the battery wasn’t registered, the wrong type was installed, or the charging system has an underlying fault.
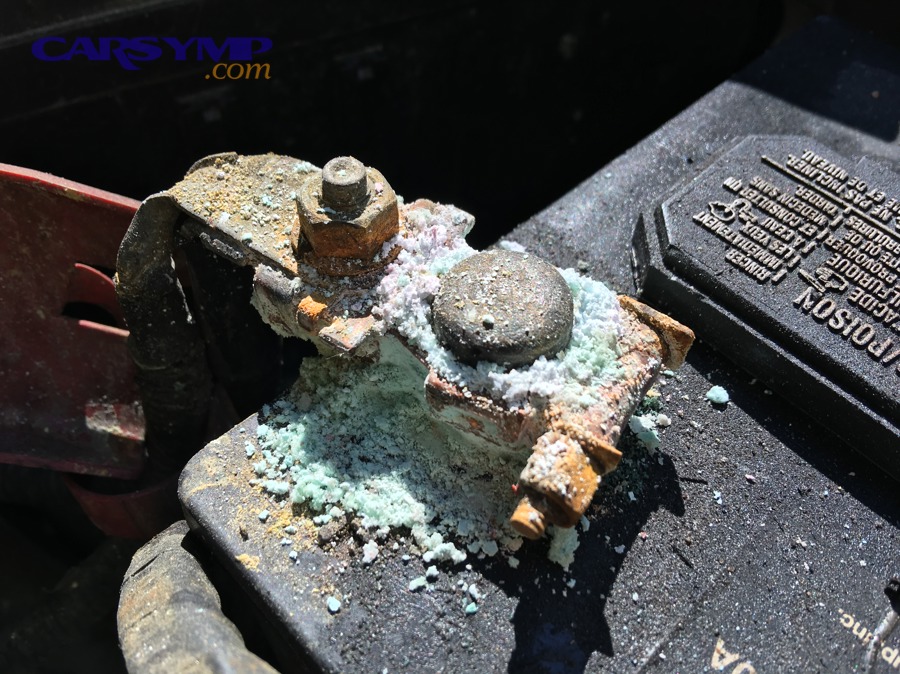
How do you clean corrosion and protect terminals so the new battery doesn’t struggle?
Cleaning corrosion restores solid electrical contact and reduces voltage drop, which protects starting performance and charging stability. Next, finish with terminal protection so corrosion doesn’t return quickly—especially in humid climates or vehicles with minor acid venting issues.
This isn’t cosmetic; it’s electrical reliability. A brand-new battery can perform like a weak one if the clamp contact area is compromised.
What is the safest way to remove corrosion?
The safest method is to disconnect the cables, neutralize corrosion on the tray and clamps with a baking-soda-and-water mix, brush the metal contact surfaces, then dry thoroughly. Next, keep liquids away from vent caps and sensitive electronics—your goal is to clean the contact points, not soak the battery.
To be clear, you’re cleaning the clamps and surrounding surfaces, not pouring solution into battery openings. Wear eye protection and gloves, and rinse/wipe residue so it doesn’t continue reacting.
Many people remember this by the phrase Corrosion cleaning and terminal protection because the job is only “complete” when the connection is clean and protected.
How tight should battery clamps be, and how do you avoid cracking things?
Clamps should be tight enough that they cannot rotate on the posts by hand, but not so tight that you deform the clamp or strip the bolt. Next, tighten gradually while ensuring the clamp is fully seated down on the post—not perched high, which creates a weak connection even if it feels tight.
If the clamp bottoms out before it grips, it may be spread too far, worn, or mismatched. In that case, replacement clamps or shims may be needed, otherwise you’ll chase intermittent no-start issues later.
What about the ground connection and chassis bonding?
A clean ground path is as important as a strong battery. Next, inspect the negative cable where it connects to the chassis or engine block: rust, looseness, or oil contamination there can mimic a failing battery.
If your car has an intelligent battery sensor on the negative terminal, handle it gently, keep it clean, and avoid using harsh chemicals on the sensor housing. Poor sensor readings can lead to incorrect charging decisions.
What should you do if the car won’t start after replacement?
If your car won’t start after you change car battery, the usual causes are connection issues, blown fuses from accidental shorting, incorrect battery fitment, or a system that needs re-initialization. Next, troubleshoot in a calm order: start with the simplest physical checks before assuming the new battery is bad.
This is where most DIY frustration happens—but it’s also where methodical checks solve the problem quickly.
First checks: what can you verify in 60 seconds?
Start by confirming the clamps are fully seated and tight, the battery hold-down isn’t pulling the battery crooked, and the correct cables are on the correct posts. Next, check for obvious signs: loose ground strap, disconnected sensor plug, or a terminal protector cap left on the post.
Also verify the battery is charged. New batteries can sit on shelves and may not be fully charged at purchase; a quick charge can transform “no crank” into normal starting.
Clicking, no crank: what does it usually mean after a battery swap?
Clicking often indicates insufficient current delivery—usually from a poor connection at the clamps or ground point. Next, move your multimeter leads directly onto the battery posts (not clamps) and check voltage during crank; then repeat on the clamp surfaces to spot voltage drop across the connection.
If voltage is strong at the posts but weak at the clamps during crank, your issue is contact, not battery capacity. Clean, reseat, and tighten again.
No power at all: what’s the fastest path to an answer?
If everything is dead, suspect the main connection path: a loose positive clamp, a disconnected main fuse link, or a battery safety terminal (on some vehicles) that opened due to a short or collision history. Next, inspect the main fuse box and any high-amp fuses near the battery.
Also confirm you didn’t disconnect something else while removing covers—some cars hide distribution blocks near the battery that must be secured and latched.
Many owners search for What to do if car won’t start after replacement because the fix is often simple, but only if you check the right things in the right order.
Contextual Border: From here, we move beyond the basic swap into the details that protect your battery investment—recycling, long-term care, and the small decisions that prevent early failure.
Extra details that protect your new battery long-term
These advanced points aren’t required for every vehicle, but they help you avoid premature failure, unexpected warning lights, and environmental mistakes. Next, choose the parts that match your situation—driving habits, vehicle technology level, and local recycling options.
How should you recycle the old battery properly, and why is it a big deal?
Old lead-acid batteries should be returned as a core to the retailer, a recycling center, or a qualified facility—never placed in household trash. Next, store it upright in a leak-resistant area and avoid tipping, because leaked electrolyte and lead contamination are serious hazards.
Keep this phrase as your rule: Recycling old battery properly. It protects your community and often saves you money via core refunds.
Theo nghiên cứu của U.S. Environmental Protection Agency từ chương trình quản lý pin, vào 09/2025, pin chì-axit sản xuất tại Mỹ chứa hơn 80% vật liệu tái chế nhờ mô hình kinh tế vòng, theo một nghiên cứu năm 2025 của Battery Council International.

What long-term habits keep the new battery healthy?
Protect the battery by reducing deep discharges: avoid leaving lights on, limit long accessory use with the engine off, and drive long enough to recharge after short trips. Next, keep terminals clean and clamps tight, because poor contact increases resistance, heat, and charging irregularities.
If your vehicle sits often, a quality maintainer can prevent sulfation. And if you live in extreme heat, consider parking strategies that reduce under-hood heat soak, because heat accelerates battery aging.
When should you stop and seek help instead of pushing through?
If you see swelling, cracking, leaking electrolyte, or smell strong sulfur/rotten egg odor, stop and handle the battery as hazardous. Next, if your vehicle requires registration and you don’t have the tools, don’t guess—incorrect charging strategy can shorten life quickly.
This is where professional help can be the cheapest option in the long run, especially if a misstep leads to repeated battery failures or module errors.
What’s the best mindset for beginners doing this at home?
The best approach is slow, clean, and systematic: read your vehicle’s battery location and procedures, lay out tools, and follow the disconnect/reconnect order without shortcuts. Next, treat your first battery swap as skill-building—because small wins here unlock confidence in future maintenance tasks.
That’s why so many owners file this under DIY car repair: it’s approachable, high-impact, and teaches you how to work safely around vehicle electrical systems.


