Fix an Engine Oil Leak: DIY Repair Steps for Car Owners (Valve Cover Gasket, Oil Pan Gasket, Rear Main Seal)
Engine oil leak repair is the process of finding where oil escapes, correcting the root cause (usually a seal, gasket, or connection), and verifying the fix so the leak does not return. The fastest “right” approach is simple: confirm the fluid, locate the source, repair the source—not the symptom—and recheck after a short drive.
A good repair plan starts with diagnosis, because most leaks travel before they drip. Oil can run along covers, brackets, and hoses, making a higher leak look like a lower leak. Once you know the true source, you can choose the correct repair path—whether that’s a small seal, a gasket replacement, or a bigger job like a rear main seal.
Cost and safety decisions come next. Some leaks are “monitor and schedule,” while others are “stop driving now,” especially if oil can reach hot exhaust components or your oil level is dropping quickly. Knowing which category you’re in prevents engine damage and reduces the chance of a repeat leak.
Introduce a new idea: the easiest way to win with oil leaks is to treat the job like a checklist—identify, verify, repair, and prevent—so every step supports the next and you do not pay twice for the same problem.
What does engine oil leak repair involve, and why does fixing it early matter?
Engine oil leak repair is a step-by-step process of confirming the leak is oil, tracing it to a specific seal/gasket/connection, repairing or replacing that component, and validating the repair with a recheck after driving. Next, the reason “early” matters is that oil leaks usually grow: heat cycles harden rubber, vibration loosens fasteners, and crankcase pressure can push oil past weak points.
Oil does more than lubricate; it also cools and carries contaminants to the filter. When the level drops, lubrication thins first where you can’t see it—bearings, timing components, and valve train. Even before damage, leaks create mess, odors, smoke, and slippery driveways.
A practical “early repair” mindset is this: stop the leak before it becomes a second repair. Oil leaking onto rubber hoses can soften them; oil soaking engine mounts can degrade rubber; oil on the serpentine belt can cause squeal or belt slip. Early fixes are often smaller, cleaner, and cheaper.

What are the fastest ways to confirm it’s engine oil, not another fluid?
Engine oil is typically amber to dark brown/black, feels slick, and smells “oily” or slightly burnt; coolant is usually watery and colored (green/orange/pink), and power steering/ATF is often reddish and thinner. Then, confirm with a simple three-point check: location, color, and feel.
Fast confirmation checklist
- Location under the car:
- Front-center can point to oil filter housing area, front cover, or oil pan edge.
- Mid-center can point to oil pan, drain plug, or front/rear crank seals depending on layout.
- Rear-center (near transmission bellhousing) raises suspicion for Rear main seal leak signs.
- Paper towel test: Dab the drip. Oil spreads slowly and stays slick; coolant spreads faster and feels watery.
- Oil level trend: A dropping dipstick level over days strongly supports an oil leak (or consumption).
If you’re unsure, do not guess—clean and trace (you’ll do this in the leak-finding section). Guessing leads to replacing the wrong gasket.
What immediate risks come from ignoring an oil leak?
Ignoring an oil leak risks low oil level, belt contamination, rubber degradation, smoke/fire hazards, and expensive engine damage. More importantly, the “immediate” risks are not always the drip—it’s where the oil can go next.
Immediate risks that escalate quickly
- Low oil level → low oil pressure events during turns or braking on some engines.
- Oil burning smell and smoke causes → oil dripping onto exhaust components, making smoke at stops.
- Belt slip or failure → oil on the serpentine belt can cause squeal, charging issues, or overheating (water pump driven by belt on many vehicles).
- Fire risk → leaked oil on hot surfaces can ignite under certain conditions.
According to a study by Xi’an University of Science and Technology from the College of Safety Science and Engineering, in 2025, average ignition delay time for small lubricating-oil droplets (0.1–0.5 ml) decreased from 5.71 seconds at 300–350°C to 1.19 seconds at 400–500°C, showing how quickly oil can ignite on sufficiently hot surfaces. (pmc.ncbi.nlm.nih.gov)
Can you drive with an oil leak safely?
No—you cannot assume it’s safe to drive with an oil leak because leaks vary widely, and the “safe” choice depends on oil-loss rate, where the oil is landing, and whether warning symptoms are present. To begin, you can make a safe decision by using three quick checks: oil level, leak rate, and smoke/odor.

Three reasons driving can be unsafe
- Low oil level can cause rapid engine damage even if the leak seems small.
- Oil can reach hot exhaust parts, creating smoke and potential ignition risk.
- Oil can contaminate belts and rubber, causing secondary failures (overheating, charging, mount deterioration).
If you must move the car, treat it like a controlled, short relocation—not normal driving—until you know the leak source and severity.
When is it ‘drive-to-the-shop’ vs ‘stop-now’?
There are two practical categories—drive-to-the-shop (short, cautious) or stop-now—based on severity and hazard. Specifically, the line is drawn by oil pressure warnings, rapid level loss, and oil-on-exhaust symptoms.
Drive-to-the-shop (short and cautious)
- No oil pressure light, no “low oil” warning
- Oil level is still within the safe range on the dipstick
- Drips are slow (e.g., a few drops after parking)
- No burning smell, no visible smoke
Stop-now
- Oil pressure warning light appears at any time
- Oil level is below the minimum mark (or not visible on dipstick)
- Active smoking, strong burning smell, or oil visibly dripping onto exhaust
- Puddle forms quickly or leak increases with engine running
If you’re in the stop-now category, tow is usually cheaper than an engine.
What warning signs mean the leak is getting dangerous?
A leak becomes dangerous when it threatens oil pressure, reaches heat sources, or spreads to critical components. Then, use warning signs as your “do not pass go” triggers.
Danger signs
- Oil pressure light or fluctuating oil pressure readings
- Fresh oil streaks near exhaust, downpipe, or catalytic converter area
- Oil burning smell and smoke causes becoming stronger at idle or after stopping
- Visible dripping while running
- Engine misbehavior from oil-soaked sensors/connectors (less common, but possible)
When those signs show up, prioritize diagnosis and repair over continued driving.
What are the most common engine oil leak locations?
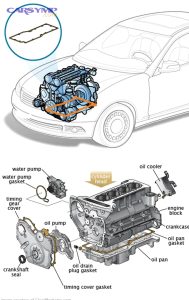
There are three main categories of Common engine oil leak locations: top-end leaks (valve cover area), mid-engine leaks (filter housing, cooler, pan rail), and rear leaks (rear main seal / bellhousing region), based on where gravity and airflow carry oil. Next, knowing these locations helps you inspect in the right order: top-down, front-to-back.
Most common location groups
- Top-end: valve cover gasket, cam seals, PCV/breather connections
- Mid/side: oil filter housing gasket, oil cooler seals, oil pressure switch/sender, oil pan gasket
- Rear: rear main seal, oil pan rear corners, sometimes valve cover leak tracking rearward

How do you do a valve cover gasket leak diagnosis?
Valve cover gasket leak diagnosis starts by inspecting the valve cover perimeter for wetness, checking the back corners for oil trails, and confirming oil is not coming from above (like a spilled fill). Then, verify with a clean-and-run test: clean, idle, and watch for fresh seepage.
What to look for
- Oil wetness along the valve cover seam
- Oil in spark plug wells (on some engines), causing misfires over time
- Oil collecting on exhaust manifolds (burning smell)
- Oil running down the engine side—this can mimic an oil pan leak
If oil appears at the seam soon after cleaning and idling, the gasket (or cover itself) is a strong suspect.
What are oil pan gasket leak symptoms?
Oil pan gasket leak symptoms include oil collecting along the oil pan rail, drips near pan bolts, and fresh oil appearing after driving, especially when the engine is hot. However, oil from higher up often lands on the oil pan, so you must confirm the pan rail is the true source.
Symptoms that support an oil pan leak
- Wet pan rail that starts clean and becomes wet from the seam outward
- Drips at the lowest point of the pan after a drive
- Oil film pattern consistent with airflow under the car (streaking backward)
Be cautious: a filter housing leak can coat the entire underside and make the pan look guilty.
What are rear main seal leak signs?
Rear main seal leak signs often show as oil dripping from the transmission bellhousing area, oil collecting at the bottom of the bellhousing inspection cover, or a persistent rear-center drip pattern after driving. Meanwhile, it’s easy to misdiagnose because valve cover leaks can track down the rear of the engine and mimic a rear main leak.
Clues that strengthen the rear main hypothesis
- Oil appears inside or at the lowest opening of the bellhousing area
- Leak worsens after highway driving (higher crankcase pressure and crank speed)
- No obvious wetness higher up on the engine rear face
A confirmed rear main leak is usually labor-heavy because access requires separating engine and transmission on many vehicles.
How do you find the exact source of an oil leak?
Finding the exact source is a how-to process: clean the area, run the engine, observe fresh oil, and verify with tracing methods (including a UV dye test for oil leaks) to pinpoint the first wet point. To better understand why this works, remember: oil travels downward and backward, so the first wet spot is the only spot that matters.
How do you clean, dry, and trace fresh oil correctly?
Clean-and-trace works in 4 steps: degrease, rinse/wipe, dry fully, then run and inspect—so fresh oil stands out clearly. Next, this is where most DIYers save hours, because old grime hides the leak path.
Step-by-step
- Degrease carefully: Use an engine-safe degreaser on cool surfaces; avoid soaking electrical connectors.
- Rinse or wipe thoroughly: Residual degreaser can look like fresh fluid.
- Dry fully: Compressed air or a short wait helps; oil and water mix-ups cause wrong conclusions.
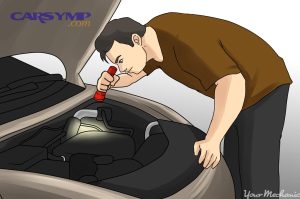
- Run and inspect: Idle first, then a short drive, then inspect again with a strong light.
Where to start inspecting
- Highest wet point first (top-down rule)
- Around seals/gaskets with edges (valve cover seam, filter housing perimeter, pan rail)
- Around sensors/switches threaded into oil galleries
If you see oil above the suspected gasket, the leak is higher than you think.
How does a UV dye test for oil leaks work?
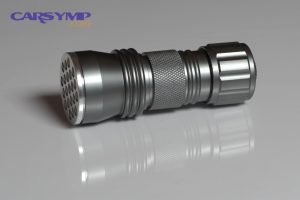
A UV dye test for oil leaks uses fluorescent dye added to engine oil, then a UV light to make new leaks glow so you can trace the exact origin even when oil spreads. Then, it becomes especially useful for slow leaks that only appear after driving.
UV dye test steps
- Add the correct oil-compatible UV dye to the crankcase (follow dye instructions).
- Drive 10–30 minutes (or until the leak occurs).
- Inspect with a UV lamp and yellow glasses if included.
- Follow the glowing trail upstream to the first wet edge or seal.
Why it works
- Fresh oil mixed with dye fluoresces strongly
- Old grime fluoresces less consistently, especially after cleaning
- You can differentiate multiple leak sources by tracing distinct paths

How do you separate oil leaks from oil burning smell and smoke causes?
Oil leaks and oil burning smell and smoke causes can overlap, but you can separate them by identifying whether oil is escaping externally (leak) or burning internally (consumption), then confirming with patterns and residue. However, smoke at idle after a stop is often external oil hitting hot exhaust parts.
Quick comparison
- External leak → smoke: usually from oil dripping onto exhaust manifold/downpipe; smell is sharp and oily; smoke may rise from engine bay.
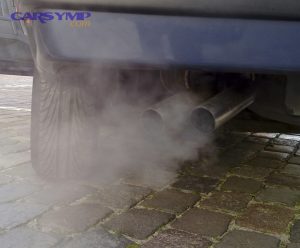
- Internal burning: tailpipe smoke (often bluish), oil consumption without visible external wetness, and oily residue inside intake on some PCV issues.
Practical checks
- Look for fresh oil on exhaust shielding or pipes near the engine
- Check tailpipe smoke behavior (cold start vs long idle vs acceleration)
- Monitor oil level over time with no visible external leaks (suggests consumption)
If you have both external leaks and consumption, fix the external leak first—it makes the remaining diagnosis far clearer.
How do you repair an engine oil leak by source?
Repairing an engine oil leak is a source-based method: identify the leaking component, replace the correct gasket/seal or restore the sealing surface, torque properly, and confirm the fix with a recheck. Besides, the most common reason leaks return is not the part—it’s surface prep, wrong torque, or a missed upstream leak.
What does a DIY gasket replacement overview look like for common seals?
A DIY gasket replacement overview follows 5 core steps: access, remove, clean, inspect, install, and verify—regardless of whether you’re doing a valve cover gasket, oil pan gasket, or housing seal. Next, apply the same discipline every time to avoid comebacks.
Common DIY pattern
- Access: remove covers, intake ducting, brackets as needed.
- Remove carefully: avoid bending covers; note bolt lengths and locations.
- Clean surfaces: plastic scraper + solvent; never gouge aluminum sealing faces.
- Inspect: check for warped covers, cracks, or clogged PCV that caused pressure.
- Install and torque: use correct torque sequence; replace grommets if required.
- Verify: run, inspect, then recheck after driving.
Source-specific notes
- Valve cover gasket: replace spark plug tube seals if equipped; check cover warpage.
- Oil pan gasket: confirm no subframe or exhaust components block removal; plan for safe lifting.
- Filter housing/cooler seals: watch for brittle plastic housings on some engines; overtightening can crack them.

When should you choose a professional engine service instead of DIY?
Yes—professional engine service is the better choice when access requires major disassembly, when precision sealing is critical, or when the leak source is uncertain after diagnosis. More importantly, “DIY-able” is not the same as “DIY-smart,” especially for labor-heavy leaks.
Three reasons to choose a shop
- Labor-intensive access: rear main seal, timing cover reseal, some oil pan jobs requiring subframe drop.
- Special tools/risks: torque angle procedures, seal installers, lift/support needs.
- High cost of mistakes: mis-sealed timing covers or pans can leak immediately and require repeating labor.
A good compromise is DIY diagnosis + shop repair for the heavy step, because accurate diagnosis reduces labor waste.
What are torque, sealant, and surface-prep mistakes that cause repeat leaks?
There are three major repeat-leak causes: poor surface prep, incorrect torqueing, and wrong sealant use, based on how gaskets actually seal under heat and pressure. Then, fixing these habits dramatically reduces “it still leaks” frustration.
Surface-prep mistakes
- Leaving old gasket material or RTV residue
- Scratching aluminum sealing faces
- Installing on oily/wet surfaces (sealant won’t bond)
Torque mistakes
- Over-tightening (crushes gasket, warps covers)
- Under-tightening (insufficient clamp force)
- Ignoring torque sequence (uneven clamp load)
Sealant mistakes
- Using RTV where a dry gasket is designed
- Using too much RTV (squeezes into oil passages)
- Not allowing correct cure time if specified
If you’ve resealed something twice, stop and inspect the mating surfaces and ventilation/pressure causes—not just the gasket.
What is an oil leak repair cost estimate by source?
There are four major cost tiers for an Oil leak repair cost estimate by source—minor seals, moderate gasket jobs, labor-heavy reseals, and “separate drivetrain” repairs—based on labor time and access difficulty. Next, a simple cost map helps you decide whether to DIY, schedule a shop visit, or combine repairs to save labor.

Before the details, the table below summarizes typical repair-cost patterns by leak source and why they vary.
| Leak source (typical) | Why the cost behaves this way | Typical “national average” estimate (where available) | DIY difficulty (general) |
|---|---|---|---|
| Valve cover gasket | Moderate access; careful cleaning + torque | $336–$461 (parts + labor estimate) (repairpal.com) | Medium |
| Oil pan gasket | Often blocked by subframe/exhaust; labor heavy | $553–$759 (parts + labor estimate) (repairpal.com) | Medium–Hard |
| Rear main seal | Often requires transmission removal | Commonly $600–$1,200+ depending on vehicle/access (endurancewarranty.com) | Hard (often not DIY-friendly) |
| Simple sealing points (filter cap, drain plug washer) | Low parts cost, fast labor | Varies widely by vehicle and shop | Easy |
Note: Estimates vary by vehicle design, region, and what else is replaced “while you’re in there,” but the ranking (easy vs labor-heavy) is usually stable.
How do parts, labor time, and vehicle layout change the price?
Cost changes most with labor time and access, then with parts quality and how many related seals you replace. Specifically, the same leak source can cost far more on vehicles where components block access.
Price drivers
- Access time: transverse vs longitudinal engines, tight engine bays, subframe interference
- Collateral removal: exhaust sections, steering racks, motor mounts, splash shields
- Parts scope: gasket only vs gasket + cover replacement + grommets + tube seals
- Shop strategy: some shops recommend bundled reseals to reduce repeat labor
A smart strategy is bundling when the labor overlaps (for example, resealing multiple top-end gaskets during the same tear-down).
Which repairs are usually affordable vs labor-heavy?
Valve cover and minor housing seals are often more affordable, while oil pan and rear main repairs tend to be labor-heavy because access is the job. Meanwhile, the “most expensive” leaks are usually those that require moving the engine/transmission relationship.
Usually more affordable
- Valve cover gasket (if accessible)
- Filter housing/cap seals (vehicle dependent)
- Drain plug washer or oil filter area issues
Usually labor-heavy
- Oil pan gasket when the subframe blocks removal
- Rear main seal due to transmission removal
- Timing cover reseal on certain engines
If your leak is labor-heavy, combining repairs can lower total cost compared to doing them one-by-one.
How can you prevent future oil leaks after the repair?
Preventing future oil leaks is a three-part method: maintain correct oil level and change intervals, keep crankcase ventilation healthy, and control heat/pressure stress on seals—so new gaskets are not forced to fail early. To sum up the logic: seals last longer when pressure stays controlled and surfaces stay clean.

Which maintenance habits reduce gasket and seal wear?
There are four maintenance habits that reduce gasket and seal wear: consistent oil changes, correct oil spec, ventilation checks, and leak rechecks, based on how oil chemistry and pressure affect rubber and sealing faces. In addition, these habits catch small seepage before it becomes a real leak.
High-impact habits
- Use the correct oil viscosity/spec for your engine and climate
- Avoid chronic overfilling (can increase crankcase pressure and aeration)
- Check and service PCV/breather systems on schedule
- Clean minor seepage early so you can spot changes
When you treat seepage like a trend, not a surprise, you keep repairs small.
What driving and heat-management habits help prevent leaks?
Heat cycles and pressure spikes stress seals, so smoother warmups and avoiding severe overheating events help prevent leaks over time. Especially, repeated short trips can create moisture/contaminant buildup that affects oil quality and sealing environments.
Practical habits
- Let the engine reach operating temperature regularly (helps reduce condensation)
- Avoid repeated high-load pulls on an overheating engine
- Address cooling issues promptly (heat accelerates gasket hardening)
- Fix misfires quickly (raw fuel contamination can degrade oil and seals)
Heat management is seal management—most gasket failures are “time + temperature” stories.
What should you re-check after the first 100–500 miles?
After repair, re-check in 3 steps—visual inspection, level monitoring, and fastener verification (where appropriate)—to confirm the seal is stable after heat cycling. Thus, you catch small issues before they become messy returns.
Re-check checklist
- Look for fresh oil at the repaired seam (top-down inspection)
- Confirm oil level stability across a week of normal driving
- Reinspect after a highway drive (higher pressure/heat reveals weak seals)
- If your service manual allows it, confirm fastener torque (many do not recommend retorque—follow spec)
If the area stays dry through multiple heat cycles, the repair is usually successful.
What else can mimic an oil leak, and how do you troubleshoot it?
Oil leak look-alikes include spilled oil from servicing, power steering/ATF seepage, coolant residue, and normal “sweating” seepage, and you troubleshoot them by confirming the fluid type, cleaning thoroughly, and tracing the true source. Next, this section expands the diagnosis beyond obvious gaskets so you can avoid replacing the wrong parts.

What are normal ‘sweat’ seepage vs active leaks?
Seepage (“sweat”) is a thin film that slowly darkens dirt without forming drips, while an active leak creates wet trails, droplets, or puddles after driving. However, seepage can become a leak when heat cycles harden the gasket further.
How to tell the difference
- Seepage: dusty grime + slight dampness, no drip points
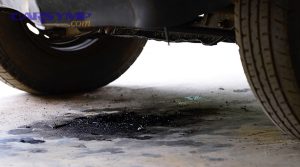
- Active leak: shiny wet oil, fresh trails, drips while hot, or puddles after parking
Seepage may be monitored; active leaks should be repaired, especially if oil reaches belts or exhaust.
How do PCV and crankcase pressure issues create leaks?
Crankcase ventilation problems can raise pressure and push oil past seals, turning borderline seepage into active leaks—especially at gaskets and crank seals. More importantly, fixing the gasket without fixing the pressure cause can make the “new” gasket fail early.
According to a thesis by the University of Windsor from the Department of Mechanical, Automotive & Materials Engineering, in 2014, the target crankcase pressure is 20–30 hPa lower than atmospheric pressure, and too high or too low pressure can compromise engine seal integrity. (collectionscanada.gc.ca)
Practical symptoms that point to ventilation/pressure
- Multiple new leaks appearing over time (not just one gasket)
- Oil pushed into intake plumbing
- Whistling/vacuum issues near oil cap or dipstick tube (varies by design)
If you suspect PCV issues, address them as part of “Preventing future oil leaks,” not as an afterthought.
How do oil additives and stop-leak products compare to real repairs?
Stop-leak additives can sometimes reduce minor seepage by swelling certain seal materials, but real repairs (replacing the failed gasket/seal and correcting surfaces/pressure) are the reliable long-term solution. On the other hand, additives can complicate diagnosis and may not help gasket failures or cracked housings.
When additives might help
- Very minor seepage on older seals where replacement is scheduled later
When they usually don’t
- Active dripping
- Gasket failures (valve cover, oil pan)
- Structural issues (warped cover, cracked housing)
- Leaks caused by crankcase pressure problems
Use additives as a temporary, measured option—not a substitute for repair when the leak is active.
What environmental and cleanup best practices should you follow?
Clean-up best practices are: contain drips, dispose of oily waste correctly, clean the underside for accurate diagnosis, and protect driveways/garage floors to prevent slips and stains. Finally, good cleanup is also good troubleshooting, because a clean engine makes future leaks obvious.
Best practices
- Use absorbent pads/cardboard under the car until repaired
- Collect waste oil and contaminated rags safely; follow local disposal rules
- Degrease and rinse responsibly (avoid storm drains)
- After repair, keep the area clean for the first week so rechecks are accurate
Cleanliness is a diagnostic tool—treat it like part of the repair, not a separate chore.