


clutch replacement labor time is usually driven by one big reality: the transmission has to come out, and that single requirement determines whether your job is a half-day appointment or a full-day shop slot. If you’re trying to plan your downtime (or your budget), you need a realistic hour range plus the specific factors that push your car toward the “fast” or “slow” end of that range.
Next, the safest way to understand that time range is to map it to the real process—what a shop actually does from intake to road test. When you see the steps in order (and where surprises typically happen), labor hours stop feeling mysterious and start feeling predictable.
In addition, a good estimate is more than “hours × shop rate.” The parts list, while-you’re-in-there replacements, drivetrain layout, and optional machining or flywheel work can move the total by hundreds—or more—so you’ll want a simple estimating method you can apply to your exact vehicle.
Introduce a new idea: once you understand time and process, you can decide whether the job belongs in your garage or on a lift at a professional shop—and you’ll know what can go wrong before it costs you extra.
What is clutch replacement labor time and why does it vary?
Clutch replacement labor time is the flat-rate or clock time a technician needs to remove the transmission, replace the clutch components, and reassemble and test—typically varying because access, drivetrain layout, and “while you’re in there” work change the steps and difficulty.
To better understand why those hours swing so widely, it helps to break “labor time” into what it includes, what it excludes, and what commonly adds extra time.
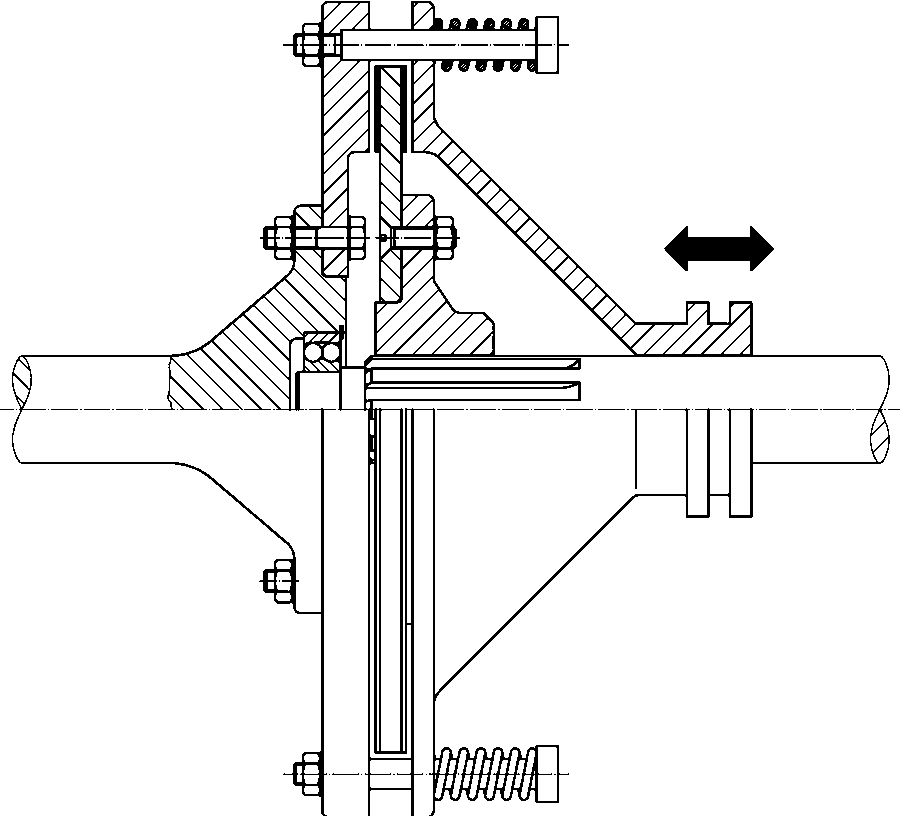
What does "labor time" mean in a clutch job quote?
Labor time is the billed time assigned to the procedure (often a standardized “flat-rate” time), not always the literal hours your car sits in the shop. Shops typically use labor guides and their own experience to set hours, then multiply by their posted hourly rate.
In practical terms, clutch labor time usually includes:
- Raising and securing the vehicle
- Removing components that block transmission removal (subframe pieces, exhaust sections, axles/CV shafts, driveshaft, starter, crossmembers, linkages)
- Supporting the engine and transmission
- Removing the transmission and clutch assembly
- Installing the new clutch components and reassembling
- Basic functional checks and a road test
It may not automatically include:
- Flywheel resurfacing or replacement
- Hydraulic diagnosis beyond basic bleeding
- Broken fasteners, seized bolts, rusted exhaust hardware
- Additional oil leaks or seal replacements discovered mid-job
A quick planning anchor: because transmission removal is a prerequisite for the repair, even general transmission removal guidance often cites a wide labor range depending on design and layout. For example, one repair guide notes a typical range of 9–12 hours to remove and replace a manual transmission (rear-wheel-drive example), illustrating how “access difficulty” dominates time.
Which drivetrain layouts take longer (FWD vs RWD vs AWD/4WD)?
There are three common “time tiers,” primarily based on what has to be removed to get the transmission out:
1) Front-wheel drive (FWD): Often moderate time
- Axles come out, some subframe lowering may be needed
- Engine bay access can be tight, but driveline is compact
2) Rear-wheel drive (RWD): Can be moderate to high time
- Driveshaft removal is typical
- Transmission tunnel access varies by vehicle
3) All-wheel drive / 4WD (AWD/4WD): Often the highest time
- More driveline components, transfer case or additional shafts
- Packaging is denser, and disassembly steps increase
If you want a budget sanity check, cost estimators also reflect this variability. RepairPal’s national clutch replacement estimate range (parts + labor) sits roughly in the mid–high four figures for many vehicles, which is consistent with a job where labor hours are a major share of total cost.
What vehicle conditions and add-ons add hours?
Even within the same drivetrain layout, a few conditions commonly push labor time up:
- Rust and corrosion: seized exhaust fasteners, frozen suspension hardware, stuck dowels
- Subframe removal/loosening: more steps, alignment concerns
- Tight packaging: turbo plumbing, skid plates, undertrays, complex intake routing
- Aftermarket parts: non-OE clutches, modified exhausts, custom mounts
- “While-you’re-in-there” work: rear main seal, pilot bearing/bushing, clutch hydraulics
- Flywheel decisions: resurfacing vs replacement (especially if heat-spotted or cracked)
A realistic takeaway: clutch jobs are predictable when the car is cooperative—and unpredictable when age, corrosion, or prior modifications force extra disassembly or rework.
How does the clutch replacement process work step by step?
The clutch replacement process follows a repeatable workflow—diagnosis, transmission removal, clutch and flywheel service, reassembly, and testing—because the only reliable way to access the clutch is to separate the engine from the transmission.
Next, seeing the steps in order makes it easier to understand which steps consume the most labor time and where mistakes typically happen.
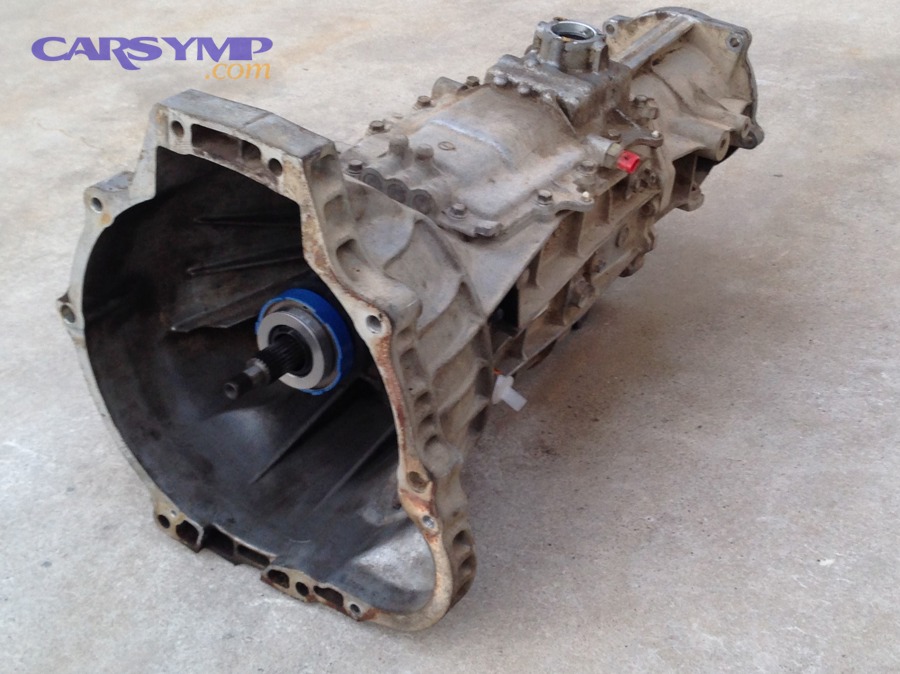
What is the standard shop workflow for clutch replacement?
Most professional workflows look like this:
- Confirm symptoms and plan the scope
- Verify slip, chatter, engagement point, shifting difficulty
- Check for hydraulic issues (fluid level, leaks, pedal feel)
- Prepare the vehicle and remove obstructing components
- Battery disconnect, vehicle on lift
- Remove undertrays, intake/exhaust components as needed
- Remove driveshaft/axles and linkages
- Support engine and transmission
- Engine support bar or brace if mounts/subframe are loosened
- Transmission jack to control angle and prevent damage
- Separate transmission from engine
- Starter removal (common)
- Bellhousing bolts, dowels, careful separation to protect input shaft
- Replace clutch components
- Remove pressure plate and disc
- Inspect flywheel surface and crank flange area
- Replace release bearing (throwout bearing) and inspect fork/pivot
- Replace pilot bearing/bushing where applicable
- Flywheel service (as needed)
- Resurface if within spec (single-mass flywheel)
- Replace if dual-mass or damaged
- Reinstall transmission and reassemble
- Align input shaft with properly centered disc
- Torque fasteners to spec, restore mounts and driveline components
- Bleed hydraulics and verify operation
- Ensure full disengagement and consistent pedal feel
- Road test and final checks
- Confirm engagement, no noise, smooth shifting
This is why clutch replacement is often described as “mostly labor”: many steps are removal/reinstall tasks rather than the actual clutch swap.
What are the key torque, alignment, and cleanliness steps?
Small errors here can add hours later. The high-impact “do it right once” actions include:
- Disc centering: Use an alignment tool and confirm the disc is seated correctly before torquing the pressure plate. A slightly off-center disc can turn reinstallation into a frustrating, time-wasting fight.
- Torque sequence: Pressure plate bolts should be torqued evenly in a cross pattern to avoid distortion.
- Clean friction surfaces: Keep grease off the disc and flywheel surface; handle with clean gloves.
- Input shaft spline lubrication (minimal): Light, correct grease on splines (not on friction surfaces) prevents binding and improves pedal feel.
- Release system inspection: Worn forks, pivot balls, or mis-seated release bearings can create noise and incomplete release.
From a materials and performance standpoint, clutch engagement depends on friction behavior between the disc material and the mating surface. According to a study by Dunarea de Jos University of Galati from the Mechanical Engineering Department, in 2024, tribological testing across multiple clutch friction materials reported mean coefficients of friction ranging from about 0.286 to 0.423, highlighting how material differences can affect engagement behavior and heat generation.
What should you replace while you're in there?
Because the transmission is already out, certain parts are “cheap insurance” compared with paying labor twice:
- Release (throwout) bearing (almost always)
- Pilot bearing/bushing (if equipped)
- Clutch fork pivot hardware (if worn)
- Rear main seal (only if leaking or clearly weeping)
- Clutch hydraulics (master/slave) if there’s known leakage or weak pedal feel
A practical rule: prioritize parts that require transmission removal to access, and be cautious with “optional” replacements that add cost without clear benefit.
What tools and parts are needed for clutch replacement?
A clutch job requires a clutch kit plus safe lifting/support tools and a few specialty items—because the real challenge is controlled transmission removal and precise reinstallation, not just swapping parts.
Then, choosing the right tools up front reduces both labor time and the risk of damage.

What parts are included in a clutch kit (and which are separate)?
Most clutch kits include:
- Clutch disc
- Pressure plate
- Release (throwout) bearing
Often separate (vehicle-dependent):
- Pilot bearing/bushing
- Flywheel (especially if dual-mass or out of spec)
- Hydraulic slave cylinder (sometimes “internal” concentric slave cylinders are strongly recommended)
- Alignment tool (some kits include it)
If your vehicle uses a dual-mass flywheel, the flywheel decision becomes a major cost driver and should be addressed during planning—not discovered after teardown.
What specialty tools make the job faster and safer?
Key tools that reduce time and prevent damage:
- Transmission jack (stability and angle control are crucial)
- Engine support bar/brace (especially for FWD where mounts are involved)
- Clutch alignment tool (non-negotiable for smooth reinstallation)
- Torque wrench (fasteners and clamp load matter)
- Breaker bar + quality sockets (seized fasteners are common)
- Pry bars and alignment pins (controlled separation and positioning)
- Vacuum/pressure bleeder (for hydraulic systems, depending on design)
Safety isn’t optional here. The transmission is heavy, awkward, and sensitive to input shaft alignment—so “make do” lifting approaches are a common cause of injury and rework.
How can you estimate labor time and total cost for your vehicle?
You can estimate clutch replacement labor time by combining (1) a realistic hour range for your drivetrain and access level with (2) the specific add-ons you expect—then converting those hours into a total using local shop rates and parts choices.
More specifically, a simple estimating framework helps you avoid under-budgeting and surprises.

How do flat-rate labor guides and shop rates turn into a bill?
Most estimates follow this structure:
Total = (Labor hours × shop rate) + parts + shop supplies + taxes
Where labor hours are often based on a labor-time system (flat-rate). ALLDATA, for example, describes using its system to look up labor times and part pricing for specific vehicles, reflecting how shops standardize quoting rather than reinventing time estimates each job.
What changes your bill fast:
- Higher local shop rate (metro areas often cost more)
- Additional labor for seized components or subframe removal
- Flywheel resurfacing/replacement
- Hydraulic repairs (master/slave)
- Extra parts you approve mid-job
What are typical clutch replacement cost ranges?
A broad benchmark can help you spot outliers. RepairPal’s clutch replacement estimator lists an average total cost range in the roughly $1,589–$2,003 band for many vehicles (parts + labor), with model-specific ranges varying around that level.
Use that as a reference point—not a guarantee—because:
- Performance clutches and specialty flywheels push parts cost up
- AWD/4WD labor often pushes labor up
- Dual-mass flywheel replacement can meaningfully increase totals
How do you get an accurate estimate before authorizing work?
To tighten your estimate (and reduce “surprise calls”), ask for these specifics in writing:
- Quoted labor hours and whether they’re flat-rate or time-and-materials
- Parts list (brand, included components, warranty terms)
- Flywheel plan (inspect + resurface/replace criteria)
- Hydraulic plan (bleeding included? slave cylinder included?)
- Known risk factors (rust, exhaust bolts, subframe removal)
- Test and break-in guidance after installation
If a shop won’t clearly describe scope, you’re more likely to pay for scope creep later.
Should you DIY clutch replacement or hire a mechanic?
Yes—DIY clutch replacement can be worth it if you have safe lifting equipment, a transmission jack, and enough time for troubleshooting, because the biggest savings come from labor costs, but the biggest risks come from alignment mistakes, safety issues, and rework.
However, the right decision depends on your skill level, your vehicle layout, and how expensive failure would be.
Is DIY clutch replacement realistic for a first-timer?
DIY is realistic for some first-timers when these conditions are true:
- You can lift and support the vehicle safely (stands rated correctly, flat surface)
- You have transmission handling tools (jack + stabilization)
- You can follow torque specs and procedures (service manual mindset)
DIY becomes risky when:
- You’re working on AWD/4WD with cramped packaging
- You have heavy rust or seized hardware
- The vehicle uses an internal concentric slave cylinder (mistakes can mean removing the transmission again)
If you choose DIY, plan extra time for learning curve, tool runs, and unexpected fastener issues.
When does professional replacement pay off?
Professional replacement often pays off when:
- You need the car back quickly (one-day turnaround matters)
- You want a labor warranty
- The job requires specialty equipment (subframe alignment, heavy transmission handling)
- Your vehicle is known for tight packaging or difficult access
A useful way to decide: if repeating the job would be financially or logistically painful, professional labor is a form of risk reduction.
How do you test and break in a new clutch after replacement?
You test a new clutch by verifying full disengagement, smooth engagement, and quiet operation before and after a short road test, then you break it in with controlled, moderate driving to seat the friction surfaces evenly and reduce glazing risk.
Next, a consistent post-install routine helps you catch problems early—when they’re easiest to fix.
What checks should you do before the first drive?
Before rolling out, confirm:
- Pedal feel is consistent and returns normally
- Engagement point is reasonable (not at the floor with grinding)
- Reverse engages cleanly (a common indicator of full disengagement)
- No abnormal noises at idle, pedal pressed, or during light revs
- No fluid leaks from hydraulic components or rear main area
During the first short drive:
- Shift gently through all gears
- Listen for chatter, scraping, or new vibrations
- Recheck for leaks after the drive
How do you perform a proper break-in?
Most street clutches benefit from a conservative break-in period:
- Avoid hard launches and high-torque pulls
- Avoid repeated high-RPM slipping
- Use smooth engagement and moderate throttle
- Let the clutch cool between stop-and-go sessions when possible
Break-in isn’t about “being gentle forever.” It’s about giving the friction surfaces time to mate evenly so the clutch holds consistently and lasts longer.
Contextual Border: At this point, you have the core answers—labor time, process, tools, estimating, DIY vs shop, and post-install testing. The next section expands into less-obvious issues that can quietly add hours and cost even when the main plan is solid.
What can go wrong during clutch replacement that affects time and cost?
Clutch jobs most often go sideways because of flywheel surprises, release bearing issues, hydraulic bleeding problems, or misdiagnosed symptoms—each of which can add rework time or trigger “transmission-out again” labor.
Besides the main procedure, these edge cases are what turn a predictable job into an expensive one.
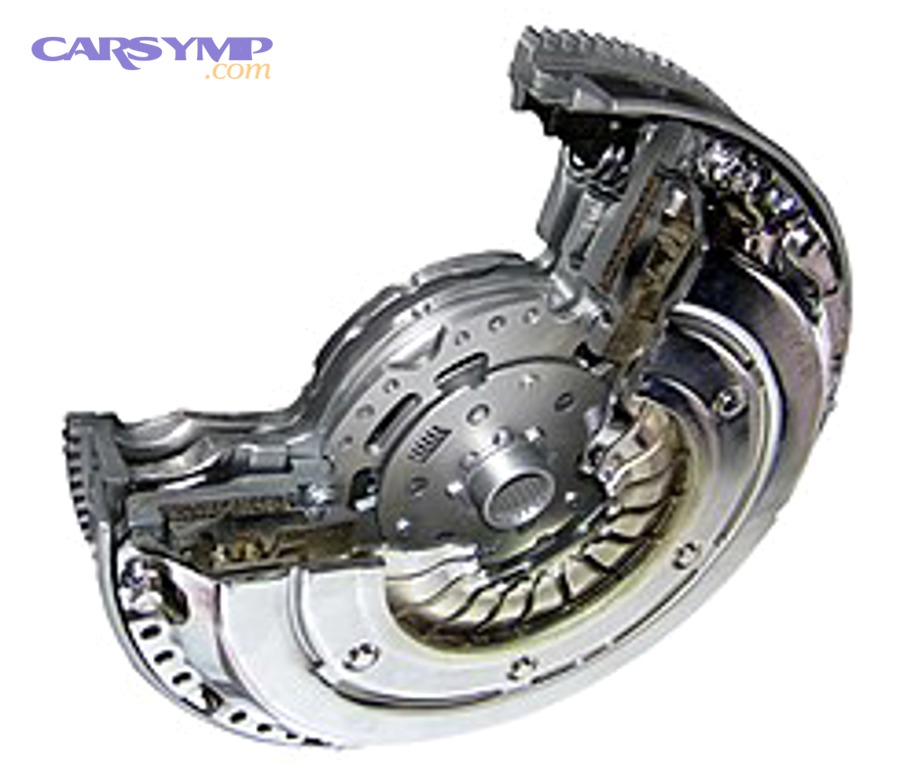
What are "Dual-mass flywheel issues and costs" you should plan for?
Dual-mass flywheels (DMFs) are designed to damp torsional vibration, but they’re also wear items with failure modes that can force replacement during a clutch job. Symptoms can include excessive free play, grease leakage, heat damage, or noise/vibration complaints.
Why this affects cost:
- DMFs are often replaced rather than resurfaced
- Parts cost is commonly higher than single-mass flywheels
- If you ignore a failing DMF, a new clutch may still feel bad (vibration, chatter, noise)
From a research standpoint, DMFs are explicitly engineered to reduce vibration transmitted into the driveline. According to a study by Izmir Katip Celebi University, in 2022, DMF parameter optimization work reported vibration-amplitude improvement over 28%, underscoring why DMF condition can strongly influence perceived drivability after clutch work.
If you want to avoid a mid-job surprise, ask your shop (or plan in DIY) how DMF wear is evaluated and what triggers replacement.
What are the "Signs of throwout bearing failure" after installation?
A failing or misinstalled release (throwout) bearing can sound like:
- Whining, chirping, or growling when pressing the clutch pedal
- Noise that changes with pedal position
- Difficulty shifting because the clutch isn’t fully disengaging
These symptoms matter because release bearing issues often require transmission removal to fix—meaning the labor time doubles if it’s missed.
A performance clutch manufacturer’s symptom guide notes that throwout bearing noise commonly presents as whining/growling/chirping when the pedal is pressed, and can be accompanied by difficulty shifting when disengagement is incomplete.
What hydraulic and bleeding problems cause a “no-disengage” clutch?
Hydraulic problems can mimic a bad clutch even when the new clutch is fine. Common causes include:
- Air trapped in the system (especially tricky designs)
- Leaking master or slave cylinder
- Weak clutch master seals causing inconsistent pressure
- Incorrect adjustment (where applicable)
Signs you’re dealing with hydraulics, not the friction disc:
- Pedal feel changes from press to press
- Engagement point wanders
- Hard shifting improves temporarily after bleeding
- Reverse gear grinds despite a new clutch
This is also why replacing a marginal slave cylinder “while you’re in there” can be smart—because it’s cheaper than paying labor again later.
When should you stop and use a "Car Symp" diagnostic approach?
If your symptoms don’t cleanly match a worn clutch—stop and diagnose before committing to major labor. A simple “Car Symp” approach (short for a symptom-first checklist) prevents expensive misfires:
- Symptom: clutch slips under load → Check: disc wear, oil contamination, pressure plate clamp load
- Symptom: hard shifting + spongy pedal → Check: hydraulics, air in system, leaks
- Symptom: noise only when pedal pressed → Check: release bearing and fork geometry
- Symptom: chatter on takeoff → Check: flywheel surface condition, mounts, contamination, DMF play
If a shop can’t explain which symptom maps to which component, your estimate is likely to inflate after teardown.
If you want, tell me your vehicle year/make/model + drivetrain (FWD/RWD/AWD) and whether it has a dual-mass flywheel, and I’ll translate this into a tighter labor-time range and a parts checklist that matches your setup.