


Your best flywheel decision during a clutch job is simple: inspect, measure, and then choose resurface (machine) or replace (new) based on damage severity, spec limits, and how much repeat labor you can tolerate if the clutch chatters or slips after reassembly.
Next, the key is knowing what “good enough” looks like in real terms—hot spots, scoring, cracks, runout, warpage, and thickness/step height—because a flywheel can look fine yet still be out of spec and cause engagement problems.
Then, cost matters in a specific way: a flywheel that should have been replaced can turn into the most expensive part of the job because the “cost” is often the labor of doing the same clutch work twice, plus towing/downtime.
Introduce a new idea: modern drivetrains add special cases—especially dual-mass flywheels—where resurfacing may be discouraged and the “right” decision shifts toward replacement even if the surface doesn’t look terrible.
Do you need to resurface or replace a flywheel when doing a clutch job?
No—you don’t automatically need flywheel resurfacing or replacement during a clutch job, because the correct choice depends on (1) friction-surface condition, (2) measured runout/warpage/thickness limits, and (3) the risk of doing the labor twice if engagement problems return.
However, a “no” only stays true when you follow a consistent inspection-and-measurement workflow before you commit to reusing anything.
Is resurfacing “always required” if you’re installing a new clutch?
No, resurfacing is not always required with a new clutch, because some flywheels are still flat, within spec, and have a stable friction surface, and because some flywheel types or coatings make machining a poor option.
Still, shops often recommend resurfacing during clutch replacement because it reduces the chance that old surface defects “print through” to the new disc and create chatter.
Here’s why many technicians lean toward resurfacing even when the flywheel looks decent:
- Friction-surface uniformity: A new disc needs consistent contact to bed in evenly. Localized glazing or hot spots can trigger intermittent grab/slip that feels like chatter.
- Break-in quality: A freshly machined surface tends to help the disc mate more predictably—if the shop hits the right finish and cleans it properly.
- Comeback prevention: If a clutch chatters after install, the flywheel is one of the first suspects. Resurfacing up front is often “cheap insurance” compared with redoing the job.
At the same time, “always resurface” has real exceptions:
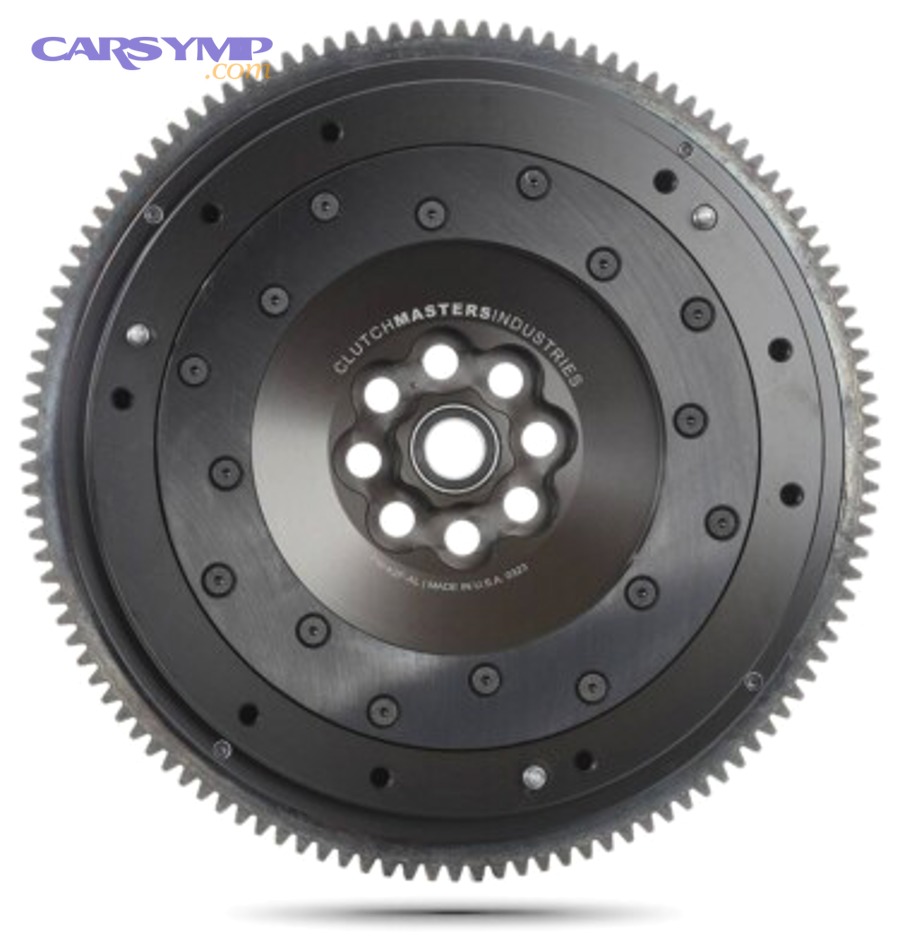
- The flywheel is dual-mass, where machining is commonly discouraged by performance and clutch manufacturers.
- The flywheel has hardening/coatings or a design that can be compromised by removing material.
- The flywheel is already near minimum thickness or has step-height requirements you can’t safely maintain after machining.
Can you skip resurfacing if the flywheel looks smooth and the clutch wasn’t slipping?
Yes, you can sometimes skip resurfacing if the flywheel is smooth and measures within runout/warpage limits, shows no heat damage, and matches the clutch manufacturer’s requirements—because “looks good” becomes “is good” only when it’s measurable.
But the catch is that a flywheel can be visually acceptable while still being slightly warped or heat-checked, which is enough to cause a new clutch to feel inconsistent.
Use this quick “skip resurfacing” checklist before you decide:
- No cracks (including fine radial cracks) and no missing material
- No heavy blueing/hot spotting or obvious hard patches
- No deep scoring you can catch with a fingernail
- Runout/warpage within spec using a dial indicator and straightedge methods (specs vary by vehicle). A service manual example lists max runout and warpage at 0.15 mm (0.006 in.) for a specific application.
- Thickness/step height within spec if your flywheel design uses a “step” (common on some applications)
If you can’t verify those points, resurfacing (machine) or replacement (new) is usually the safer path.
What does flywheel resurfacing mean (and what does “machine” actually change)?
Flywheel resurfacing is a repair process that removes a controlled, thin layer of material from the clutch-contact face to restore flatness and friction consistency, typically by machining on a brake lathe or flywheel grinder to correct heat spots, glazing, and minor scoring.
Specifically, resurfacing changes the surface in ways that a visual inspection alone can’t guarantee—so it’s worth understanding what it fixes and what it cannot.
What problems does resurfacing solve (hot spots, glazing, scoring, chatter)?
Resurfacing solves engagement problems caused by uneven friction contact—especially hot spots, glazing, and shallow scoring—because it restores a uniform face that lets the clutch disc bed in evenly.
More specifically, each common defect maps to a predictable symptom:
- Glazing (shiny, slick surface): often creates a “skatey” feel where engagement is abrupt or inconsistent.
- Hot spots / heat checking: can cause on-off friction as the disc hits harder and softer patches around the face, which feels like chatter.
- Light-to-moderate scoring: reduces contact area, creates localized high pressure, and can accelerate disc wear or produce vibration.
- Minor warpage (within machinable limits): resurfacing can restore flatness so the disc doesn’t engage more on one side than the other.
In practice, the biggest benefit is consistency: the clutch disc can develop an even transfer layer and wear pattern, which improves smoothness and longevity.
What problems can resurfacing NOT fix (cracks, severe heat damage, distortion, missing step)?
Resurfacing cannot fix structural damage—like cracks, severe heat damage, or distortion outside spec—because machining only changes the surface layer and cannot restore compromised strength or correct excessive runout/warpage without removing too much material.
In addition, resurfacing can create new problems if it changes critical geometry:
- Cracks (even fine radial cracks): can propagate; replacement is the safer choice.
- Heavy blueing and hard spots: indicate overheating that may have changed metallurgy; machining may not return stable friction behavior.
- Excessive runout/warpage: if out of spec, replacement is often required rather than “machining until it’s flat.”
- Stepped flywheels with strict step height: if step height can’t be maintained, the pressure plate clamp geometry can be wrong and cause slipping or disengagement issues.
- Dual-mass flywheel serviceability: many advise against surfacing a dual-mass flywheel at all.
What are the “replace it” red flags you should not ignore?
There are 4 main categories of “replace it” flywheel red flags—structural damage, thermal damage, measurement failures, and design/serviceability limits—because each category indicates the flywheel can’t deliver stable friction or safe operation even after machining.
Besides saving you time, this grouping prevents the most expensive mistake: installing a new clutch onto a flywheel that will force the job to be repeated.
Which visible damage signs mean replacement is the safer option?
Replacement is the safer option when you see cracks, deep gouges, missing material, or severe heat damage, because these signs point to weakened structure or unstable friction that resurfacing cannot reliably correct.
Specifically, look for:
- Cracks / heat checking: fine “spiderweb” patterns can be early warning; pronounced cracks are a hard stop.
- Deep scoring: if you can catch a groove with a fingernail, resurfacing may remove too much material to clean it up.
- Heavy blueing or discoloration bands: evidence of overheating; often paired with hard spots.
- Starter ring gear issues: chipped or missing teeth can create starting problems; on many flywheels this pushes you toward replacement.
A practical rule: if the defect looks like it belongs on a “failure analysis” board photo, don’t gamble—replace it.
Which measurement failures force replacement (runout, thickness, step height)?
Measurement failures force replacement when runout, warpage, thickness, or step height exceed specification, because incorrect geometry prevents even clamp load and makes clutch engagement unpredictable even with a perfect new disc.
More importantly, specs are not optional; they are the boundary between “machines cleanly” and “will shake, chatter, or slip.”
A service manual example for a specific vehicle lists:
- Maximum flywheel runout: 0.15 mm (0.006 in.)
- Maximum warpage: 0.15 mm (0.006 in.)
Your exact values will vary by engine and flywheel design, so always verify with your application’s manual. If you can’t access specs, many machine shops can measure and advise, but you should still ask what limits they’re using.
When does flywheel type make replacement more likely (dual-mass, coated, stepped)?
Replacement becomes more likely when the flywheel is dual-mass, specially coated/hardened, or stepped with strict geometry, because the design either can’t be surfaced safely or demands precision that many general machine shops can’t guarantee.
To illustrate:
- Dual-mass flywheel: widely discouraged for resurfacing by clutch/flywheel manufacturers; replacement is commonly recommended.
- Coated/hardened surfaces: machining may remove the intended surface layer, altering wear and heat behavior.
- Stepped flywheels: the “step” controls pressure plate geometry; if altered, you can get dragging, slipping, or a pedal feel that never seems right.
How do you decide: resurface (machine) vs replace (new) your flywheel?
Resurface (machine) wins for minor surface damage and fast, reliable reconditioning; replace (new) is best for structural/measurement failures; and reuse-as-is is only optimal when the flywheel is proven within spec and truly clean—because each option optimizes a different goal: cost, certainty, or speed.
Next, the most effective way to decide is to combine condition + measurements + economics into one repeatable framework.
Before the details, here’s what the table below contains: it compares resurfacing and replacement across the decision criteria that matter most during a clutch job—risk, time, cost, and outcome consistency.
| Decision Criterion | Resurface (Machine) | Replace (New) |
|---|---|---|
| Up-front parts cost | Usually lower | Often higher |
| Time/downtime | Depends on machine shop turnaround | Often faster if part is available |
| Risk of chatter/slip comeback | Low if done correctly | Lowest when matched and installed correctly |
| Works with cracks/out-of-spec runout | No | Yes |
| Best for | Light scoring, glazing, mild hot spots | Cracks, heavy heat damage, DMF, out-of-spec measurements |
Resurfacing vs replacement: which is better for cost, time, and reliability?
Resurfacing is usually better for cost, replacement is usually better for time certainty, and reliability favors whichever option keeps the flywheel within spec and stable under heat—because the true “cost” includes turnaround time and the probability of doing the job twice.
However, “usually” changes fast once you factor in local realities.
Think in three cost layers:
- Direct cost (invoice): machining fee vs new flywheel price.
- Indirect cost (downtime): waiting days for a machine shop can cost more than the parts difference if the car is needed for work.
- Risk cost (repeat labor): if the car chatters and you have to pull the transmission again, you pay the labor twice.
A good rule for DIY mechanics: if your machine shop is quick and reputable, resurfacing can be the sweet spot. If machining requires shipping out or long waits, replacement often becomes the practical “cheaper” move.
Resurfacing vs replacement: which is better for different driving needs (daily, towing, performance)?
Resurfacing is typically fine for normal daily driving with mild wear, replacement is safer for heavy towing or repeated high-heat use, and upgraded “new” flywheels are often optimal for performance builds—because higher torque and heat amplify any surface or geometry weakness.
Meanwhile, the clutch disc material and intended use influence how sensitive the system will be to surface imperfections.
- Daily commuting: a properly resurfaced flywheel generally performs well if the face is uniform and specs are met.
- Towing/hauling: extra load increases heat; if the flywheel shows heat damage or hard spots, replacement reduces the chance of future chatter or slipping.
- Performance/track: repeated heat cycles can expose weaknesses; a new flywheel matched to the clutch (and sometimes an upgraded design) tends to be the more robust decision.
Resurfacing vs replacement: how do outcomes differ (break-in, clutch feel, longevity)?
Resurfacing often improves break-in smoothness, replacement often maximizes predictability, and longevity depends on surface stability plus correct installation—because clutch feel is mainly the product of consistent friction, correct clamp geometry, and contamination-free assembly.
More specifically:
- A resurfaced flywheel can deliver very smooth engagement when the finish is correct and the face is clean.
- A new flywheel reduces uncertainty about hidden heat damage and geometry—especially if the old flywheel lived through a slipping clutch.
- Either choice fails early if the installer contaminates the disc with grease/oil or ignores torque procedures.
Evidence: According to a study by Dunarea de Jos University of Galati from the Mechanical Engineering Department, in 2024, tested clutch disc friction materials showed mean coefficients of friction ranging from 0.286 to 0.423 against a cast iron disc—highlighting how material and interface conditions directly affect engagement behavior.
What is the correct flywheel inspection checklist before you choose?
There are 5 main inspection groups you should complete before deciding—visual damage, heat damage, flatness/warpage, runout, and geometry/thickness—because each group catches a different failure mode that can ruin a new clutch even when the flywheel “looks fine.”
To better understand why this matters, remember the goal: you’re not inspecting for beauty; you’re inspecting for repeatable friction and correct geometry.
What tools and measurements do you need (and what can you do without special tools)?
You can complete a basic flywheel decision with a bright light, brake cleaner, a straightedge, and feeler gauges, but a dial indicator becomes essential when you want confidence in runout and face accuracy.
In addition, many DIY-friendly checks work surprisingly well when you apply them consistently:
Basic (DIY) tools
- Bright light + magnification: reveals heat checking and fine cracks
- Straightedge + feeler gauges: checks warpage/flatness across multiple directions
- Marker/paint pen: helps track rotation points
- Brake cleaner + lint-free towels: removes glaze/contamination before judging the surface
Advanced (higher confidence) tools
- Dial indicator + magnetic base: measures runout precisely
- Micrometer/calipers (where applicable): checks thickness and step height
If you only choose one “advanced” tool, choose the dial indicator—because it converts “I think it’s flat” into a number you can compare to spec.
How do you check for cracks, hot spots, and warping step-by-step?
You check for cracks, hot spots, and warping by cleaning the face, inspecting under strong light, then measuring runout and warpage systematically—because surface defects and geometry errors often hide under dust, glaze, and uneven lighting.
Specifically, follow this sequence:
- Clean the friction face thoroughly.
Use brake cleaner and a lint-free towel. Don’t judge the surface until it’s clean—oil film can mask hot spots and cracks. - Inspect for cracks and heat checking.
- Rotate the flywheel and look for radial lines, spiderweb patterns, or edge cracking.
- Pay attention to transitions between discolored areas and clean metal.
- Look for hot spots and hard patches.
- Blue/purple discoloration often indicates overheating.
- Shiny patches that differ from the surrounding face can signal glazing or material transfer.
- Check flatness/warpage with a straightedge and feeler gauge.
Place the straightedge across several directions (12–6, 3–9, and diagonals). Note any gaps. - Measure runout with a dial indicator.
A service manual example instructs measuring flywheel runout with a dial indicator and replacing if out of spec; it lists 0.15 mm (0.006 in.) maximum runout and the same maximum for warpage in that application.
If any step triggers a hard-stop red flag (cracks, out-of-spec runout/warpage, too-thin, or unmaintainable geometry), your decision moves toward replacement.
If you resurface, what should a machine shop do to avoid clutch problems later?
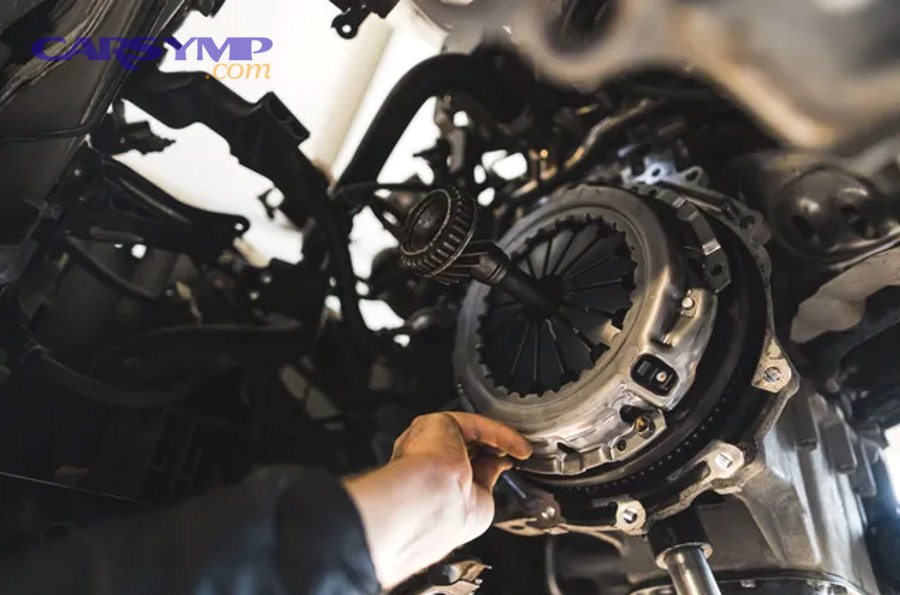
A machine shop should resurface a flywheel by restoring flatness, maintaining correct geometry (including step height where required), producing an appropriate friction finish, and returning the part surgically clean—because clutch chatter and slip often come from “machined” flywheels that were machined incorrectly or contaminated afterward.
Especially with modern clutch materials, surface quality and cleanliness can matter as much as the machining itself.
What surface finish and flatness should you ask for after machining?
You should ask for a flywheel surface that is flat/parallel within spec and finished to the clutch manufacturer’s recommended roughness—because too smooth can glaze and too rough can chew the disc or create grabby engagement.
More specifically, your conversation with the shop should include:
- What spec are you machining to? (runout/warpage and any minimum thickness)
- Can you maintain step height (if stepped flywheel)?
- How do you verify flatness and parallelism?
- How do you clean after machining? (abrasive residue is a clutch killer)
Also ask about process consistency:
- Flywheel grinders often produce better controlled finishes than “general-purpose” lathes, depending on the shop and equipment.
- If the shop says “we’ll just take a pass and it’ll be fine” without discussing specs, consider that a caution sign.
What should you replace at the same time (pilot bearing, rear main seal, bolts)?
You should replace the wearable and labor-intensive-to-access components during the same clutch job—because the entire purpose of resurfacing is preventing rework, and small parts are the usual reason people end up pulling the transmission again.
In addition to your clutch kit parts, prioritize:
- Pilot bearing/bushing (if equipped): cheap and critical for smooth input shaft support.
- Release (throwout) bearing: typically included with a clutch kit; replacing it is standard.
- Rear main seal (conditional): replace if there’s any sign of seepage; it’s inexpensive compared to repeat labor.
- Flywheel bolts (if torque-to-yield): follow service manual guidance; many applications treat them as one-time-use.
- Clutch fork pivot and clips (where applicable): small wear points that affect feel.
This is also the best time to learn and document the Signs of throwout bearing failure (noise when the pedal is pressed, shifting difficulty, and pedal vibration), because catching those signs early can prevent damage to the pressure plate and reduce the chance you’ll be back in the same job soon.
If you replace the flywheel, what parts and fitment details matter most?
There are 4 main fitment groups to get right when replacing a flywheel—correct type and compatibility, correct hardware and torque procedure, correct mating-surface cleanliness, and correct clutch pairing—because a new flywheel can still chatter or fail if any of these groups are wrong.
Then, once you commit to replacement, your job becomes “eliminate variables” so the clutch beds in cleanly.
OEM vs aftermarket flywheels: which is the smarter “new” choice for your build?
OEM is usually the smarter “new” choice for daily-driver smoothness and noise control, aftermarket is best for specific goals like reduced rotating mass or higher-heat tolerance, and the optimal pick is the one explicitly matched to your clutch and intended use.
However, the wrong “upgrade” can create new issues—especially noise and drivability changes.
- OEM replacement: predictable fit, NVH characteristics, and compatibility; often best for stock driving.
- Aftermarket performance flywheel: can be stronger or lighter, but may change idle behavior and engagement feel.
- Single-mass conversions (from dual-mass): can increase mechanical noise/vibration; may require a matched clutch kit and sometimes ECU/idle adjustments on certain platforms.
If your vehicle uses a dual-mass flywheel, you’ll often find that manufacturers advise replacement rather than resurfacing, making the OEM route the “lowest-risk” option.
What installation mistakes cause chatter or failure even with a new flywheel?
The most common installation mistakes that cause chatter or failure are contamination, incorrect torque/sequence, misalignment, and mismatched parts, because clutches are friction systems that punish small errors with big symptoms.
More importantly, these mistakes are preventable with discipline.
Avoid these high-impact errors:
- Touching friction surfaces with greasy hands: oil contamination can cause slip and glazing from the first drive.
- Skipping cleaning: even a new flywheel can have protective oil; always clean the friction face.
- Improper torque sequence or wrong torque values: can distort the flywheel or pressure plate.
- Wrong clutch disc orientation: some discs are directional; reversed installation can cause immediate issues.
- Not checking pilot bearing fit or input shaft condition: can cause drag, difficult shifting, and chatter.
If you’re chasing a noise or vibration that seems to occur when pressing the clutch pedal, remember that flywheel symptoms can overlap with bearing issues—so confirm the Signs of throwout bearing failure before you blame a new flywheel.
What factors can change the best resurfacing vs replacement decision in real-world scenarios?
There are 4 real-world factors that most often change the “best” decision—dual-mass flywheel constraints, downtime vs labor economics, high-heat use cases, and machine-shop capability—because they shift the balance between saving money today and avoiding expensive repeat work later.
In other words, your decision is not only mechanical; it’s logistical.
How does a dual-mass flywheel (DMF) change the repair vs replace choice?
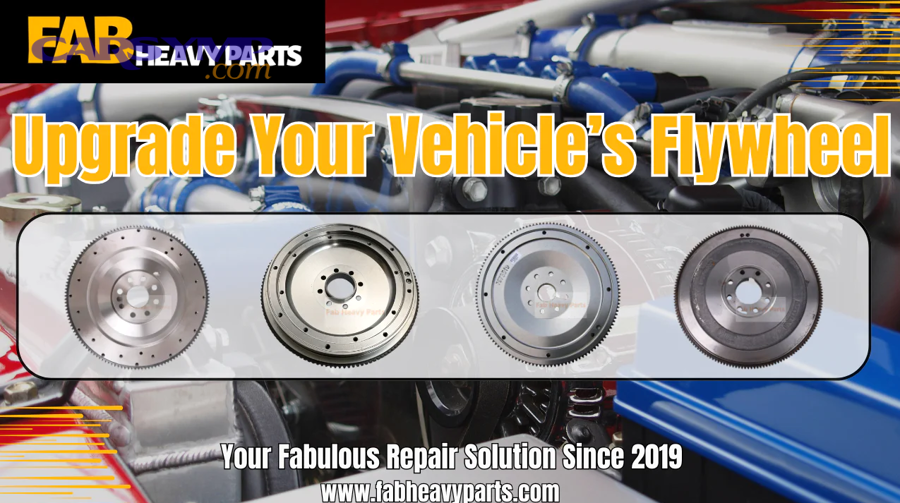
A dual-mass flywheel usually shifts the decision toward replacement, because many sources and manufacturers discourage surfacing and because DMFs can fail internally (springs/damping) even if the friction face looks acceptable.
More specifically, DMF problems aren’t only about the visible surface—they’re about the internal damping mechanism that controls torsional vibration.
If you’re weighing DMF choices, you’re really weighing Dual-mass flywheel issues and costs: the part is often expensive, but it also reduces vibration and can protect driveline components; replacing it is often the “certainty” move when you’re already paying the labor to access it.
When is replacement cheaper than machining once you factor in downtime and repeat labor?
Replacement is cheaper than machining when the machine shop turnaround delays the job, when the old flywheel is borderline on specs, or when the probability of a comeback is high—because repeat labor and downtime frequently outweigh the price difference between machining and a new part.
For example, if resurfacing requires shipping out, a week of downtime can be “more expensive” than the price gap—especially if you need the vehicle daily.
A practical decision shortcut:
- If the flywheel is clearly healthy and machining is fast: resurface (machine).
- If the flywheel is questionable and you can’t verify specs quickly: replace (new).
- If the flywheel is out of spec or damaged: replace (new), no debate.
How do performance clutches, towing, and track use shift the decision toward “new”?
High-heat, high-torque use pushes the decision toward “new” because thermal cycling magnifies hard spots, distortion, and friction instability, making borderline flywheels more likely to chatter, glaze, or crack under load.
Besides the flywheel itself, performance clutches may use more aggressive materials that are less forgiving of imperfect surfaces.
If you tow or drive hard:
- Treat heat damage as more serious.
- Prioritize spec compliance over “it’ll probably be fine.”
- Consider matching components designed to work together rather than mixing old and new surfaces.
What should you ask a shop or machine shop before approving resurfacing?
You should ask about spec targets, step-height capability, surface finish approach, cleaning procedure, and warranty policy, because those answers predict whether resurfacing will behave like “new” or behave like a shortcut that comes back as chatter later.
Here are the questions that matter most:
- “What spec are you using for runout/warpage and minimum thickness?”
- “Can you maintain or restore step height if my flywheel is stepped?”
- “How do you verify flatness after machining?”
- “How do you clean the flywheel after machining to remove abrasive residue?”
- “If I get clutch chatter after install, what’s your policy on rechecking the flywheel?”
And if your vehicle uses a DMF, ask directly whether they machine them—then compare that answer to manufacturer guidance that discourages surfacing dual-mass flywheels.