8 Critical Signs Your Thermostat Is Stuck or Failing
A stuck or failing thermostat reveals itself through eight critical symptoms: constant HVAC operation without cycling off, blank or unresponsive display screens, significant gaps between set temperature and actual room temperature, complete failure to activate heating or cooling, physically stuck or non-responsive controls, repeated loss of programmed settings, noticeable delays between thermostat adjustments and system response, and frequent short cycling where your system turns on and off rapidly. When your thermostat malfunctions, your home’s comfort system loses its brain, leaving you with erratic temperatures, wasted energy, and potential damage to your HVAC equipment.
Understanding these warning signs helps homeowners diagnose problems before minor issues escalate into expensive HVAC failures. A thermostat stuck in one position—whether mechanically frozen or electronically unresponsive—prevents your heating and cooling system from maintaining comfortable temperatures, causes equipment to run inefficiently, and can lead to premature furnace or air conditioner failure. Recognizing these symptoms early allows you to determine whether simple troubleshooting, professional recalibration, or complete replacement offers the best solution.
Beyond identifying symptoms, you need practical diagnostic methods to confirm whether your thermostat is actually the problem or if underlying HVAC equipment issues are to blame. Simple tests like checking temperature accuracy with a separate thermometer, verifying power supply and battery status, and observing system response patterns help isolate thermostat failures from furnace, air handler, or compressor malfunctions. This diagnostic clarity saves time and prevents unnecessary service calls.
Prevention strategies and maintenance practices extend thermostat lifespan and maintain accurate climate control. Below, we’ll explore each critical symptom in detail, explain diagnostic procedures, examine root causes, and provide actionable guidance for repair-versus-replacement decisions.
What Does It Mean When a Thermostat Is Stuck?
A stuck thermostat is a climate control device that fails to accurately sense temperature changes, respond to setting adjustments, or properly signal your HVAC system to start or stop heating and cooling cycles. This malfunction manifests in both physical and functional dimensions, ranging from mechanically frozen dials and buttons to electronic failures in temperature sensing or relay switching.
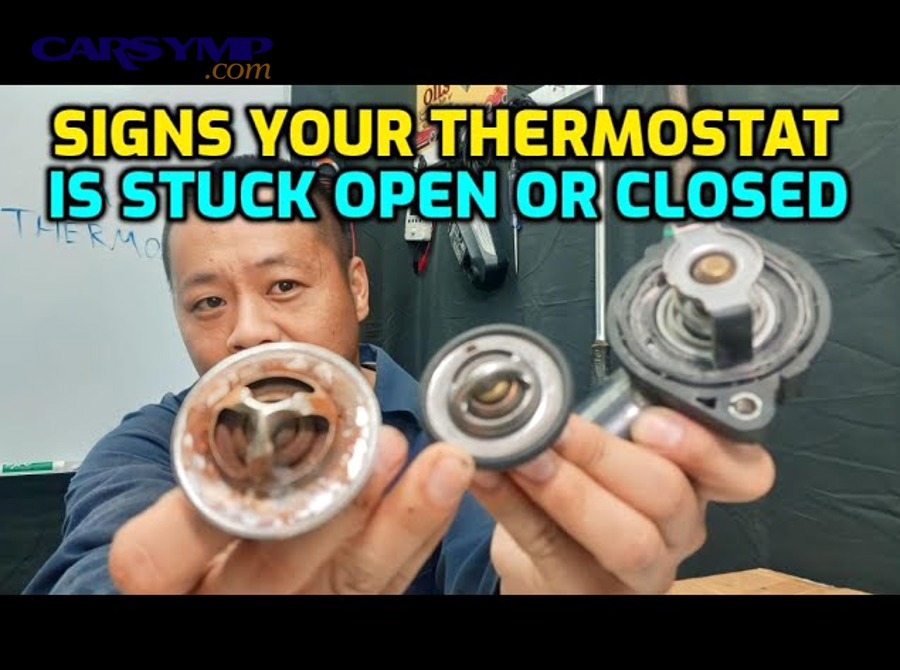
To better understand this condition, consider that thermostats function as sophisticated switches controlled by temperature-sensing elements. When working correctly, these devices continuously monitor room temperature, compare it against your desired setpoint, and activate or deactivate HVAC equipment accordingly. A stuck thermostat breaks this feedback loop at various points—the temperature sensor may provide false readings, the internal switching mechanism may fail to engage, or the control interface may stop accepting new inputs.
The term “stuck” describes several distinct failure modes. A mechanically stuck thermostat features physical components that no longer move freely—older dial thermostats may have corroded bimetallic strips or frozen mercury switches, while digital models might have buttons that don’t depress or touchscreens that don’t register inputs. Functionally stuck thermostats appear to work physically but fail electronically—displays may show information, but the device doesn’t communicate properly with HVAC equipment or ignores temperature changes in your home.
Distinguishing between “stuck,” “frozen,” and “failing” matters for diagnosis and repair. A frozen thermostat typically refers to displays that are completely dark or unresponsive due to power loss, while a failing thermostat shows intermittent problems that worsen over time before complete failure occurs. Understanding these nuances helps you communicate effectively with HVAC technicians and make informed decisions about troubleshooting steps.
What Are the 8 Critical Signs of a Stuck or Failing Thermostat?
There are 8 main critical signs of a stuck or failing thermostat: continuous HVAC operation, blank displays, temperature mismatches, activation failures, stuck controls, setting loss, response delays, and short cycling, based on observable system behavior and thermostat functionality. These symptoms represent the most reliable diagnostic indicators that homeowners can identify without specialized equipment, allowing early detection before complete system failure.
Recognizing these signs requires systematic observation of both your thermostat’s physical condition and your HVAC system’s operational patterns. Each symptom points to specific internal failures within the thermostat mechanism, helping narrow down whether you’re dealing with power issues, sensor malfunctions, or control circuit failures.
Does Your HVAC System Run Constantly Without Stopping?
Continuous HVAC operation without normal cycling indicates your thermostat has lost the ability to detect when your home reaches the desired temperature or cannot send the “off” signal to your heating or cooling equipment. Your furnace or air conditioner runs endlessly, creating uncomfortable temperature swings, excessive energy consumption, and accelerated wear on HVAC components.
This symptom typically results from a failed temperature sensor that no longer accurately measures room temperature, leaving the thermostat convinced your home hasn’t reached the setpoint. Alternatively, a stuck relay inside the thermostat may be permanently closed, continuously sending power to your HVAC system regardless of actual temperature conditions. In older mechanical thermostats, the anticipator—a small heating element that helps prevent temperature overshoot—may be incorrectly calibrated or damaged, preventing normal cycling.
When experiencing this issue, check whether adjusting your thermostat’s temperature setting produces any change in system behavior. If moving the setpoint up or down by 5 degrees fails to stop the equipment, the thermostat has likely lost its ability to control the system. This continuous operation accelerates your approach to car overheating in similar mechanical systems—just as an engine without proper temperature regulation overheats and fails, your HVAC system suffers premature component failure when forced to run without appropriate rest cycles.
Is Your Thermostat Display Blank or Unresponsive?
A blank or completely unresponsive thermostat display signals total power loss or catastrophic electronic failure within the device’s control circuitry. The screen shows no numbers, no backlight, and no indication of life, preventing you from adjusting settings or determining current temperature readings.
Power-related causes dominate this symptom category. Battery-powered thermostats exhibit blank screens when batteries are fully depleted, while hardwired models lose displays when circuit breakers trip, wiring connections loosen, or the low-voltage transformer supplying power fails. Smart thermostats with C-wire power requirements may show blank screens if the common wire connection is interrupted or if insufficient voltage reaches the device.
Beyond power issues, internal component failures can render displays non-functional even when the thermostat receives adequate electricity. Capacitor failures in the display circuit, damaged LCD or LED screens, or fried microprocessor chips prevent visual output. Distinguishing between these causes requires testing voltage at the thermostat’s terminals—if proper voltage is present but the display remains dark, internal component failure is likely.
Before concluding the thermostat is dead, verify that your HVAC system’s air handler or furnace has power. Some thermostats draw power through the same circuits that supply HVAC equipment, so a tripped breaker serving the air handler may also kill the thermostat display. Additionally, examine the thermostat’s wiring connections by removing the faceplate—loose wire connections at the terminal screws can interrupt power flow.
Does Your Home Temperature Not Match the Thermostat Setting?
Significant gaps between your thermostat’s temperature setting and your home’s actual temperature reveal sensor calibration failures or complete sensor malfunctions. When you set the thermostat to 72°F but your home feels distinctly warmer at 76°F or uncomfortably cooler at 68°F, the device has lost its ability to accurately measure ambient temperature.
Temperature sensing in thermostats relies on thermistors, bimetallic strips, or other temperature-sensitive components positioned inside the device housing. These sensors can become inaccurate due to age-related drift, dust accumulation that insulates the sensor from room air, or damage from electrical surges. Additionally, poor thermostat placement near heat sources (sunlight, lamps, appliances) or cold sources (exterior doors, supply vents) causes the sensor to read temperatures unrepresentative of your overall home environment.
Testing this symptom requires an accurate reference thermometer placed near but not touching your thermostat. Allow both instruments to stabilize for 15 minutes, then compare readings. Discrepancies exceeding 2-3°F suggest sensor problems requiring recalibration or replacement. Some digital thermostats offer calibration adjustments in their settings menus, allowing you to offset incorrect readings, while mechanical thermostats may have small calibration screws that adjust the sensor position.
This temperature inaccuracy creates comfort problems and efficiency losses. Your HVAC system works harder and longer to achieve temperatures the thermostat incorrectly believes haven’t been reached, wasting energy and increasing utility bills. Temperature gauge fluctuations diagnosis in automotive contexts parallels this troubleshooting—both involve identifying whether the gauge (thermostat) or the actual system (HVAC/engine) is faulty.

Is Your Heating or Cooling Not Turning On at All?
Complete failure to activate heating or cooling despite temperature setpoints that should trigger operation indicates broken relay switches, failed control circuits, or severed communication between the thermostat and HVAC equipment. Your home grows uncomfortably hot or cold while the thermostat sits idle, displaying settings but failing to command system operation.
This symptom differs from continuous operation—instead of never stopping, your HVAC equipment never starts. The root causes typically involve the thermostat’s internal switching mechanisms that control power flow to your furnace, air handler, or compressor. Mechanical relay switches can weld themselves in the open position due to electrical arcing, preventing contact closure necessary to complete the control circuit. Solid-state relays in digital thermostats may fail due to component aging or power surges.
Wiring problems external to the thermostat can also prevent activation. A broken wire in the cable running from the thermostat to your HVAC equipment interrupts the control signal, as does corrosion at wire connection points. Diagnosing this requires testing continuity between the thermostat’s output terminals and the corresponding connection points at your furnace or air handler.
Distinguishing thermostat failure from equipment failure is critical here. If your HVAC system refuses to start, bypass the thermostat temporarily by directly connecting the appropriate control wires at the equipment end (consulting your system’s wiring diagram). If the equipment starts when directly wired but not through the thermostat, the thermostat is confirmed as the failure point. This diagnostic approach mirrors Safe-to-drive guidance with thermostat symptoms in vehicles—you need to isolate the control system from the operational equipment to identify the true failure source.
Are Your Thermostat Buttons or Controls Stuck or Non-Responsive?
Physically stuck buttons, unresponsive touchscreens, or frozen dials prevent manual temperature adjustments and mode changes on your thermostat. You press buttons with no response, turn dials that don’t move, or tap touchscreen interfaces that ignore your inputs, leaving you unable to change temperature settings or switch between heating and cooling modes.
Mechanical wear dominates this failure category in older thermostats. Accumulated dust, dirt, and household debris infiltrate the small gaps around buttons and dial mechanisms, creating friction that prevents smooth movement. Humidity exposure can cause internal corrosion on metal contact points beneath buttons, while temperature cycling causes plastic components to warp slightly, binding moving parts. Touchscreen-equipped smart thermostats face different challenges—screen protectors applied incorrectly, screen damage from impacts, or calibration drift that misaligns touch detection can render controls non-responsive.
Cleaning often resolves mechanical control issues. Compressed air blown around button perimeters dislodges surface debris, while carefully removing the thermostat faceplate allows access for cotton swab cleaning with isopropyl alcohol. For dial thermostats, a small amount of electrical contact cleaner applied to the dial mechanism’s pivot points can restore smooth rotation. Touchscreen issues may require recalibration through the thermostat’s settings menu or, if damage is physical, screen replacement.
When controls become completely immovable or cleaning produces no improvement, internal component failure is likely. Button contact switches wear out after tens of thousands of presses, while touchscreen digitizer layers can delaminate or suffer electrical failures. These internal failures typically require thermostat replacement rather than repair, as component-level fixes exceed the cost of new units.
Does Your Thermostat Lose Settings or Programming Repeatedly?
Repeated loss of programmed schedules, customized settings, or even basic temperature setpoints indicates memory retention failures or power supply interruptions in your thermostat. You program a weekly heating and cooling schedule, only to find it erased the next day, or you set a temperature that the thermostat forgets within hours.
Battery-powered thermostats and those with battery backup systems lose settings when batteries fully deplete. The batteries maintain memory and clock functions during brief power interruptions, but once drained, all stored information erases. Many homeowners overlook battery replacement in hardwired thermostats, assuming permanent power supply eliminates battery needs—however, these backup batteries prevent memory loss during power outages and require annual replacement.
Beyond battery issues, internal memory component failures can corrupt stored data. Thermostats use non-volatile memory chips (EEPROM or flash memory) to retain programming through power cycles. These components can fail due to age, excessive write cycles, or electrical interference, causing random data loss or complete inability to save new settings. Voltage irregularities in the thermostat’s power supply can also prevent proper memory function, as memory chips require stable voltage to write and retain data.
Smart thermostats connected to WiFi may lose settings due to firmware bugs or cloud service interruptions. Some models store schedules both locally and in cloud servers—if cloud synchronization fails, apparent “setting loss” may actually be conflicting data between local and remote storage. Firmware updates sometimes resolve these issues, though persistent problems suggest hardware-level memory failures.
According to research by the Building Technologies Office at the U.S. Department of Energy, thermostats that lose programming accuracy result in 10-30% higher heating and cooling costs, as systems revert to inefficient default settings or manual control with suboptimal temperature management.
Is There a Significant Delay Between Adjustment and HVAC Response?
Noticeable delays—typically exceeding 1-2 minutes—between changing your thermostat setting and detecting HVAC system response suggest communication failures or sluggish internal processing. You lower the temperature setting for air conditioning, but your AC compressor doesn’t activate until 5-10 minutes later, or you increase heat settings with similarly delayed furnace ignition.
Modern thermostats incorporate programmed delays to prevent short cycling and protect HVAC equipment. Most include 3-5 minute protective delays between heating or cooling calls, preventing rapid on-off cycling that damages compressors and reduces equipment lifespan. However, delays exceeding these built-in protections indicate thermostat problems.
Wiring resistance issues cause communication delays between thermostats and HVAC equipment. Corroded wire connections create high resistance that weakens control signals, slowing relay activation at the equipment end. Long wire runs between thermostats and equipment—particularly in large homes—can experience voltage drop that weakens signals, especially in older 18-gauge thermostat wire installations that should use 16-gauge wire for runs exceeding 50 feet.
Internal processing delays in the thermostat’s microcontroller indicate component aging or firmware issues. As electronic components age, processing speeds decline, particularly in budget thermostats using minimal computing power. Smart thermostats with multiple concurrent functions (WiFi communication, display updates, schedule processing) may experience processing bottlenecks if internal processors are overwhelmed or if firmware bugs create infinite loops that pause normal operations.
Quick tests to confirm thermostat behavior include timing the delay between temperature adjustment and equipment activation. Delays under 5 minutes fall within normal protective parameters, while delays exceeding 10 minutes suggest thermostat malfunction. Additionally, test whether the delay is consistent or variable—consistent delays may be programmed protections, while highly variable delays (sometimes 2 minutes, sometimes 20 minutes) indicate random electronic failures.
Do You Notice Short Cycling (Frequent On/Off Switching)?
Rapid cycling where your HVAC system starts and stops every few minutes rather than running for appropriate 10-20 minute cycles indicates thermostat malfunctions, improper thermostat settings, or miscommunication between the thermostat and equipment. Your furnace ignites, runs for 2-3 minutes, shuts off, then restarts shortly after, creating temperature fluctuations, equipment stress, and energy waste.
Thermostat-related short cycling stems from several causes. Oversensitive temperature differentials—the gap between “turn on” and “turn off” temperatures—cause systems to cycle rapidly in environments with good insulation or responsive equipment. Most thermostats use 1-2°F differentials, but if incorrectly set to 0.5°F or less, systems cycle excessively. Dirty or failing temperature sensors can create rapid fluctuating readings that trigger frequent cycling as the thermostat responds to false temperature variations.
Anticipator settings in older mechanical thermostats require calibration matching your heating or cooling equipment’s amperage draw. Incorrectly calibrated anticipators cause premature system shutoff, triggering short cycling. These small adjustable levers inside the thermostat need precise positioning—too far in one direction creates long cycles with temperature overshoot, too far the other direction causes short cycling with poor comfort.
Location-based causes create short cycling unrelated to thermostat malfunction. Thermostats installed near heat sources (televisions, lamps, sunlit windows) or cold sources (exterior doors, supply vents) experience rapid local temperature swings unrepresentative of whole-home conditions. The thermostat senses these localized changes and cycles the system inappropriately. Similarly, thermostats installed on exterior walls in poorly insulated homes sense temperature extremes that trigger excessive cycling.
Distinguishing between thermostat-caused short cycling and equipment-sized issues requires professional evaluation. Oversized HVAC equipment naturally short cycles because it heats or cools spaces too quickly. However, if short cycling began suddenly in a previously well-functioning system, or if replacing the thermostat resolves the issue, the thermostat was likely the cause. This diagnostic challenge parallels Fuel economy impact of stuck thermostat scenarios in vehicles—short cycling wastes energy similar to how stuck-open automotive thermostats prevent engines from reaching optimal operating temperature, reducing fuel efficiency.
How Can You Tell If Your Thermostat Is Stuck vs. Other HVAC Problems?
Your thermostat is stuck rather than experiencing other HVAC problems when simple thermostat-focused tests—checking battery power, verifying display accuracy, and testing manual system activation—produce abnormal results while your HVAC equipment shows no obvious mechanical failures like strange noises, burning smells, or visible damage. Differentiating between thermostat failures and equipment malfunctions prevents misdiagnosis that leads to unnecessary repairs or service calls.

More specifically, systematic testing isolates the failure point. HVAC systems consist of three main components: the thermostat (control), the air handler or furnace (distribution), and the compressor or burner (generation). Failures in any component produce similar symptoms—no heating or cooling—but identifying which component failed requires targeted diagnostic steps.
What Simple Tests Can Confirm a Stuck Thermostat?
Temperature accuracy testing confirms whether your thermostat’s sensor functions properly. Place an accurate reference thermometer (digital thermometers designed for HVAC work provide best results) approximately 6 inches from your thermostat at the same height. Allow both instruments to stabilize for 15-20 minutes without temperature changes from opening doors, running appliances, or body heat. Compare the readings—discrepancies exceeding 3°F suggest thermostat sensor problems, while larger gaps of 5-10°F confirm sensor failure requiring replacement.
Fan mode testing isolates thermostat control functionality from heating and cooling systems. Switch your thermostat to “Fan On” mode (not “Auto”), which should activate only your air handler’s blower fan without triggering heating or cooling equipment. If the fan responds immediately to this setting change, your thermostat successfully sends control signals to HVAC equipment, narrowing problems to specific heating or cooling components rather than general thermostat failure. If the fan fails to activate in “Fan On” mode despite being set correctly, thermostat control circuit failure or wiring problems are likely.
Visual inspection reveals obvious thermostat damage or deterioration. Remove your thermostat’s faceplate and examine internal components for dust accumulation, corrosion on wire terminals, loose wire connections, or signs of overheating (discolored wiring insulation, melted plastic). Check battery condition if applicable—corroded or leaking batteries indicate replacement needs. Examine the wall mounting—thermostats installed unlevel can cause mercury switch thermostats to malfunction, as the mercury bulb requires precise positioning for proper operation.
Power verification testing determines whether the thermostat receives adequate electrical supply. For battery-powered models, install fresh batteries and observe whether display function and system control return. For hardwired thermostats, use a multimeter to test voltage at the R (power) and C (common) terminals—you should measure 24-28 volts AC in most residential systems. Low voltage readings suggest transformer problems or wiring issues rather than thermostat failure, while normal voltage combined with non-function confirms thermostat malfunction.
System override testing bypasses the thermostat to test HVAC equipment directly. At your furnace or air handler, locate the low-voltage wire terminals and identify the R (power) and W (heat call) or Y (cooling call) wires. With power to the system on but the thermostat set to “Off,” carefully touch the R wire to the W wire using insulated tools—this simulates a heating call. If your furnace ignites, the equipment is functional and the thermostat is faulty. Similarly, touching R to Y should activate cooling. This test requires caution to avoid electrical shock and should only be performed if you’re comfortable working with electrical systems.
Creating a diagnostic table helps organize test results:
| Test Performed | Expected Result | Actual Result | Interpretation |
|---|---|---|---|
| Temperature Accuracy | Within 3°F of reference | 8°F difference | Sensor failure likely |
| Fan Mode Response | Immediate fan activation | No response | Control circuit issue |
| Battery Replacement | Display activates | Display remains blank | Hardwired power problem |
| Voltage at R-C Terminals | 24-28V AC | 25V AC measured | Power supply normal |
| System Override Test | Furnace ignites | Furnace ignites normally | Confirms thermostat failure |
This systematic approach identifies whether your thermostat or HVAC equipment requires repair. When tests confirm thermostat failure, you can confidently proceed with replacement. When tests reveal equipment issues—the override test fails to start your furnace, for example—you know professional HVAC service is needed for the heating equipment rather than simple thermostat replacement.
According to data from the Air Conditioning Contractors of America (ACCA), approximately 30-35% of no-heat or no-cool service calls result from thermostat failures rather than equipment malfunctions, highlighting the importance of proper thermostat diagnosis before investing in expensive equipment repairs.
What Causes a Thermostat to Get Stuck or Fail?
Thermostats get stuck or fail due to six primary causes: electrical power interruptions from dead batteries or wiring failures, accumulated dust and debris interfering with mechanical components, age-related component degradation after 10-15 years of service, incorrect installation creating calibration or wiring issues, environmental factors like extreme temperature or humidity exposure, and electrical surges damaging sensitive electronic circuits. Understanding these root causes helps prevent future failures and informs repair-versus-replacement decisions.
These failure mechanisms affect different thermostat types differently. Mechanical thermostats with bimetallic strips and mercury switches suffer primarily from dust accumulation and mechanical wear, while digital and smart thermostats face electronic component failures and power supply issues. Each cause creates distinct symptom patterns that aid diagnosis.
How Do Dust, Dirt, and Debris Cause Thermostat Problems?
Dust and debris accumulation inside thermostats creates multiple failure modes by interfering with temperature sensing, jamming mechanical components, and creating electrical resistance at connection points. Airborne particles enter thermostats through ventilation slots designed to allow air circulation for accurate temperature measurement, gradually coating internal components with insulating layers that prevent proper function.
Temperature sensors require direct exposure to room air for accurate readings. When dust coats thermistors, bimetallic strips, or other sensing elements, the insulating layer prevents rapid thermal response to room temperature changes. This creates measurement lag—the sensor responds slowly to temperature changes—and inaccuracy, as the dust layer maintains the sensor at temperatures different from actual room conditions. In severe cases, thick dust accumulation can create 5-10°F measurement errors.
Mechanical components in both old dial thermostats and modern touchscreen models suffer from debris interference. Dust infiltrating button mechanisms increases friction, making buttons harder to press until they eventually stick in depressed positions or become completely unresponsive. In dial thermostats, dust and hair fibers wrap around pivot points, creating binding that prevents smooth rotation. Mercury switch thermostats are particularly vulnerable—dust particles can prevent the mercury bulb from tilting properly, inhibiting electrical contact necessary to call for heating or cooling.
Electrical contact points deteriorate when exposed to dust in humid environments. The combination of airborne particles and moisture creates conductive pathways that allow small amounts of electrical current to flow where it shouldn’t, causing erratic behavior. Conversely, dust can also increase contact resistance at wire terminal screws, weakening control signals sent to HVAC equipment. This manifests as intermittent operation or complete failure to activate heating or cooling.
Preventing dust-related failures requires regular cleaning maintenance. Remove the thermostat faceplate annually and use compressed air to blow dust from internal cavities, being careful not to disturb wiring connections. Wipe temperature sensors gently with a soft, dry cloth—avoid solvents or liquids that might damage sensitive components. For thermostats located in particularly dusty environments (homes under renovation, areas near high-traffic entrances), quarterly cleaning may be necessary.
Can Battery or Power Issues Make a Thermostat Appear Stuck?
Battery depletion and electrical power interruptions create symptoms identical to stuck thermostats—blank displays, non-responsive controls, and failure to activate HVAC equipment—despite the thermostat’s mechanical and electronic components being fully functional. Power-related issues account for approximately 40% of apparent thermostat failures, making them the first diagnostic area to address before concluding hardware replacement is necessary.
Battery-powered thermostats and those with battery backup systems gradually lose functionality as batteries discharge. Early symptoms include dim displays, intermittent loss of programmed settings, and sluggish response to button presses. As batteries near complete depletion, the thermostat may display low battery warnings (if design includes this feature), followed by total shutdown. Many homeowners overlook battery replacement in hardwired thermostats, not realizing that backup batteries serve critical functions even when wall power is available—these batteries maintain clock time, preserve programmed schedules, and retain custom settings during brief power interruptions.
Hardwired thermostat power problems stem from several sources. The 24-volt transformer providing thermostat power can fail due to age, electrical surges, or overheating, cutting all power to the thermostat. Circuit breakers serving the HVAC system may trip due to short circuits or overloads, removing power from both the equipment and thermostat. Loose wire connections at the furnace terminal board, at the thermostat wall plate, or within junction boxes create intermittent power delivery that causes erratic thermostat behavior—working sometimes but failing at other times.
Smart thermostats with WiFi connectivity face unique power challenges. Many models require a C-wire (common wire) to provide continuous 24-volt power for WiFi radios, display backlights, and processors. Homes with older HVAC systems often lack C-wire installations, forcing homeowners to use adapter kits or battery power. Insufficient power delivery to smart thermostats creates symptoms including WiFi disconnections, frozen displays, failure to send commands to HVAC equipment, and random reboots. These power-starved thermostats may work initially but fail increasingly often as power demands exceed available supply.
Testing for power issues follows a straightforward process. For battery-powered units, install fresh batteries (using name-brand alkaline or lithium batteries rather than generic or rechargeable types) and observe whether full function returns. For hardwired thermostats, measure voltage at the R and C terminals using a multimeter set to AC voltage—residential systems should show 24-28 volts. Low readings below 20 volts indicate transformer or wiring problems, while zero voltage confirms complete power loss requiring electrical troubleshooting at the furnace or air handler.
Addressing C-wire requirements in smart thermostat installations prevents ongoing power problems. If your HVAC system lacks a C-wire, three solutions exist: run new thermostat wire with a dedicated common conductor, install a C-wire adapter kit at the furnace that repurposes an unused wire, or select a smart thermostat model designed to function without C-wire power (though these often sacrifice features or reliability). Professional HVAC technicians can assess which solution best fits your specific system configuration.
When to replace thermostat vs sensor considerations overlap with power diagnosis. If power testing reveals adequate voltage and fresh batteries fail to restore function, internal component failure rather than power issues is likely. However, if voltage testing shows power supply problems, addressing those electrical issues may revive an apparently “dead” thermostat. This diagnostic distinction prevents unnecessary thermostat replacement when simple electrical repairs would suffice.
Should You Repair or Replace a Stuck Thermostat?
Replace a stuck thermostat rather than repair it when the unit exceeds 10 years old, repair costs approach 50% of replacement cost, or you’re upgrading to programmable or smart technology that offers energy savings exceeding $180 annually, because modern thermostats provide superior accuracy, efficiency features, and reliability compared to aging units while component-level thermostat repairs are rarely cost-effective. Repair makes sense only for thermostats under 5 years old with simple issues like dead batteries, loose wiring, or minor calibration adjustments that cost under $75 to address.
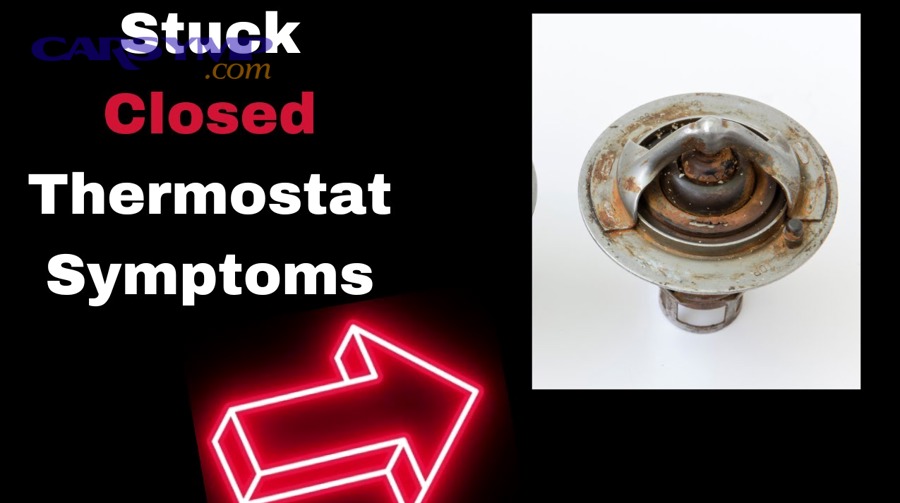
Several factors inform this decision beyond simple age calculations. Thermostat technology has advanced significantly—modern programmable and smart thermostats reduce heating and cooling costs by 10-23% compared to older manual models through optimized scheduling and learning algorithms. If your stuck thermostat is a basic mechanical or non-programmable digital model, replacement with advanced technology typically pays for itself within 1-2 years through energy savings.
Cost analysis reveals why repair rarely makes financial sense. Basic programmable thermostats cost $25-75, mid-range WiFi-enabled models cost $100-200, and premium smart thermostats with learning capabilities cost $200-250. Professional installation adds $75-150 to these costs. By contrast, diagnosing and repairing internal thermostat failures requires technician time for troubleshooting, ordering specialized parts (if available), and performing repairs—easily accumulating $150-300 in labor and parts. Since repair costs approach or exceed replacement costs, replacement provides better long-term value with a new warranty and modern features.
Compatibility considerations affect the replace decision. Older thermostats may use mercury switches (now discouraged for environmental reasons) or specialized wiring schemes incompatible with modern HVAC equipment. If you’re upgrading HVAC equipment, simultaneously upgrading the thermostat ensures proper communication between components and access to advanced features like two-stage heating/cooling control, humidity management, and equipment status monitoring. Mismatched older thermostats limit new equipment capabilities.
DIY replacement capabilities influence total costs. Thermostats rank among the easiest HVAC components for homeowner installation—the process involves turning off power, labeling and removing old wires, mounting the new unit, connecting wires according to included diagrams, and configuring settings. Most homeowners complete installations in 30-60 minutes with basic tools (screwdriver, drill, level). Professional installation becomes necessary when rewiring is required, when C-wire installation is needed, or when integration with complex zoned systems is involved.
Repair cost estimate for thermostat issues shows the replacement decision makes economic sense:
| Scenario | Repair Cost | Replacement Cost (DIY) | Replacement Cost (Professional) | Recommendation |
|---|---|---|---|---|
| Dead batteries | $5-10 | N/A | N/A | Repair (replace batteries) |
| Loose wiring | $0-75 | $25-250 | $100-400 | Repair if under warranty, replace if old |
| Failed sensor | $100-250 | $25-250 | $100-400 | Replace |
| Stuck controls | $150-300 | $25-250 | $100-400 | Replace |
| Display failure | $150-300 | $25-250 | $100-400 | Replace |
Environmental and technological obsolescence also favor replacement. Mercury switch thermostats require special disposal through hazardous waste programs and are banned in many jurisdictions. Non-programmable thermostats lack features that modern building codes increasingly require in new construction and renovations. Smart thermostats enable remote monitoring and control, energy usage tracking, and integration with home automation systems—capabilities impossible to retrofit into older units.
Decision criteria should weigh age, repair costs, energy savings potential, and desired features. Replace immediately if your thermostat is over 10 years old, shows multiple symptoms simultaneously, or uses outdated technology. Consider replacement if single symptoms persist despite basic troubleshooting, if you want programmable or smart features, or if you’re upgrading other HVAC components. Repair only if the thermostat is under 5 years old with simple, obvious issues like dead batteries or loose wire connections.
According to research published by the Energy Information Administration (EIA) in 2024, homes upgrading from manual to programmable thermostats reduced heating energy consumption by an average of 6-8% and cooling energy by 4-6%, translating to $180-$220 in annual savings for typical U.S. households—substantially exceeding the cost of new thermostat installation within the first year.
How Can You Prevent Your Thermostat from Getting Stuck?
Prevent your thermostat from getting stuck through four key practices: annual cleaning to remove dust and debris, battery replacement every 12 months even in hardwired units, professional calibration checks every 2-3 years, and optimal placement away from heat sources, cold drafts, and direct sunlight, because preventive maintenance addresses root causes before they create failures. These straightforward maintenance activities extend thermostat lifespan from typical 10-12 years to 15-20 years while maintaining accuracy within ±1°F throughout the service life.
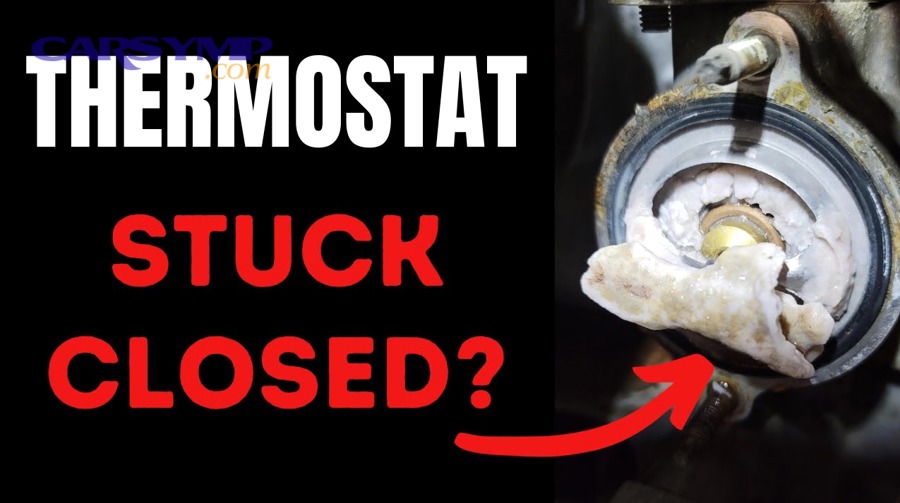
Implementing a maintenance schedule prevents gradual performance degradation that homeowners often don’t notice until complete failure occurs. Proactive care costs less than $50 annually in materials and time but avoids $150-400 in emergency replacement costs plus the discomfort of HVAC system failures during extreme weather.
What Maintenance Schedule Should You Follow for Thermostats?
Follow a thermostat maintenance schedule that includes monthly visual inspections, semi-annual cleaning, annual battery replacement, and biennial professional calibration to maintain optimal performance and prevent stuck conditions. This tiered approach addresses different failure modes at appropriate intervals, balancing thoroughness with time efficiency.
Monthly visual inspections take less than 60 seconds but catch developing problems early. Check that the display shows clear, stable readings without flickering or dim segments. Verify that temperature readings seem reasonable for your home’s actual comfort level—if the thermostat shows 72°F but your home feels significantly warmer or cooler, sensor drift may be developing. Look for any obvious physical damage, loose mounting, or signs of moisture intrusion around the unit.
Semi-annual cleaning, performed before heating season and before cooling season, removes accumulated dust before it impairs function. Turn off power to your HVAC system at the circuit breaker before removing the thermostat faceplate. Use compressed air to blow dust from internal cavities, directing the air stream away from sensitive components to avoid damage. Gently wipe the temperature sensor (usually visible as a small bead or rod) with a soft, dry cloth. Inspect wire connections for corrosion or looseness, tightening terminal screws if necessary. For touchscreen models, clean the screen with microfiber cloth slightly dampened with water—avoid harsh chemicals that might damage protective coatings.
Annual battery replacement prevents power-related failures even in hardwired thermostats. Mark your calendar for battery changes at the same time each year—spring is ideal, before cooling season demands peak thermostat reliability. Use high-quality alkaline batteries from reputable manufacturers, as generic batteries often have shorter lifespans and higher failure rates. When replacing batteries, note whether old batteries show any signs of corrosion or leakage—if so, clean battery contacts with a cotton swab dipped in white vinegar, then dry thoroughly before installing new batteries.
Biennial professional calibration ensures temperature accuracy as sensors gradually drift with age. HVAC technicians use precision reference thermometers to verify thermostat readings and adjust calibration settings or physical sensor positioning as needed. This service typically costs $75-125 when combined with annual HVAC maintenance, less than the energy waste from a thermostat running 3-5°F off calibration for two years.
Creating a maintenance log helps track service history and identify patterns:
Thermostat Maintenance Log
- Unit Location: Main floor hallway
- Model: [Record model number]
- Installation Date: [Date]
| Date | Action Performed | Notes | Next Service Due |
|---|---|---|---|
| 03/15/2025 | Battery replacement | Installed Duracell AA batteries | 03/2026 |
| 03/15/2025 | Cleaning | Moderate dust accumulation | 09/2025 |
| 09/20/2025 | Pre-heating cleaning | Minimal dust | 03/2026 |
| 03/15/2026 | Professional calibration | Found 2°F drift, recalibrated | 03/2028 |
This documentation proves valuable when diagnosing problems, planning upgrades, or selling your home.
Does Thermostat Placement Affect Malfunction Risk?
Thermostat placement significantly affects malfunction risk and measurement accuracy, with poor locations causing 15-30% of thermostat reliability problems through exposure to localized temperature extremes, direct sunlight, vibration, or moisture that corrupt readings and accelerate component failures. Optimal placement on interior walls at 52-60 inches height in rooms with average temperatures and minimal environmental disturbances ensures accurate whole-home temperature sensing and extends thermostat service life.
Specific location hazards create distinct failure patterns. Thermostats mounted on exterior walls in poorly insulated homes sense radiant cold in winter or heat in summer transmitted through the wall, creating temperature readings 5-10°F different from interior room conditions. This causes HVAC systems to over-compensate, running excessively to counteract phantom temperature extremes that don’t actually exist in living spaces. The resulting excessive cycling accelerates wear on both the thermostat’s switching components and HVAC equipment.
Direct sunlight exposure creates severe temperature measurement errors and physical damage. Afternoon sun striking a thermostat heats the device and its internal sensors to temperatures 20-40°F above actual room temperature, convincing the thermostat that cooling is needed when the home is actually comfortable. This wastes energy and creates uncomfortable over-cooling. UV radiation in sunlight also degrades plastic housings and LCD displays over time, causing yellowing, brittleness, and display failures within 5-7 years compared to 15+ year lifespans for shaded thermostats.
Heat sources near thermostats corrupt measurements and create accelerated aging. Placing thermostats above televisions, near table lamps, over ovens or ranges, or adjacent to south-facing windows exposes sensors to localized heat that misrepresents whole-home conditions. The thermostat senses this concentrated heat and reduces heating or increases cooling based on false data. Similarly, cold sources including exterior doors that frequently open, supply air vents, and window AC units create false cold readings that trigger unnecessary heating.
Vibration and airflow considerations affect both accuracy and longevity. Thermostats mounted on walls adjacent to frequently-slammed doors experience repeated vibration that loosens wire connections over time and can jar mechanical components out of calibration. Locations directly in front of supply air vents receive concentrated heated or cooled air unrepresentative of room conditions, while locations in “dead air” zones without circulation (closets, alcoves, corners behind furniture) fail to sense actual living space temperatures.
Moisture exposure in bathrooms, near kitchen sinks, or in humid basement locations accelerates corrosion of electrical contacts and can penetrate electronic components, causing short circuits or component failures. Even periodic humidity spikes from showers or cooking create condensation inside thermostat housings that promotes corrosion and mold growth on circuit boards.
Optimal thermostat placement guidelines include:
Ideal Locations:
- Interior walls in frequently-used rooms (living room, hallway) with average home temperatures
- 52-60 inches above floor level (approximating average human height for comfort sensing)
- Away from direct sunlight at all times of day
- At least 4 feet from supply air vents, returns, windows, and exterior doors
- On walls without plumbing or exterior exposure
- In areas with normal air circulation, not dead zones or high-airflow areas
- Away from heat-generating appliances, electronics, and lamps
Locations to Avoid:
- Exterior walls, especially poorly insulated walls
- Kitchens (heat from cooking) or bathrooms (humidity and temperature swings)
- Direct sunlight paths at any time of day
- Immediately above or beside heat sources (TVs, lamps, appliances)
- Near frequently-used exterior doors
- Inside cabinets, closets, or alcoves with restricted airflow
- Hallways directly in front of supply vents
- Walls adjacent to fireplaces or wood stoves
Relocating poorly-placed thermostats requires running new thermostat wire from the HVAC equipment to the new location. While this involves more effort than simple replacement, correcting placement errors solves chronic accuracy problems and prevents future malfunctions that relocation-without-replacement cannot address.
Are Smart Thermostats Less Likely to Get Stuck Than Mechanical Ones?
Smart thermostats are generally less likely to suffer mechanical failures like stuck dials or frozen mercury switches due to their solid-state electronic designs, but they introduce new failure modes including WiFi connectivity problems, software bugs, C-wire power deficiencies, and firmware update issues that mechanical thermostats never experience. Overall reliability between technologies is comparable—approximately 8-12 year average service life—but failure types differ substantially based on design approach.
Mechanical thermostat advantages include simplicity and independence from power fluctuations or software issues. Mercury switch thermostats and bimetallic strip designs contain minimal electronic components that can fail, operating reliably in their core temperature sensing and switching functions. These devices don’t require configuration, don’t lose settings to software bugs, and function identically throughout their service lives without updates or connectivity requirements. Their primary failure modes—mechanical wear, dust accumulation, and calibration drift—develop gradually with clear warning signs.
Smart thermostat advantages center on precision and features. Digital temperature sensors in smart thermostats typically maintain ±0.5°F accuracy compared to ±2-3°F for mechanical sensors, providing better temperature control and comfort. Adaptive algorithms learn household patterns and automatically optimize schedules, eliminating the programming complexity that causes many homeowners to abandon programmable thermostats in manual mode. Remote access enables temperature adjustments from smartphones, helpful when schedules change unexpectedly. Energy usage tracking and HVAC system monitoring provide insights into equipment performance and potential problems before complete failures occur.
Smart thermostat vulnerabilities include dependency on reliable power supplies, particularly C-wire connections that many older homes lack. Thermostats without adequate power exhibit OBD codes related to thermostat behavior in automotive diagnostics—error messages, system warnings, and operational anomalies. WiFi connectivity problems prevent remote access features and cloud-based learning in some models. Firmware bugs can corrupt scheduling, create temperature control errors, or even brick devices during failed updates. Manufacturer cloud service outages sometimes disable functionality in thermostats that heavily rely on cloud processing rather than local intelligence.
Compatibility issues plague smart thermostats more than mechanical models. HVAC systems with unusual wiring configurations, multi-stage equipment, heat pumps with auxiliary heat, or older proprietary controls may not work with all smart thermostat models. Mechanical thermostats, using simpler on/off switching, accommodate wider equipment variety. Researching compatibility before purchasing smart thermostats prevents costly returns and installation problems.
Lifespan comparisons show that well-maintained mechanical thermostats can last 20-30 years, while smart thermostats typically remain serviceable for 8-15 years before obsolescence, battery degradation, or component failures necessitate replacement. However, the energy savings and convenience features of smart thermostats often justify more frequent replacement cycles.
Technology selection should match household needs and technical comfort:
Choose mechanical/basic digital thermostats when:
- Seeking maximum simplicity with minimal setup
- Living in homes without C-wire infrastructure
- Preferring devices without WiFi/cloud dependencies
- Wanting longest possible service life with minimal maintenance
- Having HVAC equipment with non-standard wiring
Choose smart thermostats when:
- Comfortable with technology and app-based controls
- Wanting energy usage tracking and optimization
- Requiring remote access for vacation or work schedule changes
- Having C-wire available or willingness to install adapters
- Desiring integration with broader home automation systems
According to research published by the Lawrence Berkeley National Laboratory in 2023, homes upgrading to smart thermostats with learning capabilities reduced HVAC energy consumption by an average of 10.5% compared to programmable thermostats and 16.2% compared to manual thermostats, with the greatest savings occurring in households with irregular schedules that benefit most from adaptive learning algorithms.
When Should You Upgrade to a Programmable or Smart Thermostat?
Upgrade to a programmable or smart thermostat when your current thermostat exceeds 10 years old, when you’re experiencing recurring comfort or reliability problems, when your household maintains irregular schedules that could benefit from adaptive temperature control, or when planning other HVAC system upgrades that would benefit from enhanced thermostat features. The optimal upgrade timing balances current thermostat condition, potential energy savings, and feature desires to maximize return on investment.
Thermostat stuck closed symptoms and Thermostat stuck open symptoms in automotive cooling systems parallel HVAC thermostat failures—both indicate component obsolescence requiring replacement rather than continued operation. In vehicles, a stuck-closed thermostat causes car overheating by preventing coolant circulation, while stuck-open thermostats prevent engines from reaching operating temperature, reducing efficiency and Heater performance changes from thermostat issues. Similarly, HVAC thermostats stuck in one mode or reading temperatures inaccurately create comfort problems and efficiency losses that justify immediate upgrade.
Financial analysis guides upgrade timing. Calculate your current annual heating and cooling costs (available from utility bills or estimated at $900-1,200 for average U.S. homes). Research suggests programmable thermostats reduce these costs by 10-12%, smart thermostats by 15-23%. For a household spending $1,000 annually on HVAC energy, a smart thermostat saving 18% returns $180 yearly—paying for a $250 installed thermostat within 1.4 years. Households with higher energy costs or more complex schedules see faster payback periods, while those with minimal HVAC usage may need 3-5 years for positive return.
Lifestyle factors indicate when advanced features provide practical benefits:
Strong candidates for smart thermostats:
- Households where occupants leave home at varying times daily
- Families with multiple schedule patterns (shift workers, students, telecommuters)
- Vacation homes requiring remote temperature monitoring and adjustment
- Tech-enthusiastic homeowners wanting energy usage data and automation
- Multi-zone homes benefiting from coordinated temperature control
- Households frequently forgetting to adjust manual thermostats when leaving
Candidates better served by programmable (non-smart) thermostats:
- Fixed daily schedules allowing one-time programming
- Preference for local control without cloud dependencies
- Homes without reliable WiFi coverage near thermostat location
- Budget-conscious households wanting efficiency without premium features
- Those uncomfortable with app-based controls or smart home technology
Households satisfied with manual thermostats:
- Retirees or work-from-home individuals maintaining constant occupancy
- Very small homes or apartments with minimal HVAC runtime
- Those actively managing temperature throughout the day
- Situations where manual control provides adequate comfort at acceptable cost
Installation timing considerations include coordinating thermostat upgrades with other home improvements. Installing thermostats during HVAC system replacement ensures compatibility and allows electricians to run C-wires if needed. Combining thermostat installation with whole-home insulation or window replacement maximizes efficiency gains by reducing HVAC load alongside improving temperature control. Off-season installation (spring or fall) provides time to learn features before extreme weather demands peak performance.
Environmental factors support upgrading older thermostats. Mercury switch thermostats contain toxic mercury requiring special disposal, and many jurisdictions now ban their installation or encourage replacement programs. Even non-mercury mechanical thermostats waste energy through imprecise control and lack of scheduling. Upgrading eliminates environmental concerns while improving home efficiency.
For comprehensive HVAC system health, visit carsymp.com for additional diagnostic resources and symptom guides that help identify when thermostats versus other components require attention—similar to how automotive diagnostic resources distinguish between thermostat, radiator, and water pump failures in vehicle cooling systems.
The decision to upgrade should weigh current reliability, potential savings, desired features, and installation costs. Immediate upgrade makes sense when thermostats fail or show multiple symptoms, when energy bills seem excessive relative to home size and climate, or when lifestyle changes make automated temperature control valuable. Delayed upgrade is reasonable when current thermostats function acceptably, when budgets are constrained, or when major HVAC replacements are planned within 1-2 years that would naturally include thermostat upgrades.