Estimate AC Repair Cost for Drivers: Cheap vs Expensive Fixes
AC repair cost usually depends on what failed, how long it takes to access the part, and whether you’re paying for diagnosis, refrigerant handling, or both. If you want a practical estimate, the fastest path is to match your symptoms to the most likely failure and then sanity-check the quote line by line.
Many drivers also want to know why two shops can quote wildly different totals for the “same” problem—especially when one quote feels like a quick recharge and the other looks like a full system rebuild.
Another common goal is budgeting: knowing which repairs are small-ticket, which are mid-range, and which are “big” items like compressor or evaporator work—so you can decide whether to fix now, shop around, or plan for a larger bill.
To introduce a new idea, the most accurate estimates come from understanding what you’re actually paying for (diagnosis, labor, parts, and refrigerant service) before comparing options.
How much does an A/C diagnostic usually cost, and what happens during the check?
An A/C diagnostic typically costs a fixed fee and includes basic inspection plus pressure/temperature checks to identify whether the system is low, leaking, or not controlling flow correctly. Next, that result determines whether you pay for a simple service or a deeper teardown.
To start, treat the diagnostic as the “map” for the rest of the repair—without it, you’re guessing and can easily pay twice.
What the shop is actually doing during the first inspection
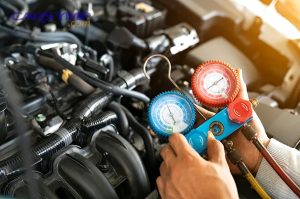
They’re checking cooling performance (vent temperature), compressor engagement, fan operation, and the relationship between high-side and low-side pressures. Then they look for obvious leak points (hose crimps, service ports, condenser face damage) and signs of contamination (oil residue, debris in fittings).
To be clear, this is where “AC diagnostic fee and inspection steps” matter: a good shop documents readings, asks about conditions (idle vs highway), and verifies airflow across the condenser—not just “adds a little refrigerant.”
Why a “diagnostic fee” can save money instead of adding cost
Because it prevents the most expensive mistake: charging refrigerant into a system with a leak or a mechanical failure. If you pay for diagnosis once, you can compare quotes using the same confirmed problem rather than comparing assumptions.
For example, a system that cools briefly then warms may look like “low refrigerant,” but could be an intermittent fan issue, a pressure sensor fault, or an expansion valve problem—each with a different repair path.
When diagnostics should be expanded before approving a big repair
If the shop suspects internal compressor failure, metal contamination, or an evaporator leak behind the dash, the right next step is confirmation (UV dye inspection, electronic leak detection, or recovered oil/debris inspection), because the parts list can change dramatically.
More importantly, deep confirmation protects you from paying a compressor price when the real issue is airflow, a relay, or a control fault.
What factors drive AC repair pricing the most across different vehicles?
AC repair pricing is driven most by labor access time, parts quality, and refrigerant handling requirements rather than the “size” of the part alone. Next, those drivers combine with shop type and local rates to set the final number.
To understand pricing clearly, separate the bill into four buckets: diagnosis, labor, parts, and refrigerant service.
Labor access time is often the real “multiplier”
Some A/C jobs are physically easy (condenser on many vehicles), while others are buried (evaporator behind the dashboard). That difference turns the same parts cost into very different totals, especially when the dash must come out.
This is why you’ll see the same “car service cost” category swing widely: the vehicle design controls how many panels, brackets, and lines must be removed safely.
Labor rates and flat-rate timing systems shape the quote
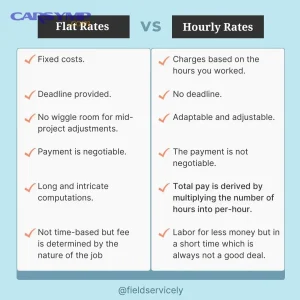
Most shops quote labor using guide times rather than stopwatch time, and the posted hourly rate multiplies that guide. That’s the core of “Labor cost drivers and flat-rate times” even before parts are added.
In practice, two shops can use different labor rates and still both be “fair,” but the total will look different because the math differs.
Parts quality and warranty terms affect price and risk
Cheaper parts can reduce today’s bill but increase the chance of repeat labor, especially for compressors and expansion devices. In addition, warranty coverage differs (part-only vs part-and-labor), so “Warranty and parts quality impact on price” is not just marketing—it changes your long-term cost exposure.
As a result, the “best deal” is often the quote that includes better warranty support and predictable performance, not the cheapest line item.
Is it cheaper to recharge only, or should you fix an A/C leak first?
Recharge-only is cheaper upfront, but fixing a leak is usually cheaper over time because a leaking system will lose refrigerant again and can be damaged by low charge operation. Next, your decision should follow one rule: if the system is low, assume there is a leak until proven otherwise.
To be specific, the deciding factor is whether the refrigerant loss is measurable and repeatable within weeks or months.
What “recharge only” is actually paying for
You’re paying for adding refrigerant (and sometimes oil), plus basic pressure checks. If the shop does not recover, evacuate, and verify vacuum hold, the service may be closer to “top-off” than a full A/C service.
This matters because “Cost to fix AC leak vs recharge only” is not simply parts vs refrigerant—it’s also whether the shop proves the system can hold pressure and vacuum afterward.
When recharge-only can be reasonable
If you have a verified minor service loss over a long period (for example, cooling gradually weakening over multiple years) and the system otherwise tests healthy, a controlled recharge may restore performance while you monitor for faster loss.
However, you still want documentation of pressures, vent temperatures, and the type/amount of refrigerant added to avoid guessing next time.
Why fixing leaks protects major components
Low refrigerant can reduce oil circulation, raise head pressures, and force the compressor to work harder. Over time, that increases the risk of expensive failures that turn a small leak into a large repair event.
In other words, leak repair isn’t just “stopping the drip”—it’s protecting the compressor and the entire system from operating outside its safe envelope.
What’s included in an evac and recharge service, and why does it cost more?
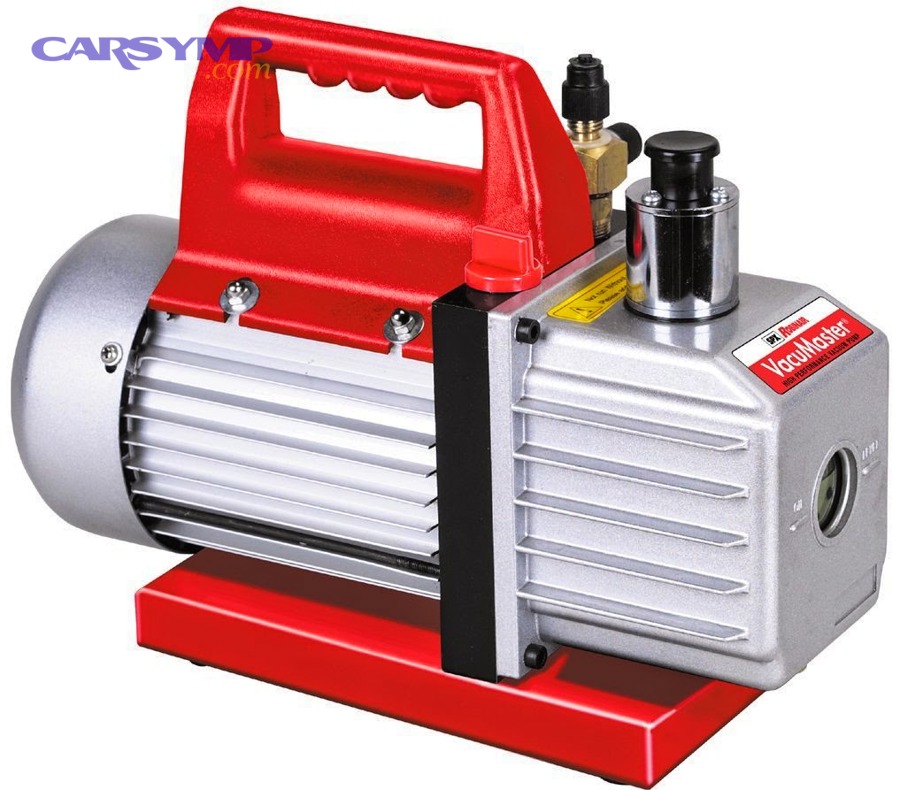
A proper evac and recharge service includes recovering old refrigerant, pulling vacuum to remove air/moisture, verifying vacuum hold, and recharging the exact specified amount by weight. Next, the shop rechecks performance to confirm the repair or service worked.
To understand the price, remember you’re paying for equipment time, refrigerant handling compliance, and accuracy—not just “adding Freon.”
Why evacuation quality changes performance and reliability
Moisture in the system can form acids, corrode components, and create freeze-ups at the expansion device. Pulling a stable vacuum removes moisture and non-condensable gases that raise pressures and reduce cooling.
This is exactly where “What’s included in evac and recharge service” matters: a real service aims for repeatable, measurable system integrity, not a quick vent-temp improvement.
What a complete service should include on the invoice
Look for: recover/recycle machine time, vacuum time, recharge amount (by weight), and a performance check. If there’s leak dye or an electronic leak test, it should be itemized, not hidden.
More importantly, ask whether the shop verified vacuum hold, because that’s the simplest indicator that the system is sealed enough to justify a recharge.
A video overview to align expectations before you approve service
If you want to compare shops confidently, it helps to visualize the equipment steps (recover, vacuum, weigh-in charge) so you can tell the difference between a proper service and a shortcut.
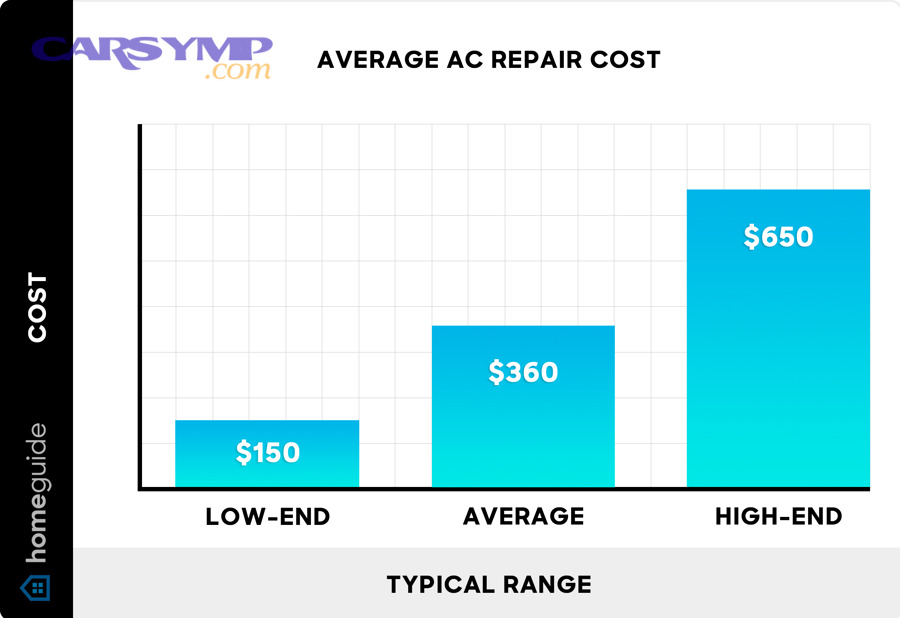
What is the average AC repair cost by issue, and how should you read the ranges?
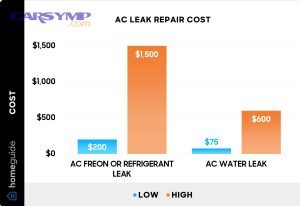
Average A/C repair costs vary by failure type: small electrical fixes and seals are usually the lowest, while compressor and evaporator jobs are typically the highest. Next, use averages only as a compass—your exact vehicle and refrigerant type will shift the final number.
To make the ranges actionable, focus on “access difficulty” and “system contamination risk” as the two biggest separators.

This table summarizes common issues and what you’re usually paying for, so you can compare quotes without getting lost in line items.
| Issue type | Typical work included | Common cost range (parts + labor) | Why it varies |
|---|---|---|---|
| Leak at service port / valve core | Confirm leak, replace core, evac/recharge if needed | $150–$400 | Whether recharge is required and shop minimums |
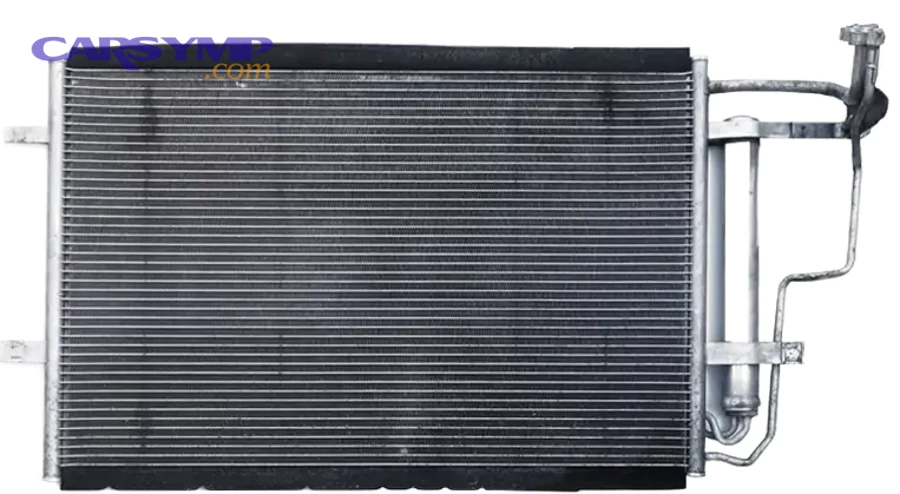
| Condenser damage or leak | Replace condenser, O-rings, evac/recharge | $400–$1,200 | Front-end access, parts quality, debris impact |
| Compressor failure | Replace compressor, flush/replace related parts, evac/recharge | $900–$2,500+ | Contamination, warranty, add-ons, labor time |
| Evaporator core leak | Dash removal, replace evaporator, evac/recharge | $1,000–$3,000+ | Dashboard labor, vehicle complexity, shop rate |
| Electrical control (relay/sensor) | Test circuit, replace component, re-verify operation | $150–$600 | Diagnostic time and access |
How to use averages without getting misled
Use “Average AC repair cost by issue” as a starting point, then ask: does your quote include evac/recharge, new O-rings, and a performance verification? If yes, your number will be higher than a parts-only estimate—and that’s often appropriate.
In addition, the same issue can cost more if it triggers extra steps like flushing, replacing the receiver-drier/desiccant, or dealing with restricted lines.
When a “cheap” quote is a red flag
If a quote is far below the typical range, it may exclude critical steps (no vacuum hold test, no weigh-in charge, or no leak confirmation). That can lead to repeat visits and higher total spend.
Conversely, a higher quote can be justified if it includes better parts, better warranty coverage, and a more complete procedure.
Which is more expensive: compressor, condenser, or evaporator repairs?
Compressor and evaporator repairs are usually the most expensive, while condenser repairs often fall in the middle, because evaporators demand heavy labor access and compressors can trigger contamination-related add-ons. Next, compare quotes by labor hours and included parts—not just the headline total.
To avoid sticker shock, ask the shop to explain the “why” behind each included component.
Why evaporator jobs often cost the most
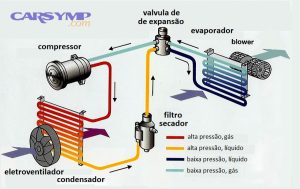
The evaporator lives inside the HVAC case behind the dash. Replacing it can require removing interior panels, the dashboard frame, and sometimes the steering column or airbags—labor that dwarfs the part price.
In real-world terms, “Compressor vs condenser vs evaporator cost comparison” is frequently a comparison of access labor, not component complexity.
Why compressor jobs can become “system jobs”
If a compressor fails internally, metal debris can spread, requiring additional actions like flushing lines, replacing the receiver-drier/desiccant, and sometimes replacing the condenser if it’s a parallel-flow design that traps debris.
This is where invoices grow quickly: the compressor isn’t just a part swap—it can be a contamination management project.
Why condenser repairs are often mid-range but still variable
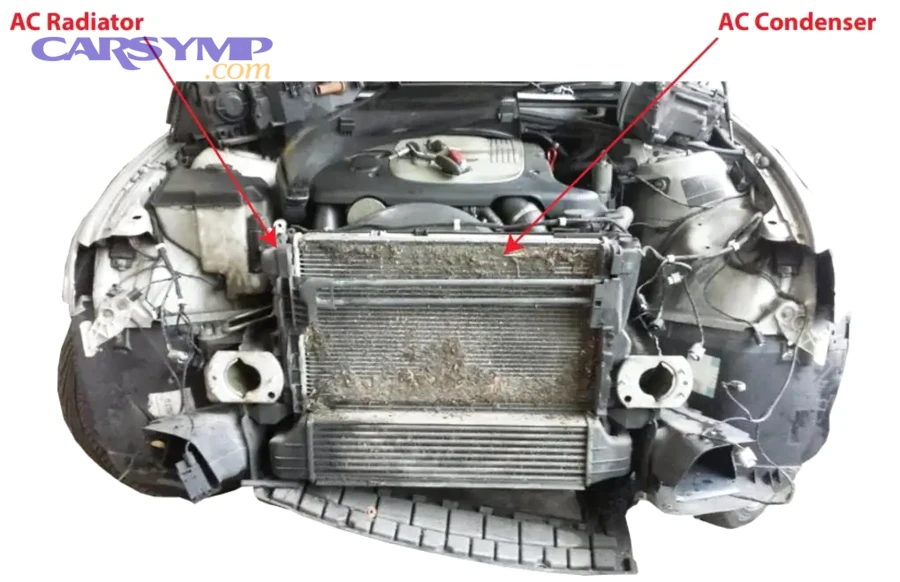
Condensers sit in front of the radiator and are vulnerable to road debris and corrosion. Access is typically easier than evaporator access, but pricing varies based on vehicle packaging and whether extra components (like integrated drier sections) are part of the assembly.
Also, damaged fins or restricted airflow can mimic refrigerant problems, so a good diagnosis matters before approving replacement.
How do R134a and R1234yf change service cost and shop procedures?
R1234yf service generally costs more than R134a because the refrigerant is pricier and equipment requirements are stricter, while procedures emphasize correct identification and contamination prevention. Next, confirm your refrigerant type before comparing quotes, because it can shift the bill substantially.
To start, look for the under-hood label that specifies the refrigerant type and required charge amount.
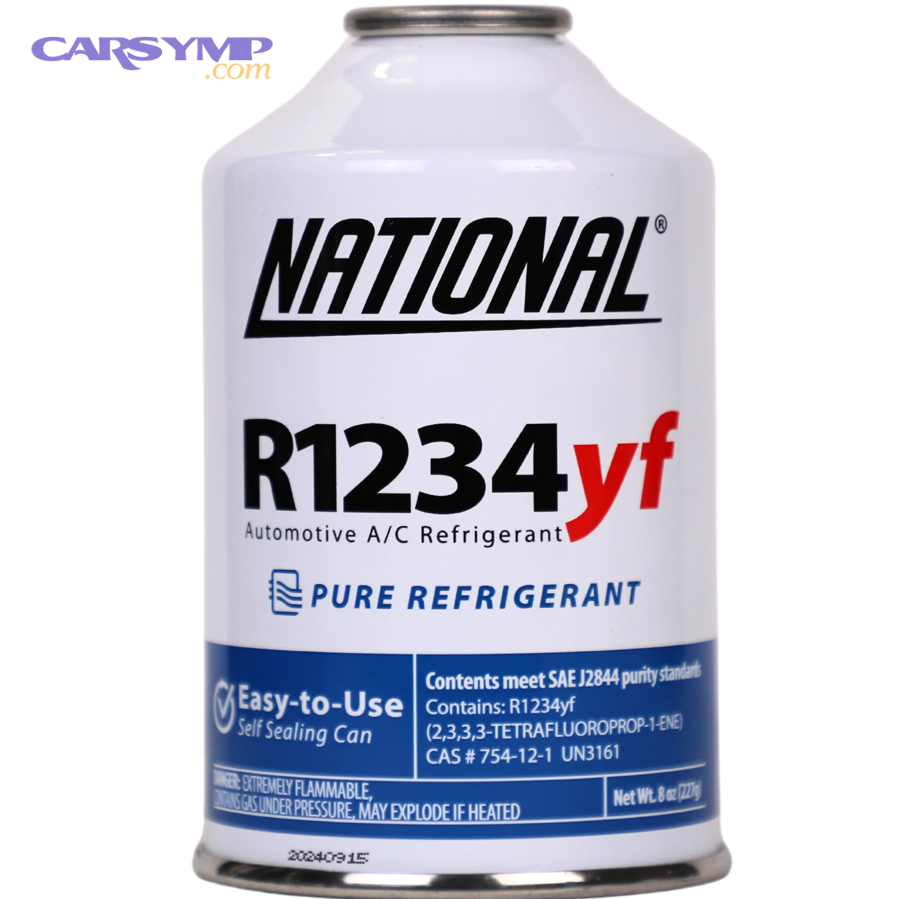
What “R134a vs R1234yf service cost differences” usually reflect
The difference often comes from refrigerant price, recovery machine cost, and handling rules. Even if the labor is similar, the materials and machine overhead can raise the invoice for R1234yf systems.
As a result, comparing a friend’s R134a recharge bill to your R1234yf quote can be misleading unless you normalize for refrigerant type.
Why correct charge weight matters more than ever
Modern systems are sensitive to charge accuracy. Undercharge reduces cooling and lubrication; overcharge can spike pressures and reduce efficiency. A proper service charges by weight, not by “pressure only.”
This is also why shops that invest in correct equipment tend to charge more—they’re aiming for repeatable results rather than a temporary vent-temp win.
How refrigerant type can influence parts and repair strategy
While the mechanical components are similar in concept, manufacturer procedures and approved parts may differ by platform and refrigerant generation. In addition, some shops price in extra verification steps because misidentification or contamination can damage machines and create compliance problems.
So, the safer comparison is: same vehicle, same refrigerant, same procedure scope—then compare price.
Should you choose a dealer or an independent shop for A/C repairs?
A dealer can be strongest for model-specific diagnosis and OEM parts matching, while an independent shop can be more cost-effective and flexible with parts options; the best choice depends on warranty, complexity, and trust. Next, compare procedures and warranty terms, not just the final number.
To frame the decision properly, ask each option what is included and what is excluded.
How “Dealer vs independent AC repair pricing” differs in practice
Dealers often have higher labor rates and may prefer OEM parts by default, which can raise totals. Independents may offer multiple parts tiers and may be more open to aftermarket options, which can reduce price if quality is managed.
However, an independent shop’s value depends on diagnostic skill and willingness to follow correct procedures, not just the hourly rate.
What to ask so you’re comparing apples to apples
Ask: Will you recover and weigh the refrigerant? Will you verify vacuum hold? Are O-rings included? What warranty applies to parts and labor? If compressor replacement is recommended, what additional parts are included and why?
Those answers reveal whether the quote is a complete repair plan or a partial fix dressed up as complete.
When dealer service can be worth the premium
If your vehicle is still under factory warranty, has a complex HVAC control system, or has known technical service updates, dealer-level access to OEM procedures can reduce trial-and-error.
In that case, paying more can be cheaper than paying for repeated “guesses” elsewhere.
How can you lower AC repair cost without gambling on short-term fixes?
You can lower A/C repair cost by confirming the failure first, choosing the right parts tier, and avoiding unnecessary add-ons that don’t match your diagnosis. Next, focus on saving money through better decisions—not by skipping critical procedures like vacuum and weigh-in charging.
To begin, build a simple checklist for quote review and refuse vague line items.
Use a quote checklist that forces clarity
A strong checklist includes: confirmed leak location (if low), documented pressure/temperature readings, exact parts list, labor hours or guide time, and whether evac/recharge is included. This directly supports “How to save money on AC repairs” because it prevents paying for work that doesn’t solve the actual fault.
In other words, clarity is the cheapest tool you can use.
Pick the right parts tier for the job’s labor burden
If labor is high (like an evaporator), prioritize parts quality because repeating the labor is painful. If labor is low (like a simple valve core), a mid-tier part may be fine if warranty and fitment are solid.
This approach aligns cost with risk: spend more where failure would force expensive repeat labor.
Avoid “add-ons” that don’t match the evidence
Flushes, extra seals, and additional replacements can be legitimate—especially with compressor debris—but they should be tied to evidence (contaminated oil, visible debris, confirmed restriction). If the shop can’t explain the why, the add-on may be padding.
That’s how you keep your total lower without reducing repair quality.
When should you stop DIY troubleshooting and book professional A/C service?
You should book professional service when cooling is inconsistent, the system is repeatedly low, there’s compressor noise, or diagnosis requires specialized tools for leak detection and proper refrigerant handling. Next, treat repeated recharging or guessing as a sign that you’ve reached the limit of safe DIY.
To make the decision easier, follow symptoms rather than hope.

Symptoms that typically require shop-level tools
Examples include: A/C cools at speed but warms at idle, cycles rapidly, blows warm on hot days only, or has visible oil residue near fittings. These patterns often require manifold gauge readings, fan performance tests, and leak detection methods beyond a consumer recharge kit.
If you’re tracking notes or reading a symptom guide like “Car Symp,” the key is to translate symptoms into testable hypotheses—then confirm them with the right equipment.
Safety and legal reasons to avoid “trial recharges”
Improper handling can lead to overcharge, high pressures, and component damage. In addition, refrigerant recovery and accurate charging are regulated and require equipment that most DIY setups don’t have.
So, the safest cost-saving move can be: pay for a correct diagnosis once, then approve only the repair that matches the confirmed failure.
What to bring to the shop to reduce time and cost
Bring your observations: when it fails (idle/highway), outside temperature, vent temperature if measured, any prior repairs, and whether the system was recently recharged. Good info reduces diagnostic time and helps you get a more accurate quote faster.
That creates a smoother handoff and a clearer plan.
Advanced pricing details most quotes don’t explain
Many quotes look confusing because key pricing logic is implicit: guide times, parts tiers, refrigerant overhead, and warranty coverage are often not spelled out. Next, once you understand these hidden variables, you can compare shops with far more confidence.
To go deeper, use the following details as your “decoder ring” for A/C estimates.
Flat-rate guides vs actual hours: why the number can feel “off”
A shop may quote a standard time even if the technician finishes faster (or slower), because guide times are designed to normalize pricing. This is not automatically unfair; it’s how many repair businesses price consistently across different jobs.
The best practice is to ask what labor time system they’re using and whether any complications could add time beyond the guide.
Parts quality tiers and the fine print in warranties
Two compressors may look identical on paper, but differ in build quality, included clutch/control valve components, and warranty support. If your quote is higher, it may be because it includes a stronger warranty—especially if it covers labor for repeat failure.
In addition, clarify whether the warranty is honored nationwide or only at that specific shop.
Add-ons that can be legitimate—or can inflate cost if not justified
Receiver-drier/desiccant replacement, expansion valve replacement, and line flushing can be necessary after internal failure or contamination. But they should connect to a reason: debris found, restriction confirmed, or OEM procedure requirement.
If the quote includes these items, ask the shop to explain the evidence and the risk of skipping them.
Seasonality and regional pricing: why summer quotes rise
Demand spikes in hot months, and refrigerant costs can fluctuate. Labor rates also vary by region, and specialty A/C shops may charge more because they invest in dedicated machines and training.
Tóm lại, always compare scope and warranty first, then compare price.
Frequently asked questions about AC repair cost
These quick answers help you confirm expectations before you approve an estimate. Next, use them to ask better questions at the counter and avoid paying for vague work.
Should a quote always include evac/recharge if parts are replaced?
Yes, if the system is opened to the atmosphere, a proper procedure usually includes evacuation and a measured recharge. Otherwise, moisture and air can reduce performance and shorten component life.
Why does the same repair cost more on some cars than others?
Access and packaging drive labor time. A condenser might be “front and easy” on one car but require removing bumpers, sensors, and braces on another; an evaporator may require dash removal on most vehicles, multiplying labor hours.
Is it normal for a shop to recommend more than one part with a compressor?
It can be normal when there’s contamination risk or OEM procedure requirements. The key is evidence: ask what they found (debris, contaminated oil, restriction) and what failure would look like if the add-ons are skipped.
How do I know if I’m paying for a real fix and not just a temporary improvement?
Look for: confirmed diagnosis, documented readings, leak verification if low, vacuum hold verification, and charge by weight. A real fix is measurable and repeatable, not just “it felt cold when you left.”
What’s the single best way to keep A/C costs down long-term?
Fix leaks early and avoid operating the system low on refrigerant. Early repairs prevent compressor stress and reduce the chance that a small problem becomes a system-wide failure.