Diagnose Bubbling Coolant Reservoir for Drivers, Bubbles vs Foam
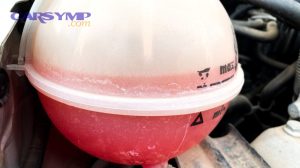
A bubbling coolant reservoir usually means gas is moving through the cooling system when it should be circulating liquid smoothly. Sometimes it’s harmless leftover air, but it can also be the first visible clue of pressure loss, localized boiling, or combustion gases entering the coolant.
If the bubbling happens only briefly after you’ve topped up coolant or replaced a part, you may be dealing with trapped air that needs to purge. If it keeps bubbling every drive, especially when the engine is warm, you need a more structured diagnosis to avoid repeating overheating episodes and expensive damage.
You can often narrow the cause by observing the bubble pattern, when it starts, how the heater behaves, and whether coolant level changes. That’s the fastest way to decide whether you’re safe to drive, whether you can fix it with proper bleeding, or whether you need immediate testing.
To begin, we’ll separate “normal purging” from “problem bubbling,” then work through the most common mechanical and sealing faults in a step-by-step flow that prevents guesswork.
What does bubbling in a coolant reservoir actually mean?
Bubbling means a gas pocket is passing through coolant, either because air is trapped, coolant is boiling in a hot spot, or exhaust gases are leaking into the cooling circuit. Next, you’ll confirm which gas source is most likely using timing, temperature, and bubble behavior.

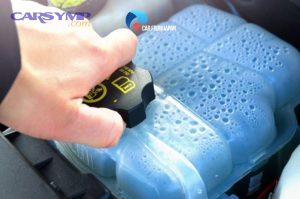
Start with where the bubbles are forming: in most cars, the reservoir/expansion tank is connected to the radiator neck or a high point in the cooling system. That makes it a “window” into what’s happening with pressure and air management. A sealed cooling system is designed to keep liquid circulating while allowing small amounts of expansion and contraction without pulling air in.
Three gas sources explain almost every bubbling coolant reservoir case:
- Trapped air from recent service, a low-fill event, or a slow leak that lets air enter as the system cools down.
- Steam (boiling coolant) created by a hot spot, usually from poor circulation, low coolant, or pressure loss.
- Combustion gas pushed into coolant through a failing seal between cylinder pressure and coolant passages.
To connect that to real symptoms, remember that the cooling system works as a pressure-controlled heat exchanger. If pressure is too low, boiling begins sooner. If flow is too weak, heat concentrates near the cylinder head or around combustion chambers. If sealing is compromised, cylinder pressure can overwhelm coolant pressure and inject gas into the system.
For context on the pressure/boiling relationship, MACS (Mobile Air Climate Systems Association) explains that increasing system pressure raises coolant boiling point by about 3°F per psi, and at around 15 psi the boiling point can be roughly 267°F.
Quick interpretation of bubble patterns:
- Small bubbles that fade after a few minutes: often trapped air purging as the thermostat opens and flow stabilizes.
- Continuous bubbling at warm idle: more suspicious—could be steady gas intrusion or localized boiling.
- Large “burps” that coincide with temp spikes: frequently steam events from boiling coolant or sudden flow interruption.
When is bubbling normal after service, and when is it a warning?
Yes, bubbling can be normal right after cooling-system work because trapped air may purge as coolant warms and circulates. Next, you’ll use a simple “time window + repeatability” test to decide whether you’re seeing normal bleed-out or an ongoing fault.
Normal-after-service bubbling usually follows a predictable script:
- It happens during the first warm-up cycle or two after a drain/fill, hose replacement, thermostat change, radiator swap, or heater core service.
- It decreases as the engine reaches operating temperature, and it’s much less noticeable on the next drive.
- The cabin heat becomes steady (no sudden cold blasts), and the temperature gauge stabilizes.
Warning bubbling tends to be repeatable and linked to pressure issues:
- It returns every drive after the engine is warm, even weeks after service.
- The reservoir level changes unusually (rising sharply hot, dropping low cold).
- There’s coolant smell, residue, or wetness around a cap, hose joint, radiator seam, or water pump area.
Use this practical “two-drive check”:
- Drive 1: watch for brief bubbles during warm-up and then calm behavior at steady temperature.
- Drive 2 (next day, cold start): if bubbling repeats the same way, treat it as a diagnosis case, not just purge air.
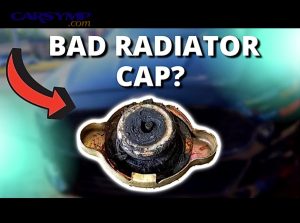
One key reason bubbles persist is loss of pressure. If a cap can’t hold its rated pressure, coolant will boil earlier and the boiling can present as bubbling in the tank. MACS also notes radiator caps should be tested to confirm they hold pressure without decay.
Important caution: Don’t interpret “a few bubbles” as harmless if you also have coolant loss, sweet smell, white crust at seams, or the heater output fluctuates. Those “extra” clues often reveal the true root cause.
What are the most common causes of a bubbling coolant reservoir?
There are five common causes: trapped air, low coolant, radiator cap pressure failure, restricted circulation, or combustion-gas intrusion. Next, you’ll group your symptoms into one of these buckets so every test you do has a purpose.
1) Trapped air pockets (post-service or leak-induced)
Air can remain in high points, heater cores, or near thermostats. It may cause gurgling sounds, intermittent heat, and short bursts of bubbles. This is especially common after a drain/fill when the system wasn’t vacuum-filled or properly bled.
2) Low coolant level (often from a slow leak)
When coolant is low, the pump can churn a mix of air and coolant (aeration), sending bubbles to the tank. Low coolant also reduces heat transfer, making localized boiling more likely under load.
3) Cooling-system pressure not holding (cap, neck, or seal)
A weak cap spring, damaged gasket, or worn filler neck seal reduces pressure. With lower pressure, boiling can begin at lower temperature, and “bubbling” may actually be steam forming and collapsing.
4) Restricted flow or poor circulation (thermostat, radiator, pump)
If the thermostat sticks, the radiator is clogged internally, or a water pump impeller is slipping/damaged, flow drops. Heat concentrates near the head and exhaust ports, creating boiling pockets and pushing gas to the tank.
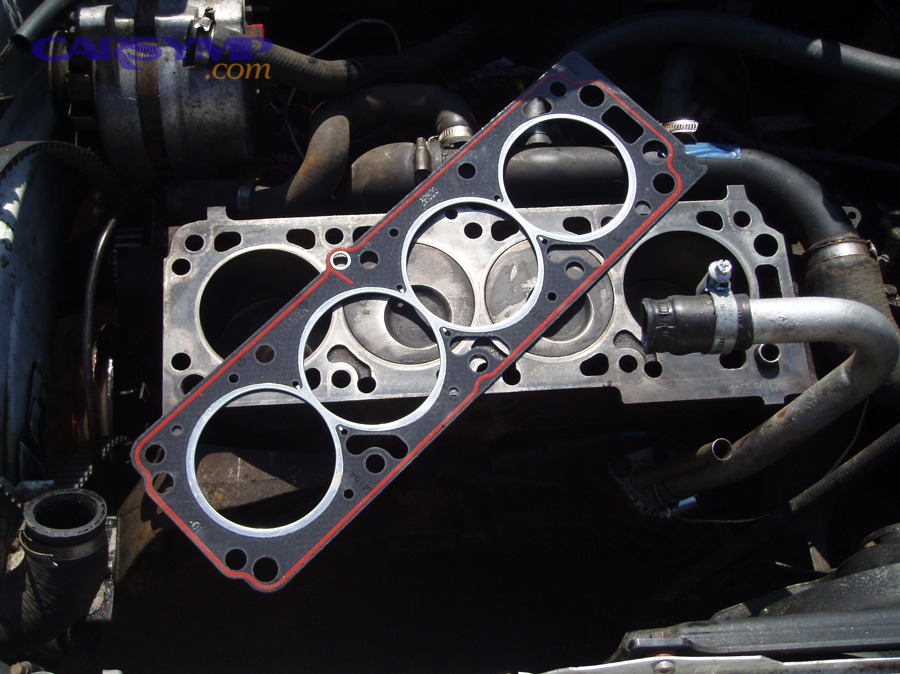
5) Combustion gases entering coolant (head gasket, cracked head/block)
Cylinder pressure can force gas into coolant passages. This often creates continuous bubbles, rising coolant level, and sometimes a hard upper radiator hose soon after start-up.
To anchor the boiling-point concept with a published reference, ExxonMobil’s coolant product data (document dated 01-2024) lists a boiling point of 129°C (265°F) for a typical 50/50 coolant mixture at 103 kPa (15 psi).
Now that you have the buckets, the next step is to tell “air you can bleed out” from “gas that shouldn’t be there.” That’s where the trapped-air versus combustion-gas comparison matters most.
How do you tell trapped air from combustion gases in the reservoir?
Trapped air usually fades after proper bleeding, while combustion gases tend to bubble consistently and build pressure quickly, even from a cold start. Next, you’ll compare timing, hose hardness, heater behavior, and test results to separate these two.
What bubble timing is most diagnostic?
Early bubbling from cold start is more suspicious for combustion gases because cylinder pressure exists immediately, while boiling usually requires heat. Next, you’ll check whether bubbles start within 1–3 minutes of a cold start before the gauge moves.
- Trapped air: bubbles often appear later—around thermostat opening—then taper off.
- Combustion gas: bubbles can start early and continue steadily as RPM rises.
How does hose pressure feel (carefully) as the engine warms?
A hose that gets rock-hard very quickly can indicate abnormal pressure input, which is consistent with combustion gases or severe overheating. Next, you’ll compare “quick hardness” versus “gradual firmness” as temperature climbs.
- Normal: upper hose firms gradually as coolant expands and pressure builds.
- Suspicious: hard hose within minutes of start, paired with persistent bubbles.
What does the heater output reveal?
Intermittent cabin heat is a classic trapped-air clue because air pockets can block heater-core flow. Next, you’ll note whether the heater cycles hot-to-cold at idle or on hills.
- Trapped air: heater may blow cold briefly, then hot, then cold again.
- Combustion gas: heater can be hot but may fluctuate if coolant is pushed out or steam pockets form.
Which test is the tie-breaker?
A combustion-gas (CO2) chemical test is the most practical confirmation when symptoms are unclear. Next, you’ll learn what the color-change fluid is detecting and how to interpret it without false positives.
The CPS combustion leak tester document explains that the test analyzes the air cushion above coolant, and the blue fluid changes color when CO2 is detected (yellow for gasoline engines, green for diesel) while using a double-chamber feature for higher accuracy.
When you combine early bubbling + rapid pressurization + positive CO2 test, the probability shifts strongly toward a sealing fault rather than trapped air. Conversely, if bubbles stop after proper bleeding and pressure behavior normalizes, trapped air was the dominant cause.
What checks can you do at home without guessing?
You can diagnose most bubbling cases safely by checking coolant level behavior, cap condition, temperature stability, and circulation clues—without opening a hot system. Next, you’ll follow a sequence that avoids burns and prevents you from “chasing” the wrong part.
Step 1: Confirm level and condition (cold only)
Check when the engine is fully cold because hot coolant expands and can mislead you. Next, you’ll compare the cold level to the “MIN/MAX” marks and look for contamination signs.
- Low level suggests leaks or poor fill; top off only with the correct coolant mixture.
- Oily film, sludge, or unusual discoloration can hint at contamination or mixing issues.
Step 2: Inspect the radiator cap and neck sealing surfaces
A weak cap can mimic serious problems by lowering boiling point and allowing repeated bubbling. Next, you’ll look for cracked seals, torn rubber, corrosion at the neck, and crusty residue.
- Replace the cap if the gasket is flattened, torn, or sticky.
- Inspect the filler neck for pitting that prevents sealing.
Step 3: Watch temperature stability and fan operation
A stable gauge and consistent fan cycling often point away from severe circulation failure. Next, you’ll observe whether temperature climbs at idle, improves at speed, or spikes under load.
- Overheats at idle but okay at speed: airflow/fan issues or low coolant can be involved.
- Overheats at highway speed: flow restriction, radiator capacity, or pressure loss becomes more likely.
Step 4: Check for circulation clues as the thermostat opens
Thermostat opening changes coolant flow patterns and can reveal trapped air or restriction. Next, you’ll monitor whether heater output stabilizes and whether the reservoir calms after the thermostat event.
As a reference for why caps matter in the “boiling vs bubbling” story, MACS notes that a cooling system commonly regulates around 195°F and uses the cap to build pressure (often around 15 psi) to prevent boiling; it also describes how caps vent to the overflow tank and have vacuum valves for cooldown recovery.
These checks connect directly to common real-world complaints like car overheating after a top-off, or an intermittent hot/cold heater. The goal is to move from “I saw bubbles” to “I understand whether pressure, flow, or sealing is failing.”
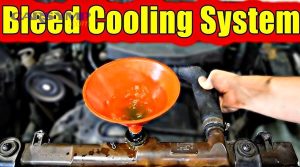
How do you bleed the cooling system properly to remove trapped air?
The best method is a controlled fill, bleed-point purge, and warm-up cycle that opens the thermostat and purges air from high points. Next, you’ll follow a safe procedure that reduces repeat bubbling and prevents new air ingestion.
Safety first: Never open a hot radiator or pressurized reservoir cap. Let the engine cool completely, and use gloves and eye protection.
Method A: Standard bleed using bleed screws (if equipped)
Use bleed screws to vent trapped air from high points while filling slowly. Next, you’ll keep the reservoir topped up to prevent sucking air back in.
- Engine cold: set heater to max heat (if the car uses a heater valve).
- Fill slowly to the correct mark using the correct coolant mixture.
- Open the bleed screw(s) until coolant flows without bubbles; then close.
- Start the engine with the cap off (if your system design allows safe venting) and watch the level.
- As the thermostat opens, top off as needed, then cap it and let it reach full temperature.
- Cool down fully and recheck level the next day.
Method B: “Burp” method for systems without bleed screws
Use a controlled warm-up cycle to move air to the highest point and out to the reservoir. Next, you’ll use gentle RPM holds to move trapped bubbles without overheating.
- Fill to the correct level cold.
- Run the engine at idle until warm, then hold 1,500–2,000 RPM for 10–20 seconds at a time.
- Watch for a sudden level drop when the thermostat opens; top up if needed.
- Stop if temperature climbs abnormally; let it cool and reassess.
Method C: Vacuum fill (best if available)
A vacuum fill tool removes air before adding coolant and is the most reliable method for complex systems. Next, you’ll understand why shops prefer this approach after major cooling-system work.
Vacuum fill helps prevent the repeated “bubbling coolant reservoir” complaint after thermostat and hose replacements because it reduces the chance of stubborn air pockets in heater cores and high hoses.
When bubbles disappear after proper bleeding and the heater becomes steady, you’ve strongly supported a trapped-air diagnosis. If bubbling persists despite correct bleeding, shift your focus to pressure retention and combustion-gas testing.
What components should you check: thermostat, water pump, and flow restrictions?
Check the thermostat for sticking, the water pump for circulation loss, and the radiator/heater core for restriction because poor flow creates hot spots that boil coolant into steam bubbles. Next, you’ll match flow failures to symptoms and quick checks.
Thermostat checks
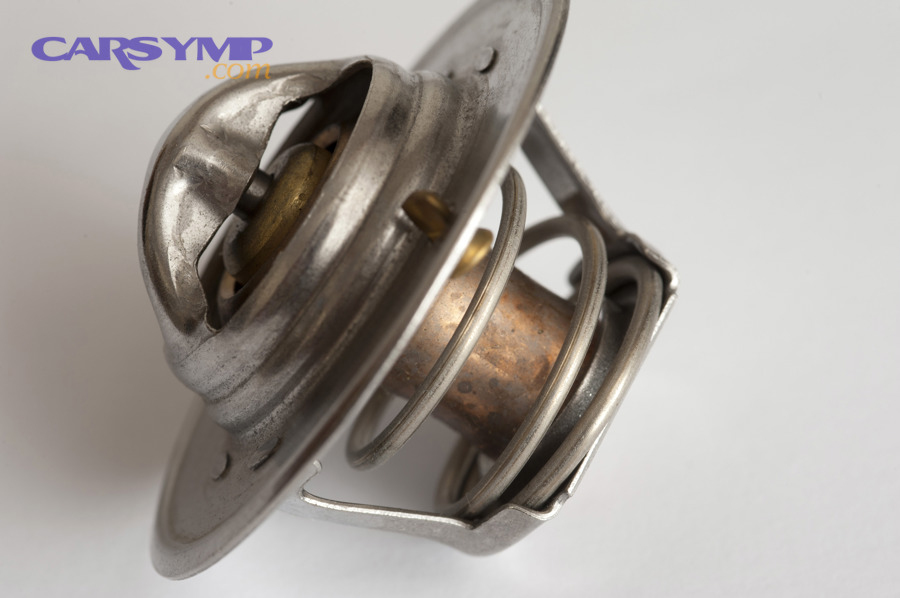
A stuck thermostat disrupts the warm-up and flow balance, which can trigger bubbling from boiling pockets or repeated air movement. Next, you’ll look for classic “overheats then suddenly cools” behavior.
- Overheats quickly from cold: thermostat stuck closed, air lock, or low coolant.
- Takes too long to warm: thermostat stuck open (less likely to cause bubbling directly, but can affect system behavior).
Water pump checks
A weak pump can move coolant poorly at idle, creating localized boiling even when the reservoir looks full. Next, you’ll watch for heat spikes at idle, noisy bearings, or leaks at the pump weep hole.
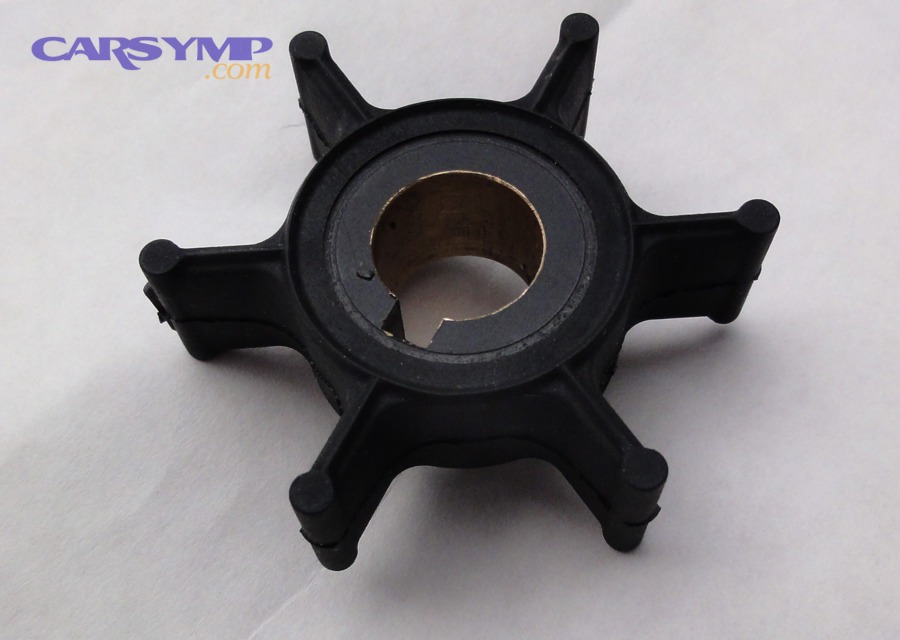
The image below illustrates an impeller component conceptually similar to what creates coolant circulation; if the impeller is damaged, slipping, or eroded, flow falls and hot spots appear.
Restriction and radiator capacity checks
Restriction raises temperature locally and can turn bubbling into repeated coolant loss. Next, you’ll compare inlet/outlet hose temperature and look for cold spots on the radiator face.
- Radiator clogged internally: poor heat rejection at speed.
- Heater core partially restricted: weak cabin heat and gurgling sounds.
- Collapsed lower hose: pump suction collapses hose at higher RPM.
Many owners describe this stage as Overheating and boiling coolant diagnosis because the reservoir shows bubbles while the gauge climbs. If you address flow and pressure together, you avoid replacing parts blindly.
Is it safe to drive with bubbling coolant in the reservoir?
No, it’s not safe to keep driving if bubbling is paired with rising temperature, coolant loss, or pressure venting; you risk severe engine damage. Next, you’ll use a simple stop/go decision tree to protect the engine and your safety.
Stop driving immediately if any of these occur:
- Temperature gauge enters the red zone or warning appears.
- Steam, strong sweet smell, or coolant spray near the engine bay.
- Reservoir rapidly overflows or cap vents repeatedly.
- Heater blows cold while temperature climbs (possible air lock or low coolant).
You may be able to drive a short distance (cautiously) only if:
- Temperature remains stable at normal operating range.
- Bubbling is brief and only after recent service, and it reduces each drive.
- Coolant level remains consistent and no visible leaks are present.
This is the practical side of Safe driving guidance with bubbling coolant: you’re not deciding based on bubbles alone, but on bubbles plus temperature control and pressure control. If you must move the car, keep RPM low, avoid hills, and stop the moment temperature rises beyond normal.
Never open the cap hot. The cooling system is pressurized, and hot coolant can flash-boil as pressure is released. As MACS explains, the cap is designed to manage pressure and must be opened safely to relieve pressure.
What repairs usually fix it, and what does it typically cost?
Most fixes fall into four repair types: sealing/pressure (cap, leaks), air removal (bleed), circulation (thermostat/pump), or engine sealing (head gasket). Next, you’ll use a cost-and-probability approach to prioritize the simplest likely fix first.
This table helps you match symptoms to likely causes and a realistic repair cost range, so you don’t jump straight to worst-case assumptions.
| Likely cause | Typical clue | Common fix | Typical cost range (USD) |
|---|---|---|---|
| Weak radiator cap / pressure loss | Bubbling/boiling at normal temps, coolant smell near cap | Replace cap + inspect neck | $10–$40 |
| Trapped air after service | Gurgling, heater fluctuates, improves over drives | Proper bleeding / vacuum fill | $0–$150 |
| External leak (hose, clamp, radiator seam) | Coolant loss, crusty residue, wet spots | Repair leak + refill/bleed | $50–$600 |
| Thermostat sticking | Temp spikes then drops, inconsistent warm-up | Replace thermostat + bleed | $150–$450 |
| Water pump weak/leaking | Overheats at idle, bearing noise, weep hole leak | Replace pump + coolant service | $350–$1,200 |
| Combustion gas intrusion | Continuous bubbles, rapid pressurization, CO2 test positive | Head gasket / head repair | $1,500–$4,500+ |
How to use the table correctly: start with the lowest-cost, highest-probability items that match your symptoms (cap, leaks, bleeding). Then escalate to circulation parts and only then to engine sealing if tests support it.
To avoid “diagnose by wallet,” confirm with tests. For example, the CPS document describes how a CO2 leak test fluid changes color when combustion gases are present in the cooling system air space.
Also, if you’re building a troubleshooting library for your own reference, you can keep a symptom-to-cause map on carsymp.com so this bubbling symptom connects to other cooling-system warning patterns and repair pathways.
Contextual Border
Up to this point, you’ve learned how to interpret bubbles as pressure/flow/sealing signals and how to diagnose with minimal risk. Next, we’ll move into micro-level prevention, edge cases, and fast answers to common “what if” questions.
FAQ and prevention: keeping bubbles from coming back
Preventing recurring bubbling is mainly about holding pressure, avoiding air ingestion, and maintaining clean coolant circulation. Next, you’ll apply a few high-impact habits that reduce repeat overheating events and help you spot issues early.
When should you replace a radiator cap even if it “looks fine”?
Replace it if you suspect pressure loss, repeated bubbling, or unexplained coolant smell because internal springs and valves can weaken without obvious visual damage. Next, you’ll treat the cap as a testable pressure-control component, not just a lid.
MACS notes caps are pressure-tested and should hold their rating without decay; a cap that can’t hold pressure should be replaced.
How do you avoid reintroducing air after topping off coolant?
Top off only when cold and do it slowly, then run a controlled warm-up cycle so the system purges air without pulling more in. Next, you’ll recheck cold level the next day to confirm the system stabilized.
- Use the correct coolant type and mixture.
- Inspect for slow leaks so the system doesn’t inhale air on cooldown.
What are radiator-cap failure symptoms you shouldn’t ignore?
Yes, cap issues can cause bubbling and overflow, especially under load, because boiling point drops when pressure can’t build. Next, you’ll look for overflow events, collapsing hoses on cooldown, and crusty residue near the neck.
This ties back to the pressure/boiling relationship MACS describes: around 15 psi raises boiling point significantly, and each psi adds about 3°F to the boiling point.
What video helps you visualize bleeding and trapped-air behavior?
A short bleeding walkthrough can help you recognize thermostat-opening events and why air pockets create heater fluctuations. Next, you’ll compare what you see in the reservoir during warm-up to the expected purge pattern after a correct fill.
Entity focus: coolant reservoir, expansion tank, radiator cap, thermostat, water pump, head gasket, combustion gas test, cooling system pressure.