

Change Engine Oil at Home: Oil Change Steps for Beginners
To change engine oil at home, you’ll follow a repeatable routine: gather the right supplies, warm the engine slightly, lift and secure the vehicle, drain old oil, replace the filter, refill, and verify the level and leaks.
You’ll also learn how to match oil specs and filter type to your exact engine, so the service you do in your driveway is as protective as a professional job.
Finally, you’ll know what “normal” looks like afterward—dipstick reading, start-up behavior, and how to confirm you didn’t leave a loose plug or a double-gasketed filter behind.
Giới thiệu ý mới: Next, the step-by-step “why and how” starts with safety, tools, and choosing the correct oil for your vehicle.
Can you change engine oil at home safely?
Yes—you can change engine oil at home safely if you support the vehicle correctly, control hot-oil splash risk, and follow a clean, methodical sequence that prevents leaks and underfilling.
To begin, treat safety as the first “part” of the job because everything else depends on a stable, supported vehicle and a calm workspace.
Start with a flat surface, good lighting, and no distractions. Avoid sloped driveways and soft ground that can let a jack sink. If you need to raise the car, never rely on a hydraulic jack alone—use properly rated jack stands at the vehicle’s approved lift points.
Plan for heat management. Warm oil drains faster, but fully hot oil can burn skin instantly. A practical balance is to run the engine briefly, then shut it off and wait a few minutes so the oil is warm—not scalding—while still thin enough to drain well.
Protect your eyes and hands. Wear safety glasses and oil-resistant gloves. Keep absorbent pads or cardboard under the work area to control drips, and have a spill plan: kitty litter or oil absorbent plus a bag to dispose of the contaminated cleanup material.
Also protect the engine. The biggest “at-home” risks are simple mistakes: draining the wrong plug, leaving the drain plug loose, overtightening threads, or forgetting to add oil before starting. We’ll build checks into every stage so you can confirm each critical step before moving on.
What tools and supplies do you need before you start?
You need a small set of essentials: correct oil, correct filter, a drain pan, a wrench for the drain plug, and a safe way to lift and support the vehicle if clearance is limited.
Next, organizing supplies before you crawl under the car prevents mid-job scrambling and helps you avoid missed steps.
Here’s a practical checklist that covers most vehicles:
- Engine oil: the correct viscosity grade and specification for your owner’s manual.
- Oil filter: the correct part number for your engine (spin-on or cartridge style).
- Drain pan: large enough for your engine’s oil capacity with a pour spout if possible.
- Wrench/socket: the correct size for the drain plug (often 13–17 mm, but varies).
- Oil filter tool: strap wrench, cap-style socket, or pliers style (depends on access and filter type).
- Funnel: reduces spills when refilling.
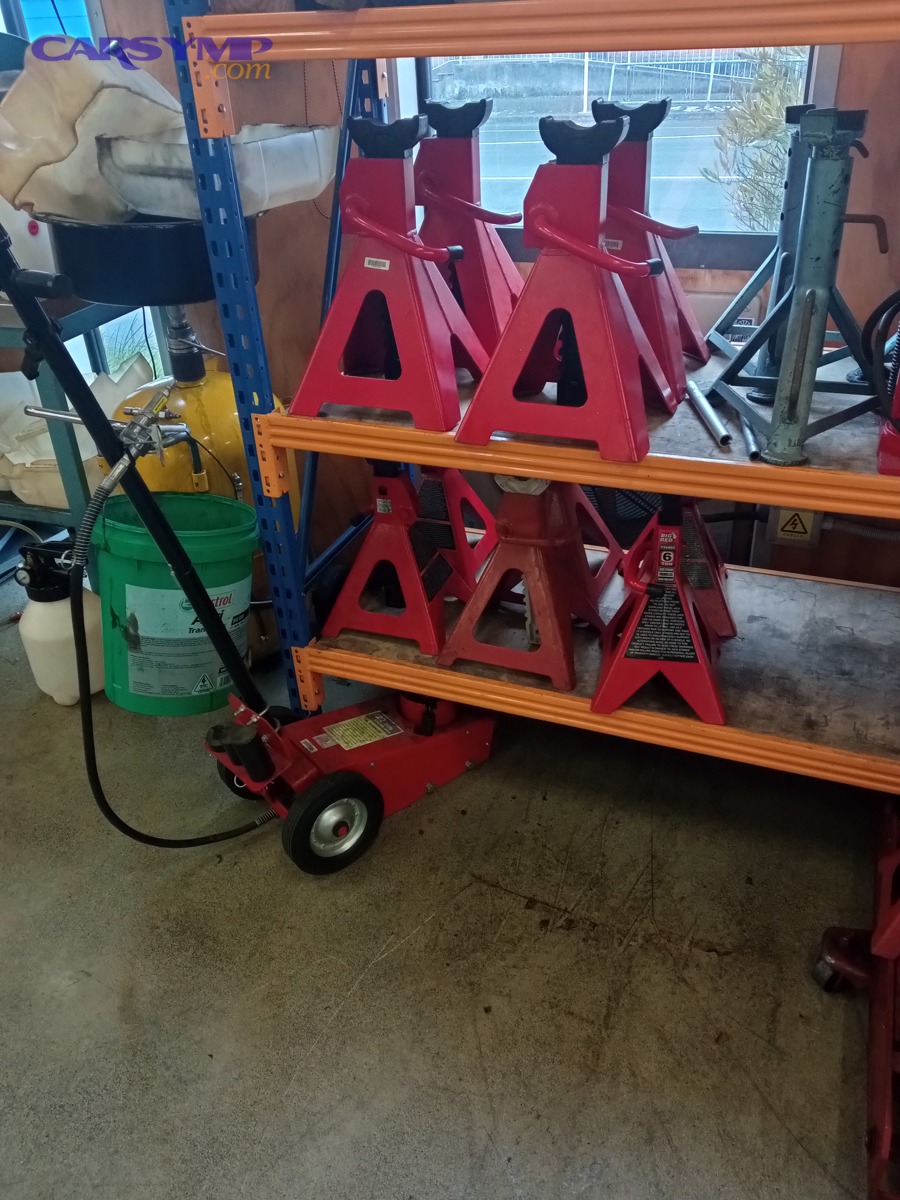
- Jack and jack stands (or ramps): use stands if you lift with a jack.
- Wheel chocks: keep the car from rolling.
- Gloves and safety glasses: basic protection.
- Rags/paper towels: wipe mating surfaces and catch drips.
- Torque wrench (recommended): prevents over- or under-tightening, especially for aluminum pans.
If you’re new, add two “confidence” items: a headlamp (so you can see the plug clearly) and a small tray or magnetic bowl to hold fasteners. That keeps shields, bolts, and tools from wandering away mid-job.
Before buying anything, confirm two numbers: your engine’s oil capacity (with filter) and the filter part number. Getting those right prevents the two most frustrating outcomes: a filter that doesn’t fit and an oil quantity that leaves you either short or with leftover quarts you didn’t need.
Which oil should you buy for your engine?
Buy the oil that matches your owner’s manual viscosity grade and required specification, then choose conventional or synthetic based on your driving conditions, budget, and the manufacturer’s recommendation.
After that, you’ll use a simple label-reading method so you’re not guessing in the oil aisle.
Start with viscosity (like 0W-20, 5W-30, 10W-40). The first number with “W” describes cold-flow behavior; the second number describes protection at operating temperature. Modern engines are designed around specific viscosities for fuel economy, oil pressure targets, and timing component lubrication. Using thicker oil “just because” can reduce flow on cold starts and may not provide the intended benefit for that engine.
Next, match the specification. Many vehicles require an API/ILSAC category (for example, API SP or ILSAC GF-6), while others require an OEM-specific approval (common with European brands and some turbocharged engines). This matters because the additive package controls deposits, wear, and turbo protection in ways viscosity alone does not.
To make it concrete, this table helps you translate the label into a buying decision.
The table below shows what common viscosity grades generally prioritize and when they are often specified (always follow your manual first).
| Viscosity Grade | Typical Use Case | Practical Notes |
|---|---|---|
| 0W-20 | Many modern gas engines | Fast cold flow; often paired with tight clearances and oil-life monitors |
| 5W-30 | Wide range of engines | Balanced protection; common for mixed driving and older designs |
| 5W-40 | Some turbo/diesel applications | Higher hot viscosity; frequently needs specific approvals |
| 10W-30 | Older engines / warm climates | May be fine where cold starts are mild; not always suitable for modern designs |
Don’t ignore the filter-change requirement that goes with extended intervals. Theo nghiên cứu của Auto Care Association từ Filter Manufacturers Council, vào Apr/2010, oil analysis programs that extend drain intervals should move in 20% increments and track key indicators like viscosity and contamination trends.
That research-style approach matters because “longer” isn’t automatically “better.” If your driving includes short trips, lots of idling, dusty roads, or towing, oil can degrade faster even if the mileage seems low.
How do you prepare the car for an oil change?
Prepare by confirming the correct drain plug location, warming the oil slightly, securing the vehicle against rolling, and setting up a clean workspace with everything within reach.
Next, you’ll reduce mistakes by doing a quick “walkaround” checklist before any bolts come out.
Do this preparation sequence in order:
- Read the manual quickly: confirm oil capacity, viscosity/spec, filter type, and service interval notes.
- Warm the engine briefly: a short idle is enough; shut off and wait a few minutes.
- Park on level ground: set the parking brake and place wheel chocks on the opposite end of the car from where you’ll lift.
- Gather all parts: oil, filter, new washer (if used), tools, drain pan, funnel.
- Open the hood: locate the filler cap and dipstick so you don’t hunt later.
A common “first-timer” win is labeling steps: drain plug first, then filter, then refill. If you keep that order, you’re less likely to forget a critical item. Also, place the new oil and filter on the hood latch area or near the front of the car as a visual reminder that refilling must happen before you start the engine.
If your car has an undertray or splash shield, identify its access panel and fasteners. Remove only what you need to reach the drain plug and filter—less disassembly means fewer missing clips and faster reassembly.
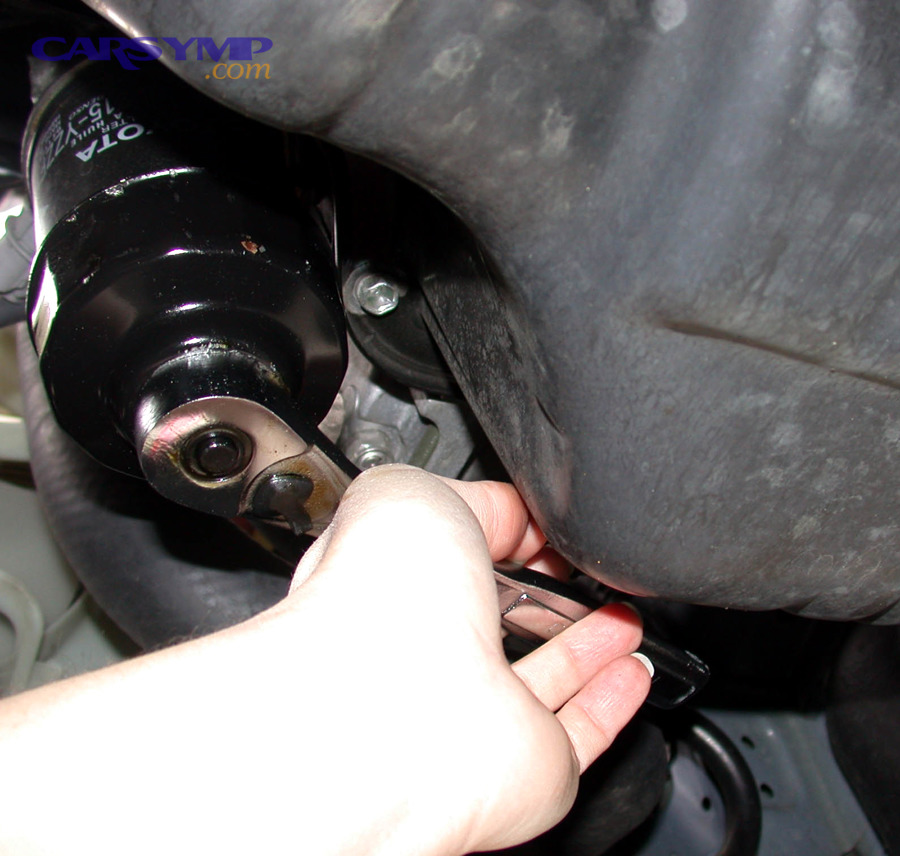
How do you drain the old oil without making a mess?
Drain oil cleanly by positioning the pan where the stream will arc, loosening the plug carefully, removing it by hand at the end, and letting the oil drain until it slows to a drip.
Then, a few small habits—like controlling the plug drop and wiping the sealing surface—keep the job tidy and prevent leaks.
Step-by-step technique:
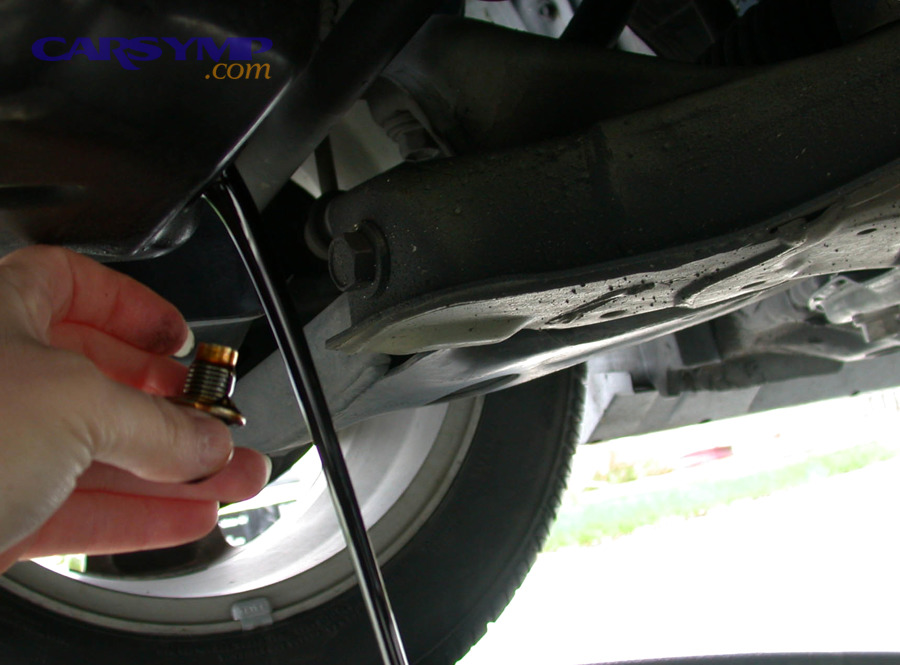
- Slide the drain pan under the oil pan drain plug. Aim the pan slightly rearward; oil often shoots out a bit before it drops straight down.
- Use the correct socket/wrench and break the plug loose with steady force (avoid rounding the head).
- Once loose, finish by hand while pressing inward on the plug to prevent a sudden oil gush.
- Quickly pull the plug away and let oil flow into the pan.
- Inspect the drain plug threads and the sealing surface on the pan.
Let it drain long enough that the flow slows and becomes intermittent. Full “bone dry” draining is unnecessary; your goal is to remove the degraded oil and contaminants while avoiding impatience-driven mistakes.
Keep the plug safe. A simple trick is to place the plug immediately into a small tray, not on the ground. If it rolls away, you’ll waste time and may introduce dirt onto the threads.
Also look at the oil’s condition. A burnt smell, heavy glittery particles, or a milky appearance can indicate problems beyond routine maintenance. If you see suspicious signs, note them and consider further diagnosis before extending intervals.
How do you replace the oil filter correctly?
Replace the filter by removing the old unit, ensuring the old gasket comes off, cleaning the mating surface, lubricating the new gasket with fresh oil, and tightening to the filter maker’s instruction (usually hand-tight plus a fraction of a turn).
Next, you’ll choose the right removal method so you don’t crush the filter or create a stuck housing.
First, identify your filter style:
- Spin-on: a metal canister that unscrews from the engine block.
- Cartridge: a paper element inside a reusable housing that requires an O-ring replacement.
For a spin-on filter, place the drain pan underneath—it will spill. Use a strap wrench or cap socket if it’s tight. Once loose, spin it off slowly and keep it upright to reduce spills.
Critical check: confirm the old rubber gasket is not stuck to the engine. A “double gasket” situation (old gasket plus new gasket) often causes a sudden oil leak when the engine starts.
For a cartridge filter, replace the housing O-ring (and any smaller O-rings specified) and lightly oil them before installation so they seat without twisting. Tighten the housing to spec if your manual provides torque.
This is where Oil filter selection and replacement tips matter: match the exact part number or OEM equivalent, confirm bypass valve requirements (if applicable), and don’t “upgrade” to a taller filter unless fitment and clearance are verified. The right filter is the one that fits and maintains correct flow and sealing—not necessarily the biggest one.

How do you reinstall the drain plug and avoid leaks?
Avoid leaks by cleaning the sealing surfaces, using the correct washer or gasket, threading the plug by hand to prevent cross-threading, and tightening to the correct torque—not “as tight as possible.”
After that, a final wipe-and-check routine catches small problems before they become big puddles.
Here’s the leak-prevention sequence that works across most vehicles:
- Wipe the pan surface where the plug seals. Dirt or old oil can prevent proper sealing.
- Inspect threads on both plug and pan. Damaged threads are a warning sign—don’t force it.
- Replace the washer if required (crush washer, sealing ring, or gasket).
- Thread by hand first until it seats easily. If it binds early, back off and restart.
- Tighten to spec if available. If not, snug plus a small additional turn is safer than brute force.
Many leaks come from either a reused crushed washer or an overtightened plug that deforms the sealing surface or strips threads. If your drain plug uses a crush washer, assume it’s a “consumable” and replace it often—especially if you’ve seen seepage in the past.
And yes, Oil drain plug and gasket leak prevention is mostly about restraint: correct washer, clean surface, correct torque, and a calm hand on the wrench.
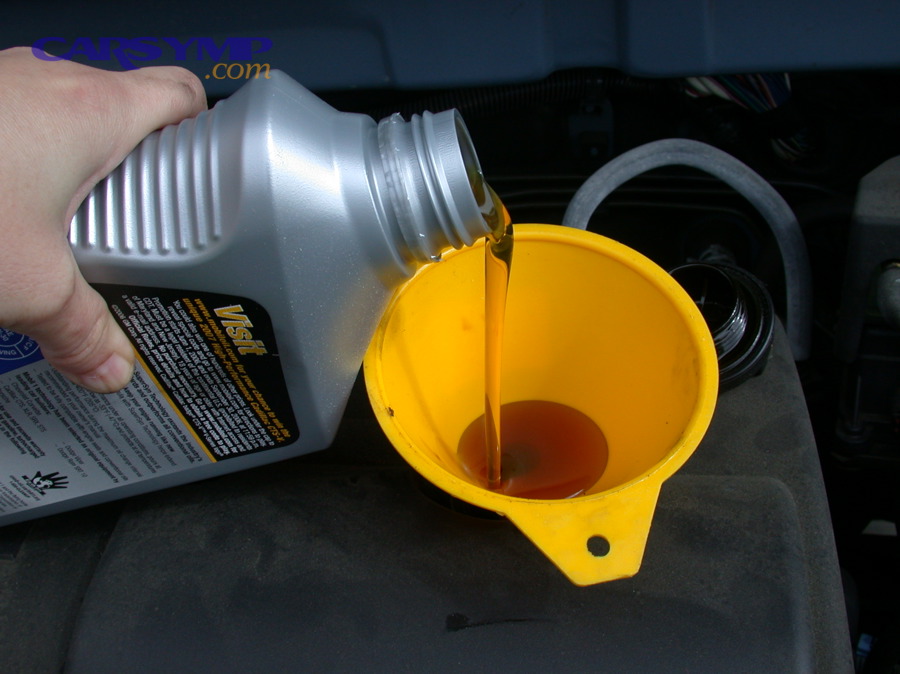
How do you refill the engine and confirm the oil level?
Refill by adding most of the capacity first, waiting a minute for oil to settle, checking the dipstick, then topping off gradually until it reaches the correct mark without overfilling.
Next, you’ll run the engine briefly, recheck for leaks, and verify the final level after a short wait.
Use this clean refill workflow:
- Confirm the drain plug and filter are installed.
- Remove the oil filler cap and place a funnel in the opening.
- Pour in about 80–90% of the stated capacity.
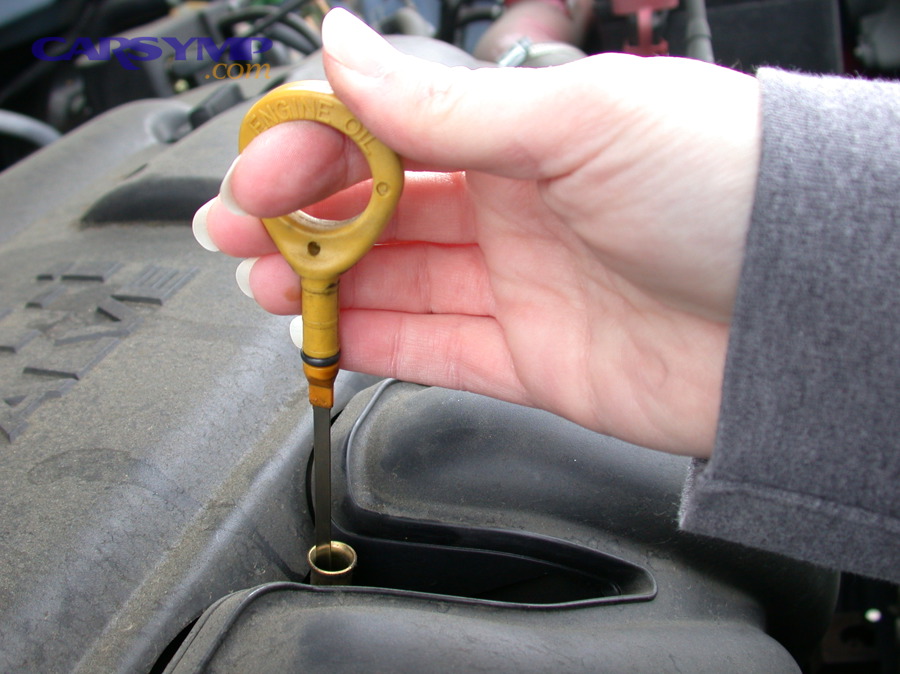
- Wait 60–90 seconds, then check the dipstick.
- Top off in small amounts until the level reaches the correct range.
Now start the engine and let it idle for 20–40 seconds. Watch the oil pressure light; it should turn off quickly. Shut the engine off and inspect underneath for drips around the filter and drain plug.
Wait a few minutes, then recheck the dipstick. This final reading is the one that matters, because oil needs time to drain back into the pan.
If you accidentally overfill, don’t ignore it. Too much oil can cause aeration (foaming), increased crankcase pressure, and leaks. The safest fix is to drain a small amount until the level is correct.
Where should the waste oil and filter go when you’re done?
Dispose of used oil and filters by storing them in sealed containers, draining the filter as recommended, and taking both to an approved recycling or collection facility—never into the trash, ground, or drain.
Next, you’ll set up a simple storage routine so you can transport everything cleanly and legally.

Used oil is a long-term environmental hazard when mishandled. Theo nghiên cứu của U.S. Environmental Protection Agency (EPA) từ Office of Resource Conservation and Recovery, vào June/2025, used oil from one oil change can contaminate one million gallons of fresh water.
That’s why Proper disposal of used oil and filter is not a “nice-to-have”—it’s part of doing the job correctly.
Practical disposal steps:
- Transfer oil from the drain pan into a sealed, sturdy container (often the empty oil jugs work well).
- Drain the filter (if permitted locally) by letting it drip into the pan for a while; then bag it to prevent mess.
- Wipe the pan and your tools so oil doesn’t spread into your car interior or driveway.
- Drop off oil and filter at an approved recycling center or participating auto parts store (availability varies by region).
Never mix used oil with solvents, coolant, fuel, or brake cleaner. Mixing can change how it must be handled and may cause it to be treated as more hazardous waste.
If you spilled oil, absorb it and dispose of the contaminated material according to local rules. Leaving stained oil on concrete may seem harmless, but rain can carry it to storm drains and waterways.
How do you decide the next interval for your oil change?
Decide the next interval by following the manufacturer’s schedule, then adjusting earlier for severe driving—short trips, heavy loads, extreme temperatures, dusty conditions, or long idle time.
Next, you’ll learn how to read your usage patterns so the interval fits your real-world driving, not just an ideal scenario.
Start with the baseline in your owner’s manual or service guide. Many modern vehicles also account for conditions through an oil-life monitor that estimates oil degradation based on operating patterns.
Then adjust based on how your engine experiences stress:
- Short trips: oil may not fully heat up, increasing moisture and fuel dilution.
- Frequent idling: engine runs without adding many miles, still aging the oil.
- Dusty roads: more airborne contamination can enter despite air filtration.
- Towing/hauling: more heat and load accelerate oxidation and additive depletion.
This is where How often to change oil by driving style becomes the correct question. If your “miles” are mostly stop-and-go, short commutes, or heavy load, your interval should usually be shorter than someone who cruises long highway trips.
Also pay attention to warning patterns. If your engine consumes oil, the dipstick may drop between changes even if your interval is reasonable. Keeping the level correct between services is just as important as the oil change itself.
If you’re building confidence in home maintenance, treat each oil service as a chance to inspect: look for wet spots near the pan, valve cover, or filter housing; check belts and hoses; and note anything that resembles early Car Symptoms such as new noises, oil smell, or smoke on startup.
Contextual Border
Extra details that keep your oil change reliable
Small follow-up actions—resetting reminders, avoiding common errors, and understanding cost and interval tradeoffs—are what turn a one-time success into a repeatable maintenance habit.
After that, you’ll have the “fine print” that experienced techs use to prevent comebacks and hidden mistakes.

Service reminders and electronic monitors
Many vehicles need an oil-life reset after service; otherwise the reminder stays inaccurate and can confuse future maintenance planning. This is exactly How to reset oil life/service light—the steps vary by make and year, so use the owner’s manual method rather than guessing. A reliable routine is: verify the oil level first, then perform the reset, then confirm the reminder count changed correctly.
To illustrate, some cars use a steering-wheel menu, others use pedal sequences, and some require a scan tool. If your car doesn’t reset, don’t keep repeating random sequences—look up the specific procedure for your model to avoid battery drain or accidental settings changes.
Avoiding costly slip-ups
The fastest way to ruin an easy oil change is repeating the same avoidable errors—Common oil change mistakes to avoid include draining the transmission fluid by mistake, double-gasketing a filter, overtightening the drain plug, underfilling, and forgetting to reinstall the filler cap. Build a “two-touch” check: touch the drain plug and filter with your hand before refilling, then visually confirm both again before start-up.
Also, if you removed a splash shield, confirm every fastener is back in place. A loose undertray can scrape on the road and become a distraction that tempts you to ignore more important warning signs.
Money math and time tradeoffs
Doing the job yourself can be cheaper, but the real value depends on oil type, filter price, tools you already own, and how much you value your time. A practical Cost comparison DIY vs shop oil change includes: oil and filter cost, washer/O-rings, disposal logistics, and the one-time cost of a drain pan and stands if you don’t already have them.
Use this simple framework: if you already have safe lifting equipment and basic tools, your ongoing cost is mostly oil and filter. If you must buy stands, a torque wrench, and specialty filter tools, the first change may cost more—but the second and third usually drop sharply.
The table below helps you compare typical line items so you can decide what matters most (price, convenience, or control over materials).
| Cost Element | At Home | At a Shop |
|---|---|---|
| Oil + filter | You choose brand/spec | Often bundled; ask for spec details |
| Tools & supplies | One-time purchase, reusable | Included |
| Time & setup | More time, especially first time | Less time, but includes travel/wait |
| Inspection add-ons | You inspect as you go | May include checks; may include upsell pressure |
Intervals, oil analysis, and the “do it yourself” mindset
If you’re learning DIY car repair skills, oil service is a great foundation—but don’t stretch intervals blindly. Theo nghiên cứu của Auto Care Association từ Filter Manufacturers Council, vào Apr/2010, an oil analysis program should extend drain intervals in steps (commonly 20% increments) while monitoring indicators like viscosity and contamination trends. That means “long life” is earned with data and consistent conditions, not hope.
This also connects to Oil type and viscosity guide thinking: a higher-quality oil can improve resistance to breakdown under heat, but it does not erase severe-duty conditions like repeated cold starts or heavy towing.
When you want a repeatable routine, write your own mini checklist and keep it with your tools. Over time, you’ll complete a clean DIY oil change step-by-step without stress, and you’ll be far less likely to miss a plug, gasket, or dipstick check.
FAQ
These quick answers cover common first-time concerns and help you double-check decisions without overthinking.
To begin, treat each question as a “spot check” for your process so you can finish with confidence.
Should you use ramps or jack stands?
Ramps are simple and stable if they fit your car and surface; jack stands are more flexible for vehicles that need extra clearance or have limited ramp access. Choose the method that keeps the car most stable and gives you the safest working room.
What if the filter is stuck?
Use the correct filter tool for your filter type and access. Avoid hammering or puncturing unless it’s a last resort, because torn filters can become harder to remove. If access is extremely tight, a cap-style socket matched to the filter housing is often the cleanest solution.
What if the drain plug feels like it won’t tighten?
Stop and inspect threads—do not force it. Cross-threading or stripped threads can turn a maintenance job into a repair. If threads are damaged, you may need a thread repair solution or a replacement pan depending on severity.
Can you switch oil brands?
Yes, as long as the oil meets the required viscosity and specification. Consistency matters more than brand; what matters is using the correct spec and changing on an interval that matches your driving.
Is watching a video helpful before the first attempt?
Yes—seeing the sequence once can reduce uncertainty, especially for locating the filter and drain plug and understanding how the oil stream behaves.


 3")


