Replace vs Repair: Brake Caliper Replacement Guide for DIY Drivers
Brake caliper replacement is the practical fix when a caliper leaks, sticks, or can’t apply/release clamp force evenly—problems that can overheat a rotor, warp pads, and reduce stopping control.
Beyond restoring safe braking, the job is also about preventing repeat failures: keeping the hose from twisting, matching hardware, and making sure the new caliper moves freely on its guides.
You’ll also want a clear plan for parts choice, tool access, and a clean workflow so you don’t introduce air into the hydraulic system or contaminate pads and rotors with fluid or grease.
Giới thiệu ý mới: Below you’ll get a diagnosis-first approach, a step-by-step replacement process, and the checks that matter most after you bolt everything back together.
What does a brake caliper do, and when does it need replacement?
A brake caliper is the hydraulic clamp that squeezes pads onto the rotor; it needs replacement when it leaks, seizes, or can’t slide/center correctly, causing heat, pull, or uneven wear.
To start, picture the caliper as a controlled “hand” that must grip hard and then let go instantly—anything that prevents either action becomes a safety and wear problem.

How the caliper creates stopping force
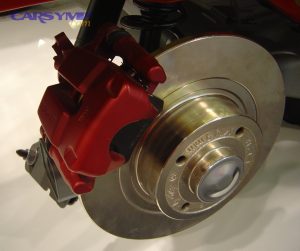
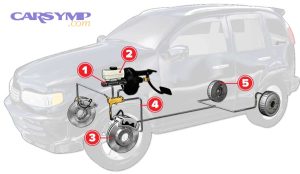
Hydraulic pressure from the master cylinder pushes a piston (or pistons) inside the caliper. That piston presses the inboard pad into the rotor. On a floating caliper, the body then slides on guide hardware so the outboard pad clamps too. On a fixed caliper, pistons on both sides apply force directly. In both designs, the caliper must move smoothly and seal perfectly to convert pedal pressure into consistent clamp force.
Red flags that point toward replacement instead of minor fixes
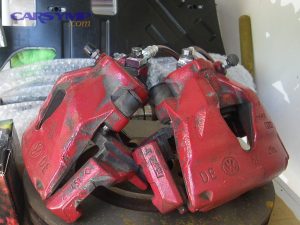
Replacement is typically justified when you see brake fluid at the dust boot or around the bleeder/hose connection, when a piston won’t retract enough to fit new pads, or when the caliper binds so badly that pads drag even after releasing the pedal. Severe corrosion around the piston bore, damaged threads at the hose port/bleeder, or repeated sticking after cleaning also push the decision toward replacing the caliper rather than chasing symptoms.
Why “good enough” movement isn’t good enough
Even slight sticking can build heat over a short drive. Heat changes rotor friction, can glaze pads, and can boil fluid, which softens pedal feel. That’s why the threshold for action is lower with calipers than with many other components: if the caliper can’t apply and release predictably, it’s not just wear—it’s control.
Is replacing the caliper always necessary, or can you repair it?
No—brake caliper replacement is not always necessary; you can repair when the piston and bore are healthy, the leak is limited to serviceable seals, and the caliper body/slides aren’t corroded or damaged beyond cleanup.
However, the key is deciding with evidence, not hope: confirm the failure mode first, then choose the most reliable fix for your timeline, tools, and safety margin.

Three reasons replacement is the smarter call
Reason 1: Sealing surface damage. If corrosion or scoring lives where the seal rides, new seals won’t last. Reason 2: Mechanical binding. If the piston is pitted, swollen with rust, or the bore is rough, it may stick again under heat. Reason 3: Safety and time. A complete caliper swap is often faster and more predictable than rebuilding, especially when downtime matters.
When a “repair” is legitimately enough
A repair makes sense when the caliper is fundamentally sound: slide pin boots are torn but the pins are cleanable; pad abutments are rusty but can be brushed and reconditioned; the piston retracts smoothly and there is no fluid seepage. In those cases, cleaning, hardware replacement, and correct lubrication can restore normal function without replacing the caliper body.
How to avoid false confidence
Don’t judge by appearance alone. A caliper can look fine yet stick under temperature. If you’ve had repeat hot-rotor events, rapid pad wear on one wheel, or a pull that returns after pad replacement, treat it as a functional failure until proven otherwise—because that’s exactly how calipers quietly ruin rotors and pads.
What are the symptoms of a sticking caliper, and what usually causes it?
Sticking caliper symptoms include pulling to one side, a hot wheel smell, a rotor too hot to touch, rapid pad wear on one wheel, and reduced fuel economy from constant drag.
Next, you’ll want to connect each symptom to a specific mechanical cause so your fix targets the real restriction—piston, slides, or hydraulic pressure not releasing.

Common symptoms you can confirm quickly
After a short drive without heavy braking, carefully check for a wheel that radiates much more heat than the others, or a wheel that’s hard to rotate when safely lifted. Another clue is a steering pull that worsens as you drive, then reduces after cooling. You may also see one pad worn much thinner than its mate on the same caliper (or much thinner than the opposite side of the car).
Three main root causes
Piston-related binding: corrosion, pitting, torn dust boot letting moisture in, or a piston that can’t retract. Slide-related binding: dry/rusted pins, swollen pin boots, seized bushings, or rust buildup at pad abutments preventing pads from moving. Hydraulic hold: a collapsed hose acting like a one-way valve or residual pressure that doesn’t release, keeping the caliper applied.
Why heat makes everything worse
Heat expands components and changes fluid behavior. A borderline piston or sticky slide can become fully stuck once temperatures rise. That’s why a quick driveway test may look “okay” while the problem returns on the road. Treat heat-related symptoms as the most reliable evidence: if one corner overheats, something is dragging.
How can you diagnose a caliper issue versus pads, hose, or master cylinder?
You can diagnose by separating mechanical drag from hydraulic pressure: confirm free movement with the caliper unloaded, then release trapped pressure (if present) to see whether the wheel frees up instantly.
To begin, the goal is to answer one question: is the caliper mechanically stuck, or is it being held on by pressure that shouldn’t be there?

Step 1: Check for mechanical binding first
With the wheel off and the caliper safely supported, try sliding a floating caliper along its guides. It should move smoothly with firm hand pressure. Pull the pads and verify they can slide in the bracket (not wedged by rust). If the caliper can’t move freely on the pins or the pads are seized in place, you’ve found a mechanical cause before blaming hydraulics.
Step 2: Test for hydraulic “hold” safely
If the wheel is hard to turn and you suspect pressure, you can carefully crack the bleeder while a hose routes fluid into a container. If the wheel suddenly frees up, pressure was trapped. That result points you toward a hose restriction, a blocked return path, or a system issue that keeps pressure applied. If opening the bleeder changes nothing, the problem is more likely mechanical binding at the caliper or pad hardware.
Step 3: Compare behavior side-to-side
Brakes are symmetrical systems. Compare the suspect corner to the healthy side: pad thickness pattern, rotor color/heat marks, slide pin condition, and piston retraction. This comparison approach is often faster than guessing, and it reduces the chance you replace the caliper when the real problem is upstream.
What tools, parts, and prep make the job safer and easier?
You’ll need safe lift support, correct sockets/wrenches, a line-cap strategy to control fluid loss, and the right hardware so the caliper mounts squarely and slides freely.
Below, the goal is to prevent two common mistakes: letting the caliper hang by the hose and contaminating friction surfaces with fluid or grease.

Core tools checklist
- Floor jack and jack stands (or a lift), plus wheel chocks
- Socket set and torque wrench for caliper bolts and wheel lugs
- Brake line wrench (flare nut wrench) if your setup uses a hard line fitting
- Catch bottle and clear hose for bleeding, plus fresh brake fluid
- Wire brush, brake cleaner, and shop towels
- Caliper hanger hook or wire to support the caliper safely
Parts and hardware that often matter more than the caliper itself
Many repeat issues come from ignoring small parts: new copper crush washers for banjo fittings (if equipped), new slide pin boots if torn, pad abutment clips if rusty, and proper guide pin grease compatible with rubber. If your replacement caliper arrives “loaded” with bracket and hardware, verify everything matches your old setup before tightening anything.
Prep steps that prevent messy setbacks
Before you open the hydraulic system, clean the area around the hose/bleeder to keep grit out. Loosen the wheel lugs before lifting. Plan where you’ll place the old caliper and how you’ll cap or elevate the hose to minimize fluid loss. If you’re doing this as part of broader brake service, stage all wear items so you aren’t leaving the system open while you run for parts.
How do you replace a brake caliper step by step without creating new problems?
The safest method is a controlled swap: secure the vehicle, remove the old caliper and pads, transfer or install the bracket/hardware correctly, connect the hose without twisting, then torque fasteners and verify free movement before bleeding.
Next, follow the sequence below in order, because caliper jobs fail most often when steps are rushed or done out of sequence.
Step 1: Lift, remove the wheel, and inspect the corner
Chock the opposite wheels, lift at the correct jacking point, and support the vehicle on stands. Remove the wheel and do a fast inspection: rotor surface, pad thickness, and any wetness around the caliper. If there is visible fluid, treat it as slippery contamination—avoid touching pads/rotor with greasy gloves.
Step 2: Remove the old caliper safely
Unbolt the caliper from its mount. If it’s a floating design, you’ll typically remove guide pin bolts first and lift the caliper off. Support the caliper with a hanger—never let it hang by the hose. Remove pads and note their wear pattern; this pattern often confirms whether the caliper was sticking on the piston side or the slide side.
Step 3: Disconnect the hose or line with control
If your caliper uses a banjo fitting, prepare new crush washers and a catch container. If it uses a hard line fitting, use a flare nut wrench to reduce rounding risk. Minimize fluid loss by keeping the hose elevated and capped if possible, but don’t jam foreign objects into the line. Work cleanly—brake fluid attracts moisture and can damage paint.
Step 4: Mount the replacement caliper and confirm alignment
Install the caliper bracket if separate, then ensure pads fit and move properly in the bracket. Mount the caliper and verify the bleeder is positioned at the top (so air can rise and escape). If the bleeder is not at the top after installation, you may have the wrong caliper side, and bleeding will be difficult or incomplete.
Step 5: Reconnect the hose without twisting
Thread fittings by hand first to avoid cross-threading. Ensure the hose isn’t kinked and has the same routing as before, with full steering/suspension travel in mind. For banjo fittings, use new washers, seat the fitting flush, and torque to spec. A small hose twist can become a big problem later, so correct it now while everything is accessible.
Step 6: Final torque and movement check before bleeding
Torque caliper bolts and bracket bolts to manufacturer specifications. Spin the rotor by hand (with pads installed) to confirm you don’t have obvious binding beyond normal light pad contact. Confirm guide pins move properly and boots aren’t pinched. Only then move to bleeding.
Do you need to bleed the brakes after replacing a caliper, and what’s the cleanest method?
Yes—if you opened the hydraulic connection, you must bleed to remove air; the cleanest method is a controlled bleed that keeps the reservoir full and pushes air out until fluid runs clear and bubble-free.
To start, treat bleeding as the step that decides pedal feel and safety—rushing it is how “successful” caliper installs end with a soft pedal.

How to bleed with a helper (classic method)
Fill the reservoir with the correct fluid. Attach a clear hose to the bleeder and route it to a catch bottle. Have the helper press and hold the pedal while you crack the bleeder, then close it before the pedal is released. Repeat until you see no bubbles and the fluid looks fresh. Keep topping off the reservoir—running it low introduces air into the master cylinder and turns a small bleed into a bigger job.
How to bleed solo with a vacuum tool
Vacuum bleeding pulls fluid through the bleeder with suction. It can be fast, but it may draw tiny air bubbles around the bleeder threads, which can look like trapped air. Use thread seal tape on bleeder threads only if you know it won’t interfere with sealing surfaces, and rely on pedal feel plus bubble-free flow at the hose end as your true indicator. This approach is commonly referenced as Brake bleeding after caliper replacement in DIY workflows because it pairs well with single-person jobs.

When you may need to bleed more than one wheel
If you clamped a hose, opened a line upstream, or let the reservoir run low, air can migrate. In those cases, bleed beyond the replaced caliper until pedal feel is firm and consistent. Some vehicles have specific sequences, but the practical rule is: remove air from the section you opened, then confirm the rest of the system is solid with a final pedal test and a controlled stop in a safe area.
What checks should you do right after installation and during the first drive?
Immediately after installation, check for leaks, verify the pedal is firm, confirm the wheel spins without abnormal drag, and ensure the brakes apply smoothly without pull or noise on a short, cautious test drive.
Next, you’ll use a simple checklist so you don’t miss the small signs—like a weeping banjo bolt—that become big failures later.
Static checks before the wheel goes back on
- Inspect the hose connection and bleeder for any dampness
- Verify the bleeder is snug and capped
- Confirm pads sit correctly in the bracket and clips are seated
- Confirm caliper bolts are torqued and secured as designed
Pedal and pressure checks
With the vehicle still safely supported, pump the brake pedal until it firms up. The first pushes move the piston to meet the pads, which is normal after caliper work. Hold steady pressure and confirm the pedal doesn’t slowly sink. If it does, re-check for leaks and confirm bleeding is complete.
First-drive behavior that matters most
On your first drive, avoid aggressive braking. Listen for scraping that suggests a pad clip is mis-seated. Check for pull during light braking. After a few minutes, stop and cautiously check for unusual heat at the repaired wheel. If it’s significantly hotter than the others, treat it as ongoing drag and re-check slide movement and hydraulic release. This is also where many people realize they need a more deliberate Break-in procedure after brake work to stabilize friction and prevent noise.
How do you estimate cost and labor time realistically for this job?
Cost and labor time depend on caliper type, whether you replace the bracket/hardware, rust severity, and whether you’re bleeding one corner or flushing more of the system.
To begin, treat estimates as a range you refine by inspection: access, seized bolts, and hose fittings can change the job more than the caliper price tag.
What changes the parts cost the most
Loaded calipers (with bracket and sometimes pads) cost more but reduce surprises. Performance or multi-piston designs can raise cost sharply. Add-ons like new hoses, fresh hardware, and new pads/rotors also shift the total. When you see the phrase Caliper replacement cost estimate in guides or quotes, the hidden variable is usually how much “while you’re in there” work is required to make the system reliable again.
What changes labor time the most
Rust belt conditions, seized slide pins, rounded bleeders, stuck banjo bolts, or hard line fittings that won’t start cleanly can turn a straightforward job into a slow one. If you’re planning around schedules, understand that Caliper replacement labor time often reflects best-case access on a clean vehicle; real-world time expands when you must recondition brackets, chase threads, or replace a hose that won’t seal.
A simple table to plan your workflow
This table summarizes what each job scope includes and how it changes complexity, so you can plan tools, fluid, and time before you start.
| Job scope | What’s included | What usually adds time |
|---|---|---|
| Caliper swap only (one corner) | Remove/install caliper, reconnect hose/line, bleed that corner | Seized bolts, stuck bleeder, hose twist correction |
| Caliper + bracket service | Swap caliper, clean bracket, replace clips, verify pad movement | Rust at pad abutments, damaged boots, pin extraction |
| Caliper + hose replacement | Everything above plus new flex hose | Hard line fitting corrosion, routing/clips, extra bleeding |
| Caliper + pads/rotors | Full friction refresh plus bleeding | Rotor removal, hub rust, bedding/break-in process |
Contextual Border: Up to this point, you’ve covered the main replacement decision, diagnosis, step-by-step swap, bleeding, checks, and planning. Next are the extra details that heavily influence long-term reliability and repeat failures.
Extra details that decide long-term reliability after a caliper swap
These details matter because most “new caliper” comebacks come from hardware, sealing surfaces, or friction management—not from the caliper casting itself.
Below are the high-impact extras that keep your replacement from turning into a repeat job.

Choosing between rebuilt and new parts
Many buyers compare Rebuilt vs new caliper pros/cons by price alone, but the practical difference is consistency. A quality rebuild can work well, yet outcomes vary by reman process, piston condition, and sealing quality. New calipers can still vary, but tend to reduce the chance of a repeat leak or sticky piston when you’re trying to solve an existing drag issue. If your original failure involved severe corrosion, heat damage, or recurring sticking, “new” often buys peace of mind.
Spotting and confirming leaks early
If you’re learning How to tell if caliper is leaking, focus on three areas: the piston dust boot, the bleeder screw area, and the hose connection. Fresh wetness that returns after wiping is meaningful; old grime without fresh fluid is not. After your first drive, re-check the caliper face and the inside of the wheel for any new damp streaks. Even a small seep will eventually drop fluid level and soften the pedal.
Free movement depends on slides and pad hardware
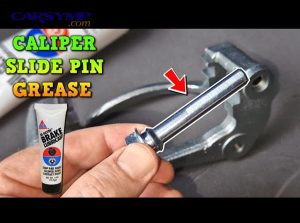
Slide pin service and lubrication is where many DIY installs succeed or fail. Pins must be smooth, boots must seal, and the grease must be compatible with rubber. Too little grease leads to corrosion; too much can hydraulic-lock the pin and prevent full travel. Also, pads must move freely in the bracket: if rust squeezes the pad ears tight, the caliper can’t self-center, which mimics a sticking piston even when the piston is fine.
Fixing uneven wear and preventing noise after replacement
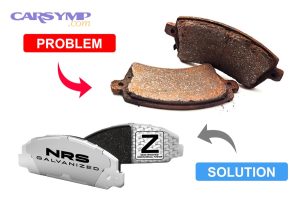
If you’re dealing with Uneven pad wear causes and fixes, treat it as a system issue: pad movement in the bracket, pin freedom, piston retraction, and hydraulic release all contribute. After replacement, manage friction surfaces correctly: keep grease off pads/rotors, clean any spilled fluid immediately, and follow a controlled series of moderate stops to stabilize the contact surfaces. That controlled approach is commonly described as a Break-in procedure after brake work, and it reduces squeal, vibration, and glazing—especially if you installed new pads or rotors during the caliper job.
FAQ
What’s the fastest way to confirm a sticking caliper at home?
The fastest confirmation is a heat-and-drag check: after a short drive with minimal braking, compare wheel heat and see if one wheel is difficult to rotate when safely lifted. If one corner is dramatically hotter, treat it as drag until proven otherwise, then inspect slides and piston movement.
Can a bad brake hose mimic a bad caliper?
Yes. A restricted hose can trap pressure so the caliper stays applied even when you release the pedal. If cracking the bleeder instantly frees the wheel, that result often points to a pressure-release problem upstream rather than a purely mechanical caliper bind. Many DIYers describe this decision point as Caliper vs hose vs master cylinder diagnosis because the test helps narrow the real source of the drag.
Should you replace pads and rotors when replacing a caliper?
Not always, but it’s often wise if the caliper failed by sticking or leaking onto the pads. Dragging overheats pads and can damage rotor surfaces. If pads are contaminated with fluid or show heat damage, replace them. If the rotor is heavily grooved, heat-spotted, or warped, address it now to avoid blaming the new caliper for old friction problems.
What’s the biggest mistake after finishing the job?
The biggest mistake is skipping a leak re-check and heat comparison after the first short drive. A tiny seep at a fitting, or slight drag from tight pad hardware, can look “fine” in the garage but show up as heat on the road. Re-checking immediately prevents a small issue from becoming brake fade or rapid wear.
Where should you document the work for future troubleshooting?
Write down which corner was serviced, whether you replaced the hose or only the caliper, what fluid you used, and whether you bled one wheel or more. If you maintain a maintenance log or publish DIY notes on a platform like Car Symp, that record makes future diagnosis much faster—especially if symptoms return months later under heat or heavy load.