How to Handle Valve Cover Gasket Replacement for Car Owners: DIY Steps, Leak Signs, and Repair Basics
Valve cover gasket replacement is one of the most approachable engine oil leak repair jobs for car owners because the gasket sits at the top of the engine, the failure signs are usually visible, and the repair often follows a clear remove-clean-reinstall process. In practical terms, the job matters because a leaking gasket can let oil escape onto the engine, lower the oil level over time, and create mess, smoke, and odor that get worse as heat and engine speed rise.
The first thing most drivers want to know is whether the problem is really a valve cover gasket leak. That question usually starts with Car Symptoms such as fresh oil around the perimeter of the valve cover, a Burning oil smell from valve cover leak residue landing on hot exhaust parts, and grime building up along the top half of the engine. Those signs matter because oil from the top of the engine can travel downward and imitate other leaks if you do not trace it carefully.
The next concern is whether the repair is realistic as a DIY project. In many vehicles, it is, because the toughest part is usually access rather than advanced engine disassembly. Even so, a successful repair depends on careful cleaning, correct gasket placement, proper sealant use where specified, and a controlled tightening pattern instead of guessing by feel.
A third concern is avoiding a repeat leak after the new gasket goes in. That is where related issues matter, including warped covers, old grommets, spark plug tube seals, and the PCV system link to valve cover leaks. Introduce a new idea: the best way to understand the repair is to move from definition, to diagnosis, to DIY steps, to the most common mistakes that turn a simple job into a second repair. (aa1car.com)
What Is Valve Cover Gasket Replacement and Why Does It Matter?
Valve cover gasket replacement is a top-end sealing repair that removes a worn gasket between the valve cover and cylinder head, restores the oil seal, and helps stop leaks, odor, smoke, and contamination around ignition components.
To better understand the issue, it helps to look at what the gasket does before deciding how urgent the repair really is.

What Does a Valve Cover Gasket Do in an Engine?
A valve cover gasket seals the upper part of the engine where the valve cover meets the cylinder head. That sounds simple, but the job is critical because the valvetrain operates in a constant bath of hot oil. The gasket keeps that oil inside while the engine runs, vibrates, heats up, cools down, and cycles through pressure changes. When the seal ages, hardens, shrinks, or cracks, oil begins to seep out of the cover edge and spread across the top or side of the engine.
In real-world ownership, this repair matters because the leak is usually not isolated to appearance alone. Oil can move backward with airflow, drip onto exhaust components, collect dirt, and make future diagnosis harder. A small leak near the top of the engine can leave the underside looking like multiple seals have failed when the actual source is still the valve cover. That is why experienced diagnosis starts at the highest wet point, not the lowest drip point.
This is also why many drivers notice the smell before they notice a puddle. The gasket sits high enough that leaked oil often burns off on hot metal before enough accumulates to reach the ground. As a result, a driver may think the car “smells hot” or “smells like oil after driving” long before spotting a visible drip in the driveway. That early pattern is one of the clearest Valve cover gasket leak symptoms.
Can a Bad Valve Cover Gasket Cause Serious Problems if Ignored?
Yes, a bad valve cover gasket can cause serious problems if ignored because it can lower oil level, foul surrounding components, and let oil reach hot exhaust parts or spark plug areas.
More specifically, the most important reason is oil loss. A small seep may stay manageable for a while, but leaks tend to worsen with age, heat cycles, and crankcase pressure. If the engine runs low on oil because the leak goes unchecked, the damage risk becomes much bigger than the cost or labor of the gasket itself. That is why even a “minor” leak deserves monitoring and repair planning.
The second reason is fire and smoke risk around hot surfaces. Valve cover leaks often drip onto an exhaust manifold or nearby hot section, producing smoke and a sharp burned-oil odor. The third reason is contamination of nearby ignition parts, especially on engines where oil enters spark plug wells through failing tube seals. When that happens, rough running and misfire complaints can follow.
According to Mobil’s vehicle maintenance guide, a leaking valve cover can send oil onto a hot exhaust manifold, create smoke, and worsen at higher engine speed because more oil is thrown around under the cover while the engine is operating.
What Are the Signs of a Leaking Valve Cover Gasket?
There are several main signs of a leaking valve cover gasket: visible oil around the cover, burning oil odor, smoke from hot surfaces, falling oil level, and sometimes oil contamination near spark plugs or ignition coils.
Let’s explore those symptoms in a way that helps separate a valve cover leak from other common engine leaks.

What Symptoms Usually Mean the Valve Cover Gasket Is Failing?
There are 5 main types of symptoms: top-of-engine oil seepage, burning oil smell, smoke, unexplained oil loss, and oil found near ignition components, based on where the seal fails and where the escaped oil travels.
The first symptom is visual seepage. You may see fresh oil or damp grime tracing the edge of the valve cover where it meets the cylinder head. On some engines, the back side of the cover leaks first, so you need a flashlight and mirror rather than a quick glance from the front. A leak that starts high often leaves oily residue running down the engine later, which is why the upper seam should always be checked first.
The second symptom is odor. A burning oil smell from valve cover leak residue is classic because the escaping oil often lands on exhaust parts. The smell usually appears after the engine reaches full operating temperature, not at cold start. On some vehicles, the odor may enter the cabin through the HVAC intake when the vehicle is stopped.
The third symptom is smoke. That smoke is usually light and intermittent at first, especially after a drive. The fourth symptom is oil loss between service intervals. The fifth symptom is oil in spark plug wells or on ignition coil boots, which points toward Spark plug tube seal replacement considerations in addition to the perimeter gasket. When oil reaches those parts, you may also need Cleaning oil from ignition coils after leak contamination and possibly replacing damaged plugs or boots. (butteramotors.com)
How Is a Valve Cover Gasket Leak Different From Other Engine Oil Leaks?
A valve cover gasket leak wins in top-side visibility, an oil pan leak is best identified from below, and a timing cover or other front seal leak is more common near the front of the engine and belt area.
However, this comparison becomes tricky because oil travels. A valve cover leak often runs down the side or rear of the engine and makes drivers suspect an oil pan, rear main seal, or head gasket. The best clue is not where the oil ends up, but where the highest fresh wetness starts. If the upper seam around the valve cover is wet and the lower area is only catching runoff, the valve cover remains the primary suspect.
An oil pan leak behaves differently. It usually appears lower, often at the bottom edge of the engine, and tends to leave drips after parking. A timing cover leak usually shows itself more toward the front of the engine. A head gasket problem carries a different pattern altogether and may involve coolant loss, overheating, or combustion issues rather than just external oil seepage. For car owners, this comparison matters because correct diagnosis prevents paying for the wrong oil leak repair. (aa1car.com)
According to AA1Car’s oil leak guide, valve cover and oil pan gaskets are among the most common engine oil leak points, and heat-driven gasket aging is a major reason older engines begin to seep oil externally. (aa1car.com)
Can Car Owners Replace a Valve Cover Gasket Themselves?
Yes, car owners can often replace a valve cover gasket themselves because the job is usually straightforward, uses common hand tools, and focuses more on access, cleaning, and correct tightening than on internal engine timing work.
That said, the job only stays simple when the owner respects the sealing process and does not rush the preparation.

Is Valve Cover Gasket Replacement a Good DIY Job for Beginners?
Yes, valve cover gasket replacement is a good DIY job for beginners if the engine has clear access, the owner can follow torque guidance, and the repair does not require removing major intake or turbo plumbing.
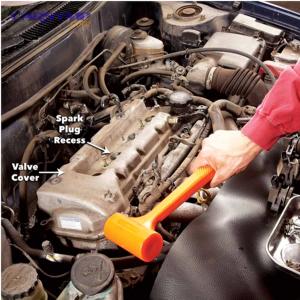
Specifically, the strongest reason to consider DIY is that the repair usually happens at the top of the engine. Unlike many lower-engine leaks, you often do not need to raise the car. In many vehicles, the basic sequence is to remove obstructions, unbolt the cover, lift it off, replace the gasket, clean the mating surfaces, and reinstall the cover in a controlled pattern. For many car owners, that is manageable over an afternoon.
Still, beginners should know what makes the job harder. Tight transverse engine bays, brittle plastic connectors, hidden rear bolts, ignition coil removal, and intake tubes crossing the cover all add time and risk. On V-engines, access can be split across two covers, and on some modern engines the cover itself may be a larger plastic assembly that is more sensitive to warping or cracking. If the service area is crowded, paying for labor may be smarter than learning on a difficult layout.
DIY also makes sense financially. A shop charge is driven mostly by labor and access time, while the gasket itself is usually much cheaper than the total invoice. That cost gap is why many owners consider the repair once the symptoms are confirmed. (cartalk.com)
What Tools and Materials Are Needed for Valve Cover Gasket Replacement?
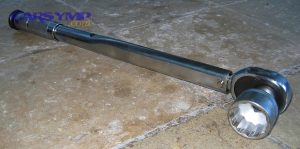
There are 7 main items needed for DIY valve cover gasket replacement: a socket set, torque wrench, new gasket set, brake or parts cleaner, shop towels, plastic scraper, and any RTV or replacement seals required by the engine design.
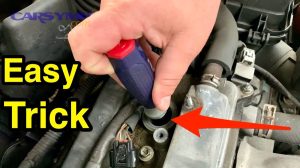
The essential tool is a small torque wrench because valve covers usually do not need much clamping force. Guessing can lead to overtightening, distorted covers, crushed gaskets, or stripped fasteners. The essential material is the correct gasket set, not just the perimeter seal. On many engines, the best purchase includes spark plug tube seals, bolt grommets, and any half-moon end seals that age with the same heat exposure. That is why Spark plug tube seal replacement considerations should happen before you close the parts order, not after you find oil inside the plug wells. (butteramotors.com)
You also need cleaning supplies because surface prep determines whether the new seal works. A plastic scraper prevents gouging, and residue-free cleaner helps remove oil film before reassembly. RTV should only be used where the service design calls for it, often at seams or corners rather than across the entire gasket. That small detail separates a clean repair from a messy one.
According to RepairPal’s estimate page, labor makes up the largest share of the total bill for this job, which is why having the right tools and doing the work correctly the first time can substantially change the overall cost outcome. (repairpal.com)
How Do You Replace a Valve Cover Gasket Step by Step?
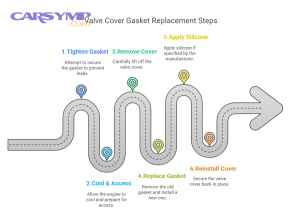
DIY valve cover gasket replacement steps usually follow 6 stages: cool the engine, remove obstructions, remove the cover, clean surfaces, install the new gasket and any seals, then tighten correctly and inspect for leaks.
Next, the method works best when each stage is done deliberately rather than quickly.

What Preparation Should You Do Before Removing the Valve Cover?
The best preparation is to cool the engine completely, identify the leak source, clear access, and organize hoses, coils, and fasteners before a single valve cover bolt comes out.
To begin, confirm that the leak really starts at the valve cover. Wipe the area, inspect the top seam, and follow the fresh oil trail. Once you are confident, let the engine cool fully. A hot valve cover area can burn you, and hot aluminum or plastic can be easier to damage. Then remove any cosmetic covers, intake tubes, coil connectors, brackets, PCV hoses, or throttle-related parts that block access. Labeling or photographing each step prevents mistakes during reassembly.
This is also the right time to inspect the surrounding parts. If a plug well is wet, add tube seals to the plan. If ignition coil boots are oily, wipe and inspect them once removed. Cleaning oil from ignition coils after leak exposure is usually part of the job, but if a coil boot is swollen, cracked, or degraded, replacement may be smarter than reusing it. Many owners also choose this moment to inspect spark plugs because the area is already open. (butteramotors.com)
How Do You Remove the Old Gasket and Install the New One Correctly?
The correct method is to remove the cover carefully, discard the old gasket, clean both mating surfaces thoroughly, fit the new gasket precisely, and use sealant only where the engine design specifically requires it.
Specifically, loosen fasteners evenly and lift the cover gently rather than prying aggressively. If the cover sticks, work patiently around it. Once removed, pull the old gasket from its channel and inspect the cover for cracks, distortion, or hardened residue. Then clean the cover groove and cylinder-head mating surface until both are free of old sealant, debris, and oil film. A new gasket cannot seal over slippery residue.
Install the new gasket squarely into its groove so it does not twist or bunch. If the kit includes tube seals, install them fully and evenly. If your engine calls for RTV at timing cover joints, corners, or half-moon sections, apply only a small amount at those exact points. Smearing RTV everywhere is one of the most common DIY mistakes because excess sealant can squeeze out, compromise gasket seating, and create cleanup problems the next time the cover comes off.
How Do You Tighten the Valve Cover Without Causing New Leaks?
The safest Post-repair leak check and torque sequence begins with hand-starting all fasteners, seating the cover evenly, and tightening in stages and pattern rather than tightening one corner fully at a time.
Then, focus on even pressure. Start every bolt by hand to avoid cross-threading. Bring the cover down gradually in a center-out or crisscross pattern if the service design allows. Use the vehicle’s torque specification, especially on plastic covers or small bolts that need far less force than most owners expect. The goal is even clamp load, not maximum clamp load. Overtightening will not rescue a bad gasket and can warp or crack the cover itself.
This stage is where many repeat leaks begin. An uneven pattern can pinch one section while leaving another loose. Reusing flattened rubber grommets can also change clamping behavior even when torque is correct. If the gasket kit includes new grommets, install them. Preventing repeat leaks is often less about buying expensive parts and more about preserving uniform sealing pressure. (thelandautorepair.com)
How Do You Check Whether the Replacement Worked?
A successful leak check uses 3 steps: inspect at idle, inspect after a short warm drive, and recheck the cover perimeter, plug wells, and surrounding hot surfaces for fresh oil or odor.
Below that simple sequence is a practical mindset: assume nothing until the engine has heat in it. Start the vehicle and let it idle while you look around the cover edges with a light. Then take a short drive, park, and inspect again while the engine is warm. If the previous failure caused odor or smoke, confirm that those symptoms fade rather than return. Check the rear edge of the cover if accessible, because that area often leaks without being obvious from the front.
Also inspect plug wells and ignition components if they were previously contaminated. If oil remains pooled in a well, the problem may be a missed tube seal, a mis-seated seal, or a leak from a different point. This second inspection is what turns installation into confirmation. In a proper oil leak repair, the repair is not finished when the bolts are tight. It is finished when the engine stays dry through heat and vibration. (thelandautorepair.com)
According to Mobil’s replacement guide, the toughest part of the job is often access, while the final quality of the repair depends on following the removal and reinstallation procedure carefully and monitoring the oil level until the leak is confirmed fixed.
What Mistakes Cause Valve Cover Gasket Replacement to Fail?
Valve cover gasket replacement usually fails for 5 reasons: poor cleaning, wrong sealant use, uneven tightening, reusing worn sealing hardware, or overlooking related parts such as tube seals, PCV faults, or a warped cover.
In addition, most repeat leaks are not caused by the new gasket itself but by something around it that was missed during installation.
What Are the Most Common DIY Mistakes During Valve Cover Gasket Replacement?
There are 6 common DIY mistakes: misdiagnosing the leak, installing on oily surfaces, overusing RTV, overtightening bolts, skipping related seals, and failing to confirm the repair after heat cycling.
The first mistake is misdiagnosis. If the wettest area is actually the timing cover or another upper seal, replacing the valve cover gasket will not solve the issue. The second mistake is dirty surfaces. Even a small film of oil can let the gasket shift or fail to bite properly. The third mistake is RTV misuse. Many owners think more sealant means more security, but correct sealant placement is targeted, not excessive.
The fourth mistake is overtightening. This is especially risky on plastic covers and small fasteners. The fifth mistake is skipping spark plug tube seals, bolt grommets, or end seals when the engine clearly needs them. The sixth mistake is ending the job without a proper warm leak check. A dry engine at cold idle does not prove much if the original leak only appeared once the exhaust heated up and crankcase flow increased. That is why Post-repair leak check and torque sequence discipline matters as much as installation itself. (thelandautorepair.com)
When Should You Replace the Gasket, the Valve Cover, or Related Parts Together?
The gasket alone wins when the cover is flat and undamaged, the full valve cover assembly is best when the cover is cracked or warped, and related seals should be replaced together when oil has already reached plug wells or sealing hardware shows age.
More importantly, this is where car owners can save a second labor cycle. If the cover is plastic and visibly distorted, replacing only the gasket may not restore a stable seal. If the tube seals are hard or leaking, replacing just the outer gasket leaves one major leak path untouched. If the bolts use rubber-isolated grommets and those grommets are flattened, clamp pressure may be inconsistent even with the right torque. These are not luxury add-ons; they are part of doing the job once. (butteramotors.com)
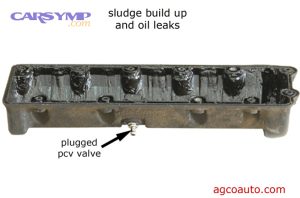
The PCV system link to valve cover leaks also belongs here. A restricted or plugged PCV valve can increase crankcase pressure and push oil past gaskets and seals. That means a perfectly installed gasket may still leak if pressure is abnormal. When a new gasket seeps again quickly, checking the PCV system is not optional troubleshooting; it is part of the root-cause diagnosis. (aa1car.com)
According to AA1Car’s PCV guide, a restricted or plugged PCV valve can allow pressure to build inside the crankcase and force oil past gaskets and seals, which directly supports checking PCV function when a valve cover gasket leak returns. (aa1car.com)
What Else Should Car Owners Know Before Paying for or Repeating Valve Cover Gasket Replacement?
Car owners should know the repair cost is often driven more by labor time than by gasket price, and repeat leaks usually point to access difficulty, missed seals, warped covers, or unresolved pressure and ignition-related issues. (cartalk.com)
Beyond the core replacement itself, these details help owners decide whether to proceed with DIY, approve shop work, or troubleshoot a leak that returned too soon.
How Much Does Valve Cover Gasket Replacement Cost Compared With DIY Repair?
DIY wins in total cash outlay, a shop is best for difficult-access engines, and hybrid decision-making works well when owners handle diagnosis but outsource labor-heavy layouts. (cartalk.com)
For many vehicles, the gasket set itself is modestly priced, but the Valve cover gasket replacement cost estimate rises because labor time depends on access. If the engine bay is open and the cover comes off easily, the job may be simple. If coils, intake hardware, turbo plumbing, or multiple covers complicate access, labor time climbs quickly. That is why Valve cover gasket replacement labor time can vary much more than the price of the seal. (repairpal.com)
A reasonable owner-level rule is this: if the vehicle has easy top-side access and you already have basic tools, DIY has a strong value case. If the engine design turns the “gasket job” into a half-day disassembly task, paying for the labor can be the cheaper decision once time, risk, and broken connectors are considered.
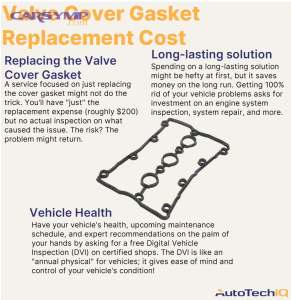
According to RepairPal’s January 2026 estimate, the average cost for valve cover gasket replacement falls between $336 and $461, with labor estimated at $254 to $373 and parts around $82 to $87, while CarTalk notes that many mainstream vehicles commonly land in roughly the $300 to $500 range. (repairpal.com)
Why Does a New Valve Cover Gasket Sometimes Leak Again?
A new valve cover gasket usually leaks again because the surface was not cleaned well, the cover was distorted, the torque sequence was uneven, the wrong seal points were used, or crankcase pressure remained too high. (aa1car.com)
Specifically, repeat leaks come from process failure more often than part failure. A gasket can look seated and still be pinched. A cover can appear fine and still have enough distortion to prevent even pressure. Old grommets can relax clamp load. Tube seals can be overlooked. The PCV system can continue forcing pressure against a fresh seal. When owners or shops treat the gasket as the only variable, they often miss the reason the leak came back. (aa1car.com)
This is where Preventing repeat leaks becomes a checklist, not a hope. Verify the leak source. Clean thoroughly. Replace related seals when needed. Use RTV sparingly and only at specified joints. Tighten evenly. Confirm PCV function. Recheck when warm. That sequence is what separates a repair from a temporary pause in leaking.
Can a Valve Cover Gasket Leak Cause Misfires or Spark Plug Problems?
Yes, a valve cover gasket leak can contribute to misfires or spark plug problems when oil enters the spark plug wells or contaminates coil boots, especially on engines with failing tube seals. (butteramotors.com)
More specifically, the risk is not usually the outer perimeter leak by itself. The bigger issue is when the same aging seal set allows oil into the spark plug tube area. Oil there can coat coil boots, sit around plug wells, and degrade ignition performance. That is why Spark plug tube seal replacement considerations belong in the same conversation as gasket replacement whenever oil is found around plugs or coils. (butteramotors.com)
If you find oil on the coils, clean them carefully and inspect the rubber boots before reinstalling. Cleaning oil from ignition coils after leak exposure can be enough when the coils remain dry internally and the boots are intact, but badly soaked or deteriorated components may justify replacement. The important point is not to ignore the ignition side once oil has reached it. (butteramotors.com)
What Is the Difference Between a Valve Cover Gasket Replacement and Other Top-End Oil Leak Repairs?
Valve cover gasket replacement is usually the easiest top-end leak repair, timing cover or cam-related leaks are often more labor-intensive, and head gasket repairs belong in a far more complex category with different symptoms and risks.
That comparison matters because car owners often hear “upper engine oil leak” and assume every repair is equally serious. It is not. A valve cover gasket sits at the outer top of the engine and commonly fails from heat and age. A timing cover repair may involve far more front-engine disassembly. A head gasket issue can involve oil, coolant, compression, overheating, and major labor. Knowing the difference helps owners approve the right estimate and avoid unnecessary panic when the actual problem is a much more manageable top-side seal.
In short, valve cover gasket replacement is usually a practical, visible, and solvable repair. When the diagnosis is accurate, the surfaces are clean, the torque sequence is controlled, and related issues like tube seals or PCV pressure are addressed, most car owners can either complete the repair confidently or speak to a mechanic from a much stronger position.