Daniel James Carter
Lead Diagnostic Technician & Technical Content Author
Company / Organization
CarSymp
Experience / Skills
Check Engine Light diagnosis (OBD-II); engine performance & ignition/fuel systems; brake service; steering & suspension; AC/heater diagnostics; cooling system service; basic transmission diagnostics; electrical & battery/charging systems; maintenance schedules
About Daniel James Carter
Daniel James Carter (born July 14, 1988) is an Automotive Diagnostic & Repair Technician and the Lead Diagnostic Technician & Technical Content Author for this auto repair website. His work focuses on translating real shop-floor diagnostics into clear, step-by-step guidance for vehicle owners—especially around check-engine issues, climate control problems, brake safety, and steering/suspension wear.\n\nDaniel’s interest in mechanical systems started early, but his professional path became formal in 2006 when he began a structured apprenticeship in general automotive service. Between 2006 and 2008, he worked alongside senior technicians learning foundational skills—oil services, brake inspections, tire work, basic electrical checks, and service documentation. During this period, he also built the habits that still define his process today: verifying the customer’s concern, road-testing when safe, and confirming repairs with repeatable measurements.\n\nIn 2009, Daniel moved into a full-time automotive service technician role, where he handled a higher volume of maintenance and repair work (brakes, cooling systems, belts, ignition components, and driveline basics). By 2012, he shifted toward diagnostics, focusing on OBD-II fault tracing, fuel trim interpretation, misfire detection, smoke-testing intake leaks, and electrical circuit testing using wiring diagrams and voltage-drop methods.\n\nA major milestone came in 2015 when he began pursuing advanced professional credentials through the National Institute for Automotive Service Excellence (ASE). After completing multiple ASE exams and documenting the required hands-on experience, Daniel earned the ASE Master Automobile Technician designation in 2017. He continued building depth in drivability and emissions-related diagnostics and achieved the ASE L1 Advanced Engine Performance Specialist credential in 2019. He maintains his credentialing through ongoing study and periodic recertification, aligning his knowledge with modern engine management systems, updated scan-tool workflows, and evolving diagnostic standards.\n\nFrom 2018 to 2021, Daniel served as a senior technician in a busy service environment where his day-to-day work centered on complex complaints: intermittent stalling, hard starts, rough idle, overheating, vibration under braking, and AC systems that blow warm or smell musty. He became known for careful diagnosis before parts replacement, using a consistent checklist:\n\n\n Confirm the symptom and capture freeze-frame data.\n Test likely causes (air leaks, sensors, ignition, fuel delivery, charging system) with measurable evidence.\n Repair only after the failure is verified and the fix can be validated.\n Validate with a road test, live data review, and final inspection.\n\n\nIn 2022, Daniel began formalizing his field notes into consumer-friendly write-ups and troubleshooting guides. By 2023, he expanded that work into structured content for this website, combining real repair patterns with clear explanations of why failures happen (for example: how moisture and organic buildup can cause musty AC smell, why worn suspension joints can mimic wheel balance issues, or how vacuum leaks and weak ignition coils can trigger persistent misfires).\n\nToday, Daniel’s role on the website is to ensure every guide reflects practical repair reality—tools a shop actually uses, common misdiagnoses to avoid, and safety-first recommendations. He writes with the same standard he uses in the bay: the diagnosis must make sense, the repair must be verifiable, and the timeline from symptom to fix must be clear for the reader.

Related topics
Latest posts by Daniel James Carter


7 Critical Causes of a Soft Brake Pedal Every Driver Should Know
A soft brake pedal is caused by seven critical issues: air trapped in brake lines, brake fluid leaks, worn brake components, master cylinder failure, faulty brake booster, caliper and wheel cylinder problems, and contaminated brake fluid. Each of these causes disrupts the hydraulic pressure in your brake system, reducing the firm resistance you normally feel when pressing the pedal.
Daniel James Carter March 1, 2026 at 8:59 AM
Essential DIY Engine Checks Before Committing to Major Repairs: Car Owner’s Guide
Before committing to expensive major engine repairs, car owners should perform essential DIY diagnostic checks including visual inspections for leaks and damage, fluid level and condition assessments, OBD-II scanner code reading, and component-specific examinations of spark plugs, air filters, and belts to verify repair necessity and potentially identify simple fixes that could save thousands of dollars. These preliminary checks empower vehicle owners to make informed decisions, avoid unnecessary repairs, and communicate effectively with mechanics about genuine engine problems versus minor issues that mimic serious damage.
Daniel James Carter March 1, 2026 at 6:48 AM![Fire & Smoke Damage Restoration Costs by Type: Complete Pricing Guide for Homeowners [2026]](https://carsymp.com/wp-content/uploads/2026/03/66a9fe838ed5480a492ab8a2_66a8e906d2d7890d278aea69_AD_4nXfovd2a92394GiYEAY2CG1Bp0.jpeg)
Fire & Smoke Damage Restoration Costs by Type: Complete Pricing Guide for Homeowners [2026]
Fire and smoke damage restoration costs range from $3,107 to $51,243, averaging $27,175 nationally, with pricing determined primarily by fire classification type (Class A, B, K, or D), smoke characteristics (dry soot versus oily soot), and the extent of damage across your property. Homeowners face significantly different restoration expenses depending on whether they're dealing with ordinary combustible fires ($8,665-$14,000 for a 2,500 sq ft home), flammable liquid fires ($13,335-$19,335), or kitchen grease fires ($11,000-$50,000), making it essential to understand how fire type directly impacts your total repair bill.
Daniel James Carter March 1, 2026 at 6:20 AM
How to Track Oil Consumption and Identify Blue Smoke Links in Your Engine
Tracking engine oil consumption requires systematic dipstick monitoring at 500-1,000 mile intervals while recording oil quantities added, and identifying blue smoke links involves observing exhaust color during cold starts, acceleration, and deceleration to pinpoint valve seal or piston ring failures. Most engines should consume less than one quart of oil per 3,000-5,000 miles, and blue smoke appearing from the exhaust indicates oil burning in the combustion chamber due to worn internal components.
Daniel James Carter March 1, 2026 at 5:42 AM
Why Coolant Loss Causes Sweet Smell: 7 Hidden Leak Sources Car Owners Miss
Coolant loss causes a sweet smell because antifreeze contains ethylene glycol or propylene glycol, which produces a distinctive syrup-like odor when heated by engine components. When coolant leaks from your vehicle's cooling system, it either evaporates on hot surfaces creating sweet-smelling vapor, or burns inside the combustion chamber producing white exhaust smoke.
Daniel James Carter March 1, 2026 at 5:26 AM
How to Diagnose Turbo Failure: 7 Smoke Symptoms & Essential Checks for Car Owners
Diagnosing turbo failure requires identifying seven key smoke symptoms and performing essential verification checks to distinguish turbocharger problems from other engine issues. The most reliable diagnostic approach combines visual smoke analysis—black smoke indicating overfueling, blue or grey smoke revealing oil leaks, and white smoke suggesting coolant issues—with hands-on inspection methods including compressor wheel examination, shaft play testing, and boost leak verification.
Daniel James Carter March 1, 2026 at 5:01 AM
Startup Smoke vs Acceleration Smoke: Which Engine Component Is Failing?
Engine smoke timing reveals specific component failures, with startup smoke typically indicating valve seal deterioration while acceleration smoke points to piston ring wear, turbocharger seal damage, or head gasket issues. The critical difference lies in when pressures and temperatures stress different sealing surfaces—valve seals fail when oil drips during extended shutdowns, whereas piston rings leak under the sustained cylinder pressure of hard acceleration.
Daniel James Carter March 1, 2026 at 4:37 AM
Diagnose Black Exhaust Smoke: 8 Common Causes & How to Fix Each Problem
Black exhaust smoke from your vehicle signals incomplete fuel combustion, indicating your engine burns excess fuel that doesn't fully ignite in the combustion chamber. This diagnostic guide covers eight primary causes—clogged air filters, faulty fuel injectors, malfunctioning sensors, EGR valve failures, turbocharger issues, fuel pressure problems, engine wear, and fuel system blockages—along with systematic troubleshooting methods to identify the exact source.
Daniel James Carter March 1, 2026 at 4:18 AM
7 Common Causes of White Smoke From Exhaust: Complete Diagnosis Guide for Car Owners
White smoke billowing from your vehicle's exhaust can range from completely harmless condensation to a catastrophic engine failure requiring immediate attention. There are 7 common causes of white smoke from exhaust: condensation buildup, blown head gasket, cracked cylinder head, cracked engine block, faulty fuel injectors in diesel engines, damaged radiator, and transmission fluid leaks.
Daniel James Carter March 1, 2026 at 3:56 AM
8 Common Causes of Blue Smoke From Exhaust: Complete Diagnosis Guide for Car Owners
Blue smoke from your exhaust signals that your engine is burning oil inside the combustion chamber, typically caused by worn piston rings, damaged valve seals, a blown head gasket, faulty PCV valve, leaking turbocharger, deteriorated engine seals, inlet manifold leaks, or defective glow plugs in diesel engines. This bluish-gray smoke appears when oil bypasses protective seals and mixes with fuel during combustion, creating a distinctive burning smell and visible emissions that differ markedly from white coolant-related smoke or black fuel-rich smoke.
Daniel James Carter March 1, 2026 at 3:35 AM
OEM vs Performance Shocks: Choose the Right Suspension Upgrade for Your Vehicle
Choosing between OEM and performance shocks depends on your driving needs, budget, and vehicle usage—OEM shocks prioritize comfort and cost-effectiveness for daily driving, while performance shocks deliver superior handling, durability, and adjustability for enthusiasts and demanding applications. The decision hinges on three core factors: ride quality preferences, intended vehicle use, and long-term value considerations.
Daniel James Carter March 1, 2026 at 3:02 AM
7 Common Causes of Clunking Noises After Shock Replacement
Clunking noises after shock replacement typically stem from seven primary causes: loose mounting bolts, worn strut mount bearings, improper installation procedures, missing hardware components, faulty bushings, other suspension component issues, and in rare cases, defective shock absorbers themselves. The overwhelming majority of post-installation clunking sounds—approximately 90 to 95 percent—result from mounting and installation issues rather than defective parts, meaning most problems can be resolved through proper inspection, tightening procedures, or component replacement without discarding the new shocks.
Daniel James Carter March 1, 2026 at 2:49 AM![Do You Need Alignment After Shock/Strut Replacement? [Essential Guide for Car Owners]](https://carsymp.com/wp-content/uploads/2026/03/photo-1486262715619-67b85e0b08d3-8.jpg)
Do You Need Alignment After Shock/Strut Replacement? [Essential Guide for Car Owners]
Yes, you need a wheel alignment after replacing struts, but typically not after replacing shocks alone. Struts are structural suspension components that directly affect your vehicle's alignment angles—camber, caster, and toe—so removing and reinstalling them alters these critical measurements.
Daniel James Carter March 1, 2026 at 2:26 AM
Essential Tools and Safety Precautions for DIY Shock Replacement: Complete Home Mechanic Guide
Successfully replacing your vehicle's shocks at home requires the right tools and strict adherence to safety protocols to prevent serious injury and ensure proper installation. DIY shock replacement demands specific hand tools including socket sets, breaker bars, and torque wrenches, along with critical lifting equipment such as a quality floor jack rated for at least 2 tons and properly rated jack stands.
Daniel James Carter March 1, 2026 at 2:11 AM
Replace Shocks in Pairs vs All Four: Complete Decision Guide for Car Owners
When deciding between replacing shocks in pairs versus all four at once, automotive experts recommend replacing them in pairs at minimum, but replacing all four simultaneously provides optimal safety, balanced handling, and long-term cost savings. The choice depends on your budget, vehicle condition, and safety priorities, with manufacturers like Monroe and Bilstein advising complete four-shock replacement for maximum performance consistency.
Daniel James Carter March 1, 2026 at 1:57 AM
How Worn Shocks Reduce Braking Performance and Accelerate Tire Wear: A Driver’s Safety Guide
Yes, worn shocks dramatically reduce braking performance and accelerate tire wear by compromising tire-to-road contact, increasing stopping distances by 20-30%, and causing distinctive cupping patterns that destroy tires prematurely. This degradation occurs because shock absorbers control how your tires maintain contact with the pavement—when they fail, your vehicle's ability to stop safely deteriorates even if your brakes are in perfect condition.
Daniel James Carter March 1, 2026 at 1:40 AM
Shock Replacement Cost: 2026 Price Guide for All Vehicle Types
Shock replacement costs in 2026 typically range from $400 to $2,500 for a pair of shocks or struts, with total costs for all four corners reaching $800 to $5,000 depending on your vehicle type and service choices. The wide price variation reflects differences between compact cars requiring basic shock absorbers versus luxury vehicles equipped with sophisticated electronic suspension systems.
Daniel James Carter March 1, 2026 at 1:26 AM
How Long Does Shock Replacement Take? Average Labor Hours for Front & Rear Shocks
Replacing shock absorbers typically takes 2 to 3 hours for all four shocks when performed by a professional mechanic, though this timeframe varies based on vehicle type, shock location, and technician experience. Front shock replacement generally requires 1 to 1.
Daniel James Carter March 1, 2026 at 1:09 AM
Shock vs Strut Differences Explained: Complete Guide for Vehicle Owners
Shock absorbers and struts are fundamentally different suspension components—struts provide structural support to the vehicle chassis while shock absorbers only dampen spring movement. The primary distinction lies in their design and integration: struts combine multiple suspension elements (shock absorber, coil spring, and mounting hardware) into a single structural assembly that replaces the upper control arm, whereas shocks function as standalone hydraulic components that work alongside separately mounted springs.
Daniel James Carter March 1, 2026 at 12:56 AM
Recognize 8 Critical Bad Shock Absorber Symptoms Every Driver Should Know
Experiencing a bouncy ride, extended stopping distances, or unusual clunking noises while driving signals that your shock absorbers may be failing. Bad shock absorber symptoms include excessive bouncing after bumps, fluid leaks, uneven tire wear, longer braking distances, vehicle swaying during turns, knocking sounds, harsh ride quality, and unstable steering—all of which compromise your safety and vehicle performance.
Daniel James Carter March 1, 2026 at 12:40 AM
7 Essential Inspection Techniques to Prevent Industrial Belt Failures
Industrial belt failures cost facilities thousands in downtime and emergency repairs, yet most failures are preventable through systematic inspection techniques. There are seven essential inspection methods that effectively prevent belt failures: visual inspection, tension measurement, alignment checking, splice examination, surface analysis, load zone inspection, and pulley assessment, each targeting specific failure modes before they escalate into costly breakdowns.
Daniel James Carter March 1, 2026 at 12:07 AM
7 Critical Steps When Your Car Belt Breaks on the Road: Emergency Response Guide
When your car belt breaks while driving, you must immediately recognize the warning signs, safely pull over, turn off the engine, assess your situation, inspect the damage if safe, call for professional assistance, and document the incident to prevent catastrophic engine damage and ensure your safety. These seven critical steps form your emergency response protocol when facing serpentine belt failure on the highway or any roadway.
Daniel James Carter February 28, 2026 at 11:49 PM
How to Inspect Idler Pulleys During Belt Service: 7 Critical Wear Signs
Inspecting idler pulleys during belt service involves a systematic visual and physical examination to identify bearing wear, surface damage, wobble, misalignment, noise, and belt track degradation before or during serpentine belt replacement. This critical inspection step prevents premature belt failure and costly breakdowns by catching problems when the belt system is already accessible for maintenance.
Daniel James Carter February 28, 2026 at 11:35 PM
Essential Tools Required for Belt Replacement: Complete Equipment Checklist for DIYers
Successfully replacing a belt requires seven essential tools: a socket wrench set (10mm-14mm), breaker bar or belt tensioner tool, screwdrivers, safety equipment including gloves and goggles, a new replacement belt, and a belt tension gauge for proper installation. These tools form the foundation of any DIY belt replacement project, whether you're working on a serpentine belt, timing belt, or drive belt system in your vehicle.
Daniel James Carter February 24, 2026 at 2:35 AM
Belt Squealing After Replacement: 7 Root Causes and Step-by-Step Diagnostic Guide
Belt squealing after replacement occurs due to seven primary root causes: improper belt tension, defective or weak tensioners, pulley misalignment, worn or failed pulley bearings, incorrect belt installation, contamination causing slippage, and defective new belts. Despite investing time and money in serpentine belt replacement, many vehicle owners experience the frustrating reality of persistent squealing noise that should have been eliminated by the new belt.
Daniel James Carter February 24, 2026 at 2:16 AM
Serpentine Belt Replacement Cost: 2026 Price Guide for Car Owners (Parts + Labor Breakdown)
Serpentine belt replacement costs between $90 and $250 in 2026, with the national average ranging from $109 to $203 depending on your vehicle type, location, and service provider. This essential repair includes both the belt itself ($25-$150) and professional labor ($50-$125), with most replacements taking 30 minutes to one hour.
Daniel James Carter February 24, 2026 at 1:52 AM
Serpentine Belt Replacement Time: 15 Minutes to 2 Hours (By Vehicle Type)
Serpentine belt replacement takes between 15 minutes and 2 hours depending on your vehicle type, engine configuration, and belt accessibility. Most standard vehicles with 4-cylinder or accessible V6 engines require 30 to 60 minutes for a complete serpentine belt replacement, while complex configurations like V8 engines in tight compartments or dual alternator systems can extend the labor time to 1.
Daniel James Carter February 24, 2026 at 1:37 AM
Essential Belt Tensioner Replacement Guide: When to Replace vs. Inspect for DIY Mechanics and Car Owners
Replacing a belt tensioner during belt service depends on three critical factors: the tensioner's current condition, your vehicle's mileage, and whether you're replacing a serpentine or timing belt. For timing belt replacements, you should always replace the tensioner simultaneously due to catastrophic engine damage risks, while serpentine belt tensioner replacement can be deferred if the component passes rigorous inspection criteria and shows no signs of wear.
Daniel James Carter February 24, 2026 at 1:19 AM![Complete Guide: Belt Routing Diagrams & Installation Tips for DIY Mechanics [With Visual Examples]](https://carsymp.com/wp-content/uploads/2026/02/Bruce-1-2.jpg)
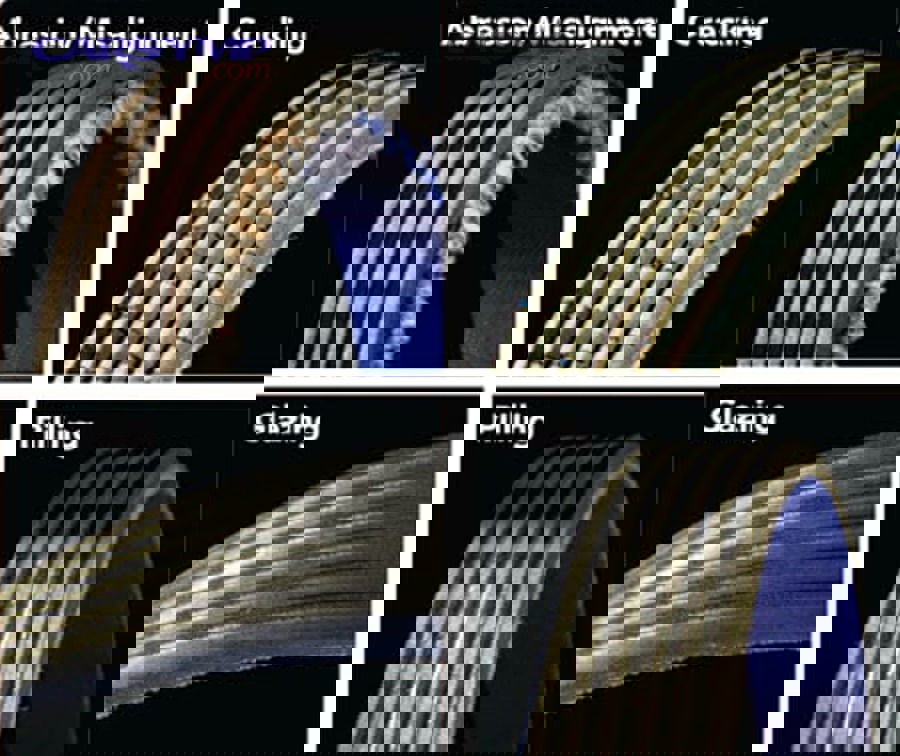
Complete Guide: Belt Routing Diagrams & Installation Tips for DIY Mechanics [With Visual Examples]
A belt routing diagram is a visual schematic that shows the exact path a serpentine or drive belt must follow around engine pulleys, and proper installation requires following this diagram precisely to prevent engine damage, component failure, and costly repairs. For DIY mechanics, understanding how to read these diagrams and execute correct installation techniques separates successful serpentine belt replacement from potentially catastrophic mistakes that can leave you stranded or damage critical engine components.
Daniel James Carter February 24, 2026 at 12:57 AM
7 Critical Serpentine Belt Wear Signs Every Car Owner Should Recognize
A serpentine belt shows seven critical wear signs: squealing noises during startup, visible cracks along the ribs, glazed or shiny surfaces, fraying edges with exposed cords, power steering or air conditioning failure, engine overheating, and electrical problems including battery warning lights. These symptoms indicate the belt has deteriorated beyond safe operating condition and requires immediate replacement to prevent complete accessory system failure and potential engine damage.
Daniel James Carter February 22, 2026 at 8:57 AM
7 Essential Methods to Prevent Lug Nut and Wheel Stud Damage for DIY Mechanics
Preventing lug nut and wheel stud damage requires seven essential methods: hand-starting nuts before tool use, applying proper torque specifications with a torque wrench, following the star pattern sequence, avoiding impact gun over-tightening, maintaining clean threads, conducting regular inspections, and replacing worn components promptly. These techniques protect against the three primary damage mechanisms—cross-threading from misalignment, galling from metal-to-metal friction in fine-pitch threads, and corrosion from moisture exposure—that collectively cause thousands of roadside emergencies and costly hub replacements annually.
Daniel James Carter February 22, 2026 at 8:17 AM
How to Inspect Tire Age and Tread Depth Before Mounting: Essential Safety Guide for Vehicle Owners
Inspecting tire age and tread depth before mounting involves checking the DOT code on the sidewall to determine manufacturing date (tires over 6-10 years should be rejected) and measuring tread depth using the penny test, tread depth gauge, or wear bar indicators to ensure minimum depths of 2/32" for legal safety or 4/32"-6/32" for optimal performance. This pre-installation verification prevents mounting degraded rubber that appears visually acceptable but poses catastrophic failure risks including tread separation, blowouts, and loss of traction in wet or winter conditions.
Daniel James Carter February 22, 2026 at 7:56 AM
Maximize Tire Life: The Complete Guide to Rotating Tires During Seasonal Changes for Year-Round Performance
Yes, you should absolutely rotate your tires during seasonal changes because it maximizes tire lifespan by promoting even wear, saves money by reducing premature replacements, and maintains optimal safety and performance year-round. Seasonal tire changeovers—when you swap between winter and summer tires—present the ideal opportunity to rotate your tires since the wheels are already being removed from your vehicle.
Daniel James Carter February 22, 2026 at 7:40 AM
7 Essential Safety Tips to Prevent Injuries During DIY Tire Changes
Changing your own tires can save money and give you independence, but improper technique causes thousands of preventable injuries each year—from crushed hands to vehicles falling off jacks. The seven essential safety tips to prevent injuries during DIY tire changes include choosing stable ground, engaging the parking brake, positioning the jack correctly, loosening lug nuts before lifting, using proper lifting techniques, following the star pattern for tightening, and performing final torque verification after lowering the vehicle.
Daniel James Carter February 22, 2026 at 7:23 AM
Seasonal Tire Change Cost: Complete 2026 Price Guide for Car Owners
Seasonal tire change services in 2026 typically cost between $60 and $200 per set of four tires, depending on whether you're doing a simple swap or a full changeover. A basic tire swap where your winter or summer tires are already mounted on dedicated rims runs $30-$80, while a complete changeover that includes dismounting, mounting, and balancing ranges from $100-$200.
Daniel James Carter February 22, 2026 at 7:06 AM
Transfer vs Replace: Essential TPMS Sensor Decisions When Changing Wheels
When changing wheels, you should transfer existing TPMS sensors if they're less than 5 years old and you plan to keep the original wheels, but buy new sensors if the current ones are aging, you're permanently upgrading, or the transfer cost exceeds new sensor prices. This decision hinges on three critical factors: sensor age and battery lifespan, the permanence of your wheel change, and total cost comparison including labor fees.
Daniel James Carter February 22, 2026 at 6:53 AM
Master Tire Storage: 10 Essential Best Practices to Maximize Longevity and Prevent Deterioration
Proper tire storage is essential to maximize longevity and prevent deterioration, protecting your investment and ensuring safety when tires return to service. Tires stored incorrectly suffer from dry rot, cracking, deformation, and compromised structural integrity—problems that cost hundreds or thousands of dollars in premature replacements.
Daniel James Carter February 22, 2026 at 6:34 AM
Complete Seasonal Tire Change Checklist: When to Switch at 7°C + Essential Steps
Seasonal tire changes require switching tires when average daily temperatures consistently reach 7°C (45°F), using a comprehensive checklist that includes pre-change inspection, proper tools, correct installation procedures, and post-change verification to ensure optimal safety and performance. This temperature threshold marks the critical point where tire rubber compounds either lose or gain the flexibility needed for safe traction, making timing essential for winter and summer transitions.
Daniel James Carter February 22, 2026 at 6:17 AM
All-Season vs Winter Tire Performance: Which Delivers Better Traction for Your Climate?
Choosing between all-season and winter tires fundamentally depends on your climate's winter severity, with winter tires delivering superior traction in temperatures below 45°F through specialized rubber compounds and tread patterns, while all-season tires offer year-round convenience for moderate climates with minimal snow and ice exposure. The performance gap becomes critical in safety-critical situations: winter tires can reduce braking distances on ice by up to 30% compared to all-season alternatives, making them essential rather than optional for regions experiencing regular freezing conditions, heavy snowfall, or icy roads.
Daniel James Carter February 22, 2026 at 6:05 AM
When to Switch Between Summer and Winter Tires: Temperature Thresholds & Optimal Timing for Drivers
The critical temperature threshold for switching between summer and winter tires is 45-46°F (7°C), with winter tires recommended when temperatures consistently fall below this point and summer tires optimal when temperatures remain above it. This temperature matters because tire rubber compounds behave fundamentally differently across this threshold—winter tire compounds stay flexible in cold conditions while summer tire compounds harden, and conversely, winter tires wear rapidly in warm weather while summer tires maintain their structure and performance.
Daniel James Carter February 22, 2026 at 5:49 AM
Rough Idle Repair Cost Guide: 8 Common Causes & Price Estimates for Car Owners
Rough idle repair costs typically range from $80 to $1,000 or more, depending on the underlying cause, with common fixes like spark plug replacement averaging $149–$161, vacuum leak repairs costing $80–$250, and fuel injector cleaning running $80–$150, while more complex issues involving ignition coils, sensors, or internal engine components can reach $400–$1,000+. The total expense varies based on your vehicle type, the severity of the problem, and whether multiple components require attention.
Daniel James Carter February 22, 2026 at 5:14 AM
Complete Guide: 12 DIY Tests to Perform Before Visiting Any Shop or Professional
DIY tests before visiting any shop or professional are self-administered diagnostic procedures that help you identify issues, verify conditions, and make informed decisions across health, automotive, home, and product categories—potentially saving you $100-$500 per assessment. These tests empower you to skip unnecessary professional visits, maintain privacy, and gather preliminary information that makes subsequent consultations more efficient and cost-effective.
Daniel James Carter February 22, 2026 at 4:50 AM
10 Common Scan Codes Tied to Rough Idle: Complete Diagnostic Guide for Car Owners
When your engine shakes at a stoplight or vibrates excessively while idling, specific OBD-II diagnostic trouble codes reveal the underlying problem—the ten most common scan codes tied to rough idle are P0300 (random misfire), P050D (cold start rough idle), P0506 (idle control system RPM low), P0301-P0304 (cylinder-specific misfires), P2187/P2189 (system too lean at idle), P0171/P0174 (system too lean), P0101/P0102 (MAF sensor issues), P0121-P0123 (throttle position sensor problems), P0505 (idle air control malfunction), and P0125 (insufficient coolant temperature). Understanding these codes enables accurate rough idle diagnosis, helping you identify whether the issue stems from ignition system failures, fuel delivery problems, or sensor malfunctions.
Daniel James Carter February 22, 2026 at 4:35 AM
7 Warning Signs of EGR-Related Rough Idle
EGR-related rough idle occurs when a malfunctioning exhaust gas recirculation valve disrupts the air-fuel mixture, causing engine vibration, stalling, and erratic RPM fluctuations at idle. The seven primary warning signs include excessive engine shaking, stalling in traffic, specific check engine codes (P0401, P0404, P1404, P1406), cold versus warm idle variations, black exhaust smoke, poor throttle response, and knocking sounds.
Daniel James Carter February 22, 2026 at 3:58 AM
How to Diagnose Rough Idle Using Fuel Trim Data: Step-by-Step Guide for Mechanics and DIYers
Diagnosing rough idle requires analyzing fuel trim data through a systematic five-step process: accessing live data via an OBD-II scanner, establishing baseline readings at stable idle, testing fuel trim behavior across different RPM ranges, identifying characteristic patterns that reveal vacuum leaks or sensor faults, and verifying your diagnosis through functional testing. This method enables both professional mechanics and DIY enthusiasts to pinpoint the root cause of rough idle conditions with precision, transforming what appears as confusing percentage values into actionable diagnostic intelligence that distinguishes between vacuum leaks, mass airflow sensor contamination, oxygen sensor failures, and fuel delivery problems.
Daniel James Carter February 22, 2026 at 3:33 AM![How to Distinguish Motor Mount Vibration vs True Rough Idle Diagnosis [Mechanic’s Method]](https://carsymp.com/wp-content/uploads/2026/02/photo-1486262715619-67b85e0b08d3-117.jpg)
How to Distinguish Motor Mount Vibration vs True Rough Idle Diagnosis [Mechanic’s Method]
Distinguishing between motor mount vibration and true rough idle requires understanding that worn mounts transmit normal engine movement as excessive shaking without affecting actual engine performance, while genuine rough idle involves measurable RPM fluctuation, misfiring, or combustion irregularities that indicate underlying mechanical or sensor problems. The key difference lies in perception versus reality—bad motor mounts amplify the feeling of vibration through the chassis and cabin, making a normally-running engine seem problematic, whereas true rough idle manifests as erratic tachometer readings, engine stumbling, stalling tendencies, and often triggers diagnostic trouble codes that point to ignition, fuel delivery, or air intake issues.
Daniel James Carter February 22, 2026 at 3:12 AM
7 Common Symptoms of Dirty Throttle Body and IAC Problems (+ Cleaning Solutions for Car Owners)
Dirty throttle body and idle air control valve issues manifest through seven distinct symptoms: rough or fluctuating idle, engine stalling, poor acceleration, check engine light codes, decreased fuel economy, starting difficulties, and abnormal engine noise. These symptoms occur when carbon deposits and dirt accumulate inside the throttle body and IAC valve, disrupting the precisely controlled airflow your engine needs to run smoothly.
Daniel James Carter February 22, 2026 at 2:52 AM
Still Misfiring After Replacing Plugs, Coils & Injectors? 7 Hidden Causes of Rough Idle
Engine misfires and rough idle persist even after replacing spark plugs, ignition coils, and fuel injectors because these three components represent only a fraction of the potential failure points in modern engines—with compression issues, vacuum leaks, faulty sensors, fuel system pressure problems, electrical wiring defects, carbon deposits, and ECU malfunctions accounting for the majority of stubborn misfire cases that resist standard repairs. When your check engine light continues flashing and your vehicle shakes at stoplights despite installing new ignition and fuel components, the root cause typically lies in one of seven overlooked diagnostic categories that require systematic testing rather than the common "parts cannon" approach.
Daniel James Carter February 22, 2026 at 2:33 AM
7 Warning Signs of Vacuum Leak Rough Idle: How to Detect Engine Performance Issues
A vacuum leak causing rough idle creates seven distinct warning signs: unstable RPM fluctuations at idle, excessive engine vibration, audible hissing or whistling sounds from the engine bay, check engine light with lean mixture codes (P0171/P0174), stalling or hesitation during acceleration, decreased fuel economy, and difficulty starting or maintaining idle. These symptoms occur because unmetered air enters the engine through cracks or gaps in vacuum hoses, intake manifold gaskets, or related components, disrupting the carefully balanced air-fuel ratio and forcing your engine to run lean with too much air and insufficient fuel.
Daniel James Carter February 22, 2026 at 2:12 AM