Daniel James Carter
Lead Diagnostic Technician & Technical Content Author
Company / Organization
CarSymp
Experience / Skills
Check Engine Light diagnosis (OBD-II); engine performance & ignition/fuel systems; brake service; steering & suspension; AC/heater diagnostics; cooling system service; basic transmission diagnostics; electrical & battery/charging systems; maintenance schedules
About Daniel James Carter
Daniel James Carter (born July 14, 1988) is an Automotive Diagnostic & Repair Technician and the Lead Diagnostic Technician & Technical Content Author for this auto repair website. His work focuses on translating real shop-floor diagnostics into clear, step-by-step guidance for vehicle owners—especially around check-engine issues, climate control problems, brake safety, and steering/suspension wear.\n\nDaniel’s interest in mechanical systems started early, but his professional path became formal in 2006 when he began a structured apprenticeship in general automotive service. Between 2006 and 2008, he worked alongside senior technicians learning foundational skills—oil services, brake inspections, tire work, basic electrical checks, and service documentation. During this period, he also built the habits that still define his process today: verifying the customer’s concern, road-testing when safe, and confirming repairs with repeatable measurements.\n\nIn 2009, Daniel moved into a full-time automotive service technician role, where he handled a higher volume of maintenance and repair work (brakes, cooling systems, belts, ignition components, and driveline basics). By 2012, he shifted toward diagnostics, focusing on OBD-II fault tracing, fuel trim interpretation, misfire detection, smoke-testing intake leaks, and electrical circuit testing using wiring diagrams and voltage-drop methods.\n\nA major milestone came in 2015 when he began pursuing advanced professional credentials through the National Institute for Automotive Service Excellence (ASE). After completing multiple ASE exams and documenting the required hands-on experience, Daniel earned the ASE Master Automobile Technician designation in 2017. He continued building depth in drivability and emissions-related diagnostics and achieved the ASE L1 Advanced Engine Performance Specialist credential in 2019. He maintains his credentialing through ongoing study and periodic recertification, aligning his knowledge with modern engine management systems, updated scan-tool workflows, and evolving diagnostic standards.\n\nFrom 2018 to 2021, Daniel served as a senior technician in a busy service environment where his day-to-day work centered on complex complaints: intermittent stalling, hard starts, rough idle, overheating, vibration under braking, and AC systems that blow warm or smell musty. He became known for careful diagnosis before parts replacement, using a consistent checklist:\n\n\n Confirm the symptom and capture freeze-frame data.\n Test likely causes (air leaks, sensors, ignition, fuel delivery, charging system) with measurable evidence.\n Repair only after the failure is verified and the fix can be validated.\n Validate with a road test, live data review, and final inspection.\n\n\nIn 2022, Daniel began formalizing his field notes into consumer-friendly write-ups and troubleshooting guides. By 2023, he expanded that work into structured content for this website, combining real repair patterns with clear explanations of why failures happen (for example: how moisture and organic buildup can cause musty AC smell, why worn suspension joints can mimic wheel balance issues, or how vacuum leaks and weak ignition coils can trigger persistent misfires).\n\nToday, Daniel’s role on the website is to ensure every guide reflects practical repair reality—tools a shop actually uses, common misdiagnoses to avoid, and safety-first recommendations. He writes with the same standard he uses in the bay: the diagnosis must make sense, the repair must be verifiable, and the timeline from symptom to fix must be clear for the reader.

Related topics
Latest posts by Daniel James Carter


How to Replace Intake Duct Clamps and Seals: Complete DIY Guide for Car Owners
Replacing intake duct clamps and seals is a straightforward repair that involves loosening old clamps, removing damaged seals, cleaning mating surfaces, and installing new components—typically taking 15 to 30 minutes for most vehicles. This essential maintenance task prevents vacuum leaks that can cause rough idling, poor acceleration, and check engine lights, while ensuring your engine receives properly metered and filtered air for optimal performance.
Daniel James Carter February 21, 2026 at 9:30 AM
How to Prevent Unfiltered Air Leaks in Your Home: 7 Essential Sealing Methods for Homeowners
Preventing unfiltered air leaks requires a systematic approach combining detection, material selection, and proper sealing techniques across seven critical areas: HVAC filter slots, doors and windows, stationary gaps, attics, basements, utility penetrations, and ongoing maintenance. Homeowners who implement these methods typically reduce energy waste by 20-30% while significantly improving indoor air quality by blocking allergens, dust, and outdoor pollutants from bypassing filtration systems.
Daniel James Carter February 21, 2026 at 9:14 AM
Essential Air Filter Housing Inspection Guide: 7 Critical Checks to Prevent Engine Damage
Inspecting your air filter housing regularly prevents catastrophic engine damage by identifying cracks, seal failures, and bypass issues before they allow unfiltered air into your combustion chamber. A systematic 7-point inspection process—checking structural integrity, sealing surfaces, dust trails, latches, heat distortion, inlet connections, and drain holes—catches problems early and protects your engine from the approximately 100,000 cubic feet of air that passes through the system every 1,000 miles driven.
Daniel James Carter February 21, 2026 at 8:54 AM
How to Clean Reusable Filters Properly: Complete Care Guide for Homeowners
Cleaning reusable filters properly involves removing dust buildup, washing with appropriate solutions, allowing complete drying, and reinstalling correctly—a process that takes 24-48 hours but saves hundreds of dollars annually while maintaining optimal air quality and system efficiency. This comprehensive approach ensures your washable filters perform at peak capacity, extending their lifespan from the typical 1-2 years to potentially 5 years or more when maintained correctly.
Daniel James Carter February 21, 2026 at 8:39 AM
Engine Air Filter Replacement Cost: $20-$142 Price Breakdown for Car Owners (DIY vs. Shop)
Engine air filter replacement costs between $20 and $142 total, with parts ranging from $10 to $85 and labor from $20 to $70, making it one of the most affordable maintenance services for vehicle owners. The wide price variation depends primarily on whether you choose professional installation or DIY replacement, along with factors like your vehicle type, filter quality, shop selection, and geographic location.
Daniel James Carter February 21, 2026 at 8:26 AM
Choose the Right Air Filter: 7 Critical Differences Between OEM and Aftermarket Options for Car Owners
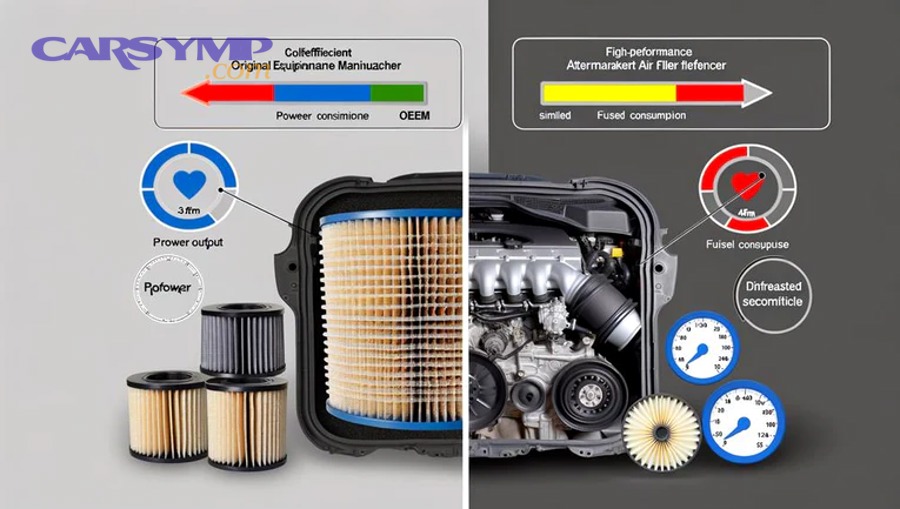
Choosing between OEM and aftermarket air filters requires understanding seven critical differences: fitment accuracy, material quality, filtration efficiency, airflow performance, price value, warranty coverage, and replacement longevity. OEM filters excel in precise engineering and guaranteed compatibility, while aftermarket options offer cost savings and specialized performance applications, making the right choice dependent on your specific vehicle needs and driving priorities.
Daniel James Carter February 21, 2026 at 8:11 AM
How Air Filters Impact MPG and Engine Performance: 10-20% Fuel Economy Guide
Air filters directly impact your vehicle's MPG and engine performance, with dirty filters reducing fuel economy by 10-20% and cutting horsepower by up to 10%. The air filter controls airflow into the engine's combustion chamber, and when clogged with debris, it restricts oxygen supply, forcing the engine to work harder and consume more fuel to maintain performance levels.
Daniel James Carter February 21, 2026 at 7:56 AM
7 Critical Warning Signs Your Engine Air Filter Is Clogged (Don’t Ignore #4)
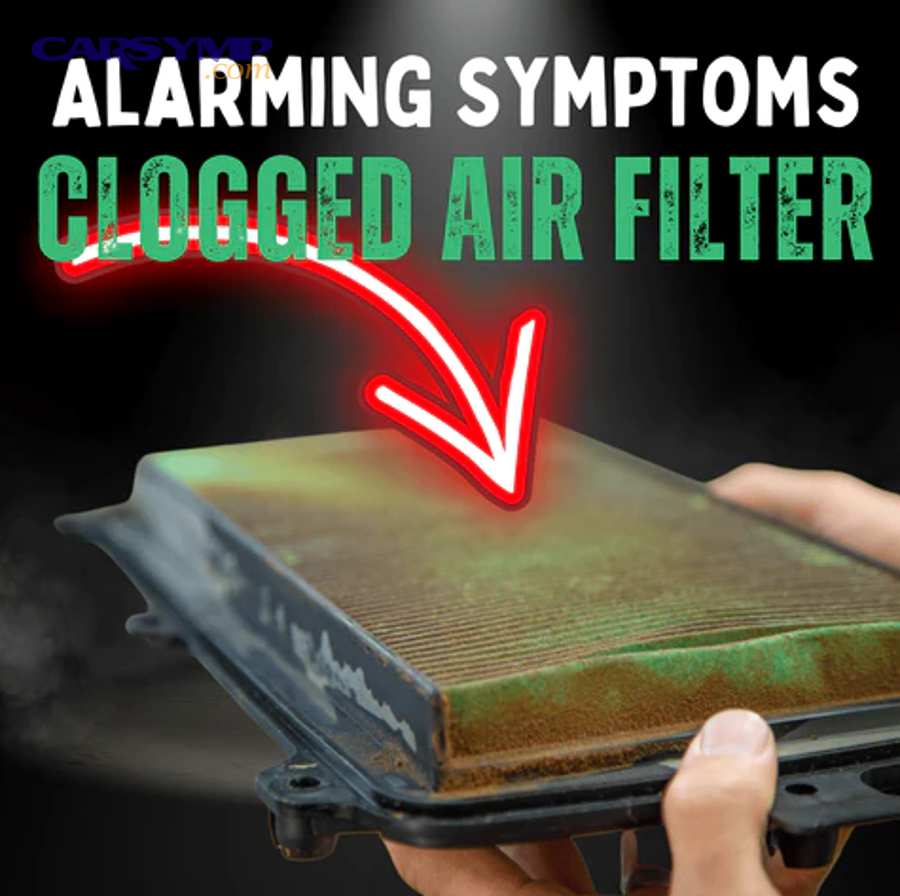
Your engine air filter becomes clogged when it accumulates excessive dirt, dust, and debris that restrict airflow to the engine, causing seven critical warning signs: check engine light illumination, decreased fuel economy, reduced power and acceleration, unusual engine noises, black exhaust smoke, rough idling or misfiring, and difficulty starting. These symptoms emerge because a dirty air filter disrupts the precise air-to-fuel ratio required for optimal combustion, forcing your engine to work harder while performing worse.
Daniel James Carter February 21, 2026 at 7:43 AM
How to Replace Your Engine Air Filter: Complete DIY Guide for Beginners (Step-by-Step)
Replacing your engine air filter is a simple maintenance task that takes 10-15 minutes and requires minimal or no tools, making it the perfect first DIY project for beginners who want to save money and gain confidence working on their vehicle. This straightforward procedure involves locating the air filter housing under your hood, removing the old filter, and installing a new one—a process so easy that even those without any mechanical experience can complete it successfully while saving $50-100 in labor costs at a dealership or repair shop.
Daniel James Carter February 21, 2026 at 7:27 AM
How Often to Replace Your Engine Air Filter: Complete Mileage Guide for Car Owners
Most vehicles require engine air filter replacement every 15,000 to 45,000 miles, depending on the manufacturer's specifications and driving conditions. The standard recommendation falls within this range, with many automakers suggesting intervals between 30,000 and 45,000 miles for normal driving conditions.
Daniel James Carter February 21, 2026 at 7:14 AM
10 Proven Methods to Prevent Seal Leaks in Hydraulic and Mechanical Systems
Seal leaks in hydraulic and mechanical systems can be prevented through ten proven methods: proper seal selection, precise installation techniques, regular maintenance schedules, contamination control, fluid compatibility verification, shaft alignment procedures, temperature management, pressure regulation, vibration monitoring, and seal conditioning programs. These prevention strategies address both immediate operational concerns and long-term system reliability, reducing downtime by up to 75% and extending equipment lifespan significantly.
Daniel James Carter February 21, 2026 at 6:39 AM
When to Repair vs Monitor a Leak: 7 Critical Factors for Homeowners
Deciding whether to repair or monitor a leak depends on seven critical factors: leak severity, location, visible damage, duration, water bill impact, health hazards, and seasonal conditions. Homeowners facing a plumbing leak must quickly determine if immediate professional repair is necessary or if careful monitoring with scheduled intervention is the safer, more cost-effective approach.
Daniel James Carter February 21, 2026 at 6:17 AM
7 Hidden Dangers of Stop-Leak Products for Rear Main Seal Repairs (Car Owners Must Know)
Stop-leak products for rear main seal repairs pose seven critical dangers: excessive seal swelling leading to complete failure, oil passage and filter clogging, damage to other engine seals, incompatibility with certain seal types, manual transmission clutch contamination, oil pan paint stripping with sludge formation, and false security that delays proper repairs causing catastrophic engine damage. These chemical additives work by softening and swelling rubber seals, but this mechanism often creates more problems than it solves, transforming minor leaks into major mechanical failures.
Daniel James Carter February 21, 2026 at 5:53 AM
7 Critical Symptoms of Clutch Contamination in Manual Transmissions: Complete Diagnostic Guide
Manual transmission clutch contamination occurs when oil, hydraulic fluid, or grease penetrates the clutch disc's friction surfaces, preventing proper engagement with the flywheel and causing slipping, burning smells, and shifting difficulties. This contamination typically originates from rear main seal leaks, transmission input shaft seal failures, or hydraulic clutch system malfunctions, creating a distinct set of symptoms that differ markedly from normal wear patterns.
Daniel James Carter February 21, 2026 at 5:33 AM
Rear Main Seal Repair Cost: 2026 Price Guide by Vehicle Type (+ Labor Breakdown)
Rear main seal repair costs between $600 and $3,200 in 2026, with standard cars averaging $600-$1,200, trucks and SUVs ranging from $1,000-$2,000, and luxury vehicles reaching $1,500-$3,200 due to extensive labor requirements involving transmission or engine removal. The wide price variation stems primarily from labor intensity rather than parts cost, as the seal itself costs only $5-$110 while labor accounts for 90-95% of the total bill.
Daniel James Carter February 21, 2026 at 5:13 AM
Rear Main Seal Replacement Labor Hours: Complete Guide for Vehicle Owners (4-16 Hours by Type)
Rear main seal replacement requires between 4 and 16 labor hours depending on your vehicle type, drivetrain configuration, and engine accessibility, with most passenger cars averaging 5-7 hours while heavy-duty trucks can demand up to 16 hours of professional mechanic time. This wide variation exists because the rear main seal sits between the engine and transmission, necessitating transmission removal in virtually all cases—a complex procedure that varies significantly based on vehicle design, weight, and component accessibility.
Daniel James Carter February 21, 2026 at 4:59 AM
How Dangerous is a Rear Main Seal Leak? Critical Risks Every Car Owner Must Know
Yes, a rear main seal leak is extremely dangerous because it can rapidly drain your engine oil, lead to catastrophic engine damage, and potentially cause complete engine failure—all while being one of the most expensive automotive repairs to fix. The danger stems from three critical factors: the seal's location at the back of the crankshaft where it experiences constant rotational stress, the high oil pressure in this area that accelerates leak progression, and the seal's tendency to tear completely once initially damaged, transforming a minor drip into a hemorrhaging oil loss within hours or days.
Daniel James Carter February 21, 2026 at 4:45 AM
How to Identify Rear Main Seal vs Oil Pan vs Valve Cover Leaks (DIY Diagnostic Guide for Car Owners)
Valve cover gasket leaks are easiest to identify at the top of your engine, oil pan gasket leaks drip straight down from the bottom, and rear main seal leaks appear in the bellhousing area between your engine and transmission. The key difference lies in leak location, oil migration patterns, and visual evidence—valve covers show wetness on upper engine surfaces, oil pans create puddles directly beneath the pan, while rear main seals coat the transmission case and flywheel chamber.
Daniel James Carter February 21, 2026 at 4:32 AM
How to Diagnose Oil Leak Between Engine and Transmission: 7 Common Seal Failures Explained
Oil leaking between your engine and transmission typically originates from one of seven common seal failures: the rear main seal, transmission input shaft seal, torque converter seal, oil pan gasket, transmission sealing bolt, valve cover gasket, or oil pump seal. Accurately diagnosing which component has failed requires systematic inspection, fluid identification, and pattern analysis to pinpoint the exact source before investing in repairs.
Daniel James Carter February 21, 2026 at 4:12 AM
7 Critical Signs of a Rear Main Seal Leak Every Car Owner Should Recognize
A rear main seal leak reveals itself through seven distinct warning signs: oil puddles under your vehicle's center, oil saturation on the transmission bell housing, rapidly dropping oil levels, burning oil smell at high RPMs, check engine light activation, oil residue on the flywheel and starter, and oil trails along the driveshaft toward the rear axle. These symptoms occur when the seal between your engine's crankshaft and transmission fails, allowing pressurized engine oil to escape into areas where it doesn't belong.
Daniel James Carter February 21, 2026 at 3:55 AM
7 Common Causes of Rattling After Recent Repairs: Complete Diagnosis Guide for Car Owners
Rattling noises that appear immediately after car repairs stem from seven primary causes: loose heat shields, unsecured exhaust components, forgotten tools or hardware, improperly torqued bolts, disconnected clips and fasteners, disturbed interior panels, and loose undercarriage shields. These post-repair rattles differ fundamentally from general vehicle noise because they result directly from mechanical disturbance during service work, typically appearing within hours or days of picking up your vehicle from the shop.
Daniel James Carter February 21, 2026 at 3:19 AM
Complete Repair Cost Guide: 7 Common Car Rattles From $50 to $2,000
Car rattle repair costs range from $50 to $2,000 depending on the source, with heat shield rattles costing $50-$500, dashboard rattles running $800-$1,300, and engine-related rattles reaching $600-$2,000. The most affordable fixes involve simple heat shield clamps at $10-$20, while complex timing chain repairs can exceed $1,500 at dealerships.
Daniel James Carter February 21, 2026 at 3:00 AM
Is It Safe to Drive With Under-Car Rattling? 7 Warning Signs for Vehicle Owners
It depends on the cause—under-car rattling can range from harmless loose components to critical safety hazards requiring immediate attention. While some rattling noises indicate minor issues like a vibrating heat shield that can wait for a scheduled repair, others signal dangerous failures in your suspension, brakes, or steering systems that make continued driving unsafe.
Daniel James Carter February 21, 2026 at 2:47 AM
Essential Under-Car Inspection Points: DIY Safety Checklist for Home Mechanics
Performing under-car inspections at home requires knowing the essential inspection points to check while maintaining strict safety standards throughout the process. There are seven critical areas every home mechanic must examine: suspension components, exhaust system, frame and undercarriage structure, fluid leak sources, brake lines, drivetrain components, and protective shields or guards.
Daniel James Carter February 21, 2026 at 2:33 AM
Diagnose Car Rattles: 12 Idle vs Driving Clues for Car Owners (With Cost Guide)
Car rattles occurring exclusively at idle versus while driving reveal fundamentally different mechanical issues, with idle-only rattles typically indicating heat shields, catalytic converters, or engine mounts ($50-$1,200 repairs), while driving-only rattles suggest flexplate damage, suspension components, or driveline problems ($200-$4,500 repairs). Understanding these diagnostic clues helps car owners identify whether their vehicle requires immediate professional attention or can wait for scheduled maintenance.
Daniel James Carter February 21, 2026 at 2:17 AM
7 Suspension Components That Rattle Underneath Your Car
Suspension components that rattle underneath your car typically include sway bar links, ball joints, control arm bushings, shock absorbers, strut mounts, tie rod ends, and sway bar bushings—seven critical parts that produce distinct rattling noises when worn or damaged. These components create metal-on-metal contact or excessive movement when their rubber isolators degrade, generating sounds that range from subtle knocking to loud clanking over bumps.
Daniel James Carter February 21, 2026 at 1:51 AM
7 Internal Rattle Signs Your Catalytic Converter Is Failing
Your catalytic converter's internal rattle signals serious substrate breakdown, indicated by seven key signs: distinctive metallic rattling sounds during acceleration or deceleration, reduced engine performance, check engine light activation with specific diagnostic codes, failed emissions tests, decreased fuel economy, sulfur odors, and physical vibrations felt through the vehicle floor. These symptoms occur when the honeycomb ceramic structure inside your converter breaks apart due to thermal stress, physical impact, or prolonged engine problems that expose the catalyst to excessive heat and unburned fuel.
Daniel James Carter February 21, 2026 at 1:25 AM
How to Fix Loose Exhaust Hanger and Clamp Problems: Complete Repair Guide for Car Owners
Loose exhaust hangers and clamps cause rattling noises, vibrations, and potential safety hazards that require immediate attention through proper diagnosis and repair. The exhaust mounting system relies on rubber isolators and metal clamps to suspend the exhaust securely beneath your vehicle, and when these components fail, the entire exhaust can sag, drag, or even detach completely while driving.
Daniel James Carter February 21, 2026 at 1:14 AM
How to Diagnose Heat Shield Rattle: 7 Signs & Quick Identification Methods for Car Owners
Heat shield rattle is a metallic rattling noise caused by loose, damaged, or corroded exhaust heat shields, and diagnosing it involves identifying seven key signs including cold-start rattling, RPM-specific noise patterns, visible damage, and performing a systematic physical inspection under your vehicle. This common automotive issue stems from the thin metal shields that protect your vehicle's components from extreme exhaust temperatures becoming detached from their mounting points due to rust, vibration, or impact damage.
Daniel James Carter February 21, 2026 at 12:56 AM
Diagnose Rattling Under Your Car: Complete 12-Point Inspection Checklist for Drivers
Undercarriage rattling is a systematic diagnostic issue requiring structured inspection of 12 key vehicle systems including exhaust components, heat shields, catalytic converter, suspension parts, brackets, engine mounts, transmission mounts, underbody panels, brake components, timing chain, drive shaft elements, and foreign debris. This comprehensive checklist approach enables drivers to methodically identify the specific source of rattling noises by examining each component in sequence, determining urgency levels, and deciding between DIY fixes and professional intervention.
Daniel James Carter February 21, 2026 at 12:34 AM
7 Essential Ways to Prevent Radiator Failures and Extend Engine Life
Your car's radiator prevents engine failures by maintaining optimal cooling temperatures, and implementing seven essential prevention methods—including regular coolant maintenance, radiator flushing, hose inspections, quality coolant use, cap testing, temperature monitoring, and professional inspections—can extend your radiator's lifespan to 8-10 years while avoiding costly repairs exceeding $1,000. These proactive strategies address the root causes of radiator failures: corrosion, leaks, and clogs that account for over 40% of engine overheating incidents.
Daniel James Carter February 20, 2026 at 11:55 PM
How to Perform Leak Check and Pressure Test After Install: Complete Guide for HVAC, Plumbing & Piping Systems
Performing a leak check and pressure test after installation involves systematically pressurizing the system to specified levels, holding that pressure for a designated duration, and using detection methods like bubble solutions or electronic sensors to identify any leaks before commissioning. This critical quality assurance step ensures system integrity, prevents hazardous failures, and confirms compliance with manufacturer specifications and building codes across HVAC, plumbing, and industrial piping applications.
Daniel James Carter February 20, 2026 at 11:30 PM
7 Critical Electric Fan and Shroud Transfer Considerations Every Automotive Enthusiast Must Know
Installing an electric fan and shroud system requires careful attention to seven critical factors: fan-to-radiator spacing (1/2" to 2" minimum), proper coverage calculations (70% rule), puller versus pusher configuration selection, correct blade positioning (50% in/out of shroud), appropriate shroud depth and design, secure mounting methods, and core stack-up management. These considerations directly impact cooling efficiency, engine temperature regulation, and long-term system reliability.
Daniel James Carter February 20, 2026 at 10:57 PM
How to Bleed Air from Your Car Radiator After Replacement: Complete DIY Guide
Bleeding air from your car radiator after replacement requires opening the bleed valve or radiator cap, filling the system with coolant, running the engine through 2-3 heat cycles while monitoring for air bubbles, and verifying stable temperatures—a process that takes 30-45 minutes and prevents overheating by removing trapped air pockets that form during radiator replacement. This essential post-replacement procedure ensures your cooling system functions properly by eliminating air that enters when the old radiator is drained and the new one is installed, protecting your engine from dangerous hot spots and potential damage.
Daniel James Carter February 20, 2026 at 10:32 PM
Should You Replace Radiator Hoses and Clamps During a Radiator Job? Complete Guide for DIY Mechanics
Yes, you should replace radiator hoses and clamps during a radiator job because these components experience the same wear as the radiator, replacing them prevents future failures, and doing so while the cooling system is already drained saves time and labor costs. Professional mechanics and automotive manufacturers recommend this preventive approach to avoid roadside breakdowns and expensive emergency repairs.
Daniel James Carter February 20, 2026 at 10:12 PM
How to Flush Cooling System When Installing New Radiator: Complete Guide for Car Owners
Yes, you should flush your cooling system when installing a new radiator to remove rust, debris, and contaminated coolant that could damage the new component and reduce its lifespan. Flushing prevents sediment buildup from transferring to your fresh radiator, protects against corrosion, and ensures optimal heat transfer efficiency throughout your vehicle's cooling system.
Daniel James Carter February 20, 2026 at 9:59 PM
Complete Radiator Replacement Guide: Step-by-Step Process for DIY Homeowners & Car Owners
Radiator replacement is a critical maintenance task that involves removing a faulty or aged radiator and installing a new unit to restore optimal cooling performance in vehicles or heating efficiency in homes. This comprehensive guide covers the complete process for both automotive and home heating radiators, including step-by-step instructions, required tools, cost estimates, and safety protocols that enable DIY enthusiasts to successfully complete this project while understanding when professional assistance becomes necessary.
Daniel James Carter February 20, 2026 at 9:37 PM
OEM vs Aftermarket Radiator Quality: Which Delivers Better Performance and Value for Your Vehicle?
When choosing a radiator replacement, OEM radiators deliver guaranteed fitment and factory-grade quality at premium prices, while aftermarket radiators offer comparable performance with broader options and significant cost savings—making aftermarket the better value for most vehicle owners unless warranty preservation or exact factory specifications are critical. The quality gap between reputable aftermarket brands and OEM parts has narrowed substantially, with many aftermarket radiators manufactured in the same facilities using identical materials and processes, though budget aftermarket options may compromise on construction details like braze quality and fin density that affect long-term durability.
Daniel James Carter February 20, 2026 at 9:12 PM
Car Radiator Replacement Cost Guide 2026: Complete Price Breakdown for Vehicle Owners
Replacing a car radiator in 2026 typically costs between $700 and $1,800, with the national average falling around $1,200 to $1,400 for most passenger vehicles. This total expense includes both the radiator unit itself, which ranges from $100 to $1,000 depending on your vehicle type, and labor costs that typically run $160 to $1,200 based on hourly rates and job complexity.
Daniel James Carter February 20, 2026 at 8:52 PM
How Long Does Radiator Replacement Take? Labor Hours by Vehicle Type (2025 Guide)
Radiator replacement typically takes between 1 to 8 hours of labor depending on your vehicle type, with most passenger cars requiring 2-3 hours, SUVs and trucks needing 3-5 hours, and commercial vehicles demanding 5-8 hours. This variation stems from differences in engine bay accessibility, front-end component removal requirements, and the complexity of cooling system integration across different vehicle designs.
Daniel James Carter February 20, 2026 at 8:34 PM
Radiator Repair & Replacement Costs: Complete 2026 Price Guide for Car & Home Owners
Radiator repair costs range from $100 to $900, while replacement costs span $400 to $2,500 depending on whether you own a car or home radiator, the type of problem, and your location. Most homeowners spend around $350 for repairs, while car owners typically pay between $765 and $1,826 for full radiator replacement.
Daniel James Carter February 20, 2026 at 11:47 AM
Decide Between Radiator Repair or Replacement: 7 Critical Factors for Car Owners
When your car's radiator shows signs of failure, you face a crucial decision: repair the existing unit or invest in a complete replacement. The right choice depends on seven critical factors including damage severity, radiator material type, cost comparison, overall condition and age, previous repair history, vehicle part availability, and the specific location of the damage.
Daniel James Carter February 20, 2026 at 11:33 AM
How to Read Radiator Pressure Test Results: Complete Failure Diagnosis Guide for Car Owners
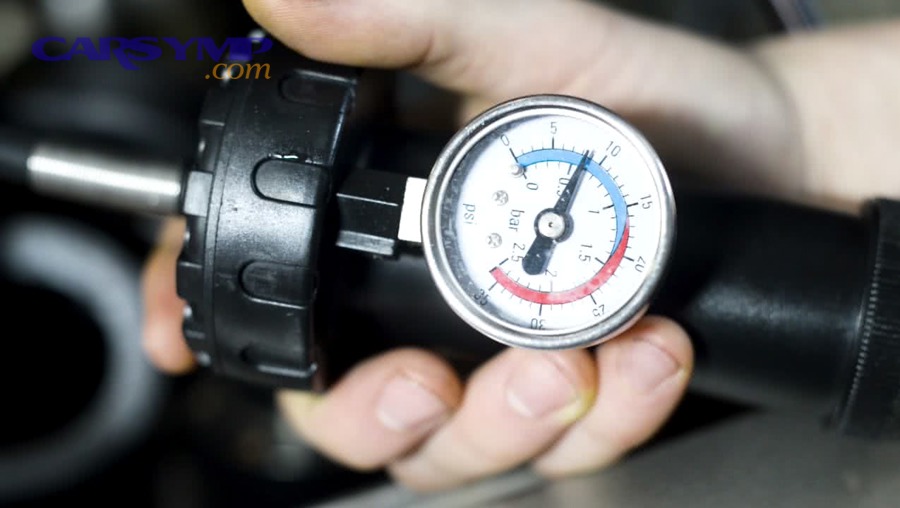
Understanding radiator pressure test results is essential for accurately diagnosing cooling system failures and preventing costly engine damage. When you perform a pressure test on your vehicle's cooling system, the gauge readings, pressure hold time, and rate of pressure drop all provide critical diagnostic information that reveals whether you're dealing with a minor hose leak, a failing radiator cap, or a catastrophic head gasket failure.
Daniel James Carter February 20, 2026 at 11:17 AM
Sweet Smell and Steam From Front of Car: 7 Coolant Leak Causes Every Driver Must Know
A sweet smell and steam from the front of your car almost always indicates a coolant leak, typically caused by radiator damage, worn hoses, water pump failure, heater core leaks, blown head gaskets, faulty radiator caps, or overflow reservoir issues. This distinctive maple syrup-like odor comes from ethylene glycol in your coolant vaporizing as it contacts hot engine components, creating visible steam that warns of potentially catastrophic engine damage if ignored.
Daniel James Carter February 20, 2026 at 11:02 AM
7 Critical Radiator Clues When Your Car Overheats at Highway Speed (Not Idle)
When your car overheats at highway speed but runs cool at idle, you're experiencing a radiator-specific cooling problem that requires immediate diagnosis using seven critical clues: cold lower radiator hose, temperature gauge drops during deceleration, visible debris on radiator fins, discolored coolant, faulty radiator cap, uneven radiator surface temperature, and water pump wear symptoms. These clues point directly to restricted coolant flow, internal radiator blockages, or high-RPM cooling system failures rather than the electric fan problems that typically cause idle overheating.
Daniel James Carter February 20, 2026 at 10:40 AM
7 Critical Signs of Rusty Coolant and Internal Corrosion in Your Cooling System
Rusty coolant appears as brown, orange, or muddy-colored fluid in your cooling system, indicating internal corrosion that can lead to radiator blockages, water pump failure, and eventual engine damage. The seven critical signs include discolored coolant in the reservoir, visible rust particles floating in the fluid, an overheating engine, coolant leaks with rusty residue, reduced heater performance, external rust on radiator components, and a sweet smell combined with visible corrosion.
Daniel James Carter February 20, 2026 at 10:17 AM
Bad Radiator Cap Causing Coolant Overflow? 7 Warning Signs and How to Fix Them
A bad radiator cap is one of the most common yet overlooked causes of coolant overflow. When the cap fails to maintain proper pressure — typically between 12 and 16 PSI — it allows coolant to escape prematurely into the overflow reservoir, leading to repeated coolant loss and eventually engine overheating.
Daniel James Carter February 14, 2026 at 10:26 AM
8 Clogged Radiator Symptoms to Identify Before Your Engine Overheats
A clogged radiator produces eight distinct warning symptoms that every driver should identify early — including a rising temperature gauge, engine overheating, steam under the hood, low coolant levels, discolored coolant, coolant leaks, weak heater output, and uneven radiator heat distribution. Recognizing these clogged radiator symptoms before your engine overheats can mean the difference between a simple radiator flush and a catastrophic engine failure costing thousands of dollars in repairs.
Daniel James Carter February 14, 2026 at 9:59 AM
How to Diagnose Coolant Leaks at Radiator Tanks: Causes, Symptoms & Fixes for DIY Mechanics
Diagnosing coolant leaks at radiator tanks requires a systematic approach that combines visual inspection, pressure testing, and coolant dye tracing to pinpoint the exact failure point on the plastic tank body, seam gasket, or inlet neck. Because radiator tanks are molded from plastic and crimped onto an aluminum core, they are particularly vulnerable to heat cycling, vibration fatigue, and chemical degradation — making them one of the most common origins of slow, persistent coolant loss that many vehicle owners initially overlook.
Daniel James Carter February 14, 2026 at 9:48 AM